2002 NISSAN FRONTIER coolant level
[x] Cancel search: coolant levelPage 145 of 273
cMake sure the area around the vehicle is
clear.
cCheck fluid levels such as engine oil,
coolant, brake and clutch fluid, and win-
dow washer fluid as frequently as pos-
sible, at least whenever you refuel.
cCheck that all windows and lights are
clean.
cVisually inspect tires for their appearance
and condition. Also check tires for proper
inflation.
cLock all doors.
cPosition seat and adjust head restraints.
cAdjust inside and outside mirrors.
cFasten seat belts and ask all passengers
to do likewise.
cCheck the operation of warning lights
when key is turned to the ON (3) position.
See9Warning/Indicator lights and au-
dible reminders9in the9Instruments and
controls9section.1. Apply the parking brake.
2.Automatic transmission:
Move the selector lever to P (Park) or N
(Neutral). P (Park) is preferred.
The selector lever cannot be moved
out of P (Park) and into any of the
other gear positions if the ignition key
is turned to OFF or if the key is re-
moved from the ignition switch.
The starter is designed not to operate
if the selector lever is in one of the
driving positions.
Manual transmission:
Move the shift lever to N (Neutral), and
fully depress the clutch pedal to the floor
while starting the engine.
The starter is designed not to operate
unless the clutch pedal is fully de-
pressed.
3.With your foot off the accelerator
pedal,turn the ignition key to START.
Release the key when the engine starts.
If the engine starts, but fails to run, repeat
the above procedure.cIf the engine is very hard to start in
extremely cold or hot weather, depress
the accelerator pedal fully and hold it
to help start the engine.
cIn the summer, when restarting the
engine within 30 minutes after it has
been stopped, keep the accelerator
pedal fully depressed while starting.
CAUTION
Do not operate the starter for more than
15 seconds at a time. If the engine does
not start, turn the key off and wait 10
seconds before cranking again, other-
wise the starter could be damaged.
4.Warm-up
Always allow the engine to idle for at
least 30 seconds after starting. Drive at a
moderate speed for a short distance first,
especially in cold weather.
BEFORE STARTING THE
ENGINESTARTING THE ENGINE
5-8Starting and driving
ZX
Page 177 of 273
If your vehicle is overheating (indicated by
an extremely high temperature gauge read-
ing), or if you feel a lack of engine power, or
detect abnormal noise, etc., take the follow-
ing steps:
WARNING
cDo not continue to drive if your ve-
hicle overheats. Doing so could
cause a vehicle fire.
cTo avoid the danger of being
scalded, never remove the radiator
cap while the engine is still hot.
When the radiator cap is removed,
pressurized hot water will spurt out,
possibly causing serious injury.
cDo not open the hood if steam is
coming out.
1. Move the vehicle safely off the road,
apply the parking brake and move the
shift lever to N (Neutral). On automatic
transmission models, move the selector
lever to P (Park).
Do not stop the engine.
2.
Turn off the air conditioner (if so
equipped). Open all of the windows,move the heater or air conditioner tem-
perature control to maximum hot and fan
control to high speed.
3. If engine overheating is caused by climb-
ing a long hill on a hot day, run the engine
at a fast idle (approximately 1,500 r/min)
until the temperature gauge indicator re-
turns to normal.
4. Get out of the vehicle. Look and listen for
steam or coolant escaping from the ra-
diator before opening the hood. Wait until
no steam or coolant can be seen before
proceeding.
5. Open the hood.
WARNING
If steam or water is coming from the
engine, stand clear to prevent getting
burned.
6. Visually check drive belts for damage or
looseness. Also check if the cooling fan
is running. The radiator hoses and radia-
tor should not leak water. If coolant is
leaking, or the water pump belt is missing
or loose, or the cooling fan does not run,
stop the engine.
WARNING
Be careful not to allow your hands, hair,
jewelry or clothing to come into contact
with, or to get caught in, engine belts or
the engine cooling fan. The engine
cooling fan can start at any time when
the coolant temperature is high.
7. After the engine cools down, check the
coolant level in the reservoir tank with the
engine running. Add coolant to the res-
ervoir tank if necessary. Have your ve-
hicle repaired at an authorized NISSAN
dealer.
IF YOUR VEHICLE
OVERHEATS
6-10In case of emergency
ZX
Page 189 of 273

8 Maintenance and do-it-yourself
Maintenance requirements .....................................8-2
General maintenance .............................................8-3
Explanation of general maintenance
items ..................................................................8-3
Exterior maintenance.........................................8-3
Interior maintenance ..........................................8-3
Maintenance precautions .......................................8-5
Engine compartment check locations ....................8-7
Engine cooling system .........................................8-10
Checking engine coolant level ........................8-10
Changing engine coolant ................................8-11
Engine oil .............................................................8-11
Checking engine oil level ................................8-11
Changing engine oil ........................................8-13
Changing engine oil filter.................................8-14
Automatic transmission fluid ................................8-15
Temperature conditions for checking ..............8-15
Power steering fluid..............................................8-17
Brake and clutch fluid...........................................8-17
Window washer fluid ............................................8-18
Window washer fluid reservoir ........................8-18
Battery ..................................................................8-18Jump starting ...................................................8-20
Drive belts ............................................................8-20
Spark plugs ..........................................................8-21
Replacing spark plugs
(except supercharger) .....................................8-22
Replacing spark plugs
(with supercharger)..........................................8-23
Air cleaner ............................................................8-23
Windshield wiper blades ......................................8-25
Cleaning ..........................................................8-25
Replacing .........................................................8-25
Parking brake and brake pedal ............................8-26
Checking parking brake...................................8-26
Checking brake pedal .....................................8-26
Brake booster ..................................................8-27
Clutch pedal .........................................................8-28
Checking clutch pedal .....................................8-28
Fuses ....................................................................8-29
Passenger compartment .................................8-29
Keyfob battery replacement .................................8-30
Lights ....................................................................8-31
Headlights ........................................................8-31
ZX
Page 194 of 273
Automatic transmission fluid level*
Check the level after putting the selector
lever in P with the engine idling at operating
temperature.
Engine coolant level*Check the coolant
level when the engine is cold.
Radiator and hosesCheck the front of the
radiator and clean off any dirt, insects,
leaves, etc., that may have accumulated.
Make sure the hoses have no cracks, de-
formation, rot or loose connections.
Engine drive belts*Make sure the drive
belts are not frayed, worn, cracked or oily.
Battery*Check the fluid level in each cell. It
should be between the MAX and MIN lines.
Vehicles operated in high temperatures or
under severe conditions require frequent
checks of the battery fluid level.
Exhaust systemMake sure there are no
loose supports, cracks or holes. If the sound
of the exhaust seems unusual or there is a
smell of exhaust fumes, immediately have
the exhaust system inspected by an autho-
rized NISSAN dealer. See the carbon mon-
oxide warning in the ``Starting and driving''
section of this manual.UnderbodyThe underbody is frequently
exposed to corrosive substances such as
those used on icy roads or to control dust. It
is very important to remove these sub-
stances from the underbody, otherwise rust
may form on the floor pan, frame, fuel lines
and exhaust system. At the end of winter,
the underbody should be thoroughly flushed
with plain water, in those areas where mud
and dirt may have accumulated. See the
``Appearance and care'' section of this
manual.
Fluid leaksCheck under the vehicle for
fuel, oil, water or other fluid leaks after the
vehicle has been parked for a while. Water
dripping from the air conditioner after use is
normal. If you should notice any leaks or if
gasoline fumes are evident, check for the
cause and have it corrected immediately.When performing any inspection or mainte-
nance work on your vehicle, always take
care to prevent serious accidental injury to
yourself or damage to the vehicle. The
following are general precautions which
should be closely observed.
WARNING
cPark the vehicle on a level surface,
apply the parking brake securely and
block the wheels to prevent the ve-
hicle from moving. For manual trans-
mission models, move the shift lever
to N (Neutral). For automatic trans-
mission models, move the selector
lever to P (Park).
cBe sure the ignition key is in the OFF
or LOCK position when performing
any parts replacement or repairs.
cNever leave the engine or automatic
transmission related component
harnesses disconnected while the
ignition switch is in the ON position.
cNever connect or disconnect the bat-
tery or any transistorized compo-
nent while the ignition switch is in
the ON position.
MAINTENANCE
PRECAUTIONS
Maintenance and do-it-yourself8-5
ZX
Page 199 of 273
The engine cooling system is filled at the
factory with a high-quality, year-round,
genuine NISSAN anti-freeze coolant solu-
tion. The anti-freeze solution contains rust
and corrosion inhibitors, therefore additional
engine cooling system additives are not
necessary.
CAUTION
When adding or replacing coolant, be
sure to use only an ethylene glycol
anti-freeze with the proper mixture ratio
of 50% Genuine Nissan Anti-freeze
coolant or equivalent and 50% demin-
eralized or distilled water. The use of
other types of coolant solutions may
damage the engine cooling system.
Outside tempera-
ture down toGenuine
Nissan
Anti-
freeze
coolant
or
equiva-
lentDeminer-
alized or
distilled
water
ÉC ÉF
þ35 þ30 50% 50%
WARNING
cNever remove the radiator cap when
the engine is hot. Wait until the en-
gine and radiator cool down. Serious
burns could be caused by high pres-
sure fluid escaping from the radia-
tor. See precautions in ``If your ve-
hicle overheats'' found in the ``In
case of emergency'' section of this
manual.
cThe radiator is equipped with a pres-
sure type radiator cap. To prevent
engine damage, use only a genuine
NISSAN radiator cap.
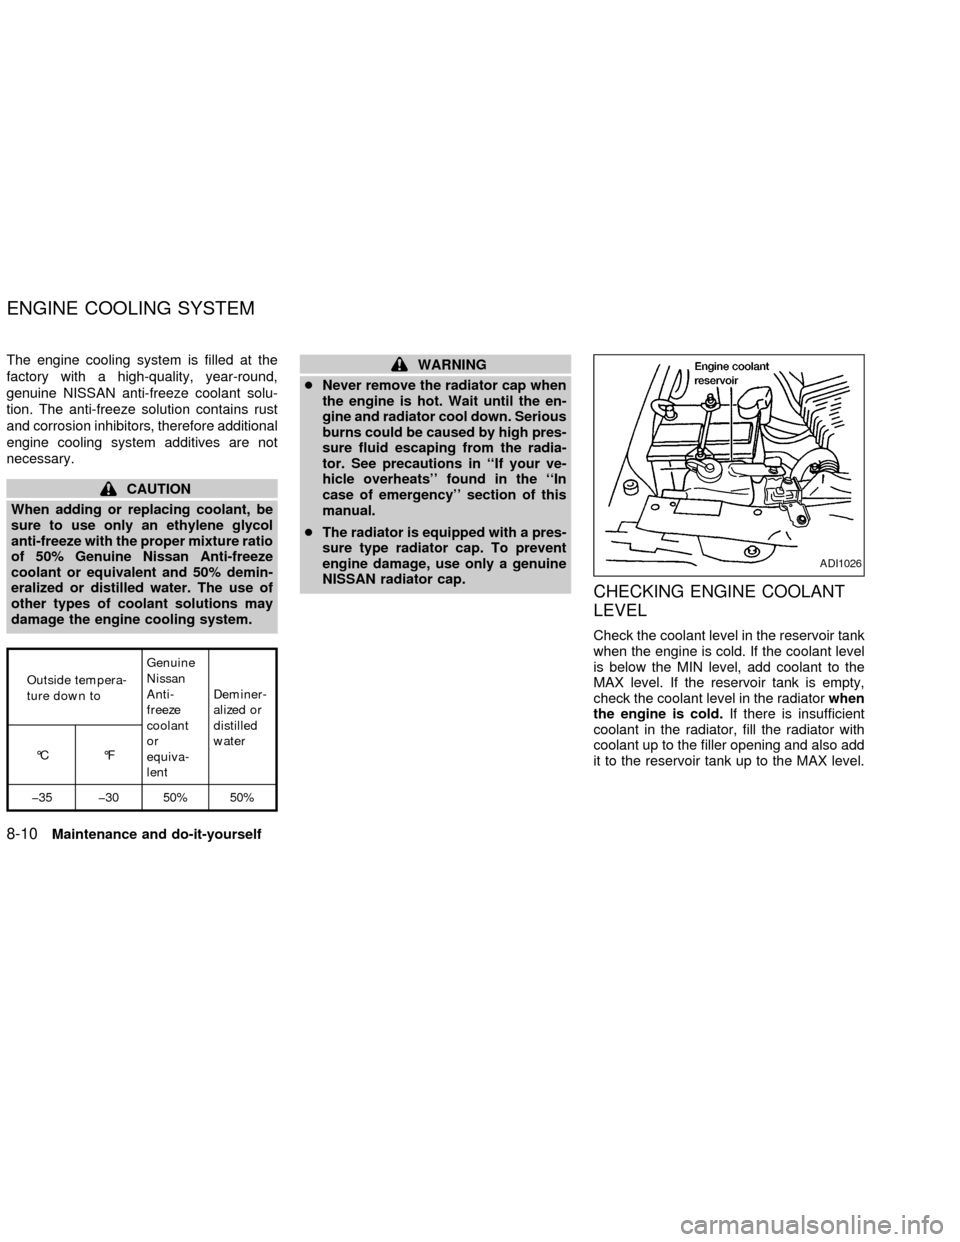
CHECKING ENGINE COOLANT
LEVEL
Check the coolant level in the reservoir tank
when the engine is cold. If the coolant level
is below the MIN level, add coolant to the
MAX level. If the reservoir tank is empty,
check the coolant level in the radiatorwhen
the engine is cold.If there is insufficient
coolant in the radiator, fill the radiator with
coolant up to the filler opening and also add
it to the reservoir tank up to the MAX level.
ADI1026
ENGINE COOLING SYSTEM
8-10Maintenance and do-it-yourself
ZX
Page 200 of 273
If the cooling system frequently requires
coolant, have it checked by an autho-
rized NISSAN dealer.
CHANGING ENGINE COOLANT
An authorized NISSAN dealer can change
the engine coolant. The service procedure
can be found in the NISSAN Service
Manual.
Improper servicing can result in reduced
heater performance and engine over-
heating.
WARNING
cTo avoid the danger of being
scalded, never change the coolant
when the engine is hot.
cNever remove the radiator cap when
the engine is hot. Serious burns
could be caused by high pressure
fluid escaping from the radiator.
cAvoid direct skin contact with used
coolant. If skin contact is made,
wash thoroughly with soap or hand
cleaner as soon as possible.
cKeep coolant out of reach of children
and pets.Engine coolant must be disposed of prop-
erly. Check your local regulations.
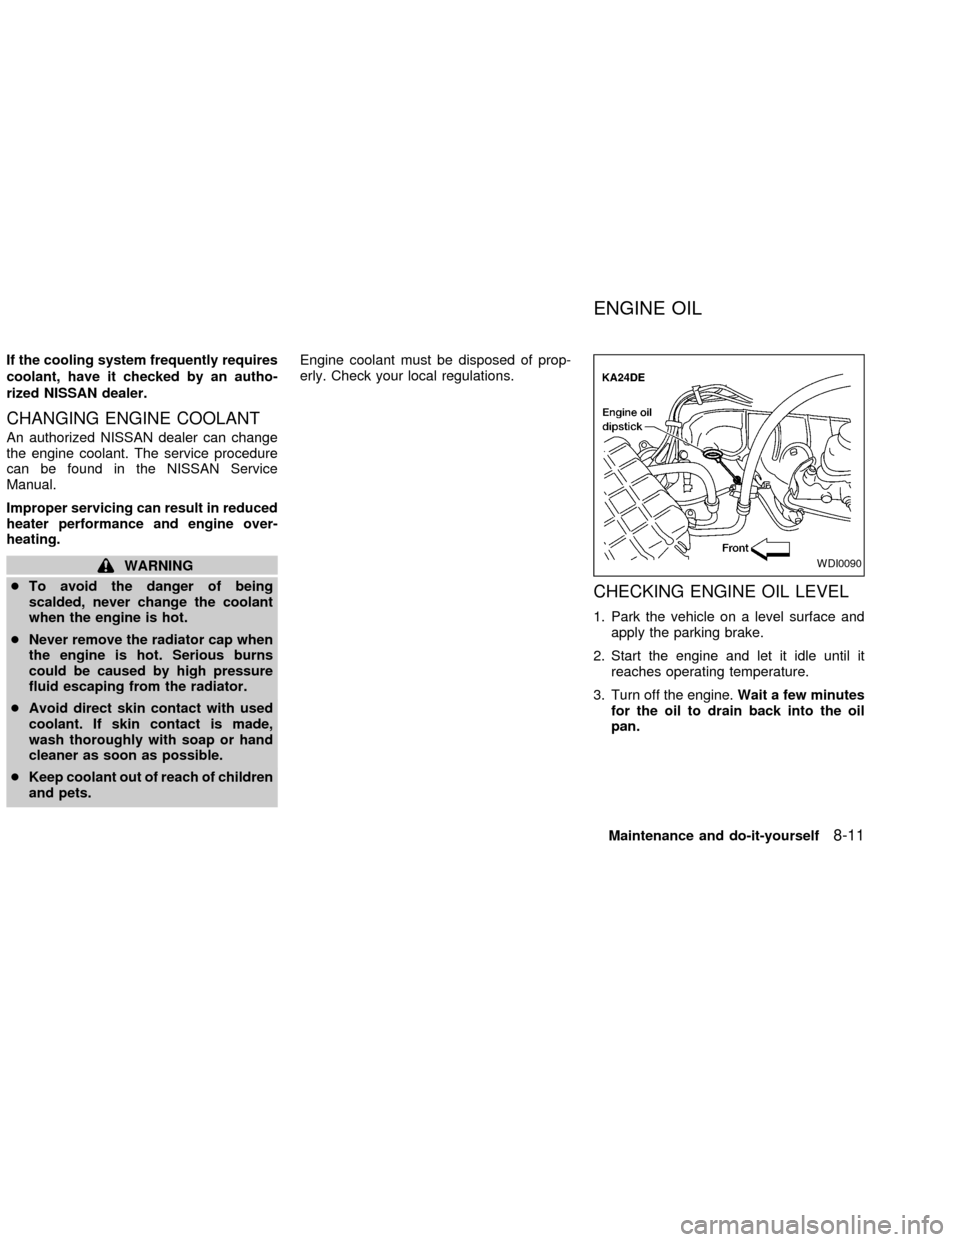
CHECKING ENGINE OIL LEVEL
1. Park the vehicle on a level surface and
apply the parking brake.
2. Start the engine and let it idle until it
reaches operating temperature.
3. Turn off the engine.Wait a few minutes
for the oil to drain back into the oil
pan.
WDI0090
ENGINE OIL
Maintenance and do-it-yourself8-11
ZX
Page 207 of 273
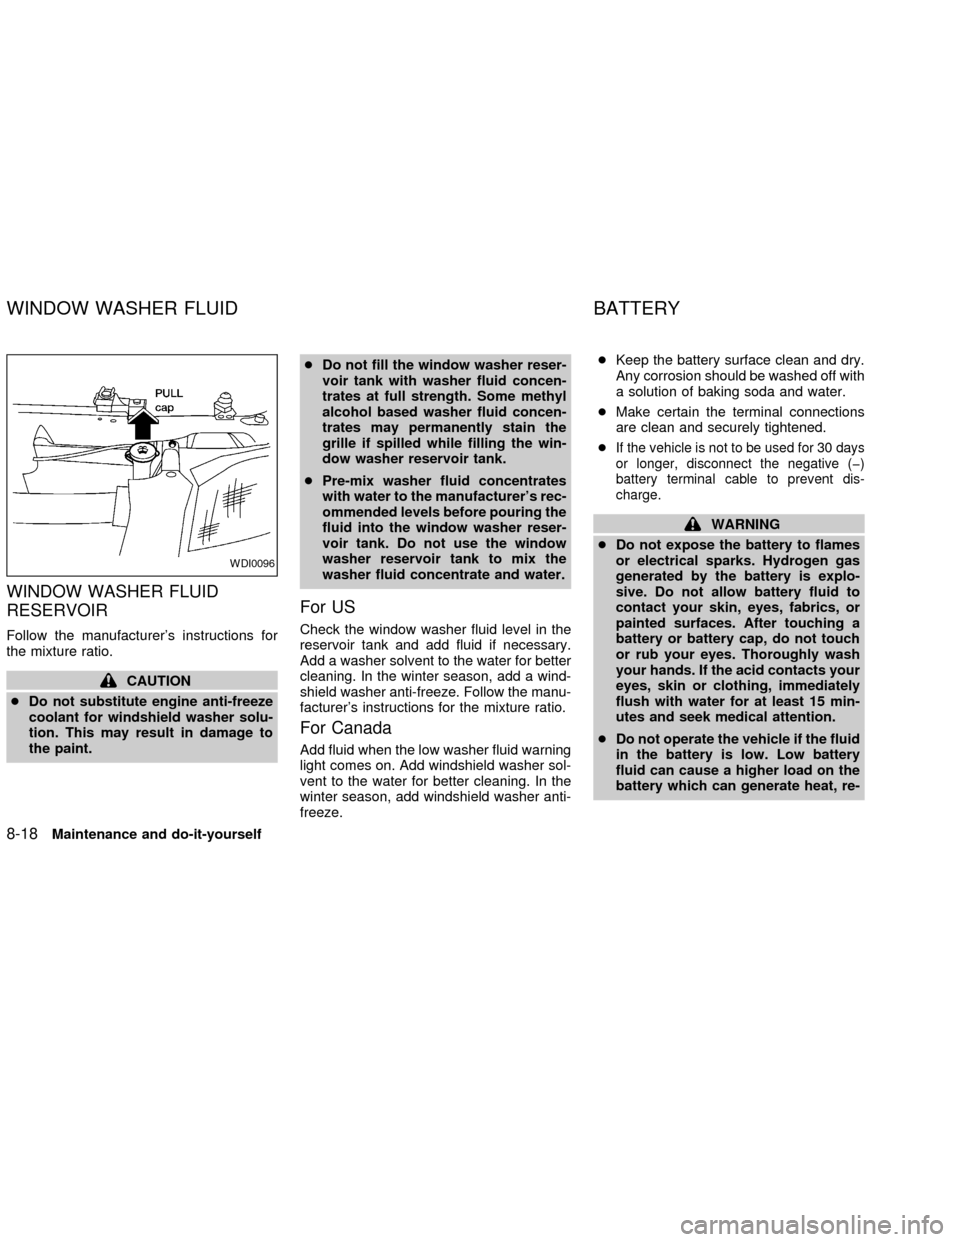
WINDOW WASHER FLUID
RESERVOIR
Follow the manufacturer's instructions for
the mixture ratio.
CAUTION
cDo not substitute engine anti-freeze
coolant for windshield washer solu-
tion. This may result in damage to
the paint.cDo not fill the window washer reser-
voir tank with washer fluid concen-
trates at full strength. Some methyl
alcohol based washer fluid concen-
trates may permanently stain the
grille if spilled while filling the win-
dow washer reservoir tank.
cPre-mix washer fluid concentrates
with water to the manufacturer's rec-
ommended levels before pouring the
fluid into the window washer reser-
voir tank. Do not use the window
washer reservoir tank to mix the
washer fluid concentrate and water.
For US
Check the window washer fluid level in the
reservoir tank and add fluid if necessary.
Add a washer solvent to the water for better
cleaning. In the winter season, add a wind-
shield washer anti-freeze. Follow the manu-
facturer's instructions for the mixture ratio.
For Canada
Add fluid when the low washer fluid warning
light comes on. Add windshield washer sol-
vent to the water for better cleaning. In the
winter season, add windshield washer anti-
freeze.cKeep the battery surface clean and dry.
Any corrosion should be washed off with
a solution of baking soda and water.
cMake certain the terminal connections
are clean and securely tightened.
c
If the vehicle is not to be used for 30 days
or longer, disconnect the negative (þ)
battery terminal cable to prevent dis-
charge.
WARNING
cDo not expose the battery to flames
or electrical sparks. Hydrogen gas
generated by the battery is explo-
sive. Do not allow battery fluid to
contact your skin, eyes, fabrics, or
painted surfaces. After touching a
battery or battery cap, do not touch
or rub your eyes. Thoroughly wash
your hands. If the acid contacts your
eyes, skin or clothing, immediately
flush with water for at least 15 min-
utes and seek medical attention.
cDo not operate the vehicle if the fluid
in the battery is low. Low battery
fluid can cause a higher load on the
battery which can generate heat, re-
WDI0096
WINDOW WASHER FLUID BATTERY
8-18Maintenance and do-it-yourself
ZX
Page 221 of 273
cAiming is not necessary after replac-
ing the bulb. When aiming adjust-
ment is necessary, contact an autho-
rized NISSAN dealer.
cDo not leave the bulb out of the
headlight reflector for a long period
of time as dust, moisture, and smoke
may enter the headlight body and
affect the performance of the head-
light.
Replacing the headlight bulb
1. Open the hood.
2. Disconnect the negative (2) battery
cable.
3 Disconnect the electrical connector from
the rear end of the bulb.
4. Turn the bulb retaining ring counterclock-
wise until it is free from the headlamp
reflector and then remove it.
5. Carefully remove the headlight bulb. Do
not shake or rotate the bulb when remov-
ing it.
DO NOT TOUCH THE BULB.6. Install the new bulb in the reverse order
of removal.
cBe sure the lip of the bulb socket
contacts the headlight body.
Adjusting the headlight aim
Before performing aiming adjustment, make
sure of the following:
a. Use an aiming wall screen.
b. Keep all of the tires inflated to the correct
pressure.
c. Place the vehicle and screen on level
ground.
d. See that the vehicle is unloaded (except
for full levels of coolant, engine oil and
fuel, and that the spare tire, jack, and
tools are stored). Have the driver or an
equivalent weight placed in the driver's
seat.
1. Open the hood. Turn headlight low beam
on.
2. Adjust the vertical aim by turning the
adjustment screw.cCover the opposite headlight and ensure
the fog lights (if so equipped) are turned
off.
cAdjust beam pattern until cutoff line is
positioned at the same height off ground
as bulb center (on H-line).
8-32Maintenance and do-it-yourself
ZX