Page 87 of 273

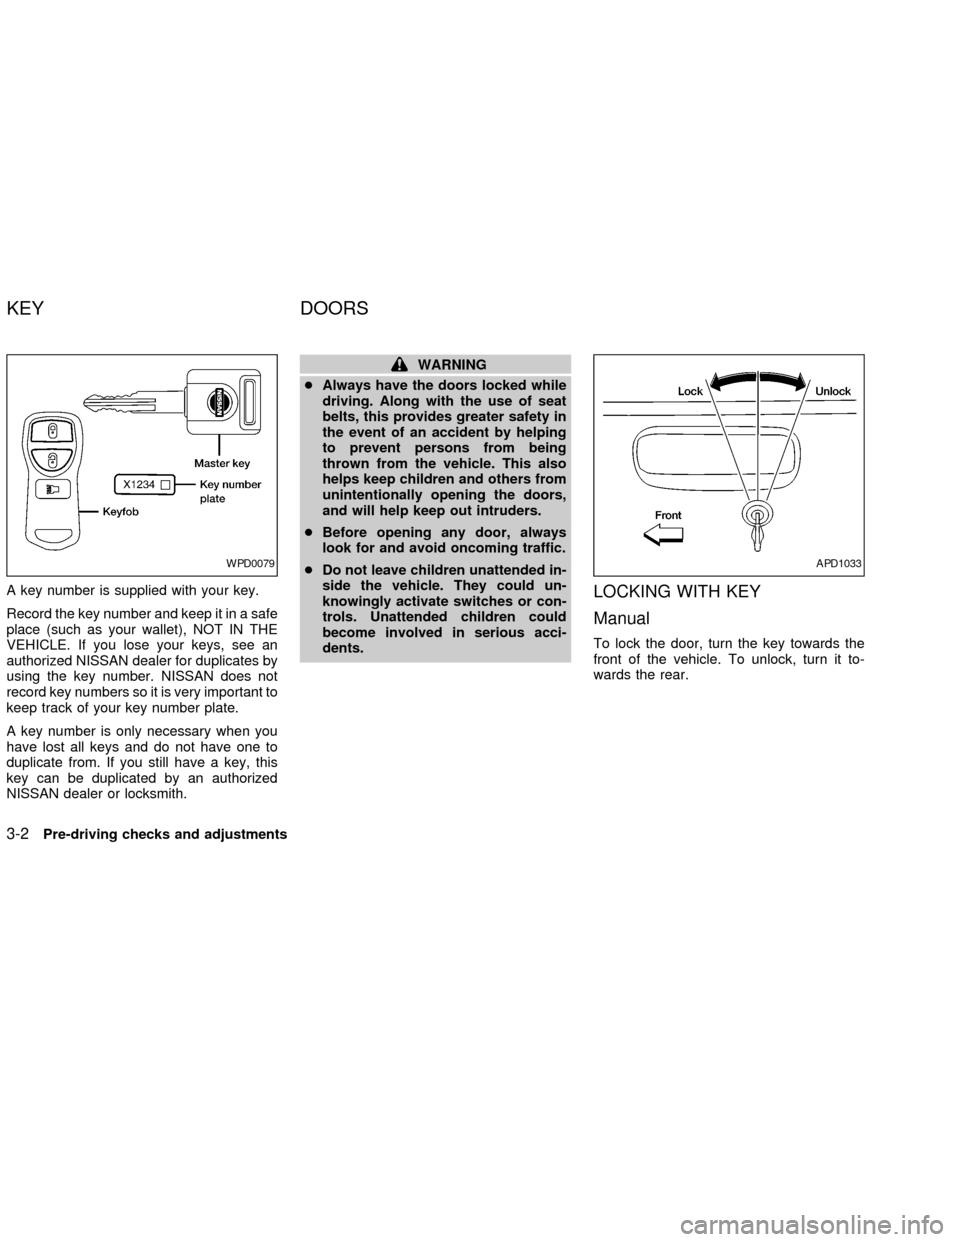
A key number is supplied with your key.
Record the key number and keep it in a safe
place (such as your wallet), NOT IN THE
VEHICLE. If you lose your keys, see an
authorized NISSAN dealer for duplicates by
using the key number. NISSAN does not
record key numbers so it is very important to
keep track of your key number plate.
A key number is only necessary when you
have lost all keys and do not have one to
duplicate from. If you still have a key, this
key can be duplicated by an authorized
NISSAN dealer or locksmith.
WARNING
cAlways have the doors locked while
driving. Along with the use of seat
belts, this provides greater safety in
the event of an accident by helping
to prevent persons from being
thrown from the vehicle. This also
helps keep children and others from
unintentionally opening the doors,
and will help keep out intruders.
cBefore opening any door, always
look for and avoid oncoming traffic.
cDo not leave children unattended in-
side the vehicle. They could un-
knowingly activate switches or con-
trols. Unattended children could
become involved in serious acci-
dents.
LOCKING WITH KEY
Manual
To lock the door, turn the key towards the
front of the vehicle. To unlock, turn it to-
wards the rear.
WPD0079APD1033
KEY DOORS
3-2Pre-driving checks and adjustments
ZX
Page 88 of 273

Power (if so equipped)
For vehicles equipped with the theft warning
system, the power door lock system allows
you to lock or unlock all doors simulta-
neously.
Turning the key to the front of the vehicle
locks all doors.
Turning the key one time to the rear of the
vehicle unlocks that door. From that posi-
tion, returning the key to neutral (where the
key can only be removed and inserted) and
turning it to the rear again within 5 seconds
unlocks all doors.
LOCKING WITH INSIDE LOCK
KNOB
To lock the door without the key, push the
inside lock knob to the lock position, then
close the door.
When locking the door this way, be certain
not to leave the key inside the vehicle.
LOCKING WITH POWER DOOR
LOCK SWITCH
To lock the doors without a key, push the
power door lock switch (driver or passenger
side), then close the door. When locking the
doors this way, be certain not to leave the
key inside the vehicle.
If the key is left in the ignition, all doors will
unlock automatically.
APD1041AIC1012LPD0059
Pre-driving checks and adjustments3-3
ZX
Page 90 of 273

Unlocking doors
1. Push the UNLOCK button on the keyfob.
Only the driver's side door unlocks.
2. Push the UNLOCK button on the keyfob
again within five seconds. All doors un-
lock.3. The interior light illuminates for 30 sec-
onds when the light switch is in the O or
DOOR position.
The interior light can be turned off without
waiting 30 seconds by inserting the key into
the ignition and turning to the ON or START
position, locking the doors with the keyfobor pushing the interior light switch to the
OFF position.
Auto Relock
All doors will lock automatically within 5
minutes unless one of the following opera-
tions is performed:
cany door is opened
ca key is inserted into the ignition switch
and the key is turned from OFF to ON.
Using the panic alarm
If you are near your vehicle and feel threat-
ened, you may activate the panic alarm to
call attention as follows:
1. Push the PANIC button on the remote
controller forlonger than 0.5 seconds.
2. The theft warning alarm and headlights
will stay on for 30 seconds.
3. The panic alarm stops when:
cit has run for 30 seconds, or
cthe LOCK or UNLOCK button is pressed,
on the keyfob.
WPD0080
Pre-driving checks and adjustments3-5
ZX
Page 93 of 273
device must accept any interference re-
ceived including interference that may
cause undesired operation of the device.
WARNING
cMake sure the hood is completely
closed and latched before driving.
Failure to do so could cause the
hood to fly open and result in an
accident.
cIf you see steam or smoke coming
from the engine compartment, to
avoid injury do not open the hood.
1. Pull the hood lock release handle located
below the driver side instrument panel;
the hood then springs up slightly.2. Lift the lever at the front of the hood with
your fingertips and raise the hood.
3. Insert the support rod into the slot in the
front edge of the hood.
4. When closing the hood, reset the support
rod to its original position, lower the hood
to approximately 12 inches (30.5 cm)
above the latch and release it. This al-
lows proper engagement of the hood
latch.
WPD0082
HOOD
3-8Pre-driving checks and adjustments
ZX
Page 94 of 273
Always evenly distribute the cargo on the
tubular roof rack.The maximum total load
is 125 lb (57 Kg) evenly distributed.Be
careful that your vehicle does not exceed the
Gross Vehicle Weight Rating (GVWR) or the
Gross Axle Weight Ratings (GAWR frontand rear). The GVWR and GAWR are lo-
cated on the Safety Compliance Certification
Label (located on the driver's side door jamb
pillar). For more information regarding GVWR
and GAWR, refer to the ªTechnical and con-
sumer informationº section of this manual.
WARNING
Properly secure all cargo with ropes or
straps to help prevent it from sliding or
shifting. In a sudden stop or collision,
unsecured cargo could cause personal
injury.
CAUTION
Use care when placing or removing
items from the roof rack. If you cannot
comfortably lift the items onto the roof
rack from the ground, use a ladder or
stool.
WPD0089
TUBULAR ROOF RACK (if so
equipped)
Pre-driving checks and adjustments3-9
ZX
Page 97 of 273

WARNING
cGasoline is extremely flammable and
highly explosive under certain con-
ditions. You could be burned or se-
riously injured if it is misused or
mishandled. Always stop the engine
and do not smoke or allow open
flames or sparks near the vehicle
when refueling.
cFuel may be under pressure. Turn
the cap one-half turn and wait for
any ``hissing'' sound to stop to pre-
vent fuel from spraying out and
causing possible personal injury.
Then remove the cap.
cDo not attempt to top off the fuel
tank after the fuel pump nozzle shuts
off automatically. Continued refuel-
ing may cause fuel overflow, result-
ing in fuel spray and possibly fire.
cUse only an original equipment type
fuel filler cap as a replacement. It has
a built-in safety valve needed for
proper operation of the fuel system
and emission control system. An in-
correct cap can result in a serious
malfunction and possible injury. Itcould also cause the malfunction
indicator lamp to come on.
cNever pour fuel into the throttle body
to attempt to start your vehicle.
CAUTION
cIf fuel is spilled on the vehicle body,
flush it away with water to avoid
paint damage.
cTighten until the fuel filler cap clicks.
Failure to tighten the fuel filler cap
properly may cause the
mal-
function indicator lamp (MIL) to illu-
minate. If the
lamp illuminates
because the fuel filler cap is loose or
missing, tighten or install the cap
and continue to drive the vehicle.
The
lamp should turn off after
a few driving trips. If thelamp
does not turn off after a few driving
trips, have the vehicle inspected by
an authorized NISSAN dealer.
cFor additional information, see the
(Malfunction indicator lamp (MIL)(in
the(Instruments and Controls(sec-
tion earlier in this manual.
TILT OPERATION (if so equipped)
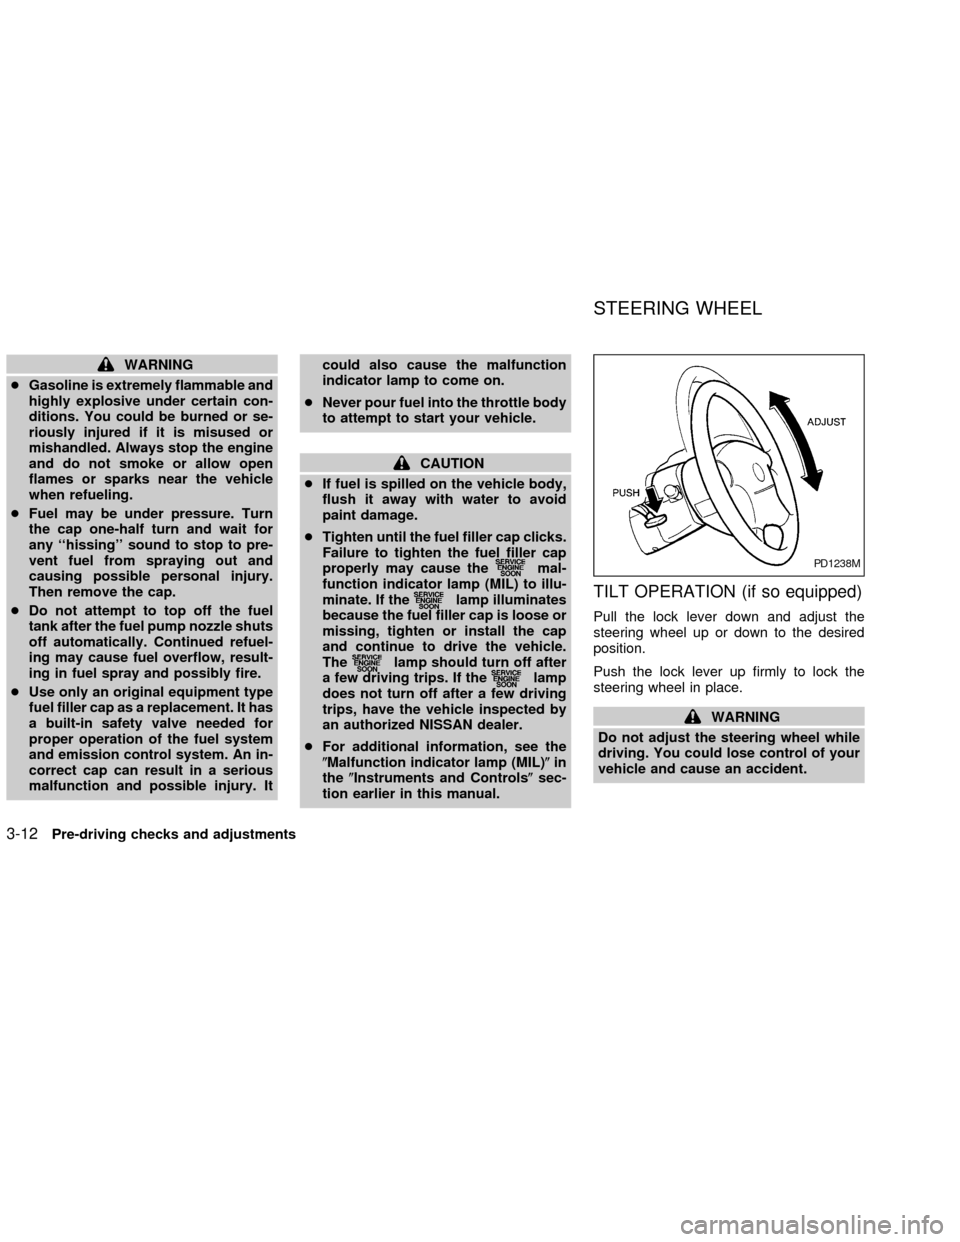
Pull the lock lever down and adjust the
steering wheel up or down to the desired
position.
Push the lock lever up firmly to lock the
steering wheel in place.
WARNING
Do not adjust the steering wheel while
driving. You could lose control of your
vehicle and cause an accident.
PD1238M
STEERING WHEEL
3-12Pre-driving checks and adjustments
ZX
Page 98 of 273
VANITY MIRROR
(if so equipped)
A vanity mirror is located on the rear side of
the passenger sunvisor.
INSIDE MIRROR
The night position reduces glare from the
headlights of vehicles behind the vehicle.
WARNING
Use the night position only when nec-
essary because it reduces rear view
clarity.
OUTSIDE MIRRORS
The outside mirror can be moved in any
direction for a better rear view.
AIC0710AIC0703APD1090
SUN VISORS MIRRORS
Pre-driving checks and adjustments3-13
ZX
Page 100 of 273
WARNING
Objects viewed in the outside mirror on
the passenger side are closer than they
appear. Be careful when moving to the
right. Using only this mirror could cause
an accident. Use the inside mirror or
glance over your shoulder to properly
judge distances to other objects.
TAILGATE
Opening the tailgate
Pull the tailgate handle upward and lower
the tailgate. The support cables hold the
tailgate open.
When closing the tailgate, make sure the
latches are securely locked.To open the tailgate to the lowest position,
lift the tailgate to a 45 degree angle, then
release the support cables.
Do not drive the vehicle with the tailgate
down, unless equipped with Nissan's
Bed Extender (accessory) in the de-
ployed position.
For proper truck box loading see9Loading
tips9under the9Vehicle loading information9
heading in the9Technical and consumer
information9section of this manual.
WPD0043APD1038
TRUCK BOX
Pre-driving checks and adjustments3-15
ZX