2002 NISSAN ALTIMA steep
[x] Cancel search: steepPage 60 of 249

INDICATOR LIGHTS
Turn signal/hazard indicator
lights
The appropriate light flashes when the turn
signal switch is activated.
Both lights flash when the hazard switch is
turned on.
High beam indicator light
(Blue)
This light comes on when the headlight high
beam is on and goes out when the low
beam is selected.
The high beam indicator light also comes on
when the passing signal is activated.
Cruise main switch indicator
light (if so equipped)
The light comes on when the cruise control
main switch is pushed. The light goes out
when the main switch is pushed again.
While the cruise main switch indicator light
comes on, the cruise control system is
operational.
Cruise set switch indicator
light (if so equipped)
The light comes on while the vehicle speed
is controlled by the cruise control system. If
the light blinks while the engine is running, it
may indicate the cruise control system is not
functioning properly. Have the system
checked by your NISSAN dealer.
Malfunction indicator lamp
(MIL)
If this indicator lamp comes on steady or
blinks while the engine is running, it may
indicate a potential emission control mal-
function.
The malfunction indicator lamp may also
come on steady if the fuel filler cap is loose
or missing, or if the vehicle runs out of fuel.
Check to make sure the fuel filler cap is
installed and closed tightly, and that the
vehicle has at least three gallons of fuel in
the fuel tank.
After a few driving trips, the
lamp
should turn off if no other potential emission
control system malfunction exists.
Operation
The malfunction indicator lamp will come on
in one of two ways:
cMalfunction indicator lamp on steady - An
emission control system malfunction has
been detected. Check the fuel filler cap. If
the fuel filler cap is loose or missing,
tighten or install the cap and continue to
drive the vehicle. The
lamp should
turn off after a few driving trips. If the
lamp does not turn off after a few
driving trips, have the vehicle inspected
by an authorized NISSAN dealer. You do
not need to have your vehicle towed to
the dealer.
cMalfunction indicator lamp blinking - An
engine misfire has been detected which
may damage the emission control sys-
tem. To reduce or avoid emission control
system damage:
a) do not drive at speeds above 45 MPH
(72 km/h).
b) avoid hard acceleration or decelera-
tion.
c) avoid steep uphill grades.
d) if possible, reduce the amount of
cargo being hauled or towed.
Instruments and controls
2-11
ZX
Page 143 of 249

P (Park):
Use this selector position when the vehicle
is parked or when starting the engine. Make
sure the vehicle is completely stopped. For
maximum safety, depress the brake pedal,
then move the lever to the P (Park) position.
The brake pedal must be depressed any
time the selector lever is moved to P (Park).
Apply the parking brake. When parking on a
hill, apply the parking brake first, then move
the lever to the P (Park) position.
R (Reverse):
Use this position to back up. Always be sure
the vehicle is completely stopped when
selecting R (Reverse). The brake pedal
must be depressed to move the selector
lever from P (Park), N (Neutral), or any drive
position to R (Reverse).
N (Neutral):
Neither forward nor reverse gear is engaged.
The engine can be started in this position.
You may shift to N (Neutral) and restart a
stalled engine while the vehicle is moving.
D (Drive):
Use this position for all normal forward
driving.3 (Third gear):
For driving up or down long slopes where
engine braking would be advantageous.
2 (Second gear):
Use for hill climbing or engine braking on
downhill grades.
Do not exceed 68 MPH (110 km/h) in the 2
(Second gear) position.
1 (Low gear):
Use this position when climbing steep hills
slowly or driving slowly through deep snow,
sand or mud, or for maximum engine brak-
ing on steep downhill grades.
Do not exceed 37 MPH (60 km/h) in the 1
(Low gear) position.
Shift lock release
If the battery is discharged, the shift selector
lever may not be moved from the P (Park)
position even with the brake pedal de-
pressed.
To move the shift selector lever, release the
shift lock. The selector lever can be moved
to N (Neutral). However, the steering wheel
will be locked unless the ignition switch is
turned to the ON position. This allows the
vehicle to be moved if the battery is dis-
charged.
To push the shift lock release button, per-
LSD0024
5-10Starting and driving
ZX
Page 147 of 249

PRECAUTIONS ON CRUISE
CONTROL
cIf the cruise control system malfunctions,
it cancels automatically. The SET indica-
tor light in the instrument panel then
blinks to warn the driver.
cIf the SET indicator light blinks, turn the
cruise control main switch off and have
the system checked by an authorized
NISSAN dealer.
cThe SET indicator light may blink when
the cruise control main switch is turned
ON while pushing the RES/ACCEL,COAST/SET, or CANCEL switch (lo-
cated on the steering wheel). To properly
use the cruise control system, use the
following procedures.
WARNING
Do not use the cruise control when
driving under the following conditions.
cWhen it is not possible to keep the
vehicle at a set speed.
cIn heavy traffic or in traffic that var-
ies in speed.
cOn winding or hilly roads.
c
On slippery roads (rain, snow, ice, etc.).
cIn very windy areas.
Doing so could cause a loss of vehicle
control and result in an accident.
CAUTION
On manual transmission models, do
not shift into N (Neutral) without de-
pressing the clutch pedal when the
cruise control is set. Should this occur,
depress the clutch pedal and turn the-
main switch off immediately. Failure to
do so may cause engine damage.
CRUISE CONTROL OPERA-
TIONS
The cruise control allows driving at a speed
between 30 to 90 MPH (48 to 144 km/h)
without keeping your foot on the accelerator
pedal.
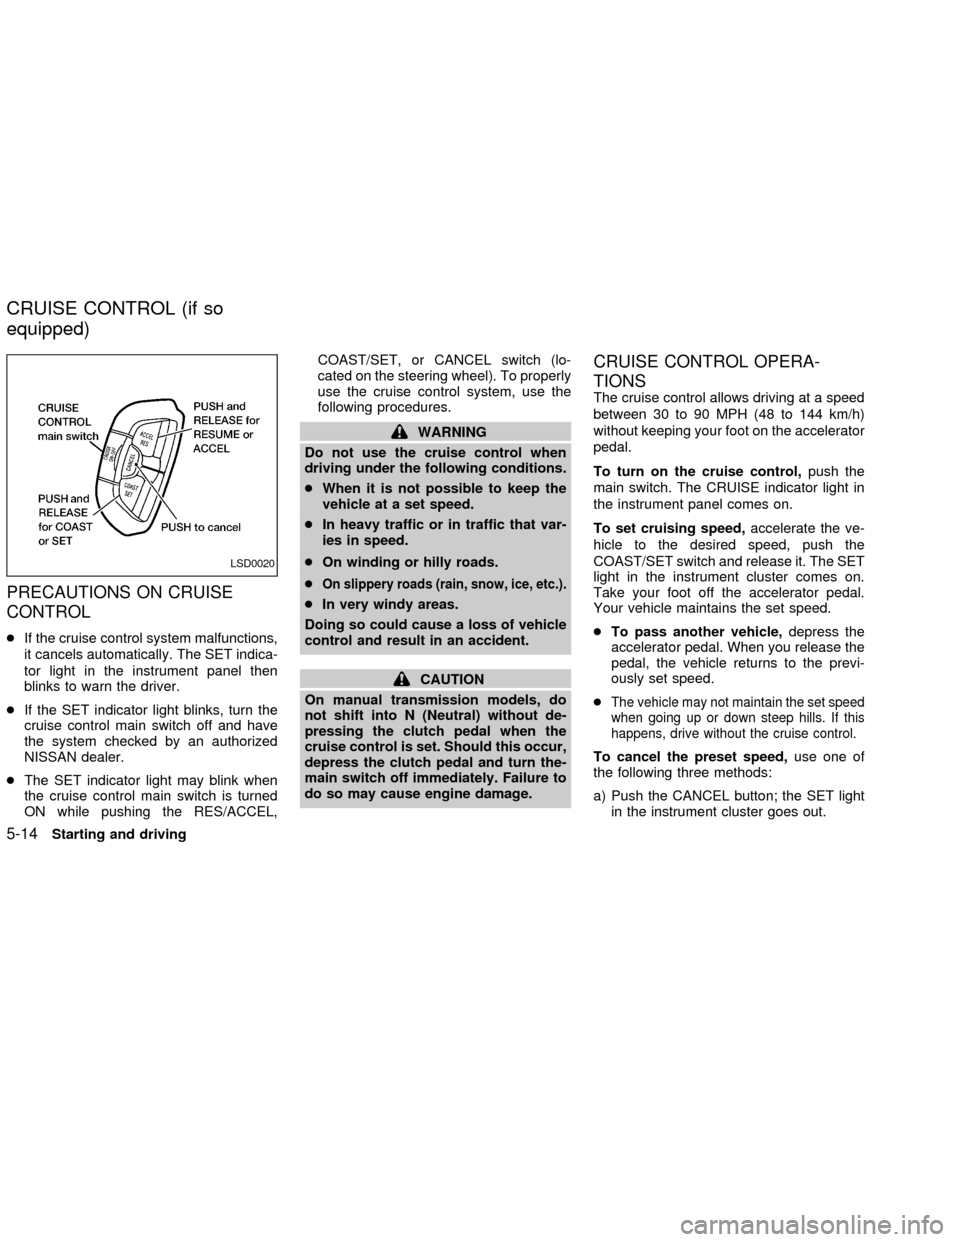
To turn on the cruise control,push the
main switch. The CRUISE indicator light in
the instrument panel comes on.
To set cruising speed,accelerate the ve-
hicle to the desired speed, push the
COAST/SET switch and release it. The SET
light in the instrument cluster comes on.
Take your foot off the accelerator pedal.
Your vehicle maintains the set speed.
cTo pass another vehicle,depress the
accelerator pedal. When you release the
pedal, the vehicle returns to the previ-
ously set speed.
c
The vehicle may not maintain the set speed
when going up or down steep hills. If this
happens, drive without the cruise control.
To cancel the preset speed,use one of
the following three methods:
a) Push the CANCEL button; the SET light
in the instrument cluster goes out.
LSD0020
CRUISE CONTROL (if so
equipped)
5-14Starting and driving
ZX
Page 181 of 249

Steering wheelCheck for changes in the
steering conditions, such as excessive free-
play, hard steering or strange noises.
SeatsCheck seat position controls such as
seat adjusters, seatback recliner, etc. to
ensure they operate smoothly and all
latches lock securely in every position.
Check that the head restraints move up and
down smoothly and the locks (if so
equipped) hold securely in all latched posi-
tions.
Seat beltsCheck that all parts of the seat
belt system (e.g., buckles, anchors, adjust-
ers and retractors) operate properly and
smoothly, and are installed securely. Check
the belt webbing for cuts, fraying, wear or
damage.
Accelerator pedalCheck the pedal for
smooth operation and make sure the pedal
does not catch or require uneven effort.
Keep the floor mat away from the pedal.
Clutch pedal*Make sure the pedal oper-
ates smoothly and check that it has the
proper free travel.
BrakesCheck that the brakes do not pull
the vehicle to one side when applied.Brake pedal and booster*Check the pedal
for smooth operation and make sure it has
the proper distance under it when de-
pressed fully. Check the brake booster func-
tion. Be certain to keep the floor mat away
from the pedal.
Parking brake*Check that the lever has
the proper travel and confirm that your
vehicle is held securely on a fairly steep hill
with only the parking brake applied.
Automatic transmission P (Park) posi-
tion mechanismCheck that the lock re-
lease button on the selector lever operates
properly and smoothly. On a fairly steep hill
check that your vehicle is held securely with
the selector lever in the P position without
applying any brakes.
Under the hood and vehicle
The maintenance items listed here should
be checked periodically (e.g., each time you
check the engine oil or refuel).
Windshield washer fluid*Check that there
is adequate fluid in the reservoir.
Engine oil level*Check the level after
parking the vehicle on a level surface with
the engine off. Wait more than 10 minutesfor the oil to drain back into the oil pan.
Brake and clutch fluid levels*Make sure
that the brake and clutch fluid level is be-
tween the MIN and MAX lines on the reser-
voir.
Power steering fluid level* and lines
Check the level when the fluid is cold, with
the engine off. Check the lines for proper
attachment, leaks, cracks, etc.
Automatic transmission fluid level*
Check the level after putting the selector
lever in P with the engine idling at operating
temperature.
Engine coolant level*Check the coolant
level when the engine is cold.
Radiator and hosesCheck the front of the
radiator and clean off any dirt, insects,
leaves, etc., that may have accumulated.
Make sure the hoses have no cracks, de-
formation, rot or loose connections.
Engine drive belts*Make sure the drive
belts are not frayed, worn, cracked or oily.
Battery*Check the fluid level in each cell. It
should be between the MAX and MIN lines.
Vehicles operated in high temperatures or
under severe conditions require frequent
8-4Maintenance and do-it-yourself
ZX
Page 234 of 249

Your new vehicle was designed to be used
primarily to carry passengers and cargo. Re-
member that towing a trailer will place addi-
tional loads on your vehicle's engine, drive
train, steering, braking and other systems.
A Nissan Trailer Towing Guide (U.S. only)
containing information on trailer towing ability
and the special equipment required may be
obtained from an authorized NISSAN dealer.
MAXIMUM LOAD LIMITS
Maximum trailer loads:
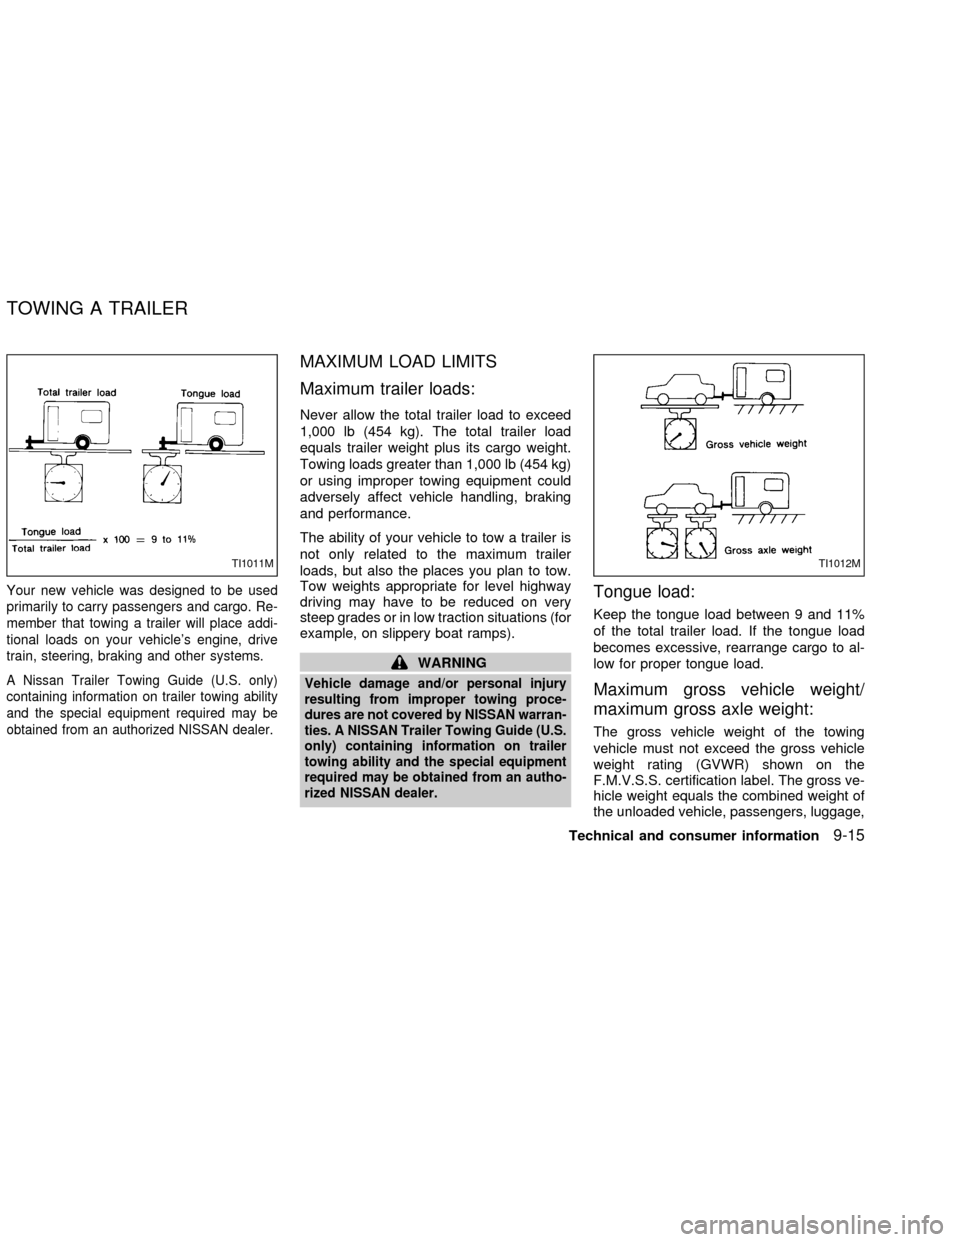
Never allow the total trailer load to exceed
1,000 lb (454 kg). The total trailer load
equals trailer weight plus its cargo weight.
Towing loads greater than 1,000 lb (454 kg)
or using improper towing equipment could
adversely affect vehicle handling, braking
and performance.
The ability of your vehicle to tow a trailer is
not only related to the maximum trailer
loads, but also the places you plan to tow.
Tow weights appropriate for level highway
driving may have to be reduced on very
steep grades or in low traction situations (for
example, on slippery boat ramps).
WARNING
Vehicle damage and/or personal injury
resulting from improper towing proce-
dures are not covered by NISSAN warran-
ties. A NISSAN Trailer Towing Guide (U.S.
only) containing information on trailer
towing ability and the special equipment
required may be obtained from an autho-
rized NISSAN dealer.
Tongue load:
Keep the tongue load between 9 and 11%
of the total trailer load. If the tongue load
becomes excessive, rearrange cargo to al-
low for proper tongue load.
Maximum gross vehicle weight/
maximum gross axle weight:
The gross vehicle weight of the towing
vehicle must not exceed the gross vehicle
weight rating (GVWR) shown on the
F.M.V.S.S. certification label. The gross ve-
hicle weight equals the combined weight of
the unloaded vehicle, passengers, luggage,
TI1011MTI1012M
TOWING A TRAILER
Technical and consumer information9-15
ZX