Page 183 of 249
dealer because the fuel lines are
under high pressure even when the
engine is off.
CAUTION
cDo not work under the hood while
the engine is hot. Turn off the engine
and wait until it cools down.
cNever connect or disconnect the bat-
tery or any transistorized compo-
nent while the ignition is in the ON
position.
cNever leave the engine or automatic
transmission related component
harnesses disconnected while the
ignition is in the ON position.
c
Avoid contact with used engine oil
and coolant. Improperly disposed
engine oil, engine coolant, and/or
other vehicle fluids can damage the
environment. Always conform to lo-
cal regulations for disposal of ve-
hicle fluid.
This ``Maintenance and do-it-yourself'' sec-
tion gives instructions regarding only those
items which are relatively easy for an owner
to perform.
A genuine NISSAN service manual is also
available. See ``Owner's manual/service
manual order information'' in the ``Technical
and consumer information'' section.
You should be aware that incomplete or
improper servicing may result in operating
difficulties or excessive emissions, and
could affect your warranty coverage.If in
doubt about any servicing, have it done
by an authorized NISSAN dealer.
8-6Maintenance and do-it-yourself
ZX
Page 184 of 249
1. Power steering fluid reservoir
2. Spark plug caps
3. Brake fluid reservoir
4. Clutch fluid reservoir (M/T models)
5. Air cleaner
6. Battery
7. Fuse/fusible link box
8. Transmission dipstick (A/T models)
9. Engine oil dipstick
10. Radiator cap
11. Fuse block
12. Windshield washer fluid reservoir
13. Coolant reservoir
14. Engine oil filler cap
NOTE: Engine cover removed for clarity
LDI0073
ENGINE COMPARTMENT
CHECK LOCATIONS QR
ENGINE
Maintenance and do-it-yourself8-7
ZX
Page 185 of 249
1. Power steering fluid reservoir
2. Engine oil filler cap
3. Brake fluid reservoir
4. Clutch fluid reservoir (M/T models)
5. Air cleaner
6. Battery
7. Fuse/fusible link box
8. Transmission dipstick (A/T models)
9. Engine oil dipstick
10. Radiator cap
11. Fuse block
12. Windshield washer fluid reservoir
13. Coolant reservoir
NOTE: Engine cover removed for clarity
LDI0074
ENGINE COMPARTMENT
CHECK LOCATIONS VQ
ENGINE
8-8Maintenance and do-it-yourself
ZX
Page 187 of 249
CHANGING ENGINE COOLANT
An authorized NISSAN dealer can change
the engine coolant. The service procedure
is found in NISSAN's Service Manual.
Improper servicing can result in reduced
heater performance and engine over-
heating.
WARNING
cTo avoid the danger of being
scalded, never change the coolant
when the engine is hot.
cNever remove the radiator cap when
the engine is hot. Serious burns
could be caused by high pressure
fluid escaping from the radiator.
cAvoid direct skin contact with used
coolant. If skin contact is made,
wash thoroughly with soap or hand
cleaner as soon as possible.
cKeep coolant out of reach of children
and pets.
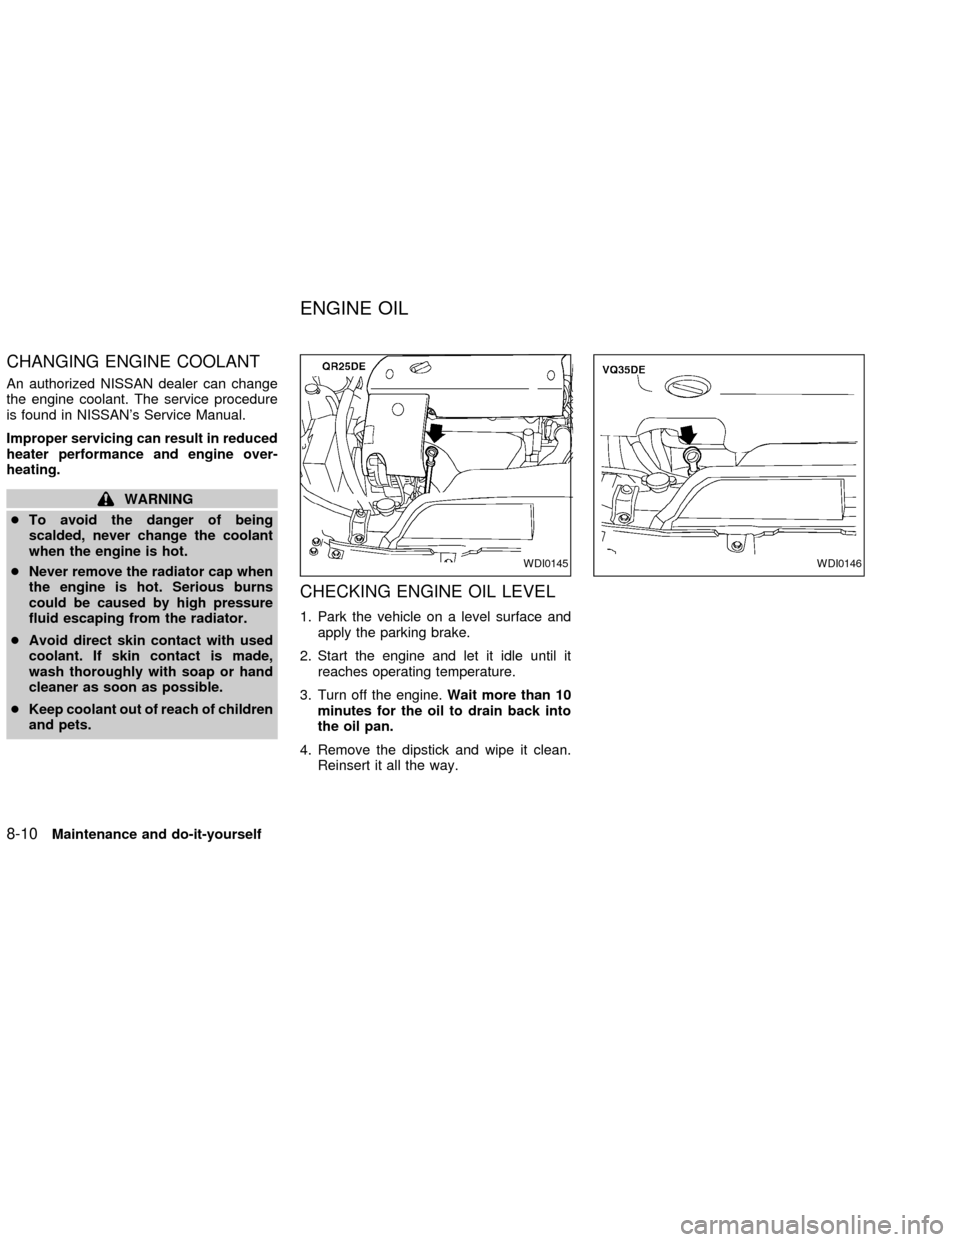
CHECKING ENGINE OIL LEVEL
1. Park the vehicle on a level surface and
apply the parking brake.
2. Start the engine and let it idle until it
reaches operating temperature.
3. Turn off the engine.Wait more than 10
minutes for the oil to drain back into
the oil pan.
4. Remove the dipstick and wipe it clean.
Reinsert it all the way.
WDI0145WDI0146
ENGINE OIL
8-10Maintenance and do-it-yourself
ZX
Page 188 of 249
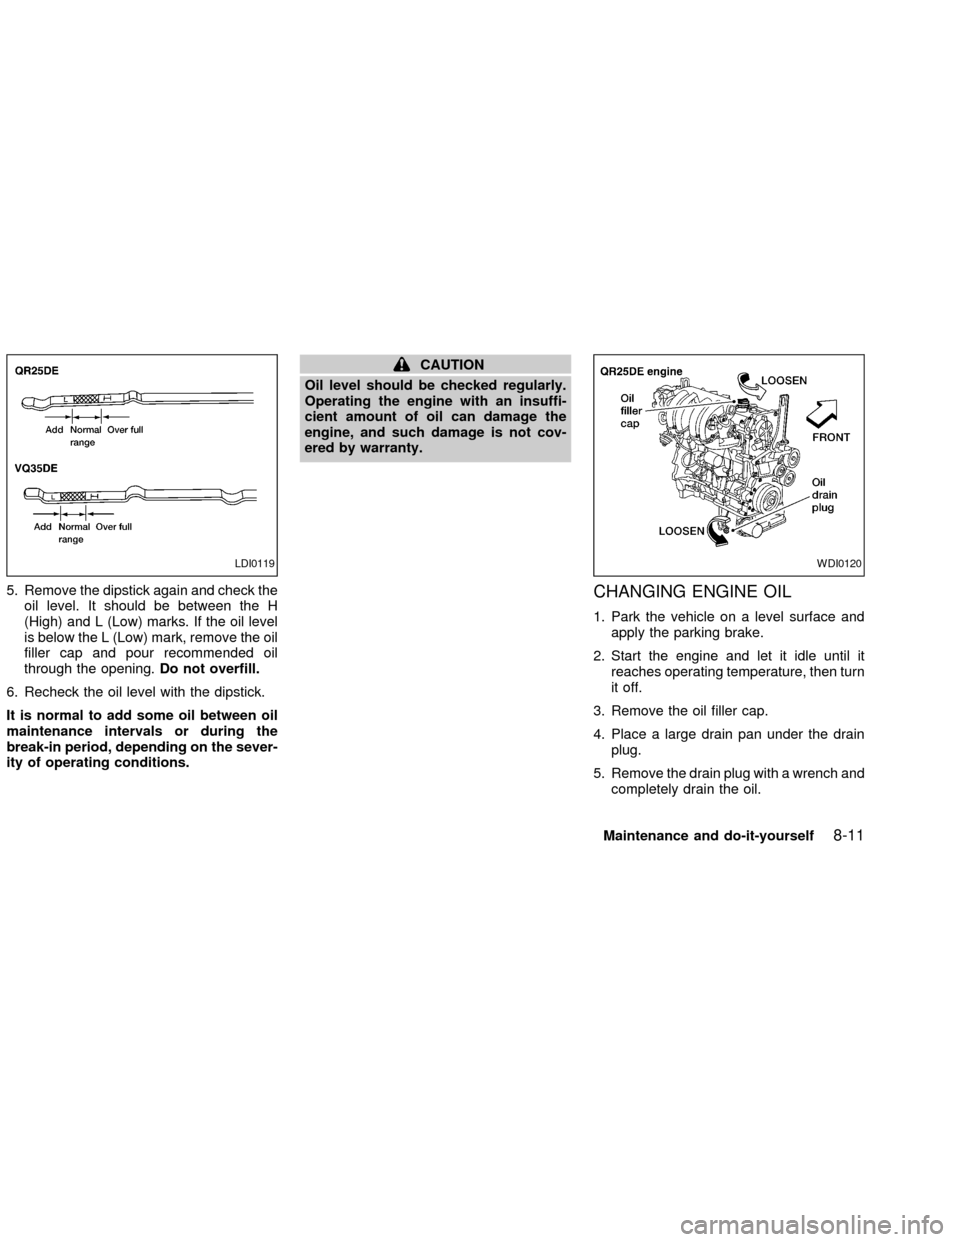
5. Remove the dipstick again and check the
oil level. It should be between the H
(High) and L (Low) marks. If the oil level
is below the L (Low) mark, remove the oil
filler cap and pour recommended oil
through the opening.Do not overfill.
6. Recheck the oil level with the dipstick.
It is normal to add some oil between oil
maintenance intervals or during the
break-in period, depending on the sever-
ity of operating conditions.
CAUTION
Oil level should be checked regularly.
Operating the engine with an insuffi-
cient amount of oil can damage the
engine, and such damage is not cov-
ered by warranty.
CHANGING ENGINE OIL
1. Park the vehicle on a level surface and
apply the parking brake.
2. Start the engine and let it idle until it
reaches operating temperature, then turn
it off.
3. Remove the oil filler cap.
4. Place a large drain pan under the drain
plug.
5. Remove the drain plug with a wrench and
completely drain the oil.
LDI0119WDI0120
Maintenance and do-it-yourself8-11
ZX
Page 189 of 249
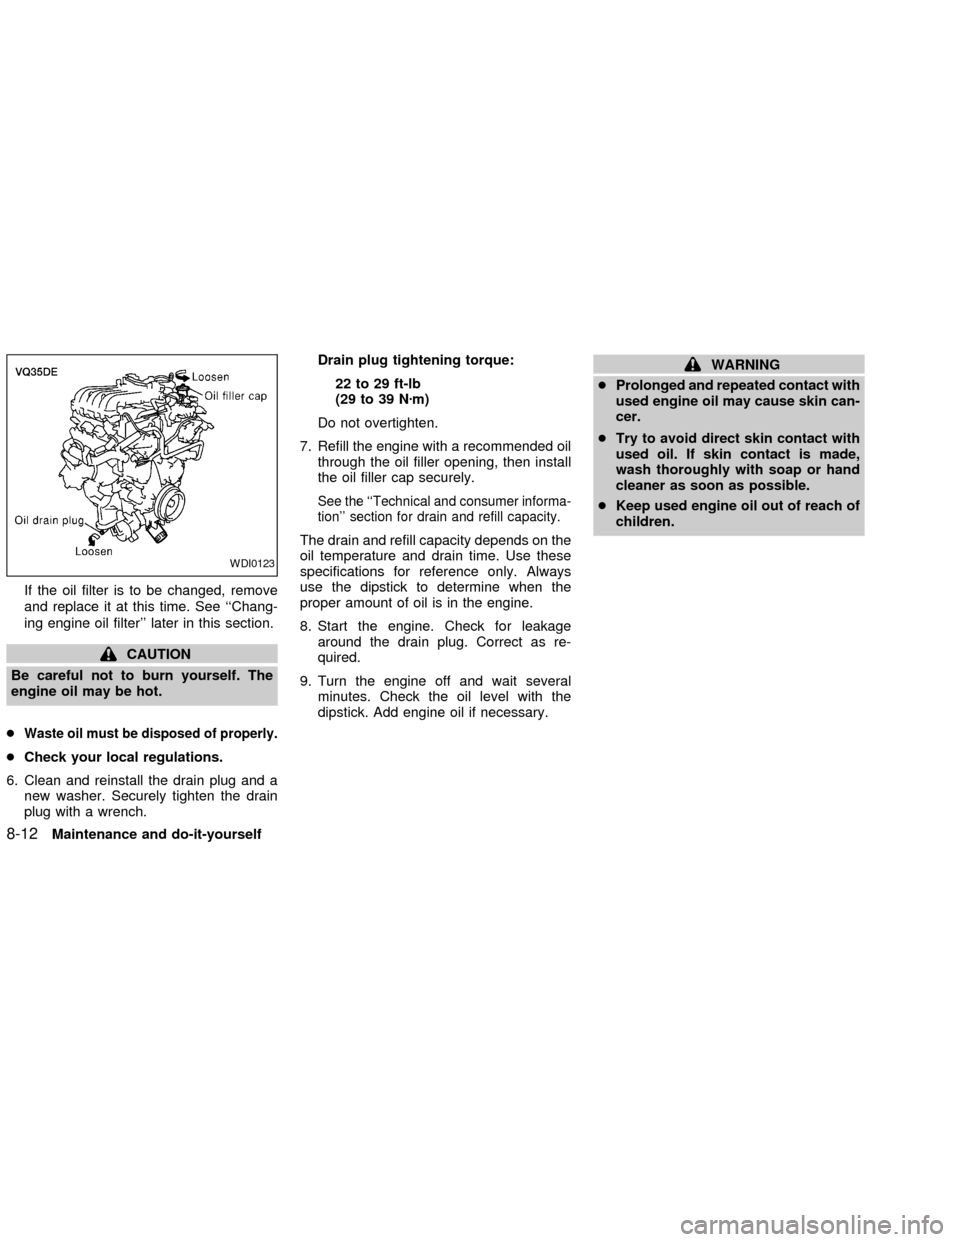
If the oil filter is to be changed, remove
and replace it at this time. See ``Chang-
ing engine oil filter'' later in this section.
CAUTION
Be careful not to burn yourself. The
engine oil may be hot.
c
Waste oil must be disposed of properly.
cCheck your local regulations.
6. Clean and reinstall the drain plug and a
new washer. Securely tighten the drain
plug with a wrench.Drain plug tightening torque:
22 to 29 ft-lb
(29 to 39 Nzm)
Do not overtighten.
7. Refill the engine with a recommended oil
through the oil filler opening, then install
the oil filler cap securely.
See the ``Technical and consumer informa-
tion'' section for drain and refill capacity.
The drain and refill capacity depends on the
oil temperature and drain time. Use these
specifications for reference only. Always
use the dipstick to determine when the
proper amount of oil is in the engine.
8. Start the engine. Check for leakage
around the drain plug. Correct as re-
quired.
9. Turn the engine off and wait several
minutes. Check the oil level with the
dipstick. Add engine oil if necessary.
WARNING
cProlonged and repeated contact with
used engine oil may cause skin can-
cer.
cTry to avoid direct skin contact with
used oil. If skin contact is made,
wash thoroughly with soap or hand
cleaner as soon as possible.
cKeep used engine oil out of reach of
children.
WDI0123
8-12Maintenance and do-it-yourself
ZX
Page 190 of 249
CHANGING ENGINE OIL FILTER
1. Park the vehicle on a level surface and
apply the parking brake.
2. Turn the engine off.
3. Place a large drain pan under the oil
filter.
4. Loosen the oil filter with an oil filter
wrench. Then, remove the oil filter by
turning it by hand.
CAUTION
Be careful not to burn yourself. The
engine oil may be hot.
5. Wipe the engine oil filter mounting sur-
face with a clean rag.
Be sure to remove any old gasket mate-
rial remaining on the mounting surface of
the engine.
6. Coat the gasket on the new filter with
clean engine oil.
7. Screw on the oil filter until a slight resis-tance is felt, then tighten an additional
2/3 turn.
8. Start the engine and check for leakage
around the oil filter. Correct as required.
9. Turn the engine off and wait several
minutes. Check the oil level. Add engine
oil if necessary.
WDI0121WDI0136
Maintenance and do-it-yourself8-13
ZX
Page 197 of 249
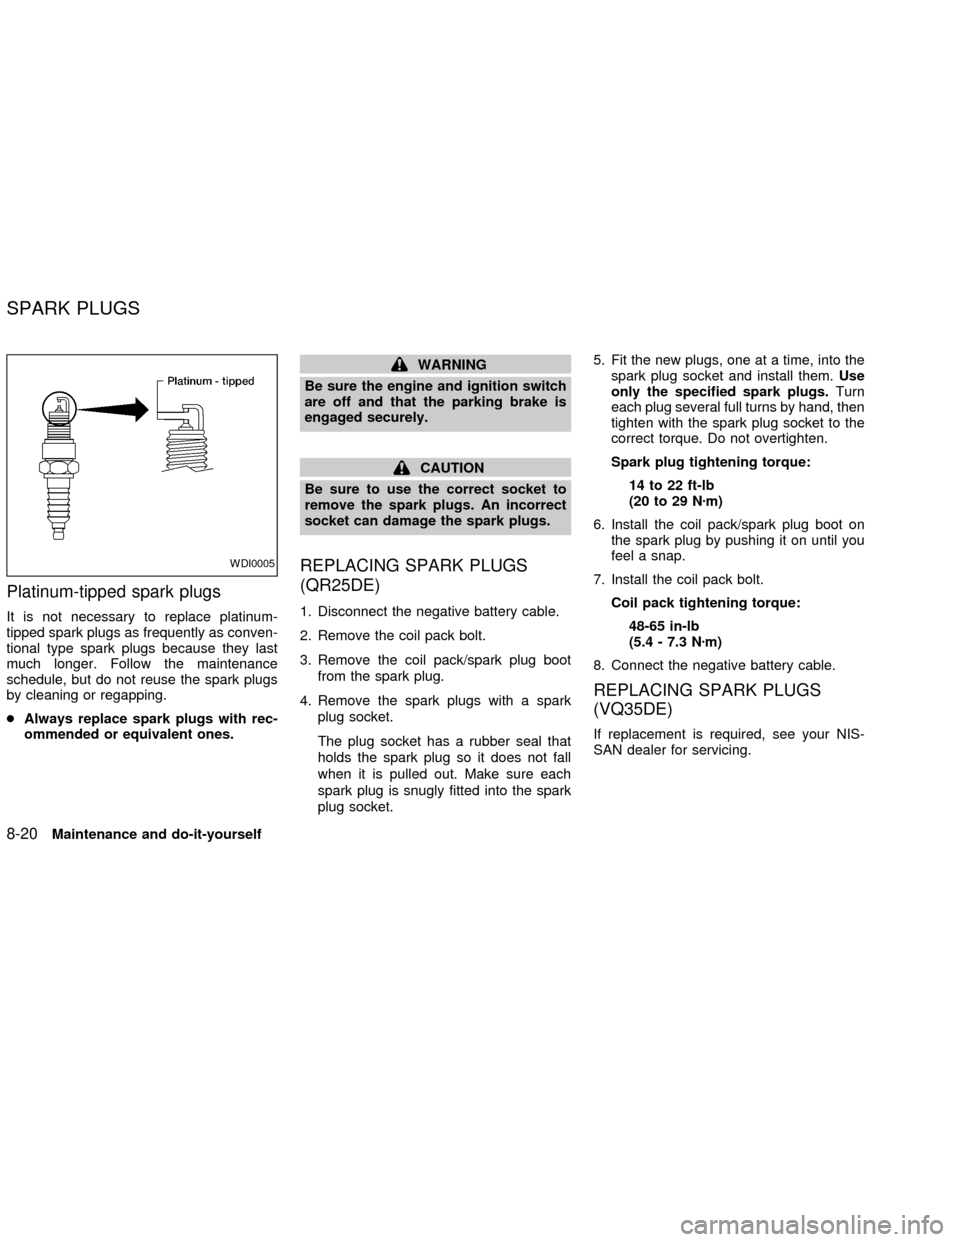
Platinum-tipped spark plugs
It is not necessary to replace platinum-
tipped spark plugs as frequently as conven-
tional type spark plugs because they last
much longer. Follow the maintenance
schedule, but do not reuse the spark plugs
by cleaning or regapping.
cAlways replace spark plugs with rec-
ommended or equivalent ones.
WARNING
Be sure the engine and ignition switch
are off and that the parking brake is
engaged securely.
CAUTION
Be sure to use the correct socket to
remove the spark plugs. An incorrect
socket can damage the spark plugs.
REPLACING SPARK PLUGS
(QR25DE)
1. Disconnect the negative battery cable.
2. Remove the coil pack bolt.
3. Remove the coil pack/spark plug boot
from the spark plug.
4. Remove the spark plugs with a spark
plug socket.
The plug socket has a rubber seal that
holds the spark plug so it does not fall
when it is pulled out. Make sure each
spark plug is snugly fitted into the spark
plug socket.5. Fit the new plugs, one at a time, into the
spark plug socket and install them.Use
only the specified spark plugs.Turn
each plug several full turns by hand, then
tighten with the spark plug socket to the
correct torque. Do not overtighten.
Spark plug tightening torque:
14 to 22 ft-lb
(20 to 29 Nzm)
6. Install the coil pack/spark plug boot on
the spark plug by pushing it on until you
feel a snap.
7. Install the coil pack bolt.
Coil pack tightening torque:
48-65 in-lb
(5.4 - 7.3 Nzm)
8. Connect the negative battery cable.
REPLACING SPARK PLUGS
(VQ35DE)
If replacement is required, see your NIS-
SAN dealer for servicing.
WDI0005
SPARK PLUGS
8-20Maintenance and do-it-yourself
ZX