Page 45 of 249

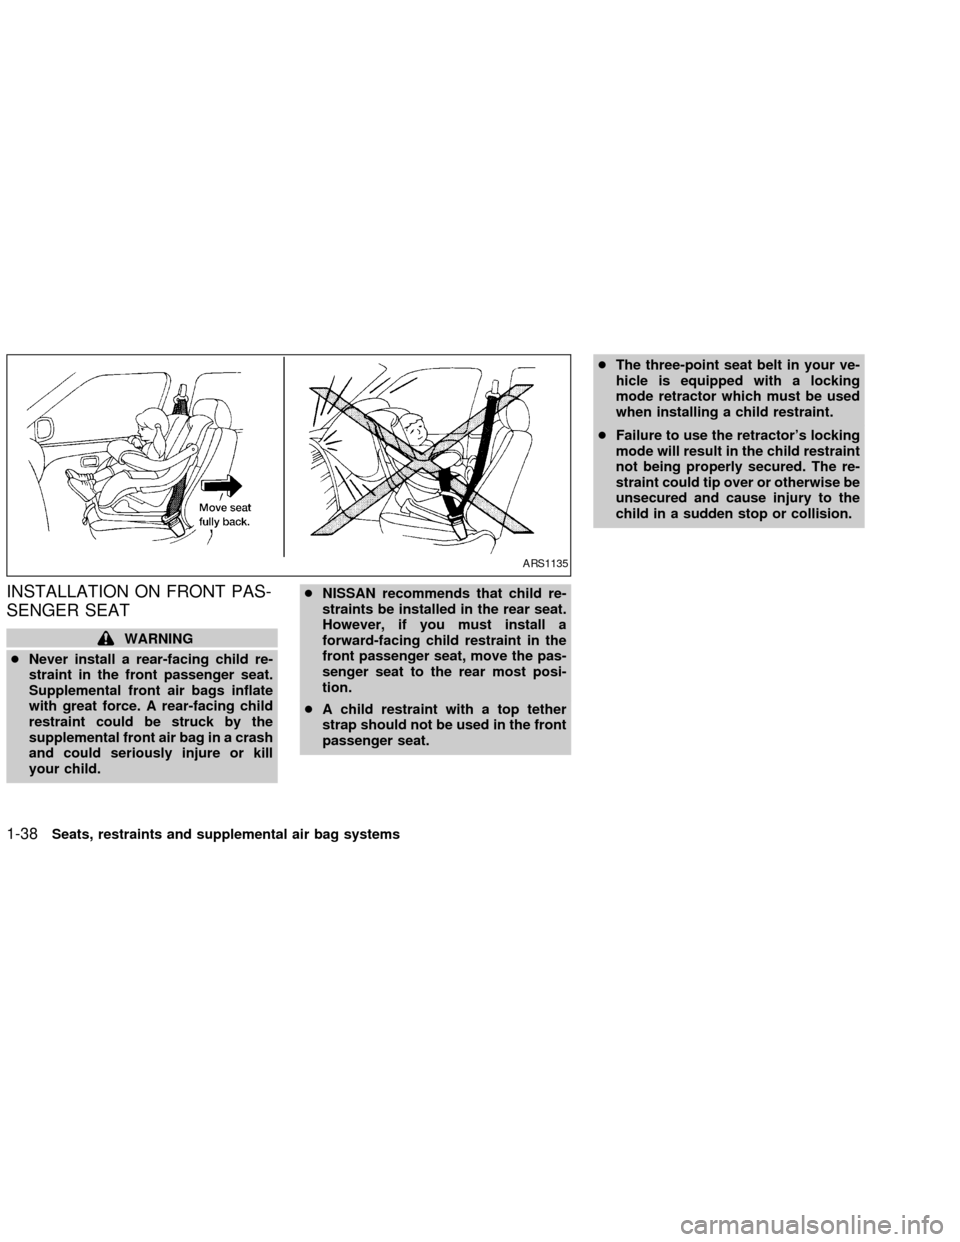
INSTALLATION ON FRONT PAS-
SENGER SEAT
WARNING
cNever install a rear-facing child re-
straint in the front passenger seat.
Supplemental front air bags inflate
with great force. A rear-facing child
restraint could be struck by the
supplemental front air bag in a crash
and could seriously injure or kill
your child.cNISSAN recommends that child re-
straints be installed in the rear seat.
However, if you must install a
forward-facing child restraint in the
front passenger seat, move the pas-
senger seat to the rear most posi-
tion.
cA child restraint with a top tether
strap should not be used in the front
passenger seat.cThe three-point seat belt in your ve-
hicle is equipped with a locking
mode retractor which must be used
when installing a child restraint.
cFailure to use the retractor's locking
mode will result in the child restraint
not being properly secured. The re-
straint could tip over or otherwise be
unsecured and cause injury to the
child in a sudden stop or collision.
ARS1135
1-38Seats, restraints and supplemental air bag systems
ZX
Page 46 of 249
If you must install a child restraint in the front
seat, follow these steps:
1. Position the child restraint on the front
passenger seat.It should be placed in
a forward-facing direction only.Move
the seat to the rear most position. Always
follow the child restraint manufacturer's
instructions.Child restraints for infants
must be used in the rear-facing direc-
tion and therefore must not be used in
the front seat.2. Route the seat belt tongue through the
child restraint and insert it into the buckle
until you hear and feel the latch engage.
Be sure to follow the child restraint manu-
facturer's instructions for belt routing.3. Pull on the shoulder belt until all of the
belt is fully extended. At this time, the
seat belt retractor is in the automatic
locking mode (child restraint mode). It
reverts back to emergency locking mode
when the seat belt is fully retracted.
WRS0019ARS1073ARS1034
Seats, restraints and supplemental air bag systems1-39
ZX
Page 47 of 249
4. Allow the seat belt to retract. Pull up on
the seat belt to remove any slack in the
belt.5. Before placing the child in the child re-
straint, use force to tilt the child restraint
from side to side, and tug it forward to
make sure it is securely held in place.
6. Check that the retractor is in the auto-
matic locking mode by trying to pull more
seat belt out of the retractor. If you can-
not pull any more belt webbing out of the
retractor, the seat belt is in the automatic
locking mode.
7. Check to make sure the child restraint is
properly secured prior to each use. If the
lap belt is not locked, repeat steps 3
through 6.After the child restraint is removed and the
seat belt is fully retracted, the automatic
locking mode (child restraint mode) is can-
celed.
ARS1074ARS1079
1-40Seats, restraints and supplemental air bag systems
ZX
Page 80 of 249

WARNING
cProperly secure all cargo to help pre-
vent it from sliding or shifting.
cBe sure to secure hooks into the
retainers. The cargo restrained in the
net must not exceed 30 lbs. (13.6 kg)
or the net may not stay secured.POWER WINDOWS
WARNING
cMake sure that all passengers have
their hands, etc. inside the vehicle
while it is in motion and before clos-
ing the windows. Use the window
lock switch to prevent unexpected
use of the power windows.
cDo not leave children unattended in-
side the vehicle. They could un-
knowingly activate switches or con-
trols and become trapped in a
window. Unattended children could
become involved in serious acci-
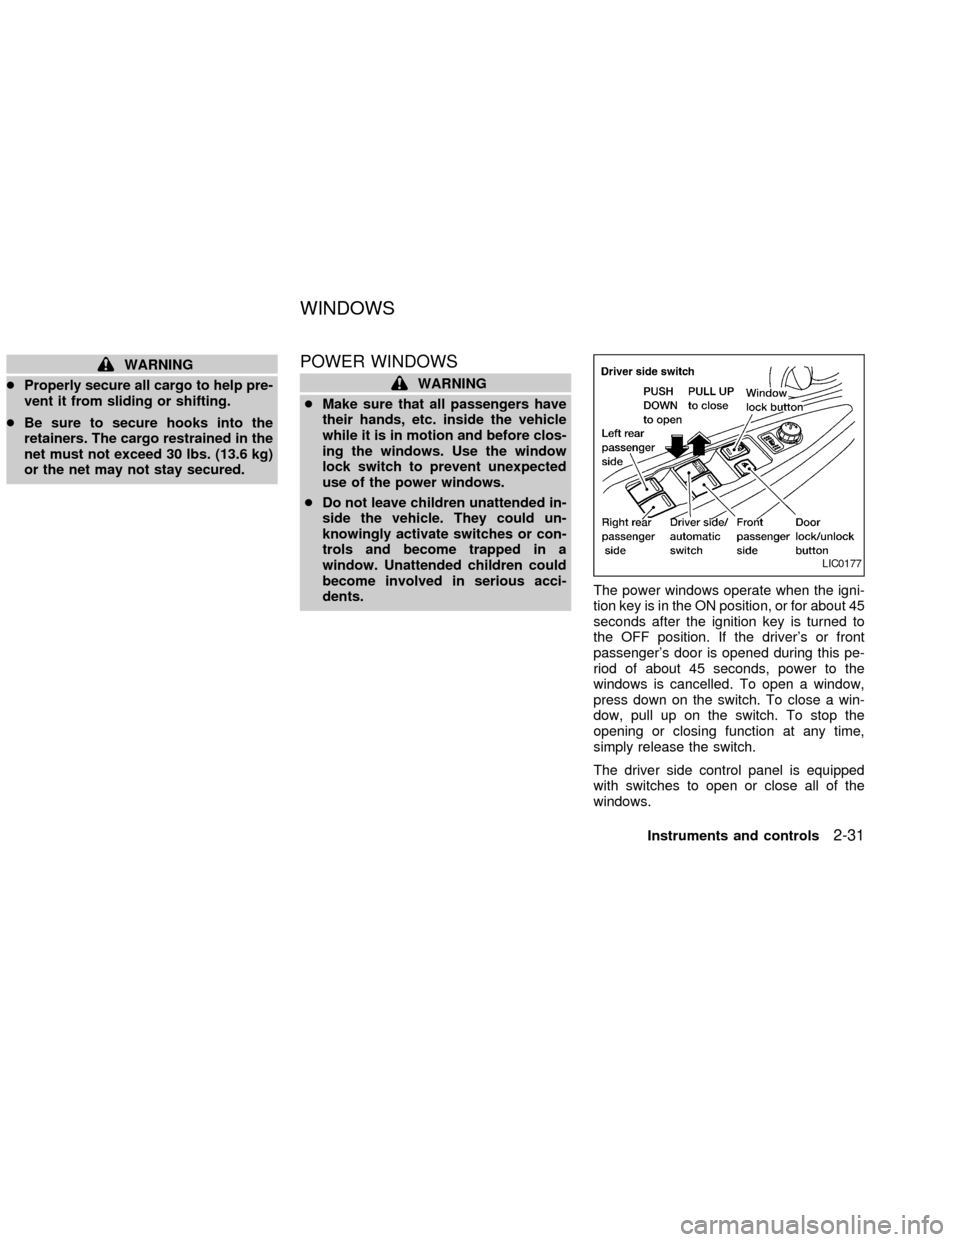
dents.The power windows operate when the igni-
tion key is in the ON position, or for about 45
seconds after the ignition key is turned to
the OFF position. If the driver's or front
passenger's door is opened during this pe-
riod of about 45 seconds, power to the
windows is cancelled. To open a window,
press down on the switch. To close a win-
dow, pull up on the switch. To stop the
opening or closing function at any time,
simply release the switch.
The driver side control panel is equipped
with switches to open or close all of the
windows.
LIC0177
WINDOWS
Instruments and controls2-31
ZX
Page 88 of 249

3 Pre-driving checks and adjustments
Keys .......................................................................3-2
Nissan vehicle immobilizer system
(NVIS) keys .......................................................3-2
Doors ......................................................................3-2
Locking with key ................................................3-3
Locking with inside lock knob............................3-3
Locking with power door lock switch.................3-4
Child safety rear door lock ................................3-4
Remote keyless entry system (if so equipped)......3-5
How to use remote keyless entry
system ...............................................................3-5
Battery replacement ..........................................3-8
Hood .......................................................................3-9
Trunk lid................................................................3-10
Opener operation ............................................3-10Key operation ..................................................3-11
Interior trunk lid release...................................3-11
Fuel filler lid ..........................................................3-12
Opener operation ............................................3-12
Fuel filler cap ...................................................3-12
Steering wheel .....................................................3-13
Tilt operation ....................................................3-13
Telescopic operation .......................................3-14
Sun visors.............................................................3-14
Vanity mirrors ..................................................3-14
Mirrors ..................................................................3-15
Inside mirror.....................................................3-15
Automatic anti-glare inside mirror
(if so equipped)................................................3-15
Outside mirror remote control .........................3-16
ZX
Page 89 of 249

NISSAN VEHICLE IMMOBILIZER
SYSTEM (NVIS) KEYS
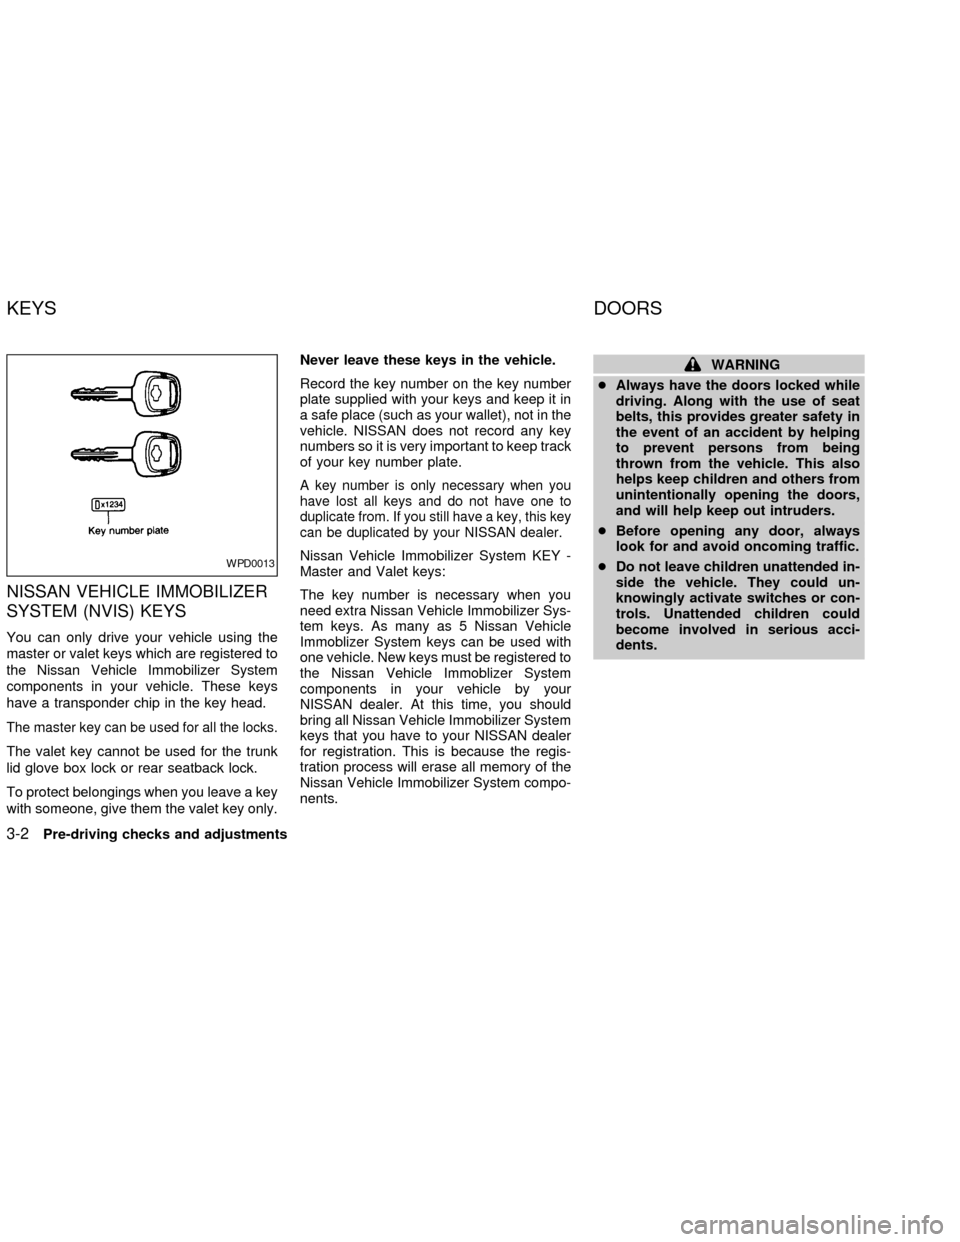
You can only drive your vehicle using the
master or valet keys which are registered to
the Nissan Vehicle Immobilizer System
components in your vehicle. These keys
have a transponder chip in the key head.
The master key can be used for all the locks.
The valet key cannot be used for the trunk
lid glove box lock or rear seatback lock.
To protect belongings when you leave a key
with someone, give them the valet key only.Never leave these keys in the vehicle.
Record the key number on the key number
plate supplied with your keys and keep it in
a safe place (such as your wallet), not in the
vehicle. NISSAN does not record any key
numbers so it is very important to keep track
of your key number plate.
A key number is only necessary when you
have lost all keys and do not have one to
duplicate from. If you still have a key, this key
can be duplicated by your NISSAN dealer.
Nissan Vehicle Immobilizer System KEY -
Master and Valet keys:
The key number is necessary when you
need extra Nissan Vehicle Immobilizer Sys-
tem keys. As many as 5 Nissan Vehicle
Immoblizer System keys can be used with
one vehicle. New keys must be registered to
the Nissan Vehicle Immoblizer System
components in your vehicle by your
NISSAN dealer. At this time, you should
bring all Nissan Vehicle Immobilizer System
keys that you have to your NISSAN dealer
for registration. This is because the regis-
tration process will erase all memory of the
Nissan Vehicle Immobilizer System compo-
nents.
WARNING
cAlways have the doors locked while
driving. Along with the use of seat
belts, this provides greater safety in
the event of an accident by helping
to prevent persons from being
thrown from the vehicle. This also
helps keep children and others from
unintentionally opening the doors,
and will help keep out intruders.
cBefore opening any door, always
look for and avoid oncoming traffic.
cDo not leave children unattended in-
side the vehicle. They could un-
knowingly activate switches or con-
trols. Unattended children could
become involved in serious acci-
dents.
WPD0013
KEYS DOORS
3-2Pre-driving checks and adjustments
ZX
Page 91 of 249
LOCKING WITH POWER DOOR
LOCK SWITCH
To lock all the doors without a key, push the
door lock switch (driver or front passenger
side), to the lock position. When locking the
door this way, be certain not to leave the
key inside the vehicle.
When the power door lock switch (driver or
passenger side) is moved to the lock posi-
tion with the key in the ignition and any door
open, all doors will lock and then unlock
automatically.
CHILD SAFETY REAR DOOR
LOCK
Child safety locks help prevent rear doors
from being opened accidentally, especially
when small children are in the vehicle.
The child safety lock levers are located on
the edge of the rear doors.
When the lever is in the lock position, the
door can be opened only from the outside.
LPD0069LPD0070APD1010
3-4Pre-driving checks and adjustments
ZX
Page 97 of 249

port rod to its original position, lower the
hood to approximately 12 inches above
the latch and release it. This allows
proper engagement of the hood latch.
WARNING
cMake sure the hood is completely
closed and latched before driving.
Failure to do so could cause the
hood to fly open and result in an
accident.
cIf you see steam or smoke coming
from the engine compartment, to
avoid injury do not open the hood.
OPENER OPERATION
WARNING
cDo not drive with the trunk lid open.
This could allow dangerous exhaust
gases to be drawn into the vehicle.
See ``Exhaust gas'' in the ``Starting
and driving'' section of this manual.cClosely supervise children when they
are around cars to prevent them from
playing and becoming locked in the
trunk where they could be seriously
injured. Keep the car locked, with the
trunk closed, when not in use, and
prevent children's access to car
keys.
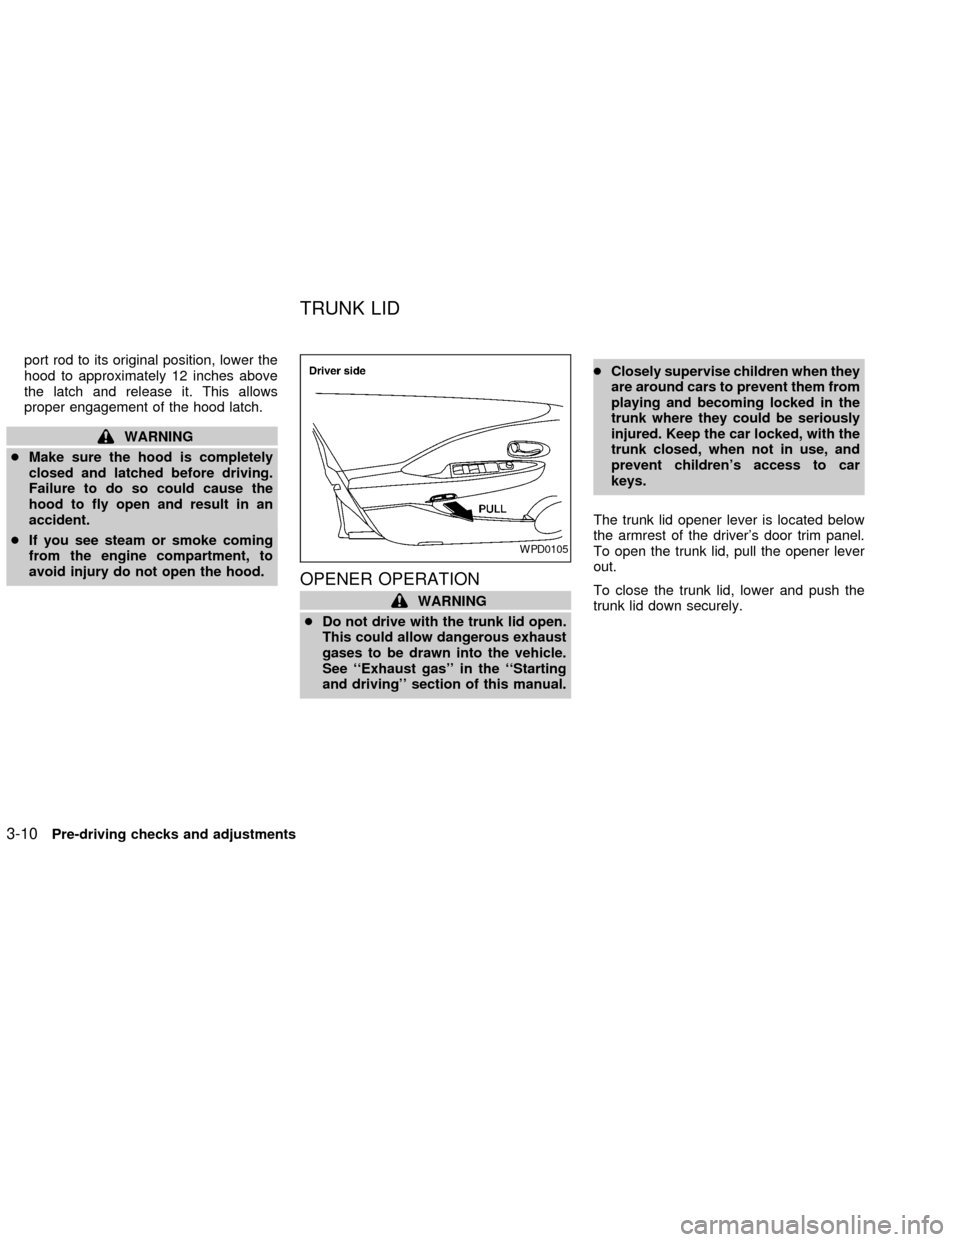
The trunk lid opener lever is located below
the armrest of the driver's door trim panel.
To open the trunk lid, pull the opener lever
out.
To close the trunk lid, lower and push the
trunk lid down securely.
WPD0105
TRUNK LID
3-10Pre-driving checks and adjustments
ZX