Page 88 of 302

84 Exterior lamp switch
Te ch n ica l
data Instruments
and controlsOperationDrivingInstrument
cluster displayPractical hints Car care Index
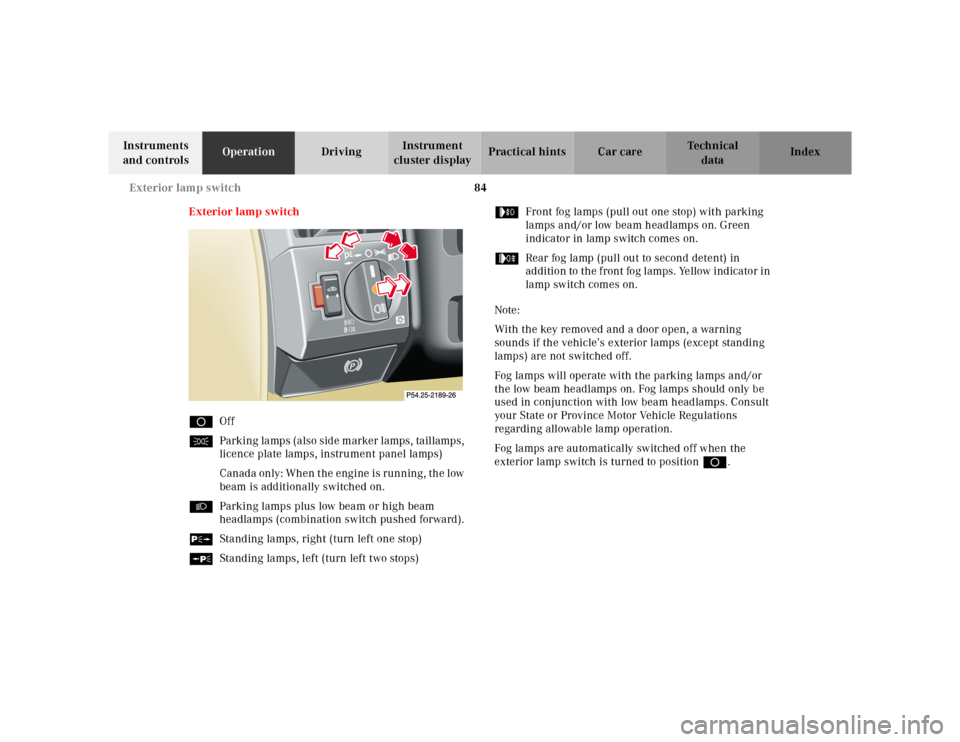
Exterior lamp switch
DOff
CParking lamps (also side marker lamps, taillamps,
licence plate lamps, instrument panel lamps)
Canada only: When the engine is running, the low
beam is additionally switched on.
BParking lamps plus low beam or high beam
headlamps (combination switch pushed forward).
ˆStanding lamps, right (turn left one stop)
‚Standing lamps, left (turn left two stops)…Front fog lamps (pull out one stop) with parking
lamps and/or low beam headlamps on. Green
indicator in lamp switch comes on.
„Rear fog lamp (pull out to second detent) in
addition to the front fog lamps. Yellow indicator in
lamp switch comes on.
Note:
With the key removed and a door open, a warning
sounds if the vehicle’s exterior lamps (except standing
lamps) are not switched off.
Fog lamps will operate with the parking lamps and/or
the low beam headlamps on. Fog lamps should only be
used in conjunction with low beam headlamps. Consult
your State or Province Motor Vehicle Regulations
regarding allowable lamp operation.
Fog lamps are automatically switched off when the
exterior lamp switch is turned to position D.
Page 103 of 302
99 Audio system
Te ch n ica l
data Instruments
and controlsOperationDrivingInstrument
cluster displayPractical hints Car care Index Operating and display elements
1On/off, volume, see page 102
2Telephone mode selector, see page 113
3Seek, see page 104, 107 and 111
4Radio mode selector, see page 104
5Tune, see page 104 and 105
Fast Forward/Reverse, see page 108 and 111
6CD mode selector, see page 1107Display panel, see page 106
8Alpha-numeric keypad for
station storage and frequency entry, see page 105
optional telephone, see page 113
Tape eject, see page 107
Tape track select, see page 107
Dolby, see page 108
CD Random/repeat, see page 112
9Function button, see page 105 and 112
Page 104 of 302
100 Audio system
Te ch n ica l
data Instruments
and controlsOperationDrivingInstrument
cluster displayPractical hints Car care Index
10Soft keys for
radio band selection, see page 104
tone controls, see page 102
scan, see page 105
11Tape mode selector, see page 106
Anti-theft system
If the power supply to the
radio has been
interrupted,“CODE” will
appear on the display when it
is next switched on. The radio
will only work after the five-digit code has been entered
using the buttons on the right-hand control panel.The code number is shown on the Radio code card,
supplied with the radio.
Important!
Never leave the Radio code card in the vehicle. Keep it in
a safe place.
Page 110 of 302

106 Audio system
Te ch n ica l
data Instruments
and controlsOperationDrivingInstrument
cluster displayPractical hints Car care Index
Cassette mode
Playing cassettes
Press the “TAPE” button. When the eject (EJ) key is
pressed, the display folds down and the cassette slot
becomes visible. Push the cassette into the slot until it
engages. The cassette will be pulled in automatically.
Note:
Do not press directly on the radio display face.
Return the display panel to its normal position by
folding it back up and pressing gently on the display
frame to lock in place.
Important:
If the display is in the down position for more than
20 seconds, 2 successive beeps will be heard. This will
continue at 5 second intervals until the display is
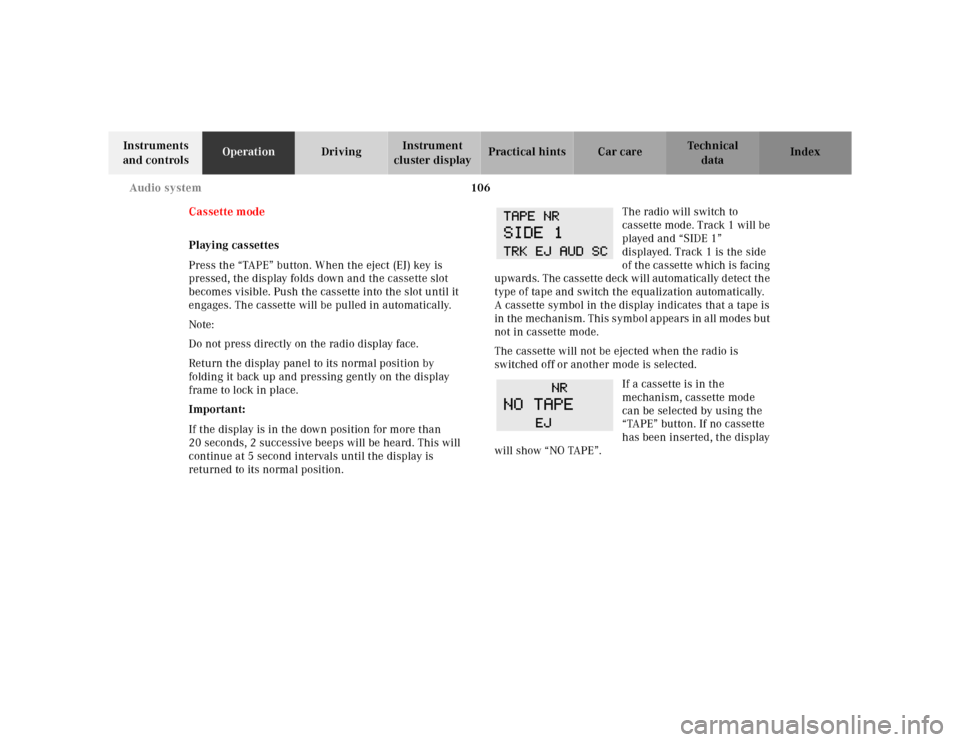
returned to its normal position.The radio will switch to
cassette mode. Track 1 will be
played and “SIDE 1”
displayed. Track 1 is the side
of the cassette which is facing
upwards. The cassette deck will automatically detect the
type of tape and switch the equalization automatically.
A cassette symbol in the display indicates that a tape is
in the mechanism. This symbol appears in all modes but
not in cassette mode.
The cassette will not be ejected when the radio is
switched off or another mode is selected.
If a cassette is in the
mechanism, cassette mode
can be selected by using the
“TAPE” button. If no cassette
has been inserted, the display
will show “NO TAPE”.
Page 114 of 302

110 Audio system
Te ch n ica l
data Instruments
and controlsOperationDrivingInstrument
cluster displayPractical hints Car care Index
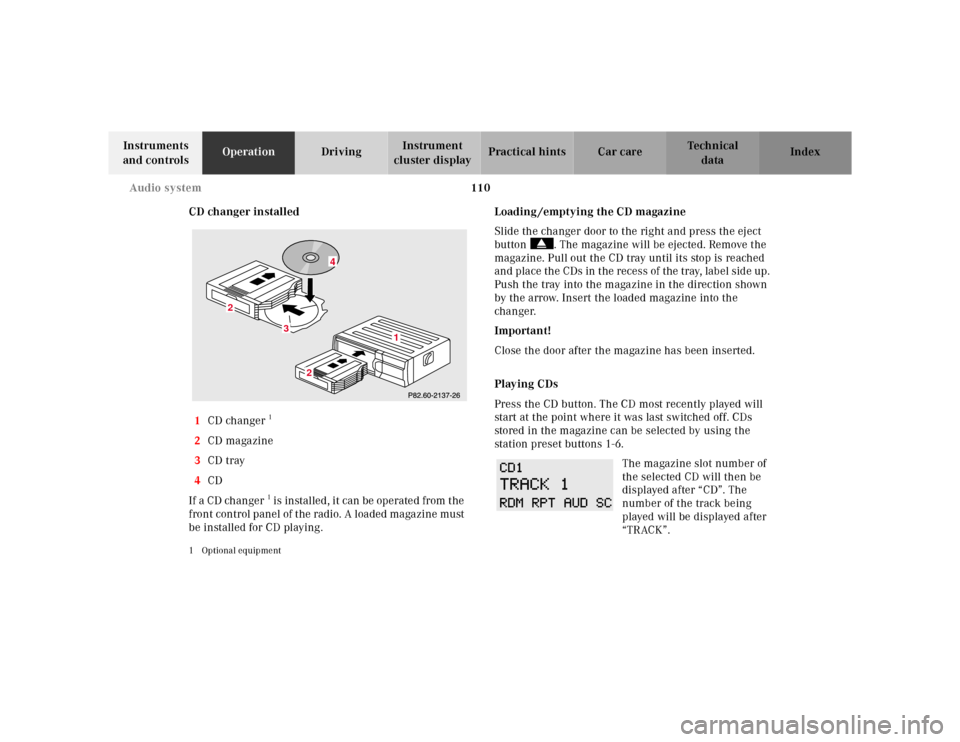
CD changer installed
1CD changer
1
2CD magazine
3CD tray
4CD
If a CD changer1 is instal led , it can be operate d from t he
front control panel of the radio. A loaded magazine must
be installed for CD playing.
1 Optional equipment
Loading /emptying the CD magazine
Slide the changer door to the right and press the eject
button . The magazine will be ejected. Remove the
magazine. Pull out the CD tray until its stop is reached
and place the CDs in the recess of the tray, label side up.
Push the tray into the magazine in the direction shown
by the arrow. Insert the loaded magazine into the
changer.
Important!
Close the door after the magazine has been inserted.
Playing CDs
Press the CD button. The CD most recently played will
start at the point where it was last switched off. CDs
stored in the magazine can be selected by using the
station preset buttons 1-6.
The magazine slot number of
the selected CD will then be
displayed after “CD”. The
number of the track being
played will be displayed after
“TRACK”.
3
2
2
1
4
Page 179 of 302
175 Parking brake
Te ch n ica l
data Instruments
and controlsOperationDrivingInstrument
cluster displayPractical hints Car care Index Parking brakeTo engage, firmly depress parking brake pedal. When
the key is in steering lock position 2, the brake warning
lamp in the instrument cluster should come on brightly.
To release the parking brake, pull handle on instrument
panel. The brake warning lamp in the instrument
cluster should go out.
A warning sounds, if you start to drive without having
released the parking brake.
Also see brake warning lamp test on page 205.
P
P42.20-0276-27
Wa r n i n g !
When leaving the vehicle always remove the
electronic key from the steering lock, and lock the
vehicle. Do not leave children unattended in the
vehicle, or with access to an unlocked vehicle.
Children could release the parking brake, which
could result in an accident or serious injury.
Page 224 of 302
220 Engine compartment
Te ch n ica l
data Instruments
and controlsOperation DrivingInstrument
cluster displayPractical hintsCar care Index
Hood
To o pen :
To unlock the hood, pull release lever under the driver’s
side of the instrument panel.
Pull handle (2) up and open hood.
Caution!
To avoid damage to the windshield wipers or hood, open
the hood only with wipers in the parked position.Pull handle (2) to its stop out of radiator grill, and open
hood (do not pull up on handle).
Note:
Do not lift hood at louvers of grill! Make certain the
windshield wiper arm is not folded forward.
P68.00-0514-26
3
2
3
P88.40-0312-26
Page 241 of 302

237 Battery
Te ch n ica l
data Instruments
and controlsOperation DrivingInstrument
cluster displayPractical hintsCar care Index Battery
Important!
Battery replacement information:
The maintenance-free battery is located in the trunk
behind the right side cover panel.
The service life of the battery is dependent on its
condition of charge. The battery should always be kept
sufficiently charged, in order to last an optimum length
of time.Therefore, we strongly recommend that you have the
battery charge checked frequently, and corrected if
necessary, especially if you use the vehicle less than
approximately 200 miles (300 km) per month,
mostly for short distance trips, or if it is not used for
long periods of time.
Only charge a battery with a battery charger after the
battery has been disconnected from the vehicle’s
electrical circuit.
Always disconnect the battery negative lead first and
connect last.
When removing and connecting the battery, always
make sure that all electrical consumers are off and the
key is in steering lock position 0. The battery must
always be securely installed when the vehicle is in
operation. During removal and installation always
protect the disconnected battery positive (+) terminal
with the cover attached to the battery.
While the engine is running the battery terminal clamps
must not be loosened or detached, otherwise the
generator and other electronic components will be
damaged.
Wa r n i n g !
Failure to follow these instructions can result in
severe injury or death.Never lean over batteries while connecting, you
might get injured.Battery fluid contains sulfuric acid. Do not allow
this fluid to come in contact with eyes, skin or
clothing. In case it does, immediately flush affected
area with water and seek medical help.A battery will also produce hydrogen gas, which is
flammable and explosive. Keep flames or sparks
away from battery, avoid improper connection of
jumper cables, smoking etc.