2002 MERCEDES-BENZ S500 height
[x] Cancel search: heightPage 39 of 430

36 Central locking system
Te ch n i c a l
data Instruments
and controlsOperationDrivingInstrument
cluster displayPractical hints Car care Index
Opening the trunk
The trunk lid will swing open automatically. You should
always make sure there is sufficient clearance.
A minimum height clearance of 6 ft. (1.85 m) is
required to open the trunk lid.
Press transmit buttonŠ until trunk lid is open.
Important!
Do not place remote control in trunk since trunk is
locked when the lid is closed if the vehicle is centrally
locked.
Notes:
If the trunk was previously locked separately, it will
remain locked, see page 51.
Vehicles with optional remote trunk lid
opening / closing system, see page 56:
The switch operated opening/closing procedure can be
immediately halted by pressing buttonŠ on the
electronic key.KEYLESS-GO
Important!
For the KEYLESS-GO-system to function properly, the
operator should observe the following:
•The driver should carry the KEYLESS-GO-card with
him / her.
•To avoid radio transmission interference, never store
the KEYLESS-GO-card together with other electronic
items (e.g. cellular telephones, other KEYLESS-GO-
cards) or metallic objects (e.g. coins, metal foil).
•To lock or unlock the vehicle, the card must be
recognized by the system as being located outside
the vehicle. The card must be in close proximity to a
door or the trunk lid (approx. 3 ft. [1 m]). To activate
the start / stop button function, the KEYLESS-GO-
card must be recognized by the system as being
located inside the vehicle.
•If the KEYLESS-GO-card is positioned farther away
from the vehicle (e.g. inside clothing or a briefcase)
and can no longer be recognized by the system, the
vehicle cannot be locked or the engine started via
the KEYLESS-GO-system.
Page 58 of 430
55 Central locking system
Te ch n i c a l
data Instruments
and controlsOperationDrivingInstrument
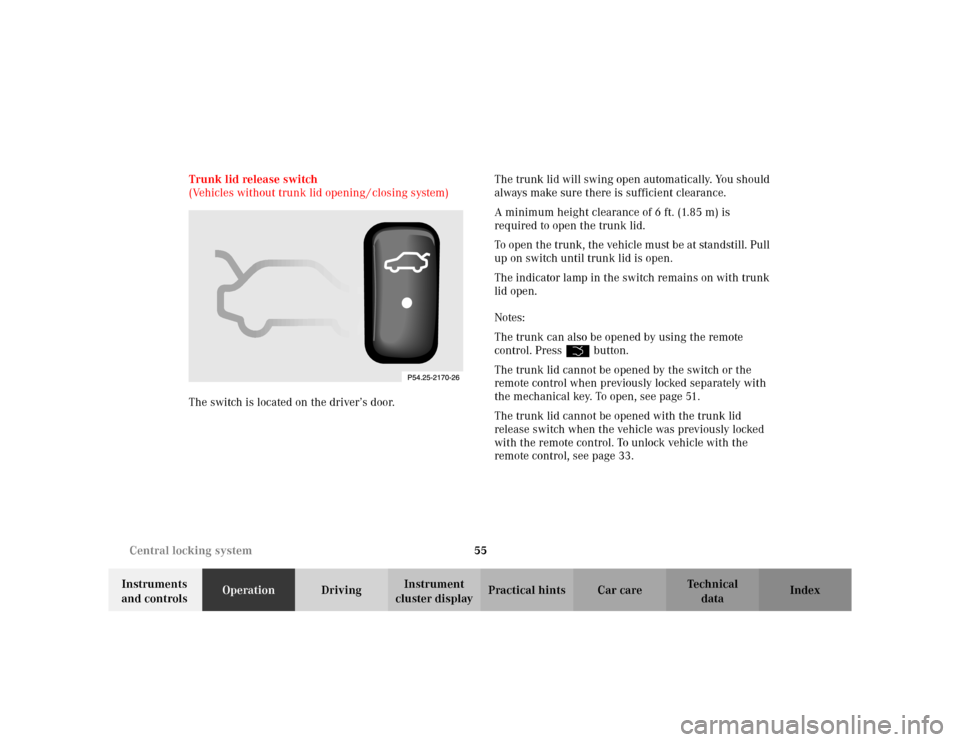
cluster displayPractical hints Car care Index Trunk lid release switch
(Vehicles without trunk lid opening / closing system)
The switch is located on the driver’s door.The trunk lid will swing open automatically. You should
always make sure there is sufficient clearance.
A minimum height clearance of 6 ft. (1.85 m) is
required to open the trunk lid.
To open the trunk, the vehicle must be at standstill. Pull
up on switch until trunk lid is open.
The indicator lamp in the switch remains on with trunk
lid open.
Notes:
The trunk can also be opened by using the remote
control. Press Šbutton.
The trunk lid cannot be opened by the switch or the
remote control when previously locked separately with
the mechanical key. To open, see page 51.
The trunk lid cannot be opened with the trunk lid
release switch when the vehicle was previously locked
with the remote control. To unlock vehicle with the
remote control, see page 33.
Page 59 of 430

56 Central locking system
Te ch n i c a l
data Instruments
and controlsOperationDrivingInstrument
cluster displayPractical hints Car care Index
Trunk lid opening / closing system (optional)
The switch is located on the driver’s door.
The trunk lid will open and close automatically. You
should always make sure that there is sufficient
clearance.
A minimum height clearance of 6 ft. (1.85 m) is
required to open the trunk lid.
To open and close the trunk, the vehicle must be at
standstill. To o p e n t r u n k l i d :
Pull up on switch until trunk lid begins to open. The
switch can now be released, the trunk lid opens
automatically.
To interrupt the opening process, either pull up on
switch, or push in trunk lid lock, or press buttonŠ
on the remote control.
The indicator lamp in the switch remains on with trunk
lid open.
To close trunk lid:
Press upper half of switch until trunk lid is closed and
the indicator lamp in the switch goes out.
Wa r n i n g !
When closing the trunk lid, be sure that there is no
danger of anyone being harmed by the closing
procedure. Be especially careful when small
children are around. Maintain sight of trunk area
while operating the door mounted switch.To interrupt the hydraulic power closing assist
mechanism release trunk lid release/close switch
and pull up to open.
Page 61 of 430
58 Central locking system
Te ch n i c a l
data Instruments
and controlsOperationDrivingInstrument
cluster displayPractical hints Car care Index
Opening height restriction of trunk lid
The trunk lid opening height can be restricted when
transporting goods on a roof rack (e.g. presence of an
MB sport luggage container). When activated, the trunk
lid opens to below the roof line of the vehicle.
To a c ti va te :
Press upper half of trunk lid opening / closing switch for
a minimum of 5 seconds.
To deactivate:
Press upper half of trunk lid opening / closing switch for
a minimum of 5 seconds.Note:
To fully open the trunk lid while opening height
restriction activated, deactivate it.
Page 69 of 430
66 Seats
Te ch n i c a l
data Instruments
and controlsOperationDrivingInstrument
cluster displayPractical hints Car care Index
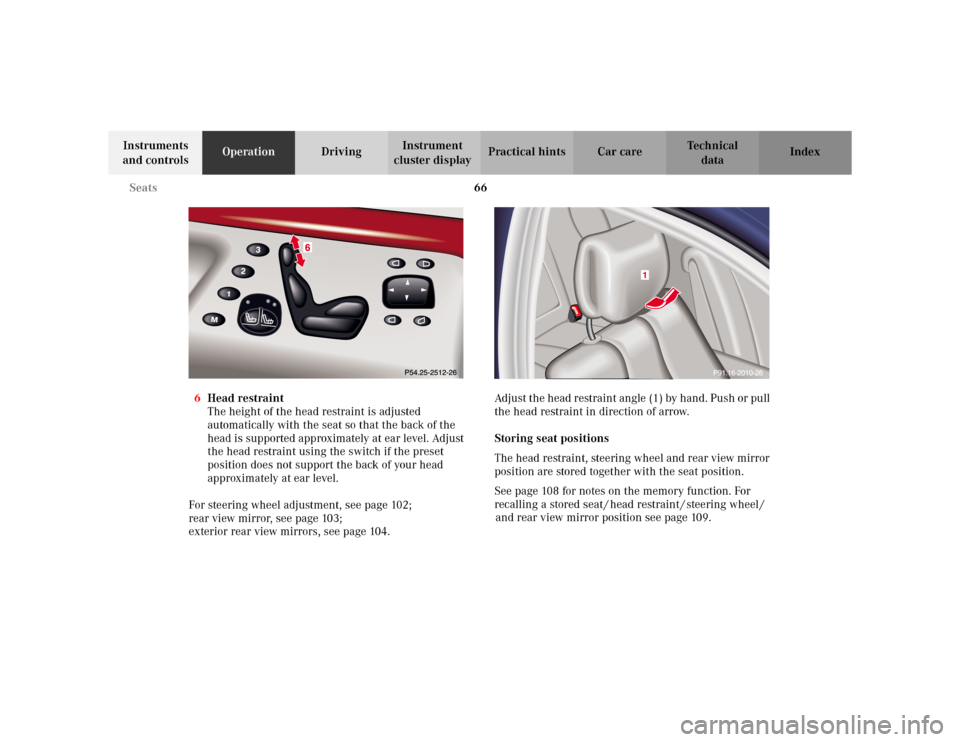
6Head restraint
The height of the head restraint is adjusted
automatically with the seat so that the back of the
head is supported approximately at ear level. Adjust
the head restraint using the switch if the preset
position does not support the back of your head
approximately at ear level.
For steering wheel adjustment, see page 102;
rear view mirror, see page 103;
exterior rear view mirrors, see page 104.Adjust the head restraint angle (1) by hand. Push or pull
the head restraint in direction of arrow.
Storing seat positions
The head restraint, steering wheel and rear view mirror
position are stored together with the seat position.
See page 108 for notes on the memory function. For
recalling a stored seat / head restraint / steering wheel /
and rear view mirror position see page 109.
1
Page 70 of 430

67 Seats
Te ch n i c a l
data Instruments
and controlsOperationDrivingInstrument
cluster displayPractical hints Car care Index Important!
Prior to operating the vehicle, the driver should adjust
the seat height for proper vision as well as fore/aft
placement and backrest angle to insure adequate
control, reach, operation, and comfort. The head
restraint should also be adjusted for proper height. See
also airbag section on page 91 for proper seat
positioning.
In addition, also adjust the steering wheel to ensure
adequate control, reach, operation, and comfort.
Both the inside and outside rear view mirrors should be
adjusted for adequate rearward vision.
Fasten seat belts. Infants and small children should be
seated in a properly secured restraint system that
complies with U.S. Federal Motor Vehicle Safety
Standard 213 and Canadian Motor Vehicle Safety
Standard 213.
All seat, head restraint, steering wheel, and rear view
mirror adjustments as well as fastening of seat belts
should be done before the vehicle is put into motion.
Wa r n i n g !
Children 12 years old and under must never ride in
the front seat, except in a Mercedes-Benz
authorized BabySmart
TM compatible child seat,
which operates with the BabySmart
TM system
installed in the vehicle to deactivate the passenger-
side front airbag when it is properly installed.
Otherwise they will be struck by the airbag when it
inflates in a crash. If this happens, serious or fatal
injury will result.
According to accident statistics, children are safer
when properly restrained in the rear seating
positions than in the front seating positions.
Infants and small children must ride in back seats
and be seated in an appropriate infant or child
restraint system, which is properly secured with
the vehicle’s seat belt, fully in accordance with the
child seat manufacturer’s instructions.A child’s risk of serious or fatal injuries is
significantly increased if the child restraints are
not properly secured in the vehicle and the child is
not properly secured in the child restraint.
Page 83 of 430
80 Seats
Te ch n i c a l
data Instruments
and controlsOperationDrivingInstrument
cluster displayPractical hints Car care Index
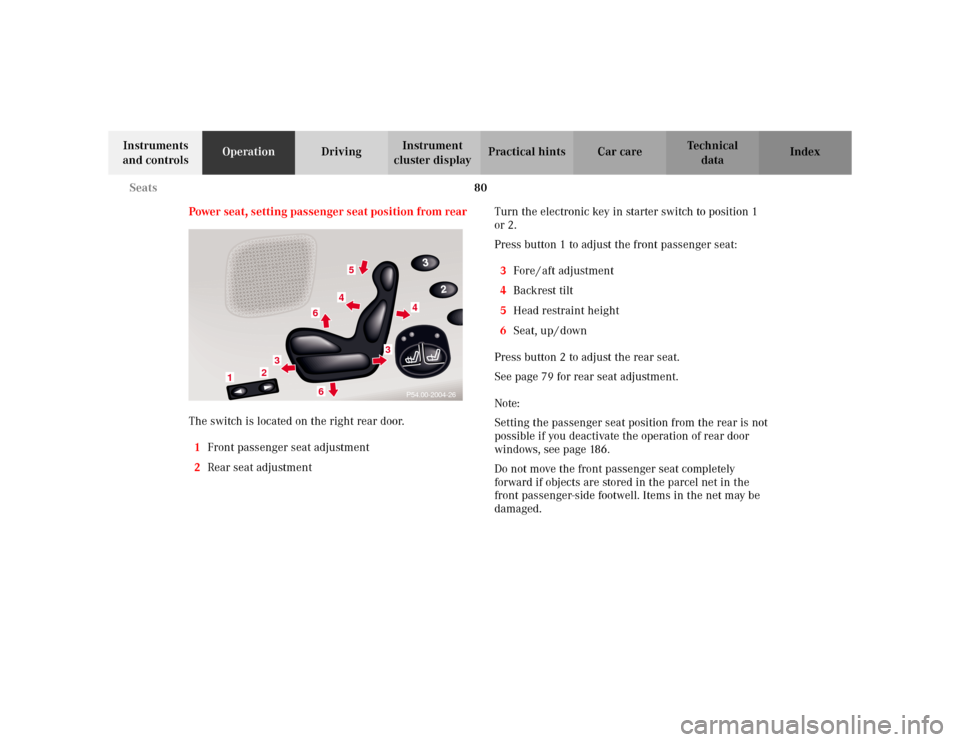
Power seat, setting passenger seat position from rear
The switch is located on the right rear door.
1Front passenger seat adjustment
2Rear seat adjustmentTurn the electronic key in starter switch to position 1
or 2.
Press button 1 to adjust the front passenger seat:
3Fore / aft adjustment
4Backrest tilt
5Head restraint height
6Seat, up / down
Press button 2 to adjust the rear seat.
See page 79 for rear seat adjustment.
Note:
Setting the passenger seat position from the rear is not
possible if you deactivate the operation of rear door
windows, see page 186.
Do not move the front passenger seat completely
forward if objects are stored in the parcel net in the
front passenger-side footwell. Items in the net may be
damaged.
5
3
4
4
66
3
1
2
P54.00-2004-26
Page 88 of 430
85 Restraint systems
Te ch n i c a l
data Instruments
and controlsOperationDrivingInstrument
cluster displayPractical hints Car care Index Operation of seat belts
The inertia reel stops the belt from unwinding during
sudden stops or when quickly pulling on the belt.
The locking function of the reel may be checked by
quickly pulling out the belt.
Adjust seat belt so that shoulder portion is located as
close as possible to the middle of your shoulder (it
should not touch the neck). The height setting for the
shoulder portion of the front seat belts is automatically
adjusted by the fore / aft movement of the front seat.
Seat moved to front: Belt outlet fully lowered.
Seat moved to rear: Belt outlet fully raised.
Caution!
For safety reasons, avoid adjusting the seat or seat back
into positions which could affect the correct seat belt
positioning.Unfastening of seat belts
Press release button (3) in the belt buckle (2).
Allow the retractor to completely rewind the seat belt by
guiding the latch plate (1).