2002 MERCEDES-BENZ ML55AMG trunk
[x] Cancel search: trunkPage 35 of 342
32 Central locking system
Te ch n i c a l
data Instruments
and controlsOperationDrivingInstrument
cluster displayPractical hints Car care Index
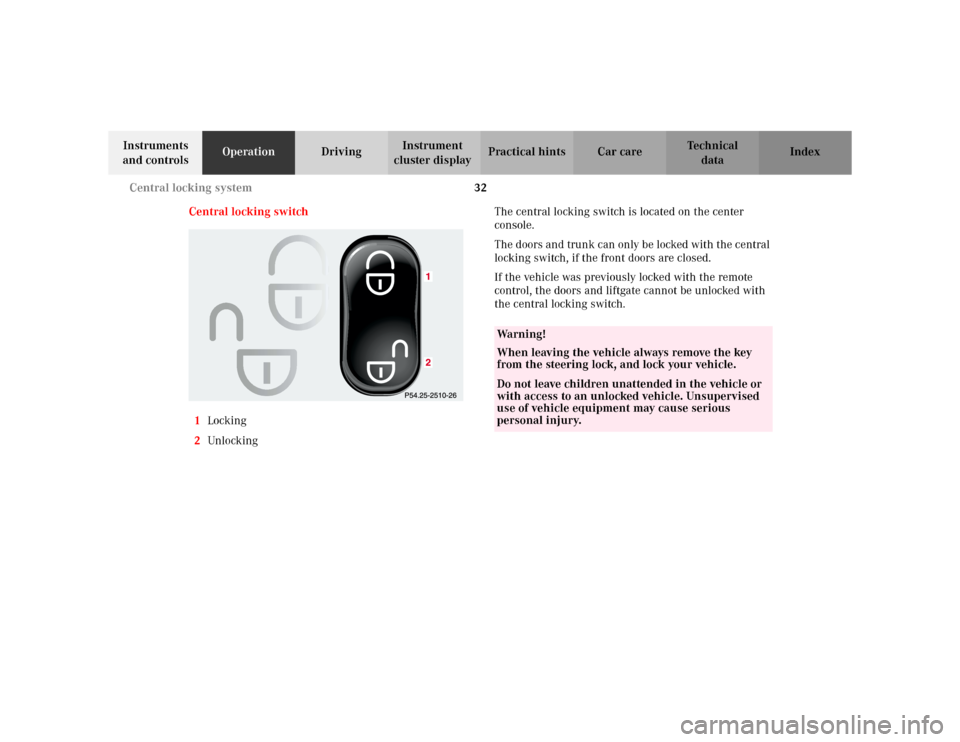
Central locking switch
1Locking
2UnlockingThe central locking switch is located on the center
console.
The doors and trunk can only be locked with the central
locking switch, if the front doors are closed.
If the vehicle was previously locked with the remote
control, the doors and liftgate cannot be unlocked with
the central locking switch.
Wa r n i n g !
When leaving the vehicle always remove the key
from the steering lock, and lock your vehicle.Do not leave children unattended in the vehicle or
with access to an unlocked vehicle. Unsupervised
use of vehicle equipment may cause serious
personal injury.
Page 36 of 342
33 Central locking system
Te ch n i c a l
data Instruments
and controlsOperationDrivingInstrument
cluster displayPractical hints Car care Index Automatic central locking
The central locking switch also operates the automatic
central locking.
With the automatic central locking system activated and
the engine running, the doors and trunk are locked at
vehicle speeds of approximately 9 mph (15 km / h) or
more.
To a c ti va te :
With key in steering lock position 2 hold upper portion
of switch (1) for a minimum of 5 seconds.
To deactivate:
With key in steering lock position 2 hold lower portion
of switch (2) for a minimum of 5 seconds.
Notes:
If doors are unlocked with the central locking switch
after activating the automatic central locking, and
neither door is opened, then the doors remain unlocked
even at vehicle speeds of approximately 9 mph
(15 km / h) or more.If a door is opened from the inside at speeds of
approximately 9 mph (15 km / h) or less with the
automatic central locking activated, the door will again
be automatically locked at speeds of approximately
9 mph (15 km / h) or more.
Important!
When towing the vehicle, or with the vehicle on a
dynamometer test stand, please, note the following:
With the engine running, the vehicle doors will lock if
the left front wheel spins at vehicle speeds of
approximately 9 mph (15 km / h) or more.
To prevent vehicle door locks from locking, deactivate
the automatic central locking.
Emergency unlocking in case of accident
The doors unlock automatically a short time after an
accident in which an airbag or emergency tensioning
retractor deploys (this is intended to aid rescue and
exit). However, the key must still be in the steering lock
position 1 or 2.
Additionally the hazard warning flashers turn on
automatically and the interior lights switch on for
approximately 30 minutes.
Page 104 of 342
101 Exterior lamp switch
Te ch n i c a l
data Instruments
and controlsOperationDrivingInstrument
cluster displayPractical hints Car care Index Night security illumination
This function will be only active with exterior lamp
switch in positionU.
When turning off the engine, the exterior lamps
(parking lamps and fog lamps) switch on for added
illumination. After the last door has been closed the
lamp-on time period commences.
The lamp-on time period for night security illumination
can be set at several different timed levels from 0 (off) to
60 seconds, see “Setting illumination time” on
page 102.Notes:
Within 10 minutes after closing the last door or the
tailgate the night security illumination can be
reactivated by opening a door or the tailgate.
If after switching the engine off, no doors are opened or
if after opening the doors or trunk they are not closed,
the night security illumination will switch off
automatically after 60 seconds.
Deactivating night security illumination temporarily:
Turn the electronic key in steering lock to position 0
then to position 2 and back to position 0 again before
getting out of the vehicle. The night security
illumination will not be activated when the door is
opened.
Page 158 of 342
155 Interior equipment
Te ch n i c a l
data Instruments
and controlsOperationDrivingInstrument
cluster displayPractical hints Car care Index Notes:
The trunk is the preferred place to carry objects. The
enlarged cargo area should only be used for items which
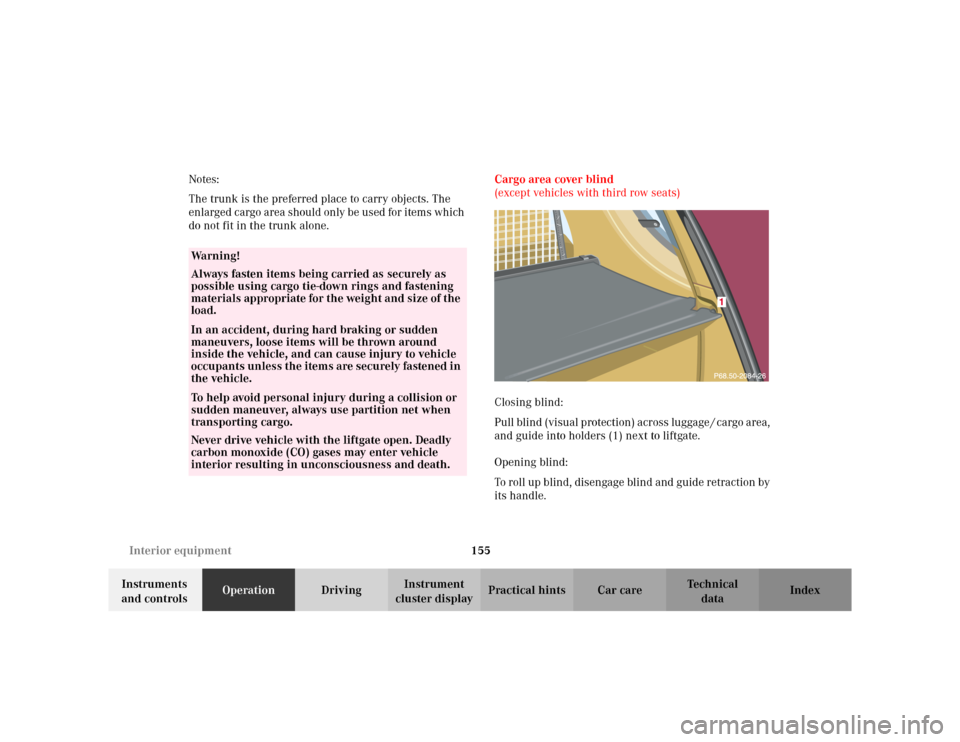
do not fit in the trunk alone.Cargo area cover blind
(except vehicles with third row seats)
Closing blind:
Pull blind (visual protection) across luggage / cargo area,
and guide into holders (1) next to liftgate.
Opening blind:
To roll up blind, disengage blind and guide retraction by
its handle.
Wa r n i n g !
Always fasten items being carried as securely as
possible using cargo tie-down rings and fastening
materials appropriate for the weight and size of the
load.In an accident, during hard braking or sudden
maneuvers, loose items will be thrown around
inside the vehicle, and can cause injury to vehicle
occupants unless the items are securely fastened in
the vehicle.To help avoid personal injury during a collision or
sudden maneuver, always use partition net when
transporting cargo.
Never drive vehicle with the liftgate open. Deadly
carbon monoxide (CO) gases may enter vehicle
interior resulting in unconsciousness and death.
Page 204 of 342
201 Driving instructions
Te ch n i c a l
data Instruments
and controlsOperationDrivingInstrument
cluster displayPractical hints Car care Index Deep water
Caution!
Do not drive through flooded areas or water of unknown
depth. Before driving through water, determine its
depth. It should not be deeper than approximately
20 inches (50 cm).
If you must drive through deep water, drive slowly to
prevent water from entering the engine compartment or
passenger compartment, being ingested by the air
intake, possibly causing damage to electrical
components or wiring, to engine or transmission that is
not covered by the Mercedes-Benz Limited Warranty.
Block heater (Canada only)
The engine is equipped with a block heater.
The electrical cable may be installed at your authorized
Mercedes-Benz Light Truck Center.Passenger compartment
Traveling abroad
Abroad, there is a widely-spread Mercedes-Benz service
network at your disposal. If you plan to travel into areas
which are not listed in the index of your Mercedes-Benz
Light Truck Center directory, you should request
pertinent information from your authorized
Mercedes-Benz Light Truck Center.
Wa r n i n g !
Always fasten items being carried as securely as
possible.In an accident, during hard braking or sudden
maneuvers, loose items will be thrown around
inside the vehicle, and cause injury to vehicle
occupants unless the items are securely fastened in
the vehicle.The trunk is the preferred place to carry objects.
Page 293 of 342
290 Exterior lamps
Te ch n i c a l
data Instruments
and controlsOperation DrivingInstrument
cluster displayPractical hintsCar care Index
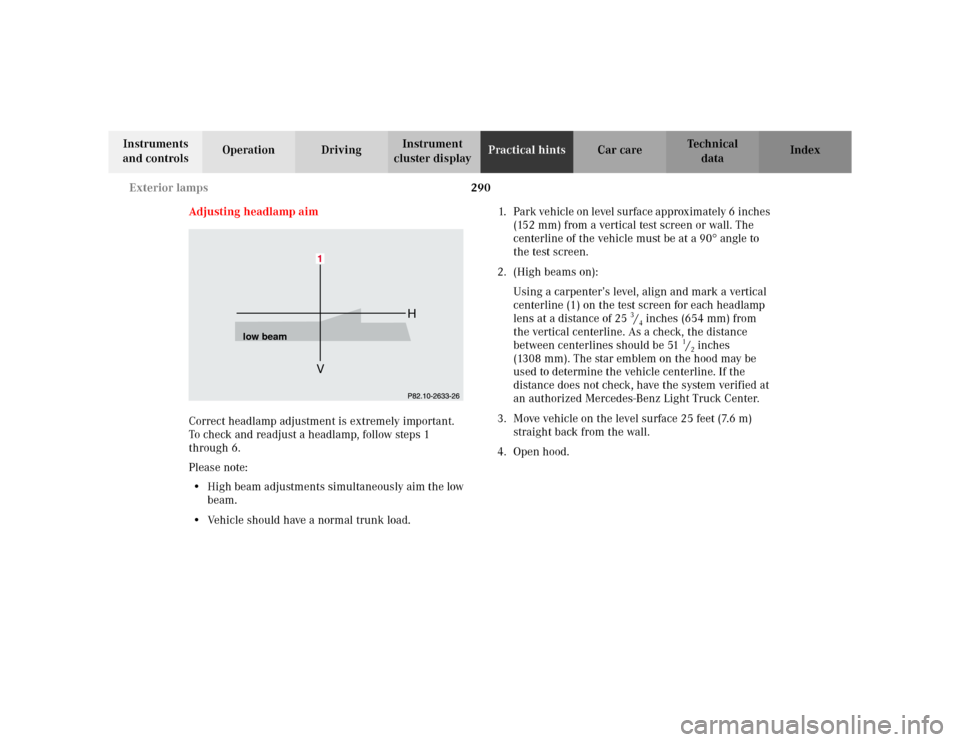
Adjusting headlamp aim
Correct headlamp adjustment is extremely important.
To check and readjust a headlamp, follow steps 1
through 6.
Please note:
•High beam adjustments simultaneously aim the low
beam.
•Vehicle should have a normal trunk load.1. Park vehicle on level surface approximately 6 inches
(152 mm) from a vertical test screen or wall. The
centerline of the vehicle must be at a 90
° angle to
the test screen.
2. (High beams on):
Using a carpenter’s level, align and mark a vertical
centerline (1) on the test screen for each headlamp
lens at a distance of 25
3/4inches (654 mm) from
the vertical centerline. As a check, the distance
between centerlines should be 51
1/2inches
(1308 mm). The star emblem on the hood may be
used to determine the vehicle centerline. If the
distance does not check, have the system verified at
an authorized Mercedes-Benz Light Truck Center.
3. Move vehicle on the level surface 25 feet (7.6 m)
straight back from the wall.
4. Open hood.
VH
low beam
Page 336 of 342
333 Index
Te ch n i c a l
data Instruments
and controlsOperation DrivingInstrument
cluster displayPractical hints Car careIndex Tie-down rings, cargo .................................................... 150
Tire inflation pressure .................................................. 272
Tire traction .................................................................... 197
Tires
Driving instructions ................................................. 195
Rims and tires ........................................................... 310
Rotating wheels ......................................................... 263
Tire inflation pressure ............................................. 272
Tire replacement ....................................................... 262
Winter driving instructions .................................... 199
Tool kit
See Vehicle tools ....................................................... 259
Tow-away alarm ................................................................ 37
Switching off ................................................................ 37
Towing the vehicle ......................................................... 277
Stranded vehicle ....................................................... 281
Transmission selector lever,
manually unlocking ............................................. 281
Trailer operation ............................................................ 216
Trailer towing .................................................................209
Transmission .................................................................. 183
Transmission control - LOW RANGE mode ...............227
Transmission fluid level ...............................................256Transmission selector lever,
manually unlocking .................................................. 281
Traveling abroad ............................................................201
Trip computer ................................................................... 89
Trip odometer ................................................................... 86
Trunk .................................................................................34
Opening ........................................................................ 27
Trunk lamp ..................................................................... 129
Turn signal failure ........................................................... 98
Turn signals ......................................................................97
UUnlocking the vehicle ...................................................... 27VVanity mirrors ................................................................ 131
Vehicle jack .................................................................... 259
Vehicle keys ......................................................................24
Vehicle tools
Screwdriver ............................................................... 259