2002 MERCEDES-BENZ ML55AMG light
[x] Cancel search: lightPage 211 of 342
208 Driving instructions
Te ch n i c a l
data Instruments
and controlsOperationDrivingInstrument
cluster displayPractical hints Car care Index
Returning from off-road driving
Off-road driving increases strain on the vehicle.
We recommend that you inspect the vehicle for possible
damage after each off-road trip. Recognizing any
damage and a subsequent timely repair reduces the
chance of a possible breakdown or accident later on.
Proceed as follows:
•Switch off the LOW RANGE mode, see page 227.
•Remove excessive dirt from tires, wheels, wheel
housings, and underbody. For instance, after driving
in mud, clean the radiator, chassis, engine, brakes,
and wheels from extreme dirt, using a strong jet of
water.
•Inspect frame, oil pan, brake hoses, etc., as well as
vehicle underbody for possible damage.
•Check tires for possible damage, clean all exterior
lamps, and conduct a brake test.•Check for brush or branches caught in the
undercarriage. They could increase the possibility of
a fire, as well as cut fuel and / or brake lines,
puncture rubber bellows of the axles or drive shafts.
•After continued operation in mud, sand, water or
other dirty conditions clean the brake discs, wheels,
brake pads and check and clean axle joints.
Wa r n i n g !
If you feel a sudden significant vibration or ride
disturbance, or you suspect that possible damage to
your vehicle has occurred, you should turn on the
hazard warning flashers, carefully slow down, and
drive with caution to an area which is a safe
distance from the roadway.Inspect the tires and under the vehicle for possible
damage. If the vehicle or tires appear unsafe, have
it towed to the nearest Mercedes-Benz Light Truck
Center or tire dealer for repairs.
Page 212 of 342
209 Driving instructions
Te ch n i c a l
data Instruments
and controlsOperationDrivingInstrument
cluster displayPractical hints Car care Index Trailer towing
Trailer Hitches
Only install a trailer hitch receiver approved for your
vehicle. For information on availability and installation,
please see your authorized Mercedes-Benz Light Truck
Center.
The bumpers on your vehicle are not designed for use
with clamp-type hitches. Do not attach rental hitches or
other bumper-type hitches to them.
To reduce the possibility of damage, remove the hitch
ball adaptor from the receiver when not in use.Electrical connections
The vehicle is prewired to accept the seven-wire harness
included in the Mercedes-Benz approved trailer hitch
receiver kit. An additional four-pole conversion plug is
included in the Mercedes-Benz supplied trailer hitch
receiver kit. For further information, please see your
authorized Mercedes-Benz Light Truck Center.
In order to prevent possible damage to the vehicle’s
electrical system by incorrectly installing the trailer
wiring plug, we recommend having the harness
connected at an authorized Mercedes-Benz Light Truck
Center.
Wa r n i n g !
Failure to use proper equipment and driving
technique can result in a loss of vehicle control
when towing a trailer.Improper towing or failure to follow the
instructions contained in this guide can result in
serious injury. Follow the guidelines below
carefully to assure safe trailer operation.Ask your authorized Mercedes-Benz Light Truck
Center should you require an explanation of
information contained in this guide.
Page 214 of 342
211 Driving instructions
Te ch n i c a l
data Instruments
and controlsOperationDrivingInstrument
cluster displayPractical hints Car care Index Checking weights of vehicle and trailer
To assure that the tow vehicle and trailer are in
compliance with the maximum permissible weight
limits, and to know the actual weights, have the loaded
rig (tow vehicle including driver, passengers and cargo,
trailer fully loaded) weighed on a commercial scale.
Check the vehicle’s front and rear Gross Axle Weight
(GAW), the GTW and TW. The values as measured must
not be exceeded, according to the weight listed under
“Vehicle and trailer weight and ratings”.
Attaching a trailer
Please observe maximum permitted trailer dimensions
(width and length).
Most states and all Canadian provinces require safety
chains between your tow vehicle and the trailer. The
chains should be crisscrossed under the trailer tongue.
They must be attached to the hitch receiver, and not to
the vehicle’s bumper or axle. Be sure to leave enough
slack in the chains to permit turning corners.
Most states and all Canadian provinces require a
separate brake system at various trailer weights.Caution!
Do not connect a trailer brake system (if trailer is so
equipped) directly to the vehicle’s hydraulic brake
system, as your vehicle is equipped with antilock
brakes. If you do, neither the vehicle’s brakes nor the
trailer’s brakes will function properly.
The provided vehicle electrical wiring harness for trailer
towing has a brake signal wire (color orange) for
hook-up to a brake controller.
Most states and all Canadian provinces require a
break-away switch on trailers with a separate brake
system. The switch activates the trailer brakes in the
possible event that the trailer might separate from the
tow vehicle.
You should consider using a trailer sway control system.
For further information see your authorized
Mercedes-Benz Light Truck Center.
Page 215 of 342

212 Driving instructions
Te ch n i c a l
data Instruments
and controlsOperationDrivingInstrument
cluster displayPractical hints Car care Index
Towing a trailer
There are many different laws, including speed limit
restrictions, having to do with trailer towing. Make sure
that your rig will be legal, not only for where you reside,
but also for where you will be driving. A good source for
this information can be the police or local authorities.
Before you start driving with the trailer, check the
trailer hitch, break-away switch, safety chains, electrical
connections, lighting and tires. Also adjust the mirrors
to permit unobstructed view beyond rear of trailer.
If the trailer has electric brakes, start your vehicle and
trailer moving slowly, and then apply only the trailer
brake controller by hand to be sure the brakes are
working properly.
When towing a trailer, check occasionally to be sure that
the load is secure, and that lighting and trailer brakes
(if so equipped) are functioning properly.
Always secure items in the trailer to prevent load shifts
while driving.
Take into consideration that when towing a trailer, the
handling characteristics are different and less stable
from those when operating the vehicle without a trailer.
It is important to avoid sudden maneuvers.The vehicle and trailer combination is heavier, and
therefore is limited in acceleration and climbing ability,
and requires longer stopping distances. It is more prone
to reacting to side wind gusts, and requires more
sensitive steering input.
In order to gain skill and an understanding of the
vehicle’s behavior, you should practice turning,
stopping and backing up in an area which is free from
traffic.
If possible, do not brake abruptly, but rather engage the
brake slightly at first to permit the trailer to activate its
brake. Then increase the braking force.
Caution!
If the trailer should begin to sway, reduce the vehicle’s
speed and use the brake controller by hand to straighten
out the vehicle and trailer. In no case should you
attempt to straighten out the tow vehicle and trailer by
increasing the speed or oversteering and stepping on
the brakes.
If the transmission hunts between gears on inclines,
manually shift to a lower gear (select “4”, “3”, “2”
or “1”). A lower gear and reduction of speed reduces the
chance of engine overloading and / or overheating.
Page 217 of 342
214 Driving systems
Te ch n i c a l
data Instruments
and controlsOperationDrivingInstrument
cluster displayPractical hints Car care Index
Cruise control
The cruise control allows you to drive in a more relaxed
manner, for example over long distances, as it
automatically maintains the set speed by actively
regulating the throttle setting.
Any given speed above approximately 20 mph
(30 km / h) can be maintained with the cruise control by
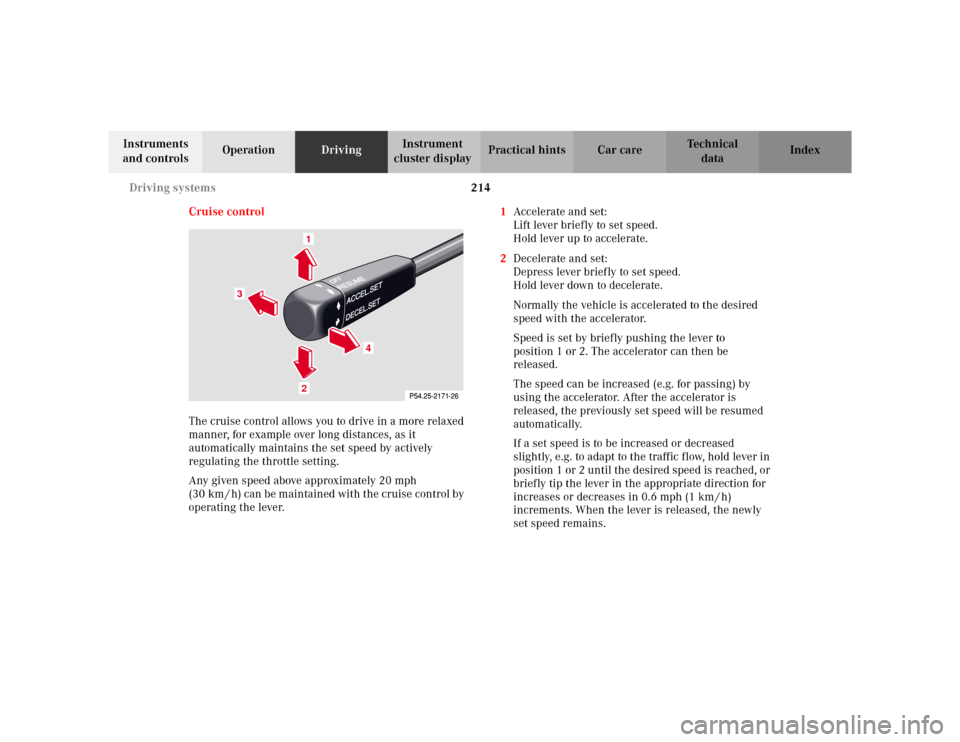
operating the lever.1Accelerate and set:
Lift lever briefly to set speed.
Hold lever up to accelerate.
2Decelerate and set:
Depress lever briefly to set speed.
Hold lever down to decelerate.
Normally the vehicle is accelerated to the desired
speed with the accelerator.
Speed is set by briefly pushing the lever to
position 1 or 2. The accelerator can then be
released.
The speed can be increased (e.g. for passing) by
using the accelerator. After the accelerator is
released, the previously set speed will be resumed
automatically.
If a set speed is to be increased or decreased
slightly, e.g. to adapt to the traffic flow, hold lever in
position 1 or 2 until the desired speed is reached, or
briefly tip the lever in the appropriate direction for
increases or decreases in 0.6 mph (1 km / h)
increments. When the lever is released, the newly
set speed remains.
1
4
2
3
Page 218 of 342
215 Driving systems
Te ch n i c a l
data Instruments
and controlsOperationDrivingInstrument
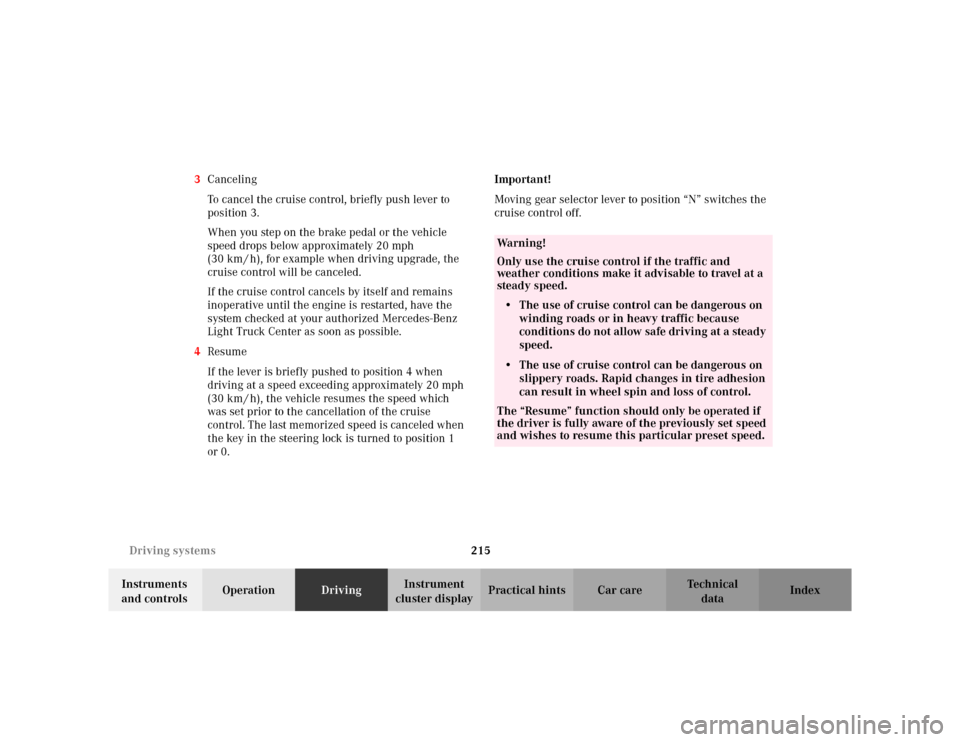
cluster displayPractical hints Car care Index 3Canceling
To cancel the cruise control, briefly push lever to
position 3.
When you step on the brake pedal or the vehicle
speed drops below approximately 20 mph
(30 km / h), for example when driving upgrade, the
cruise control will be canceled.
If the cruise control cancels by itself and remains
inoperative until the engine is restarted, have the
system checked at your authorized Mercedes-Benz
Light Truck Center as soon as possible.
4Resume
If the lever is briefly pushed to position 4 when
driving at a speed exceeding approximately 20 mph
(30 km / h), the vehicle resumes the speed which
was set prior to the cancellation of the cruise
control. The last memorized speed is canceled when
the key in the steering lock is turned to position 1
or 0.Important!
Moving gear selector lever to position “N” switches the
cruise control off.
Wa r n i n g !
Only use the cruise control if the traffic and
weather conditions make it advisable to travel at a
steady speed.• The use of cruise control can be dangerous on
winding roads or in heavy traffic because
conditions do not allow safe driving at a steady
speed.
• The use of cruise control can be dangerous on
slippery roads. Rapid changes in tire adhesion
can result in wheel spin and loss of control.The “Resume” function should only be operated if
the driver is fully aware of the previously set speed
and wishes to resume this particular preset speed.
Page 221 of 342

218 Driving systems
Te ch n i c a l
data Instruments
and controlsOperationDrivingInstrument
cluster displayPractical hints Car care Index
The BAS / ESP malfunction indicator lamp in the
instrument cluster comes on with the key in steering
lock position 2 and should go out with the engine
running.
If the BAS / ESP malfunction indicator lamp comes on
permanently while the engine is running, a malfunction
has been detected in either system. As a result, it is
possible that now only partial engine output will be
available. If the BAS malfunctions, the brake system
functions in the usual manner, but without BAS.If the charging voltage falls below 10 volts, the
malfunction indicator lamp comes on and the BAS and
the ESP are switched off. When the voltage is above this
value again, the malfunction indicator lamp should go
out and the BAS is operational.
With the ABS malfunctioning, the BAS is also switched
off. Both malfunction indicator lamps come on with the
engine running.
If the BAS / ESP malfunction indicator lamp stays
illuminated, have the BAS or ESP checked at your
authorized Mercedes-Benz Light Truck Center as soon
as possible.
Page 222 of 342

219 Driving systems
Te ch n i c a l
data Instruments
and controlsOperationDrivingInstrument
cluster displayPractical hints Car care Index Antilock brake system (ABS)
Important!
The ABS improves steering control of the vehicle during
hard braking maneuvers.
The ABS prevents the wheels from locking up above a
vehicle speed of approximately 5 mph (8 km / h)
independent of road surface conditions.
At the instant one of the wheels is about to lock up, a
slight pulsation can be felt in the brake pedal,
indicating that the ABS is in the regulating mode. Keep
firm and steady pressure on the brake pedal while
experiencing the pulsation.
Continuous steady brake pedal pressure results in
applying the advantages of the ABS, namely braking
power and ability to steer the vehicle.In the case of an emergency brake maneuver keep
continuous full pressure on the brake pedal. In this
manner only can the ABS be most effective.
On slippery road surfaces, the ABS will respond even
with light brake pedal pressure because of the
increased likelihood of locking wheels. The pulsating
brake pedal can be an indication of hazardous road
conditions and functions as a reminder to take extra
care while driving.
ABS control
The ABS malfunction indicator lamp- in the
instrument cluster comes on with the key in steering
lock position 2 and should go out with the engine
running.
When the ABS malfunction indicator lamp- in the
instrument cluster comes on while the engine is
running, it indicates that the ABS has detected a
malfunction and has switched off. In this case, the brake
system functions in the usual manner, but without
antilock assistance.
With the ABS malfunctioning, the BAS, EBP, ESP and
4-ETS+ are also switched off. The malfunction indicator
lamps come on with the engine running.
Wa r n i n g !
Do not pump the brake pedal, rather use firm,
steady brake pedal pressure. Pumping the brake
pedal defeats the purpose for ABS and significantly
reduces braking effectiveness.