Page 87 of 342
84 Instrument cluster
Te ch n i c a l
data Instruments
and controlsOperationDrivingInstrument
cluster displayPractical hints Car care Index
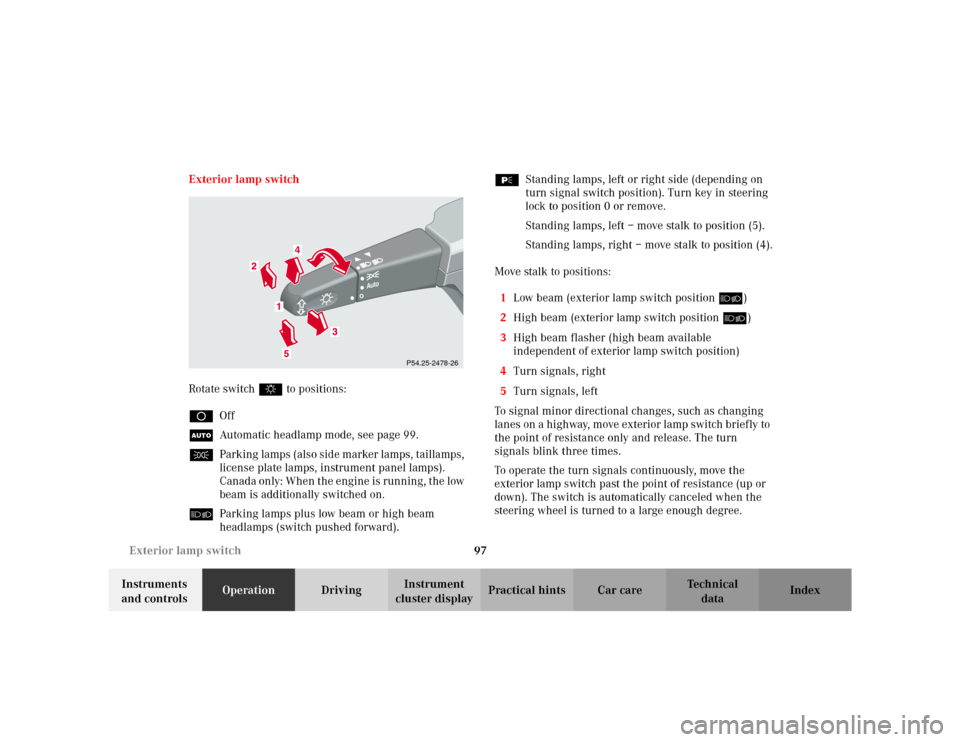
Indicator lamps in the instrument cluster
High beam
BAS malfunction, see page 243
ESP malfunction, see page 243
4-ETS+ malfunction, see page 243
ABS malfunction, see page 244
Brake pads worn down, see page 247
Engine oil level low, see page 246
Coolant level low, see page 246
Transmission in LOW RANGE mode,
see page 243ESP and 4-ETS+. Adjust driving to road
condition, see page 243
Brake fluid low, see page 241
EBP malfunction, see page 222
Parking brake engaged, see page 191
Front passenger airbag automatically
switched off, see page 55
Front fog lamp, see page 103
Steering wheel adjustment not locked,
see page 74
Fasten seat belts,
see page 245
Battery not being charged properly,
see page 245
SRS malfunction, see page 242
Fluid level for windshield and headlamp
washer system low, see page 247.
BAS
ESPABSLOW
RANGE
BRAKESRS
Page 89 of 342

86 Instrument cluster
Te ch n i c a l
data Instruments
and controlsOperationDrivingInstrument
cluster displayPractical hints Car care Index
Activating instrument cluster display
The display for temperature, odometer, oil level
indicator and clock is activated by:
•Opening the driver’s door.
•Pressing button (1) in the instrument cluster (with
key removed or in steering lock position 0).
•Turning the key in steering lock to position 1 or 2.
The instrument cluster display shuts off automatically.Display illumination
The instrument cluster illumination can be set with the
park lamps, low beam headlamps or high beam
headlamps switched on.
Rotate knob (1) to vary intensity of instrument lamps:
•Clockwise - instrument lamp intensity increases.
•Counterclockwise - instrument lamp intensity
decreases.
Odometer/trip odometer (8)
Activate the instrument cluster.
•Press knob (1) once to switch to or from odometer to
trip odometer readout.
•Press and hold knob (1) for more than 1 second to
reset trip odometer (with trip odometer displayed).
•Press knob (1) twice to display next scheduled
service.
2
Page 100 of 342

97 Exterior lamp switch
Te ch n i c a l
data Instruments
and controlsOperationDrivingInstrument
cluster displayPractical hints Car care Index Exterior lamp switch
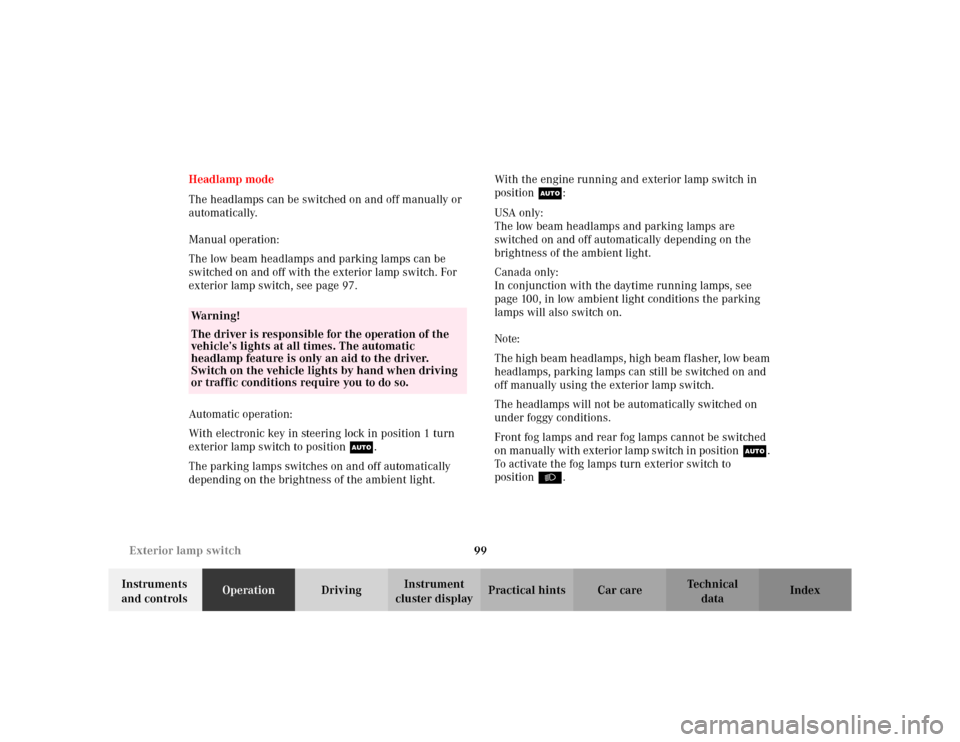
Rotate switch $ to positions:
DOff
UAutomatic headlamp mode, see page 99.
CParking lamps (also side marker lamps, taillamps,
license plate lamps, instrument panel lamps).
Canada only: When the engine is running, the low
beam is additionally switched on.
õParking lamps plus low beam or high beam
headlamps (switch pushed forward).ƒStanding lamps, left or right side (depending on
turn signal switch position). Turn key in steering
lock to position 0 or remove.
Standing lamps, left – move stalk to position (5).
Standing lamps, right – move stalk to position (4).
Move stalk to positions:
1Low beam (exterior lamp switch position õ)
2High beam (exterior lamp switch position õ)
3High beam flasher (high beam available
independent of exterior lamp switch position)
4Turn signals, right
5Turn signals, left
To signal minor directional changes, such as changing
lanes on a highway, move exterior lamp switch brief ly to
the point of resistance only and release. The turn
signals blink three times.
To operate the turn signals continuously, move the
exterior lamp switch past the point of resistance (up or
down). The switch is automatically canceled when the
steering wheel is turned to a large enough degree.
Auto
P54.25-2478-26
Page 102 of 342

99 Exterior lamp switch
Te ch n i c a l
data Instruments
and controlsOperationDrivingInstrument
cluster displayPractical hints Car care Index Headlamp mode
The headlamps can be switched on and off manually or
automatically.
Manual operation:
The low beam headlamps and parking lamps can be
switched on and off with the exterior lamp switch. For
exterior lamp switch, see page 97.
Automatic operation:
With electronic key in steering lock in position 1 turn
exterior lamp switch to positionU.
The parking lamps switches on and off automatically
depending on the brightness of the ambient light.With the engine running and exterior lamp switch in
positionU:
USA only:
The low beam headlamps and parking lamps are
switched on and off automatically depending on the
brightness of the ambient light.
Canada only:
In conjunction with the daytime running lamps, see
page 100, in low ambient light conditions the parking
lamps will also switch on.
Note:
The high beam headlamps, high beam flasher, low beam
headlamps, parking lamps can still be switched on and
off manually using the exterior lamp switch.
The headlamps will not be automatically switched on
under foggy conditions.
Front fog lamps and rear fog lamps cannot be switched
on manually with exterior lamp switch in positionU.
To activate the fog lamps turn exterior switch to
positionB.
Wa r n i n g !
The driver is responsible for the operation of the
vehicle’s lights at all times. The automatic
headlamp feature is only an aid to the driver.
Switch on the vehicle lights by hand when driving
or traffic conditions require you to do so.
Page 103 of 342
100 Exterior lamp switch
Te ch n i c a l
data Instruments
and controlsOperationDrivingInstrument
cluster displayPractical hints Car care Index
Daytime running lamp mode (Canada only)
Turn exterior lamp switch to positionD.
When the engine is running the low beam headlamps
are automatically switched on. In low ambient light
conditions the parking lamps will also switch on.
When shifting from a driving position to position “N”
or “P”, the exterior lamps switches off (3 minutes delay).For nighttime driving the exterior lamp switch should
be turned to position õ or U to permit activation
of the high beam headlamps.
Note:
The high beam flasher is always available.
Page 106 of 342

103 Fog lamp switch
Te ch n i c a l
data Instruments
and controlsOperationDrivingInstrument
cluster displayPractical hints Car care Index Fog lamp switch
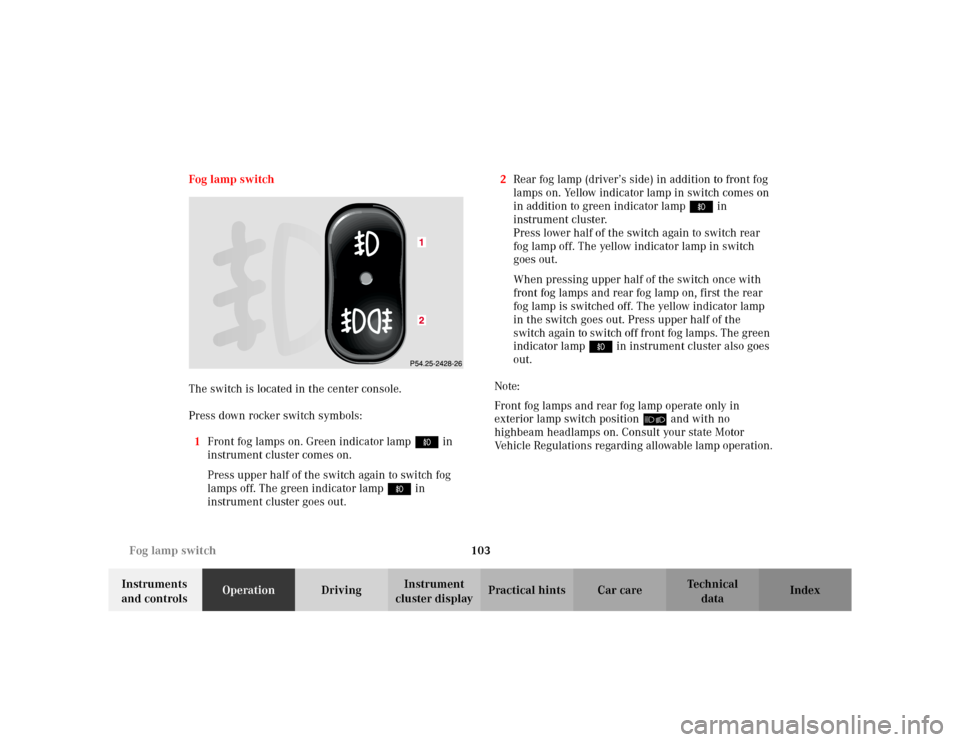
The switch is located in the center console.
Press down rocker switch symbols:
1Front fog lamps on. Green indicator lamp ‡ in
instrument cluster comes on.
Press upper half of the switch again to switch fog
lamps off. The green indicator lamp‡ in
instrument cluster goes out.2Rear fog lamp (driver’s side) in addition to front fog
lamps on. Yellow indicator lamp in switch comes on
in addition to green indicator lamp‡ in
instrument cluster.
Press lower half of the switch again to switch rear
fog lamp off. The yellow indicator lamp in switch
goes out.
When pressing upper half of the switch once with
front fog lamps and rear fog lamp on, first the rear
fog lamp is switched off. The yellow indicator lamp
in the switch goes out. Press upper half of the
switch again to switch off front fog lamps. The green
indicator lamp‡ in instrument cluster also goes
out.
Note:
Front fog lamps and rear fog lamp operate only in
exterior lamp switch position õ and with no
highbeam headlamps on. Consult your state Motor
Vehicle Regulations regarding allowable lamp operation.
Page 240 of 342

237 What you should know at the gas station
Te ch n i c a l
data Instruments
and controlsOperationDrivingInstrument
cluster displayPractical hints Car care Index • Coolant
For normal replenishing, use water (potable water
quality).
For further information (e.g. anticorrosion/
antifreeze), see page 314.
• Spark plugs
Approved spark plugs, see page 312.
• Tire pressure
For tire pressure, refer to tire pressure label inside
the fuel filler flap. See page 272 for further details.
• Air conditioner
R-134a refrigerant and special PAG lubricant, see
page 316.•Bulbs
high beam: H7(55 W),
low beam: H7 (55 W)
low beam: BiXenon D2S - 35 W (optional)
fog lamps: H8 (35 W)
fog lamps: H3 (55 W) (optional)
turn signal, parking, side marker and standing
lamps, front: 1157 (32 / 3 cp),
stop lamps: P 21 W (1073 [32 cp]),
backup lamps: P 21 W (1073 [32 cp]),
turn signal lamps, rear: P Y 21 W,
tail, parking, standing, and rear fog lamp, driver’s
side: P 21/4 W,
side marker lamp, rear: W 5 W,
license plate lamps: C 5 W (tubular),
high mounted stop lamp: P 21 W (1073 [32 cp]).
Page 286 of 342
283 Exterior lamps
Te ch n i c a l
data Instruments
and controlsOperation DrivingInstrument
cluster displayPractical hintsCar care Index Headlamp assembly (Halogen)
1Headlamp vertical / horizontal adjustment screw
2Headlamp vertical / horizontal adjustment screw
3Headlamp cover with locking tab
4High beam headlamp cover with locking tab
5Bulb socket for turn signal, parking, standing, and
side marker lamp6Electrical connector for low beam headlamp bulb
7Electrical connector for high beam headlamp bulb
P82.10-2756-26
6
P82.15-2082-26