Page 161 of 354

158 Interior equipment
Te ch n i c a l
data Instruments
and controlsOperationDrivingInstrument
cluster displayPractical hints Car care Index
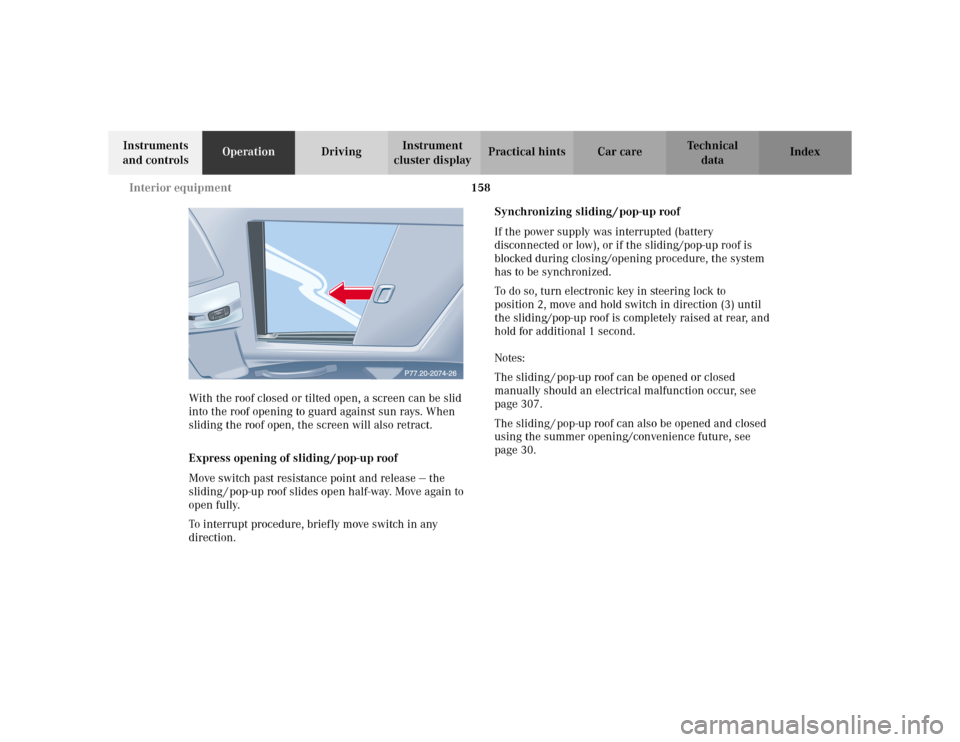
With the roof closed or tilted open, a screen can be slid
into the roof opening to guard against sun rays. When
sliding the roof open, the screen will also retract.
Express opening of sliding / pop-up roof
Move switch past resistance point and release — the
sliding / pop-up roof slides open half-way. Move again to
open fully.
To interrupt procedure, briefly move switch in any
direction.Synchronizing sliding / pop-up roof
If the power supply was interrupted (battery
disconnected or low), or if the sliding/pop-up roof is
blocked during closing/opening procedure, the system
has to be synchronized.
To do so, turn electronic key in steering lock to
position 2, move and hold switch in direction (3) until
the sliding/pop-up roof is completely raised at rear, and
hold for additional 1 second.
Notes:
The sliding / pop-up roof can be opened or closed
manually should an electrical malfunction occur, see
page 307.
The sliding / pop-up roof can also be opened and closed
using the summer opening/convenience future, see
page 30.
Page 162 of 354

159 Interior equipment
Te ch n i c a l
data Instruments
and controlsOperationDrivingInstrument
cluster displayPractical hints Car care Index Interior lighting
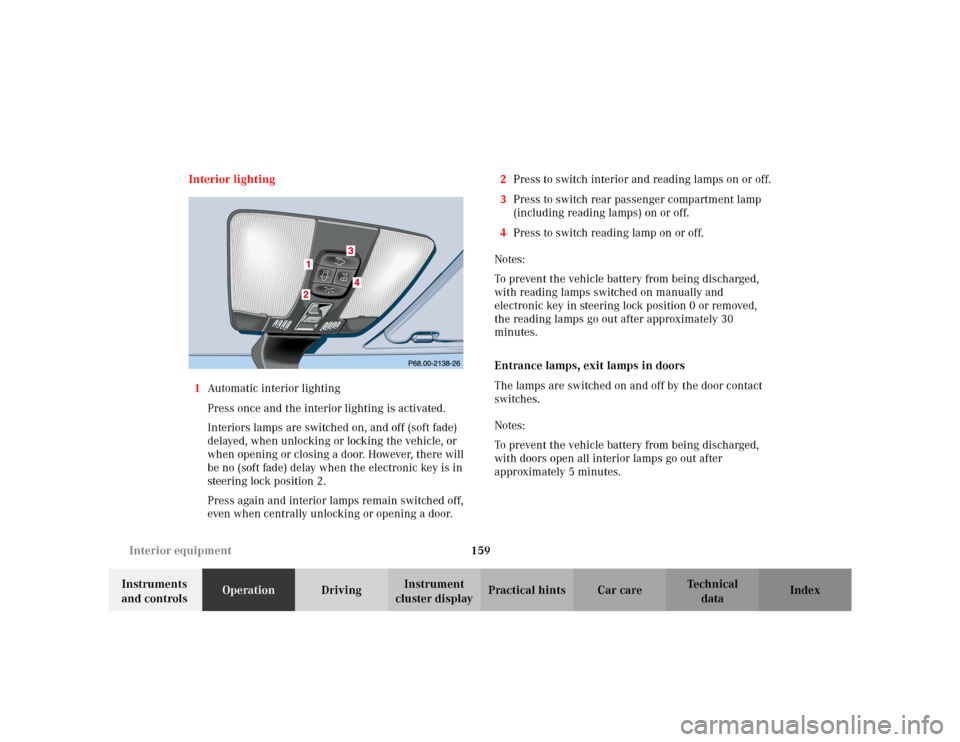
1Automatic interior lighting
Press once and the interior lighting is activated.
Interiors lamps are switched on, and off (soft fade)
delayed, when unlocking or locking the vehicle, or
when opening or closing a door. However, there will
be no (soft fade) delay when the electronic key is in
steering lock position 2.
Press again and interior lamps remain switched off,
even when centrally unlocking or opening a door.2Press to switch interior and reading lamps on or off.
3Press to switch rear passenger compartment lamp
(including reading lamps) on or off.
4Press to switch reading lamp on or off.
Notes:
To prevent the vehicle battery from being discharged,
with reading lamps switched on manually and
electronic key in steering lock position 0 or removed,
the reading lamps go out after approximately 30
minutes.
Entrance lamps, exit lamps in doors
The lamps are switched on and off by the door contact
switches.
Notes:
To prevent the vehicle battery from being discharged,
with doors open all interior lamps go out after
approximately 5 minutes.
Page 163 of 354
160 Interior equipment
Te ch n i c a l
data Instruments
and controlsOperationDrivingInstrument
cluster displayPractical hints Car care Index
Reading lamps rear compartment (optional)
1Reading lamp
2Press to switch reading lamp on or off.The lamp is located above the rear center seat.
Notes:
If you turn the electronic key in steering lock position 0,
the reading lamps go out after approximately 30
minutes.
Page 166 of 354
163 Interior equipment
Te ch n i c a l
data Instruments
and controlsOperationDrivingInstrument
cluster displayPractical hints Car care Index Glove box
1Unlocking: Turn mechanical key to vertical position
and remove.
2Locking: Turn mechanical key to the right and
remove.
3Opening: Pull on handle.
The glove box can be locked and unlocked with the
mechanical key. See page 25 for instructions on how to
remove the mechanical key from the electronic key (e.g.
for valet parking service).Cup holder and coin holder in glove box lid
Caution!
Keep glove box lid closed while traveling. Place only
containers that fit into the cup holder to prevent spills.
P68.10-2383-26
Page 167 of 354
164 Interior equipment
Te ch n i c a l
data Instruments
and controlsOperationDrivingInstrument
cluster displayPractical hints Car care Index
Storage compartment above ashtray
in center console
To o pen :
Touch bottom of cover slightly. The cover opens
automatically.Storage compartments in center console
To open compartment in armrest:
Lift lid with handle (4).
To open compartment under armrest:
Lift lid with handle (5).
To c l o s e :
Lower lid until it engages in lock.
P68.20-2260-26
Page 171 of 354
168 Interior equipment
Te ch n i c a l
data Instruments
and controlsOperationDrivingInstrument
cluster displayPractical hints Car care Index
Lighter
Turn electronic key in steering lock to position 1 or 2.
Push in lighter (1); it will pop out automatically when
hot.The lighter socket can be used to accommodate
electrical accessories up to maximum 85 W.
Wa r n i n g !
Never touch the heating element or sides of the
lighter, they are extremely hot, hold at knob only.When leaving the vehicle always remove the
electronic key from the steering lock. Do not leave
children unattended in the vehicle, or with access
to an unlocked vehicle. Unsupervised use of vehicle
equipment may cause serious personal injury.
Page 172 of 354
169 Interior equipment
Te ch n i c a l
data Instruments
and controlsOperationDrivingInstrument
cluster displayPractical hints Car care Index Split rear bench seat
The two sections can be folded down separately to
enlarge the cargo area.
1. Slip seat belt webbing behind belt retainer (1) and
move buckle latch plate upward to belt outlet.
2. Slip fingers into recess (2) and lift seat cushion to a
vertical position (move front seat forward a little, if
necessary).3. Pull head restraint up to its highest position.
Depress the release button (3) until it engages and
pull out the head restraint.
4. Insert head restraint into the openings provided in
the seat cushion.
5. Pull locking handle (4) up and fold backrest forward.
Page 173 of 354
170 Interior equipment
Te ch n i c a l
data Instruments
and controlsOperationDrivingInstrument
cluster displayPractical hints Car care Index
Set up:
Pull backrest up until it locks in its upright position.
A red indicator (5) on the pull locking handle is visible
in the unlocked position. Check for secure locking by
pushing and pulling on the backrest. Follow remaining
steps in reverse order listed above.
Note:
Do not interchange the front head restraints with the
rear head restraints.
Wa r n i n g !
Do not drive the vehicle without head restraints.
Always reinstall head restraints when returning
cushions to seating use. Head restraints help
reduce injuries should an accident occur.
P91.12-2050-26
P91.12-2199-26
5