2002 MERCEDES-BENZ E WAGON steering
[x] Cancel search: steeringPage 203 of 354
200 Steering lock
Te ch n i c a l
data Instruments
and controlsOperationDrivingInstrument
cluster displayPractical hints Car care Index
Steering lock
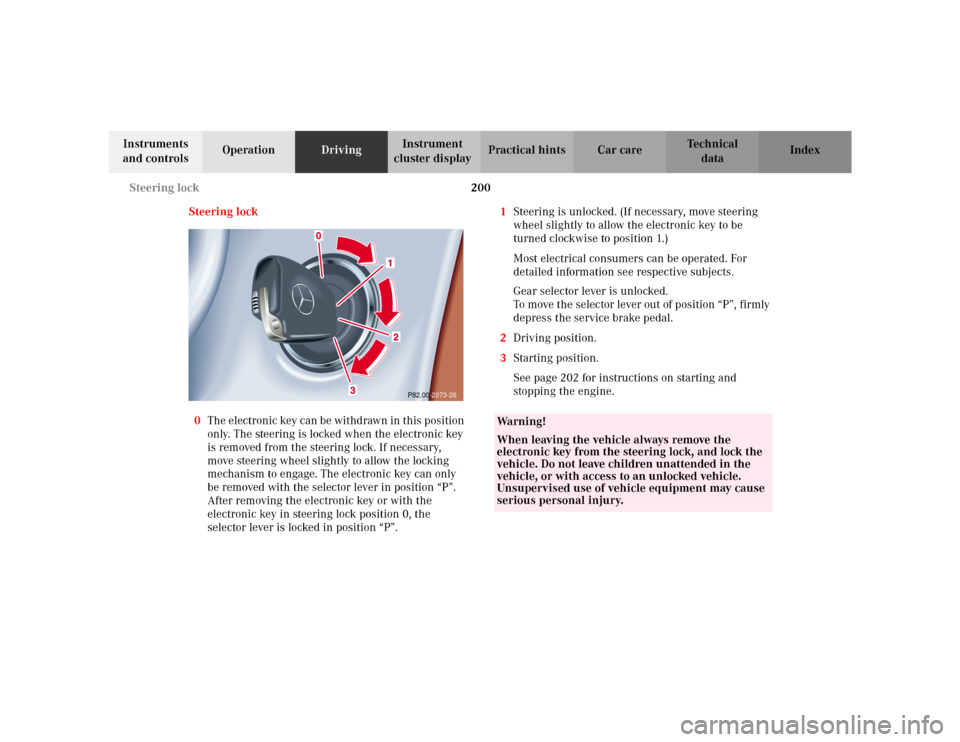
0The electronic key can be withdrawn in this position
only. The steering is locked when the electronic key
is removed from the steering lock. If necessary,
move steering wheel slightly to allow the locking
mechanism to engage. The electronic key can only
be removed with the selector lever in position “P”.
After removing the electronic key or with the
electronic key in steering lock position 0, the
selector lever is locked in position “P”.1Steering is unlocked. (If necessary, move steering
wheel slightly to allow the electronic key to be
turned clockwise to position 1.)
Most electrical consumers can be operated. For
detailed information see respective subjects.
Gear selector lever is unlocked.
To move the selector lever out of position “P”, firmly
depress the service brake pedal.
2Driving position.
3Starting position.
See page 202 for instructions on starting and
stopping the engine.
P82.00-2073-26
Wa r n i n g !
When leaving the vehicle always remove the
electronic key from the steering lock, and lock the
vehicle. Do not leave children unattended in the
vehicle, or with access to an unlocked vehicle.
Unsupervised use of vehicle equipment may cause
serious personal injury.
Page 204 of 354
201 Steering lock
Te ch n i c a l
data Instruments
and controlsOperationDrivingInstrument
cluster displayPractical hints Car care Index Important!
If the electronic key is left in the steering lock position 0
for an extended period of time, it can no longer be
turned in the lock. In this case, remove electronic key
from steering lock and reinsert.
Caution!
To prevent accelerated battery discharge and a possible
dead battery, always remove the electronic key from the
steering lock. Do not leave the electronic key in steering
lock position 0.Notes:
A warning sounds when the driver’s door is opened
while the electronic key is in steering lock position 1
or 0.
The steering lock can only be unlocked with the vehicle
battery properly charged and connected. See battery on
page 289 or jump starting on page 291.
With the engine at idle speed, the charging rate of the
alternator (output) is limited.
It is therefore recommended that you turn off
unnecessary electrical consumers while driving in
stop-and-go traffic. This precaution helps to avoid
draining of the battery.
Unnecessary strain on the battery and charging system
may be minimized by turning off the following power
consumers, for example:
Heated seats, rear window defroster. In addition, the
automatic climate air volume control should be set to
the lowest position.
Page 205 of 354

202 Starting and turning off the enging
Te ch n i c a l
data Instruments
and controlsOperationDrivingInstrument
cluster displayPractical hints Car care Index
Starting and turning off the engine
Before Starting
Ensure that parking brake is engaged and that selector
lever is in position “P” or “N”. Turn electronic key in
steering lock to position 2.
Starting
Do not depress accelerator.
Briefly turn electronic key in steering lock clockwise to
the stop and release. The starter will engage until the
engine is running.
If engine will not run, and the starting procedure stops,
turn electronic key completely to the left and repeat
starting the engine.
After several unsuccessful attempts, have the system
checked at the nearest authorized Mercedes-Benz
Center.Important!
Due to the installed starter non-repeat feature, the
electronic key must be turned completely to the left
before attempting to start the engine again.
In areas where temperatures frequently drop below
-4
°F(–20
°C) we recommend that an engine block heater
be installed. Your authorized Mercedes-Benz Center will
advise you on this subject, see page 221.
Turning off
Turn the electronic key in the steering lock to position 0
to stop the engine.
The electronic key can only be removed with the
selector lever in position “P”.
Page 208 of 354
205 Automatic transmission
Te ch n i c a l
data Instruments
and controlsOperationDrivingInstrument
cluster displayPractical hints Car care Index Stopping
For brief stops, e.g. at traffic lights, leave the
transmission in gear and hold vehicle with the service
brake.
For longer stops with the engine idling, shift into “N”
or “P” and hold the vehicle with the service brake.
When stopping the vehicle on an uphill gradient, do not
hold it with the accelerator, use the brake. This avoids
unnecessary transmission heat build up.
Maneuvering
To maneuver in tight areas, e.g. when pulling into a
parking space, control the vehicle speed by gradually
releasing the brakes. Accelerate gently and never
abruptly step on the accelerator.
To rock a vehicle out of soft ground (mud or snow),
alternately shift from forward to reverse, while applying
slight partial throttle.
Rocking a vehicle free in this manner may cause the
ABS or traction system malfunction indicator lamp to
come on. Turn off and restart the engine to clear the
malfunction indication.
Wa r n i n g !
Getting out of your vehicle with the selector lever
not fully engaged in position “P” is dangerous.
Also, when parked on an incline, position “P” alone
may not prevent your vehicle from moving,
possibly hitting people or objects.Always set the parking brake in addition to shifting
to position “P”, see page 212 for parking brake. When parked on an incline, also turn front wheel
against curb.Wa r n i n g !
When leaving the vehicle always remove the key
from the steering lock, and lock the vehicle. Do not
leave children unattended in the vehicle, or with
access to an unlocked vehicle. Children could move
the gear selector lever from position “P”, which
could result in an accident or serious injury.
Page 209 of 354
206 Automatic transmission
Te ch n i c a l
data Instruments
and controlsOperationDrivingInstrument
cluster displayPractical hints Car care Index
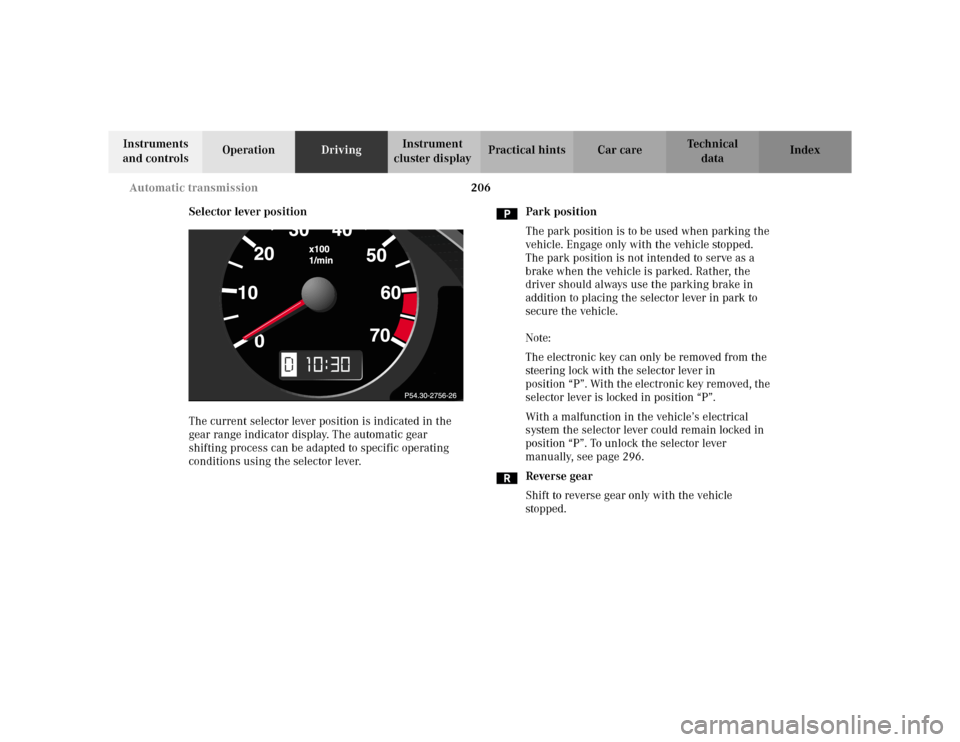
Selector lever position
The current selector lever position is indicated in the
gear range indicator display. The automatic gear
shifting process can be adapted to specific operating
conditions using the selector lever.Park position
The park position is to be used when parking the
vehicle. Engage only with the vehicle stopped.
The park position is not intended to serve as a
brake when the vehicle is parked. Rather, the
driver should always use the parking brake in
addition to placing the selector lever in park to
secure the vehicle.
Note:
The electronic key can only be removed from the
steering lock with the selector lever in
position “P”. With the electronic key removed, the
selector lever is locked in position “P”.
With a malfunction in the vehicle’s electrical
system the selector lever could remain locked in
position “P”. To unlock the selector lever
manually, see page 296.
Reverse gear
Shift to reverse gear only with the vehicle
stopped.
10
Page 215 of 354
212 Parking brake
Te ch n i c a l
data Instruments
and controlsOperationDrivingInstrument
cluster displayPractical hints Car care Index
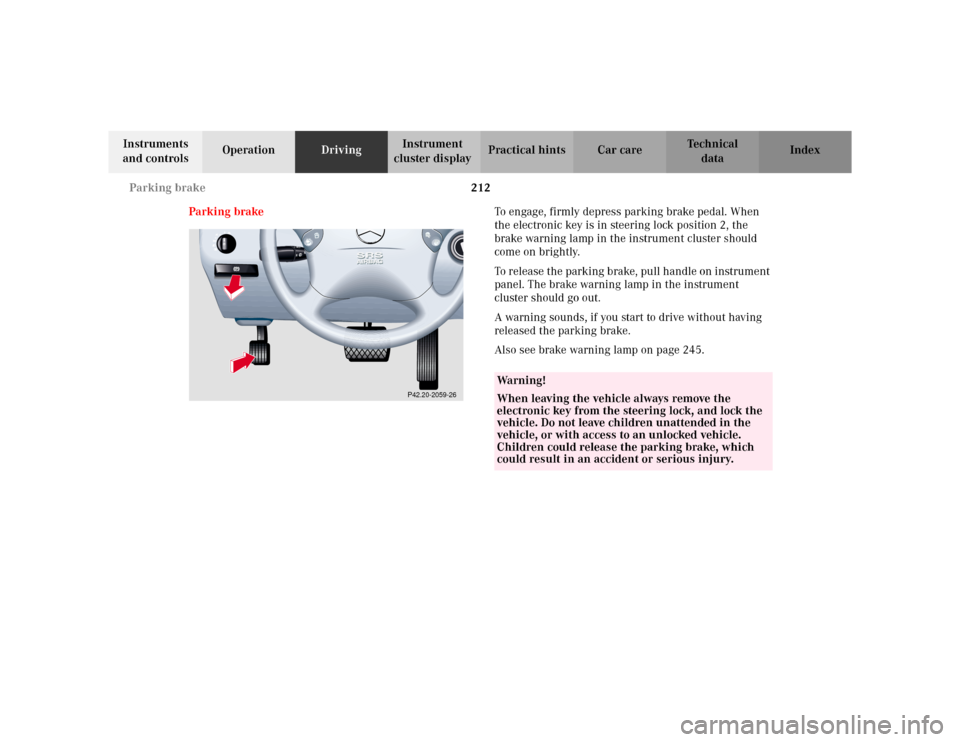
Parking brakeTo engage, firmly depress parking brake pedal. When
the electronic key is in steering lock position 2, the
brake warning lamp in the instrument cluster should
come on brightly.
To release the parking brake, pull handle on instrument
panel. The brake warning lamp in the instrument
cluster should go out.
A warning sounds, if you start to drive without having
released the parking brake.
Also see brake warning lamp on page 245.
P42.20-2059-26
Wa r n i n g !
When leaving the vehicle always remove the
electronic key from the steering lock, and lock the
vehicle. Do not leave children unattended in the
vehicle, or with access to an unlocked vehicle.
Children could release the parking brake, which
could result in an accident or serious injury.
Page 217 of 354

214 Driving instructions
Te ch n i c a l
data Instruments
and controlsOperationDrivingInstrument
cluster displayPractical hints Car care Index
Power assistance
BrakesExcessive use of salt and other snow melting chemicals
spread on roads during the winter months may cause a
build up of moisture or residue to form on the braking
components. This build up or residue could cause light
corrosion of the braking components if the vehicle is
parked with the brakes cold. Apply steady and even
braking pressure when stopping the vehicle to warm up
and dry the brake components.
Important
Please pay attention to the function of the brake assist
system (BAS), see page 225.
The condition of the parking brake system is checked
each time the vehicle is in the shop for the required
maintenance service.
If the parking brake is released and the brake warning
lamp in the instrument cluster stays on, the brake fluid
level in the reservoir is too low.
Brake pad wear or a leak in the system may be the
reason for low brake fluid in the reservoir.
Have the brake system inspected at an authorized
Mercedes-Benz Center immediately.
Wa r n i n g !
When the engine is not running, the brake and
steering systems are without power assistance.
Under these circumstances, a much greater effort is
necessary to stop or steer the vehicle.Wa r n i n g !
After driving in heavy rain for some time without
applying the brakes or through water deep enough
to wet brake components or salty road conditions,
the first braking action may be somewhat reduced
and increased pedal pressure may be necessary to
obtain expected braking effect. Be sure to maintain
a safe distance from vehicles in front.Resting your foot on the brake pedal will cause
excessive and premature wear of the brake pads.It can also result in the brakes overheating thereby
significantly reducing their effectiveness. It may
not be possible to stop the vehicle in sufficient time
to avoid an accident.
Page 219 of 354
216 Driving instructions
Te ch n i c a l
data Instruments
and controlsOperationDrivingInstrument
cluster displayPractical hints Car care Index
Parking
Important!
It is advisable to set the parking brake whenever
parking or leaving the vehicle. In addition, move
selector lever to position “P”.
When parking on hills, always set the parking brake.Tires
Tread wear indicators (TWI) are required by law. These
indicators are located in six places on the tread
circumference and become visible at a tread depth of
approximately
1/16 in (1.5 mm), at which point the tire is
considered worn and should be replaced.
The tread wear indicator appears as a solid band across
the tread.
Wa r n i n g !
To reduce the risk of personal injury as a result of
vehicle movement, before
turning off the engine
and leaving the vehicle, always:
1. Keep right foot on the service brake pedal.
2. Firmly depress parking brake pedal.
3. Move the selector lever to position “P”.
4. Slowly release the service brake pedal.
5. Turn front wheels towards the road curb.
6. Turn the electronic key to steering lock
position 0 and remove.
7. Take the electronic key and lock vehicle when
leaving.
Wa r n i n g !
If you feel a sudden significant vibration or ride
disturbance, or you suspect that possible damage to
your vehicle has occurred, you should turn on the
hazard warning flashers, carefully slow down, and
drive with caution to an area which is a safe
distance from the roadway.Inspect the tires and under the vehicle for possible
damage. If the vehicle or tires appear unsafe, have
it towed to the nearest Mercedes-Benz Center or
tire dealer for repairs.