2002 MERCEDES-BENZ CL600 fuse
[x] Cancel search: fusePage 7 of 430

4 Contents
Instrument cluster displayMalfunction and indicator
lamps in the
instrument cluster ....................296
On-board
diagnostic system .......................296
Check engine malfunction
indicator lamp .............................296
Brake warning lamp ..................298
Supplemental
restraint system
(SRS) indicator lamp ..................299
Fuel reserve warning .................299
ABS malfunction
indicator lamp .............................300
Electronic stabilityprogram
(ESP) — warning lamp ............... 301
Distronic (DTR) —
warning lamp .............................. 301
Seat belt nonusage
warning lamp ..............................302
Malfunction and indicator
lamp in the center console ......302
AIRBAG OFF indicator lamp .....302Malfunction and
warning messages in the
multifunction display .............. 303
DISPLAY DEFECTIVE
(engine control unit) ................. 304
DISPLAY DEFECTIVE
(several systems) ....................... 304
BATTERY /ALTERNATOR ......... 305
ENTRY POSITION ...................... 306
BRAKE ASSIST ........................... 306
BRAKE PAD WEAR .................... 307
BRAKE FLUID ............................ 307
PARKING BRAKE ....................... 308
TRUNK OPEN ............................. 308
ELEC. STABIL. PROG.
(Electronic stability program) . 309
COOLANT (coolant level) .......... 310
COOLANT
(coolant temperature) ................ 311
LIGHTING SYSTEM ....................312
LAMP SENSOR ............................ 314
SEAT BELT SYSTEM ................... 314
TELEPHONE – FUNCTION ........ 315
CRUISE CONTROL ...................... 315ACTIVE BODY CONTROL
(ABC) ............................................ 316
TIRE PRESSURE ......................... 318
ENGINE OIL LEVEL ...................320
SEAT BACKREST ........................ 321
KEY ...............................................322
DOOR ...........................................322
HOOD ...........................................323
TELE AID .....................................323
WASHER FLUID .........................326
DISTRONIC (DTR) ......................327
Practical hintsFirst aid kit .....................................330
Fuses ................................................ 331
Shelf below rear window ..............333
Hood .................................................334
Checking engine oil level .............337
Automatic transmission
fluid level ...................................338
Active body control
(ABC) fluid level ........................338
Coolant level ...................................339
Adding coolant ...........................339
J_OM_215.book Seite 4 Mittwoch, 30. Mai 2001 2:01 14
Page 332 of 430

329 Contents - Practical hints
Te ch n i c a l
data Instruments
and controlsOperation DrivingInstrument
cluster displayPractical hintsCar care Index
Practical hintsFirst aid kit .....................................330
Fuses ................................................ 331
Shelf below rear window ..............333
Hood .................................................334
Checking engine oil level .............337
Automatic transmission
fluid level ...................................338
Active body control
(ABC) fluid level ........................338
Coolant level ...................................339
Adding coolant ...........................339
Windshield and headlamp
washer system ...........................340
Windshield and headlamp
washer fluid mixing ratio .........340Spare wheel, vehicle tools, storage
compartment ............................. 341
Jack .................................................. 342
Wheels ............................................ 343
Tire Replacement ....................... 343
Rotating wheels ......................... 344
Spare wheel .................................... 344
Changing wheels ........................... 346
Tire inflation pressure ................. 351
Battery ............................................. 352
Jump starting ................................. 355
Towing the vehicle ........................ 357
Exterior lamps ............................... 360
Headlamp assembly .................. 361
Taillamp assemblies .................. 364
Standby bulb function .................. 367Changing batteries
in the electronic key .................369
Synchronizing
remote control ............................ 371
Changing batteries in
the KEYLESS-GO-card ..............372
Emergency engine shut-down ..... 374
Fuel filler flap,
manual release .......................... 374
Emergency operation of
sliding/pop-up roof ...................375
Replacing wiper blades ................. 376
Roof rack .........................................378
J_OM_215.book Seite 329 Mittwoch, 30. Mai 2001 2:01 14
Page 334 of 430

331 Fuses
Te ch n i c a l
data Instruments
and controlsOperation DrivingInstrument
cluster displayPractical hintsCar care Index Fuses
Most of your vehicle’s electrical components are fused
with safety fuses. With the exception of the brake lights,
all individual lighting system components are
electronically fused. Before replacing a blown safety
fuse, determine the cause of the short circuit. Always
observe amperage and color of fuse.
The circuit for components is protected by a cycled
circuit breaker interrupted if too much current is being
drawn. The circuit closes automatically after a short
time; the circuit is broken again if the malfunction
reoccurs.
A lways us e a new fus e for re placeme nt. Never atte mp t to
repair or bridge a blown fuse.
A fuse chart, spare fuses and a fuse extractor are located
in the vehicle tool kit in the luggage bowl under the
trunk floor. See page 341 for notes on the vehicle tool
kit.Fuse boxes in the engine compartment
1Fuse box in engine compartment, left-hand side
3Ta b s
3
3
1
P54.15-2064-26
J_OM_215.book Seite 331 Mittwoch, 30. Mai 2001 2:01 14
Page 335 of 430

332 Fuses
Te ch n i c a l
data Instruments
and controlsOperation DrivingInstrument
cluster displayPractical hintsCar care Index
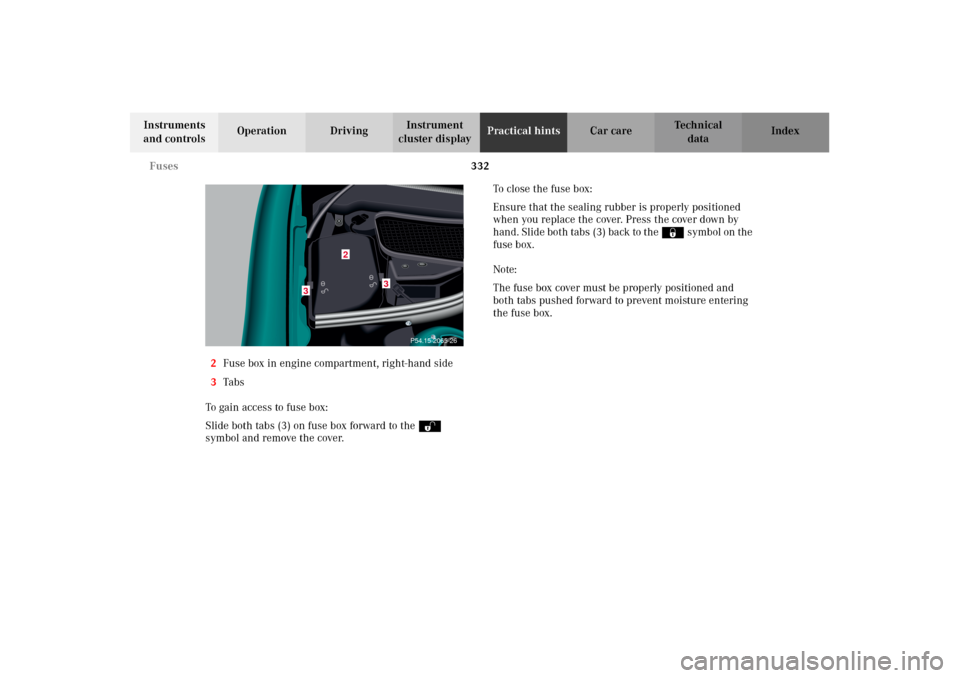
2Fuse box in engine compartment, right-hand side
3Ta bs
To gain access to fuse box:
Slide both tabs (3) on fuse box forward to the Œ
symbol and remove the cover.To close the fuse box:
Ensure that the sealing rubber is properly positioned
when you replace the cover. Press the cover down by
hand. Slide both tabs (3) back to the ‹ symbol on the
fuse box.
Note:
The fuse box cover must be properly positioned and
both tabs pushed forward to prevent moisture entering
the fuse box.
2
3
3
P54.15-2065-26
J_OM_215.book Seite 332 Mittwoch, 30. Mai 2001 2:01 14
Page 336 of 430

333 Fuses
Te ch n i c a l
data Instruments
and controlsOperation DrivingInstrument
cluster displayPractical hintsCar care Index Auxiliary fuse box below rear seat
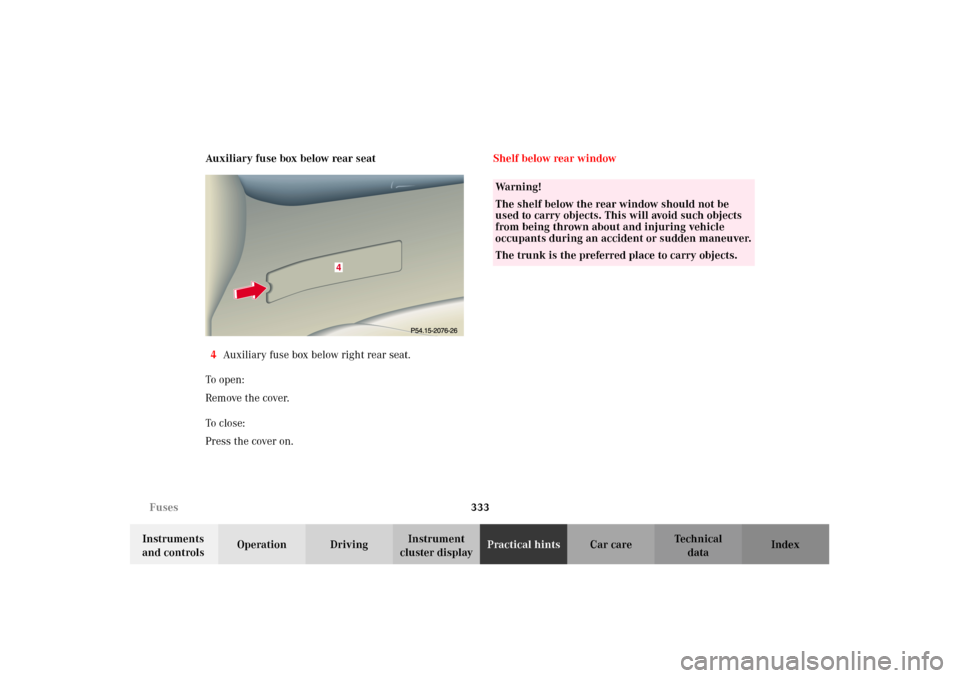
4Auxiliary fuse box below right rear seat.
To o pen :
Remove the cover.
To c lo se:
Press the cover on.Shelf below rear window
4
Wa r n i n g !
The shelf below the rear window should not be
used to carry objects. This will avoid such objects
from being thrown about and injuring vehicle
occupants during an accident or sudden maneuver.
The trunk is the preferred place to carry objects.
J_OM_215.book Seite 333 Mittwoch, 30. Mai 2001 2:01 14
Page 344 of 430

341 Spare wheel
Te ch n i c a l
data Instruments
and controlsOperation DrivingInstrument
cluster displayPractical hintsCar care Index Spare wheel, vehicle tools, storage compartment
1Jack
2Luggage bowl with vehicle tool kit, towing eye bolt,
fuses, fuse extractor and fuse chart
3Storage tray
4Spare wheel Lift trunk floor and engage handle in upper edge of
trunk.
Always lower trunk floor before closing trunk lid.
To remove the spare wheel:
Take out the vehicle tool kit tray.
Turn t he luggage b owl coun ter clock wise an d re move t he
spare wheel.
To store spare wheel:
Place spare wheel in wheel well and secure it with
luggage bowl. Turn luggage bowl clockwise to its stop.
Place vehicle tool kit tray in luggage bowl.
P40.10-0523-26
1
4
3
2
J_OM_215.book Seite 341 Mittwoch, 30. Mai 2001 2:01 14
Page 377 of 430

374 Emergency engine shut-down
Te ch n i c a l
data Instruments
and controlsOperation DrivingInstrument
cluster displayPractical hintsCar care Index
Emergency engine shut-down
If the engine can no longer be stopped using the
electronic key or the start-/stop button (vehicles with
KEYLESS-GO), the engine can be turned off by
withdrawing two fuses.
For easy removal of fuses use the fuse extractor
(supplied with vehicle tool kit) to pull out the fuses
marked on the fuse chart as “ENGINE EMERGENCY
OFF”.
The fuse chart is also located in the vehicle tool kit,
seepage341.
For fuses see page 331.Fuel filler flap, manual release
Remove the battery cover (see page 352) and the trim
inside the trunk on the right-hand side. Pull the release
knob (arrow) and open the fuel filler flap.
J_OM_215.book Seite 374 Mittwoch, 30. Mai 2001 2:01 14
Page 385 of 430

382 Cleaning and care of the vehicle
Te ch n i c a l
data Instruments
and controlsOperation DrivingInstrument
cluster displayPractical hintsCar careIndex
Ta r sta in s
Quickly remove tar stains before they dry and become
more difficult to remove. A tar remover is
recommended.
Paintwork, painted body components
Mercedes-Benz approved Paint Care should be applied
when water drops on the paint surface do not “bead up”,
normally in 3 to 5 months, depending on climate and
washing detergent used.
Mercedes-Benz approved Paint Cleaner should be
applied if paint surface shows signs of dirt embedding
(i.e. loss of gloss).
Do not apply any of these products or wax if your
vehicle is parked in the sun or if the hood is still hot.
Use the appropriate MB-Touch-Up Stick for quick and
provisional repairs of minor paint damage (i.e. chips
from stones, vehicle doors etc.).Engine cleaning
Prior to cleaning the engine compartment make sure to
protect electrical components and connectors from the
intrusion of water and cleaning agents.
Corrosion protection, such as MB Anticorrosion Wax
should be applied to the engine compartment after
every engine cleaning. Before applying, all control
linkage bushings and joints should be lubricated. The
poly-V-belt and all pulleys should be protected from any
wax.
Ve h i c l e w a s h i n g
Do not use hot water or wash your vehicle in direct
sunlight. Use only a mild car wash detergent, such as
Mercedes-Benz approved Car Shampoo.
Thoroughly spray the vehicle with a diffused jet of
water. Direct only a very weak spray towards the
ventilation intake. Use plenty of water and rinse the
sponge and chamois frequently.
Rinse with clear water and thoroughly wipe dry with a
chamois. Do not allow cleaning agents to dry on the
finish.
J_OM_215.book Seite 382 Mittwoch, 30. Mai 2001 2:01 14