2002 MERCEDES-BENZ C320 WAGON lights
[x] Cancel search: lightsPage 34 of 390

31 Central locking system
Te ch n i c a l
data Instruments
and controlsOperationDrivingInstrument
cluster displayPractical hints Car care Index Central locking system
Radio frequency and infrared remote control
The electronic key has an integrated radio frequency
and infrared remote control.
Due to the extended operational range of the remote
control, it could be possible to unintentionally lock or
unlock the vehicle by pressing the transmit button. If
one of the transmit buttons is pressed, the battery check
lamp lights up briefly – indicating that the batteries are
in order. See page 346 for checking batteries.
The vehicle doors, tailgate and fuel filler flap can be
centrally locked and unlocked via remote control.
Opening and closing the windows and sliding/pop-up
roof can only be done with the infrared portion of the
remote control. Aim transmitter eye at a receiver (6
or 7), press and hold transmit button Œ or ‹,
seepage34.
If the electronic key is inserted in starter switch, the
vehicle cannot be locked or unlocked.1Transmit button
‹ Locking
ΠUnlocking
2Lamp for battery check (see page 346 for changing
batteries if it does not light up briefly)
3PANIC button
4Transmitter eye
5Locking tab for mechanical key
P80.35-2033-26
2
1
4
3
5
S203.book Seite 31 Freitag, 19. Oktober 2001 1:25 13
Page 55 of 390
52 Seats
Te ch n i c a l
data Instruments
and controlsOperationDrivingInstrument
cluster displayPractical hints Car care Index
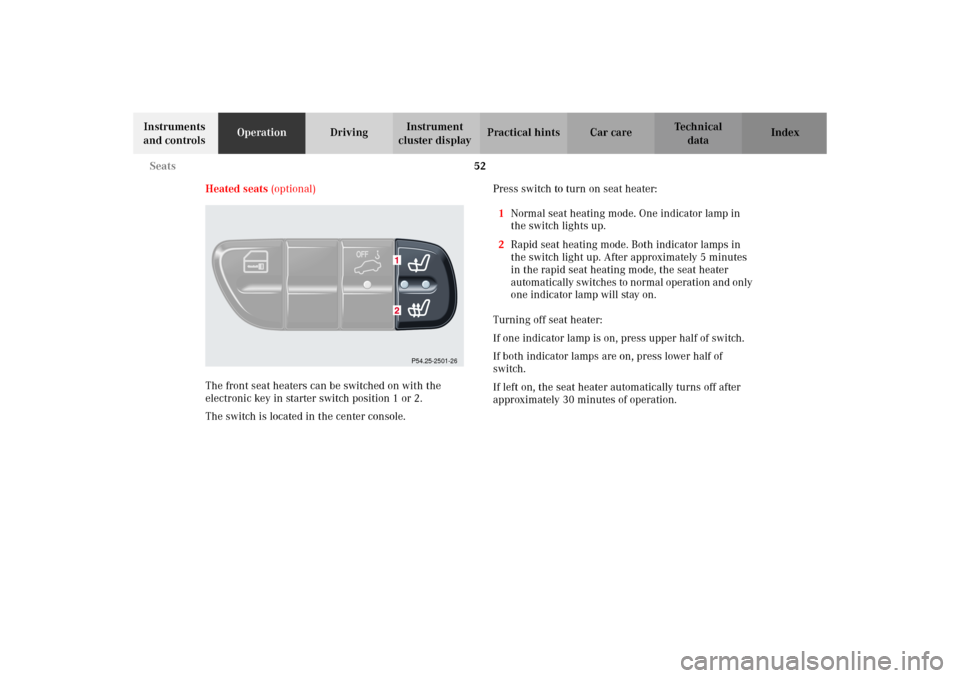
Heated seats (optional)
The front seat heaters can be switched on with the
electronic key in starter switch position 1 or 2.
The switch is located in the center console.Press switch to turn on seat heater:
1Normal seat heating mode. One indicator lamp in
the switch lights up.
2Rapid seat heating mode. Both indicator lamps in
the switch light up. After approximately 5 minutes
in the rapid seat heating mode, the seat heater
autom atically s witches to n ormal o peration an d on ly
one indicator lamp will stay on.
Turning off seat heater:
If one indicator lamp is on, press upper half of switch.
If both indicator lamps are on, press lower half of
switch.
If left on, the seat heater automatically turns off after
approximately 30 minutes of operation.
P54.25-2501-26
S203.book Seite 52 Freitag, 19. Oktober 2001 1:25 13
Page 141 of 390
138 Exterior lamp switch
Te ch n i c a l
data Instruments
and controlsOperationDrivingInstrument
cluster displayPractical hints Car care Index
Headlamp mode
Manual headlamp mode
The low beam headlamps and parking lamps can be
switched on and off with the exterior lamp switch. For
exterior lamp switch, see above.
Note:
With the daytime running lamp mode activated and the
engine running, the low beam headlamps cannot be
switched off manually.Automat ic headlamp mode
Turn exterior lamp switch to positionU.
•Electronic key in starter switch position 1:
The parking lamps switch on and off automatically
depending on the brightness of the ambient light.
•Electronic key in starter switch position 2 and the
engine running:
The low beam headlamps and parking lamps are
switched on and off automatically depending on the
brightness of the ambient light.
The low beam headlamps and parking lamps can
still be switched on and off manually using the
exterior lamp switch.
Note:
With the daytime running lamp mode activated, the low
beam headlamps cannot be switched off manually.
The headlamps will not be automatically switched on
under foggy conditions.
Front fog lamps and rear fog lamp cannot be switched
on manually with exterior lamp switch in positionU.
To activate the fog lamps turn exterior switch to
positionB.
Wa r n i n g !
The driver is responsible for the operation of the
vehicle’s lights at all times. The automatic
headlamp feature is only an aid to the driver.
Switch on the vehicle lights by hand when driving
or traffic conditions require you to do so.
S203.book Seite 138 Freitag, 19. Oktober 2001 1:25 13
Page 194 of 390
191 Interior equipment
Te ch n i c a l
data Instruments
and controlsOperationDrivingInstrument
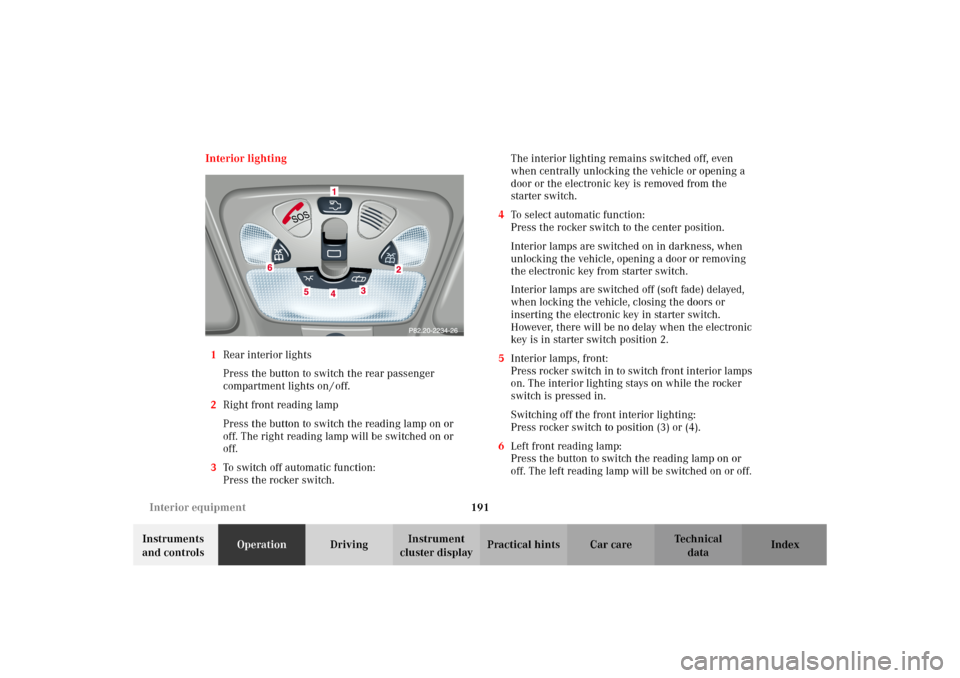
cluster displayPractical hints Car care Index Interior lighting
1Rear interior lights
Press the button to switch the rear passenger
compartment lights on / off.
2Right front reading lamp
Press the button to switch the reading lamp on or
off. The right reading lamp will be switched on or
off.
3To switch off automatic function:
Press the rocker switch.The interior lighting remains switched off, even
when centrally unlocking the vehicle or opening a
door or the electronic key is removed from the
starter switch.
4To select automatic function:
Press the rocker switch to the center position.
Interior lamps are switched on in darkness, when
unlocking the vehicle, opening a door or removing
the electronic key from starter switch.
Interior lamps are switched off (soft fade) delayed,
when locking the vehicle, closing the doors or
inserting the electronic key in starter switch.
However, there will be no delay when the electronic
key is in starter switch position 2.
5Interior lamps, front:
Press rocker switch in to switch front interior lamps
on. The interior lighting stays on while the rocker
switch is pressed in.
Switching off the front interior lighting:
Press rocker switch to position (3) or (4).
6Left front reading lamp:
Press the button to switch the reading lamp on or
off. The left reading lamp will be switched on or off.
S203.book Seite 191 Freitag, 19. Oktober 2001 1:25 13
Page 248 of 390

245 Automatic transmission
Te ch n i c a l
data Instruments
and controlsOperationDrivingInstrument
cluster displayPractical hints Car care Index Stopping
For brief stops, e.g. at traffic lights, leave the
transmission in gear and hold vehicle with the service
brake.
For longer stops with the engine idling, shift into “N”
or “P” and hold the vehicle with the service brake.
When stopping the vehicle on an uphill gradient, do not
hold it with the accelerator, use the brake. This avoids
unnecessary transmission heat build up.
Maneuvering
To maneuver in tight areas, e.g. when pulling into a
parking space, control the vehicle speed by gradually
releasing the brakes. Accelerate gently and never
abruptly step on the accelerator.
To rock a vehicle out of soft ground (mud or snow),
alternately shift from forward to reverse, while applying
slight partial throttle.Rocking a vehicle free in this manner may cause the
ABS or traction system malfunction indicator lamp to
come on. Turn off and restart the engine to clear the
malfunction indication.
Wa r n i n g !
Getting out of your vehicle with the selector lever
not fully engaged in position “P” is dangerous.
A ls o, w hen pa rked on a n in c li ne, pos i tion “P” a lon e
may not prevent your vehicle from moving,
possibly hitting people or objects.Always set the parking brake in addition to shifting
to position “P”, see page 252 for parking brake. When parked on an incline, also turn front wheel
towards the road curb.Wa r n i n g !
When leaving the vehicle always remove the key
from the steering lock, and lock the vehicle. Do not
leave children unattended in the vehicle, or with
access to an unlocked vehicle. Children could move
the selector lever from position “P”, which could
result in an accident or serious injury.
S203.book Seite 245 Freitag, 19. Oktober 2001 1:25 13
Page 287 of 390
284 Malfunction and indicator lamps
Te ch n i c a l
data Instruments
and controlsOperation DrivingInstrument
cluster displayPractical hints Car care Index
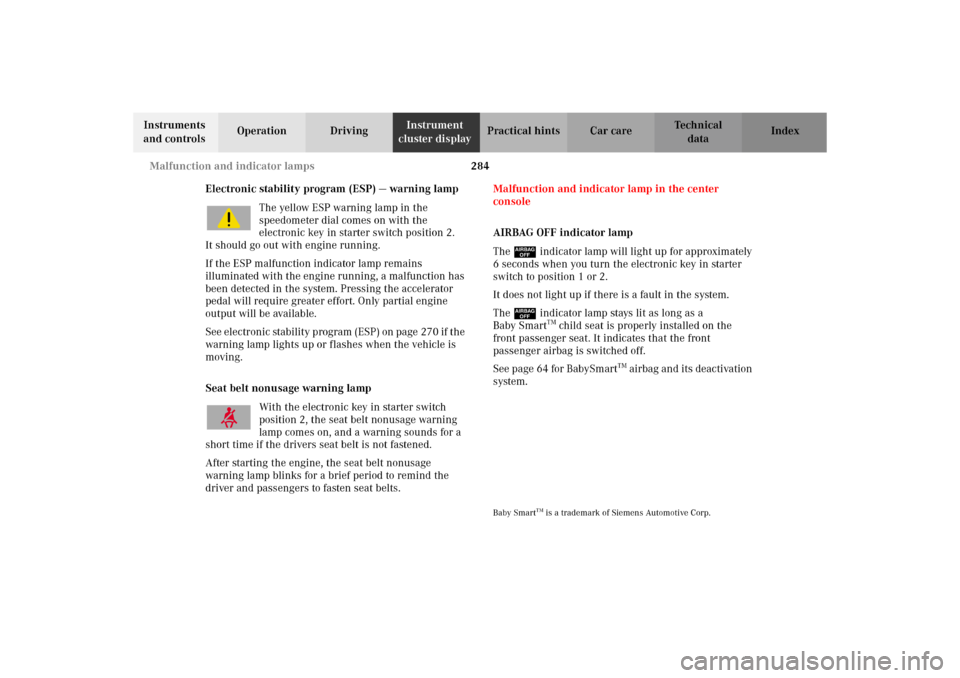
Electronic stability program (ESP) — warning lamp
The yellow ESP warning lamp in the
speedometer dial comes on with the
electronic key in starter switch position 2.
It should go out with engine running.
If the ESP malfunction indicator lamp remains
illuminated with the engine running, a malfunction has
been detected in the system. Pressing the accelerator
pedal will require greater effort. Only partial engine
output will be available.
See electronic stability program (ESP) on page 270 if the
warning lamp lights up or flashes when the vehicle is
moving.
Seat belt nonusage warning lamp
With the electronic key in starter switch
position 2, the seat belt nonusage warning
lamp comes on, and a warning sounds for a
short time if the drivers seat belt is not fastened.
After starting the engine, the seat belt nonusage
warning lamp blinks for a brief period to remind the
driver and passengers to fasten seat belts.Malfunction and indicator lamp in the center
console
AIRBAG OFF indicator lamp
The ü indicator lamp will light up for approximately
6 seconds when you turn the electronic key in starter
switch to position 1 or 2.
It does not light up if there is a fault in the system.
The ü indicator lamp stays lit as long as a
Baby Smart
TM child seat is properly installed on the
front passenger seat. It indicates that the front
passenger airbag is switched off.
See page 64 for BabySmart
TM airbag and its deactivation
system.
Baby Smart
TM is a trademark of Siemens Automotive Corp.
S203.book Seite 284 Freitag, 19. Oktober 2001 1:25 13
Page 300 of 390
297 Malfunction and warning messages
Te ch n i c a l
data Instruments
and controlsOperation DrivingInstrument
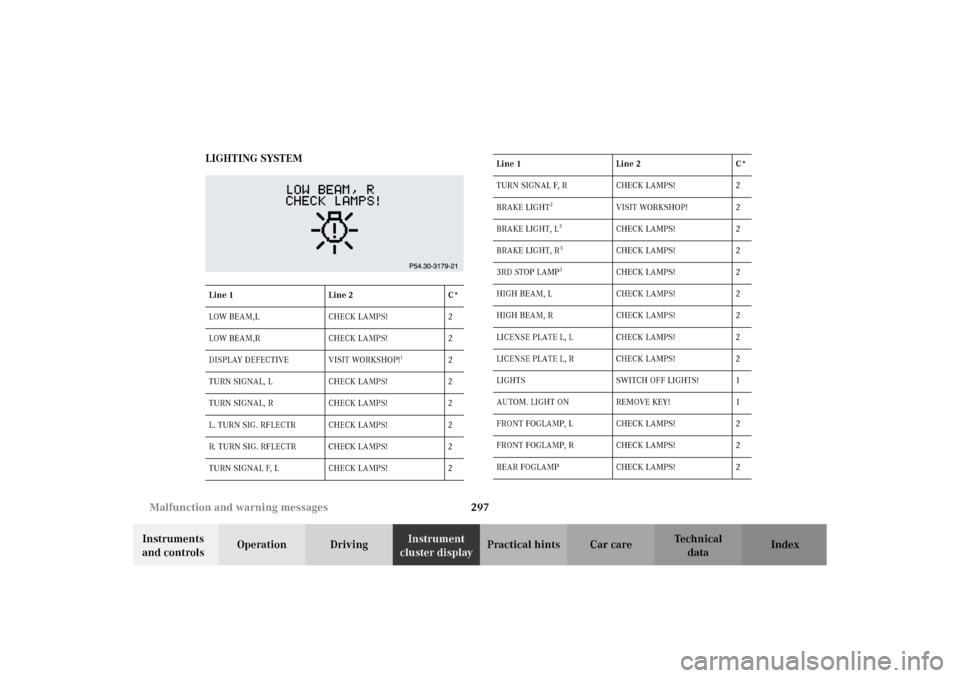
cluster displayPractical hints Car care Index LIGHTING SYSTEM
Line 1 Line 2 C*
LOW BEAM,L CHECK LAMPS! 2
LOW BEAM,R CHECK LAMPS! 2
DISPLAY DEFECTIVE VISIT WORKSHOP!
1
2
TURN SIGNAL, L CHECK LAMPS! 2
TURN SIGNAL, R CHECK LAMPS! 2
L. TURN SIG. RFLECTR CHECK LAMPS! 2
R. TURN SIG. RFLECTR CHECK LAMPS! 2
TURN SIGNAL F, L CHECK LAMPS! 2
TURN SIGNAL F, R CHECK LAMPS! 2
BRAKE LIGHT
2
VISIT WORKSHOP! 2
BRAKE LIGHT, L
3
CHECK LAMPS! 2
BRAKE LIGHT, R
3
CHECK LAMPS! 2
3RD STOP LAMP
3
CHECK LAMPS! 2
HIGH BEAM, L CHECK LAMPS! 2
HIGH BEAM, R CHECK LAMPS! 2
LICENSE PLATE L, L CHECK LAMPS! 2
LICENSE PLATE L, R CHECK LAMPS! 2
LIGHTS SWITCH OFF LIGHTS! 1
AUTOM. LIGHT ON REMOVE KEY! 1
FRONT FOGLAMP, L CHECK LAMPS! 2
FRONT FOGLAMP, R CHECK LAMPS! 2
REAR FOGLAMP CHECK LAMPS! 2 Line 1 Line 2 C*
S203.book Seite 297 Freitag, 19. Oktober 2001 1:25 13
Page 310 of 390
307 Fuses
Te ch n i c a l
data Instruments
and controlsOperation DrivingInstrument
cluster displayPractical hintsCar care Index Stowing things in the vehicle Fuses
Most of your vehicle’s electrical components are fused
wit h s afety f us es. Wit h t he exc eption o f t he b rake lights ,
all individual lighting system components are
electronically fused. Before replacing a blown safety
fuse, determine the cause of the short circuit. Always
observe amperage and color of fuse.
The circuit for components is protected by a cycled
circuit breaker interrupted if too much current is being
drawn. The circuit closes automatically after a short
time; the circuit is broken again if the malfunction
reoccurs.
Always use a n ew f use for r eplacem en t. Never attempt to
repair or bridge a blown fuse.
A fuse chart is located in fuse box (1).
Spare fuses and a special fuse puller are stored with the
tool kit, see page 319.
Wa r n i n g !
To help avoid personal injury during a collision or
sudden maneuver, exercise care when stowing
things. Put luggage or cargo in the trunk if
possible. Do not pile luggage or cargo higher than
the seat backs.Always use partition net when transporting cargo.
Partition net cannot secure hard or heavy objects.
S203.book Seite 307 Freitag, 19. Oktober 2001 1:25 13