2002 MERCEDES-BENZ C320 WAGON change time
[x] Cancel search: change timePage 6 of 390

3 ContentsGeneral notes on CD mode ........... 174
CD changer installed ..................... 175
Loading/emptying
the CD magazine ....................... 175
Playing CDs .................................... 176
Skipping tracks
forward/backward .................... 176
Fast forward/reverse ..................... 177
Scanning ......................................... 177
Random play/repeat function ...... 177
Direct track selection .................... 178
Track and time display ................. 178
Telephone operation ...................... 178
Switching the telephone
on and off ................................... 178
Adjusting the volume .................... 179
Entering telephone number and
starting dialing process ........... 179
Calling up the phone book ........... 179
Switching between
name search and
number search .......................... 179Searching and selecting
phone book entries
by number ..................................180
Placing a call ...................................180
Manual repeat dialing
(redial) ......................................... 181
Automatic repeat dialing
(redial) ......................................... 181
Speed dialing .................................. 181
Turbo-dialing ..................................182
Multi party call ...............................182
Accepting incoming call
in telephone mode .....................182
Accepting incoming call
in tape, CD or radio mode ........182
Terminating call .............................183
Muting a call ...................................183
Component malfunctions ..............183
Power windows ...............................185
Sliding/pop-up roof ........................188
Interior lighting .............................. 191
Sun visors ........................................193
Vanity mirrors ................................193Interior ............................................ 194
Storage compartments
and armrests .............................. 194
Glove box ..................................... 195
Cup holder ...................................... 198
Ashtrays ..........................................200
Lighter .............................................202
Parcel net in
front passenger footwell ..........203
Ski sack ...........................................203
Parcel net in trunk ........................208
Electrical outlet ..............................209
Storage compartment
under trunk floor ......................209
Retractable luggage cover
and partition net ....................... 210
Split rear bench seat ..................... 213
Loading instructions ..................... 217
Cargo tie-down rings ..................... 218
Cellular telephone ......................... 219
Telephone, general ........................220
Garage door opener ....................... 221
S203.book Seite 3 Freitag, 19. Oktober 2001 1:25 13
Page 36 of 390
33 Central locking system
Te ch n i c a l
data Instruments
and controlsOperationDrivingInstrument
cluster displayPractical hints Car care Index Locking and unlocking with remote control
Unlocking:
Press transmit button Œ. All turn signal lamps blink
once to indicate that the vehicle is unlocked.
The remote control can be programmed for two kinds of
unlocking modes (see below):
Selective unlocking mode –
Press transmit button Œ once to unlock driver’s door
and fuel filler flap.
Press transmit button Πtwice to unlock all doors,
fuel filler flap, and tailgate.
Global unlocking mode –
Press transmit button Πonce to unlock all doors,
fuel filler flap, and tailgate.
Notes:
If the tailgate was previously locked separately, it will
remain locked, see page 41.
The presently active unlocking mode (selective or
global) can only be determined by unlocking the vehicle
with the remote control (see below for changing mode).If within 40 seconds of unlocking with the remote
control, neither door or tailgate is opened, the electronic
key is not inserted in the starter switch, or the central
locking switch is not activated, the vehicle will
automatically lock.
Locking:
Press transmit button ‹ once. All turn signal lamps
blink three times to indicate that the vehicle is locked. If
they do not blink three times, a door or tailgate is not
properly closed.
Note:
If the vehicle cannot be locked or unlocked by pressing
the transmit button, then it may be necessary to change
the batteries in the electronic key (if ok, battery check
lamp in electronic key will light briefly when pressing
transmit button) or to synchronize the remote control,
see pages 346 and 348.
Choosing global or selective mode on remote control
Press and hold transmit buttons‹ andŒ
simultaneously for five seconds to reprogram the
remote control. Battery check lamp will blink two times
indicating the completed mode change.
S203.book Seite 33 Freitag, 19. Oktober 2001 1:25 13
Page 78 of 390
75 Restraint systems
Te ch n i c a l
data Instruments
and controlsOperationDrivingInstrument
cluster displayPractical hints Car care Index Safety guidelines for the seat belt, emergency
tensioning retractor and airbag
Wa r n i n g !
• Damaged seat belts or belts that were highly
stressed in an accident must be replaced and
their anchoring points must also be checked.
Use only belts installed or supplied by an
authorized Mercedes-Benz Center.• Airbags and “ETR’s” are designed to function
on a one-time-only basis. An airbag or
emergency tensioning retractor (ETR) that was
activated must be replaced.
• No modifications of any kind may be made to
any components or wiring of the “SRS”. This
includes changing or removing any component
or part of the “SRS”, the installation of
additional trim material, badges etc. over the
steering wheel hub, front passenger airbag
cover, door trim panels, or door frame trims,
and installation of additional electrical /
electronic equipment on or near “SRS”
components and wiring. Keep area between
airbags and occupants free from objects (e.g.
packages, purses, umbrellas, etc).• Do not pass belts over sharp edges.• Do not make any modification that could
change the effectiveness of the belts.
S203.book Seite 75 Freitag, 19. Oktober 2001 1:25 13
Page 145 of 390
142 Combination switch
Te ch n i c a l
data Instruments
and controlsOperationDrivingInstrument
cluster displayPractical hints Car care Index
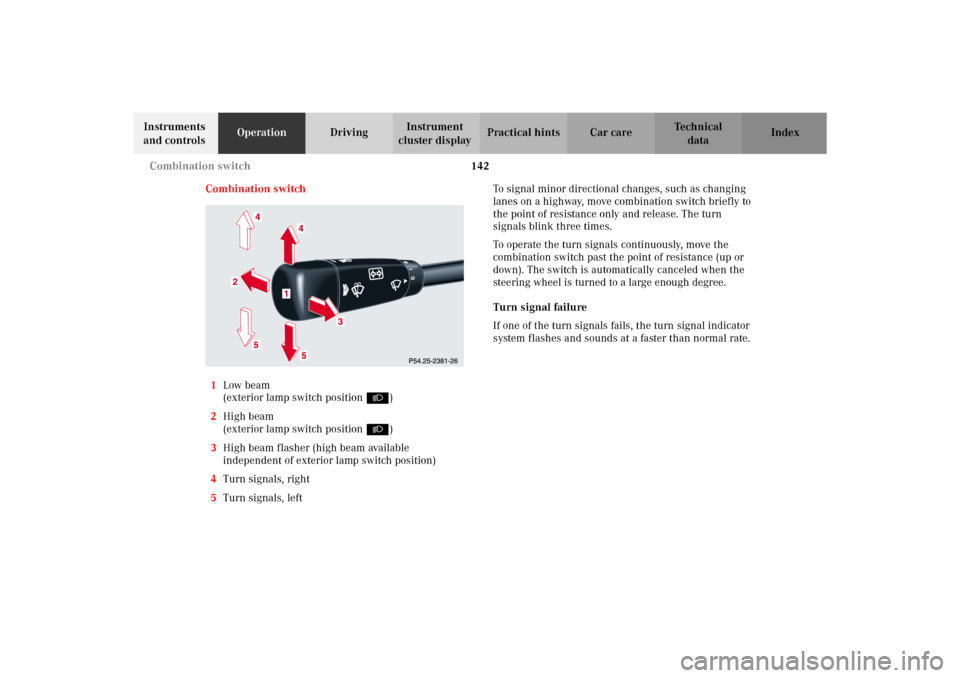
Combination switch
1Low beam
(exterior lamp switch position B)
2High beam
(exterior lamp switch position B)
3High beam flasher (high beam available
independent of exterior lamp switch position)
4Turn signals, right
5Turn signals, leftTo signal minor directional changes, such as changing
lanes on a highway, move combination switch briefly to
the point of resistance only and release. The turn
signals blink three times.
To operate the turn signals continuously, move the
combination switch past the point of resistance (up or
down). The switch is automatically canceled when the
steering wheel is turned to a large enough degree.
Turn signal failure
If one of the turn signals fails, the turn signal indicator
system flashes and sounds at a faster than normal rate.
S203.book Seite 142 Freitag, 19. Oktober 2001 1:25 13
Page 177 of 390
174 Audio system
Te ch n i c a l
data Instruments
and controlsOperationDrivingInstrument
cluster displayPractical hints Car care Index
CD mode
General notes on CD mode
Should excessive temperatures occur while in CD mode,
“ CD TEMP HIGH ” will ap pear on t he d is play and m uting
will take place. The unit will then switch back to radio
mode until the temperature has decreased to a safe
operating level.
Should temperatures occur while in CD mode which are
too low, “CD TEMP LOW” will be displayed, but the CD
will play. It will be sensitive to skipping if you are
driving over rough roads.
Handle CDs carefully to prevent interference during
playback.
Avoid fingerprints and dust on CDs. Do not write on the
CDs or apply any label or other material or devices to
the CDs.
Clean CDs from time to time with a commercially
available cleaning cloth. No solvents, anti-static sprays,
etc. should be used.
Replace the CD in its container after use. Protect CDs
from heat and direct sunlight.Only use CDs, which bear the
label shown and that conform to
the compact disc digital audio
standard (IEC 60908).
Use of CDs which do not meet this
stan dard may cause d am age to t he
CD changer. Do not play single-CDs (80 mm) with an
adapter.
1Optional equipmentWa r n i n g !
The CD changer
1 is a Class 1 laser product. There is
a danger of invisible laser radiation if the cover is
opened or damaged.
Do not remove the cover. The CD changer
1 does not
contain any parts which can be serviced by the
user. For safety reasons, have any service work
which may be necessary performed only by
qualified personnel.
S203.book Seite 174 Freitag, 19. Oktober 2001 1:25 13
Page 179 of 390
176 Audio system
Te ch n i c a l
data Instruments
and controlsOperationDrivingInstrument
cluster displayPractical hints Car care Index
Playing CDs
Press the button. When the changer is used for the
first time after removing/inserting a magazine, play
begins at CD 1 track 1. After that, the CD most recently
played will start at the point where it was last switched
of f. CDs stored in the magazine can be selected by using
the station preset buttons 1-6.
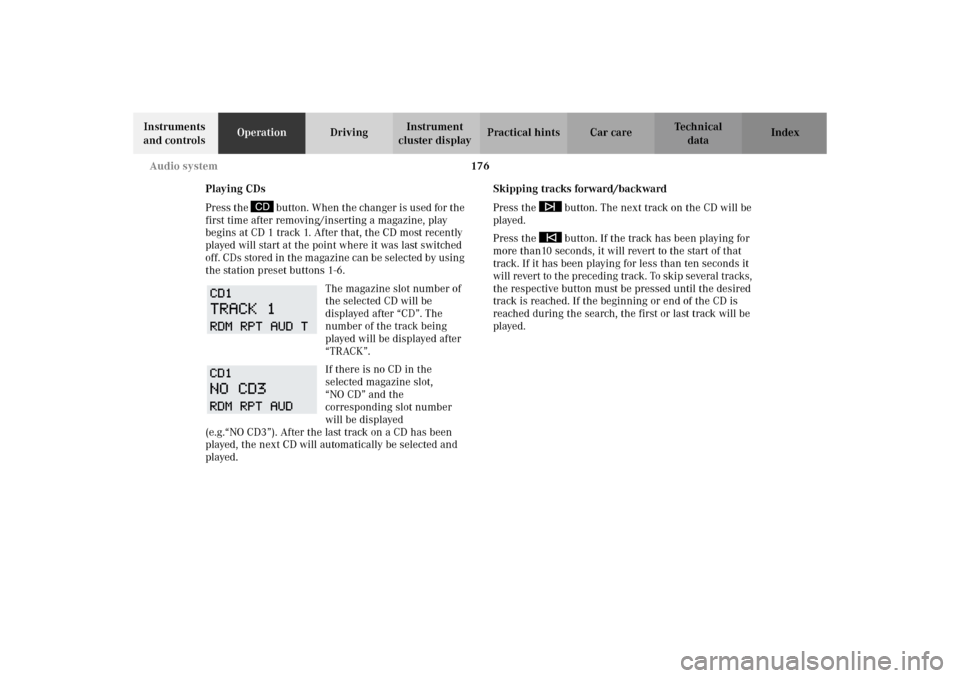
The magazine slot number of
the selected CD will be
displayed after “CD”. The
number of the track being
played will be displayed after
“TRACK”.
If there is no CD in the
selected magazine slot,
“NO CD” and the
corresponding slot number
will be displayed
(e.g.“NO CD3”). After the last track on a CD has been
played, the next CD will automatically be selected and
played.Skipping tracks forward/backward
Press the button. The next track on the CD will be
played.
Press the button. If the track has been playing for
more than10 seconds, it will revert to the start of that
track. If it has been playing for less than ten seconds it
will revert to the preceding track. To skip several tracks,
the respective button must be pressed until the desired
track is reached. If the beginning or end of the CD is
reached during the search, the first or last track will be
played.
S203.book Seite 176 Freitag, 19. Oktober 2001 1:25 13
Page 332 of 390
329 Tires, Wheels
Te ch n i c a l
data Instruments
and controlsOperation DrivingInstrument
cluster displayPractical hintsCar care Index Tire inflation pressure
A table (see fuel filler flap) lists the tire inflation
pressures specified for Mercedes-Benz recommended
tires as well as for the varying operating conditions.
Important!
Tire pressure changes by approximately 1.5 psi (0.1 bar)
per 18
°F (10
°C) of air temperature change. Keep this in
mind when checking tire pressure inside a garage –
especially in the winter.
Example:
If garage temperature = approximately +68
°F (+20
°C)
and ambient temperature = approximately +32
°F (0
°C)
then the adjusted air pressure = specified air pressure
+3 psi (+0.2 bar).
Tire pressures listed for light loads are minimum values
offering high driving comfort. Increased inflation
pressures for heavy loads produce favorable handling
characteristics with lighter loads and are perfectly
permissible. The ride of the vehicle, however, will
become somewhat harder.
Tire temperature and pressure increase with the vehicle
speed. Tire pressure should therefore only be checked
and corrected on cold tires. Correct tire pressure in warm tires only if pressure has dropped below the
pressure listed in the table and the respective operating
conditions are taken into consideration.
An underinflated tire due to a slow leak (e.g. due to a
nail in the tire) may cause damage such as tread
separation, bulging etc. Regular tire pressure checks
(including the spare tire) at intervals of no more than
14 days are therefore essential.
If a tire constantly loses air, it should be inspected for
damage.
The spare tire should be checked periodically for
condition and inflation. Spare tire will age and become
worn over time even if never used, and thus should be
inspected and replaced when necessary.
Wa r n i n g !
Do not overinflate tires. Overinflating tires can
result in sudden deflation (blowout) because they
are more likely to become punctured or damaged
by road debris, potholes etc. Follow recommended
inflation pressures.Do not overload the tires by exceeding the specified
vehicle capacity weight as indicated by the label on
the driver’s door latch post). Overloading the tires
can overheat them, possibly causing a blowout.
S203.book Seite 329 Freitag, 19. Oktober 2001 1:25 13