Page 180 of 399

177 Audio system
Te ch n i c a l
data Instruments
and controlsOperationDrivingInstrument
cluster displayPractical hints Car care Index Adjusting the volume
Turning the control knob clockwise will increase the
volume, counterclockwise will decrease the volume.
Note:
The volume setting can be selected separately for the
telephone, audio system and voice recognition system.
Audio fu nctions
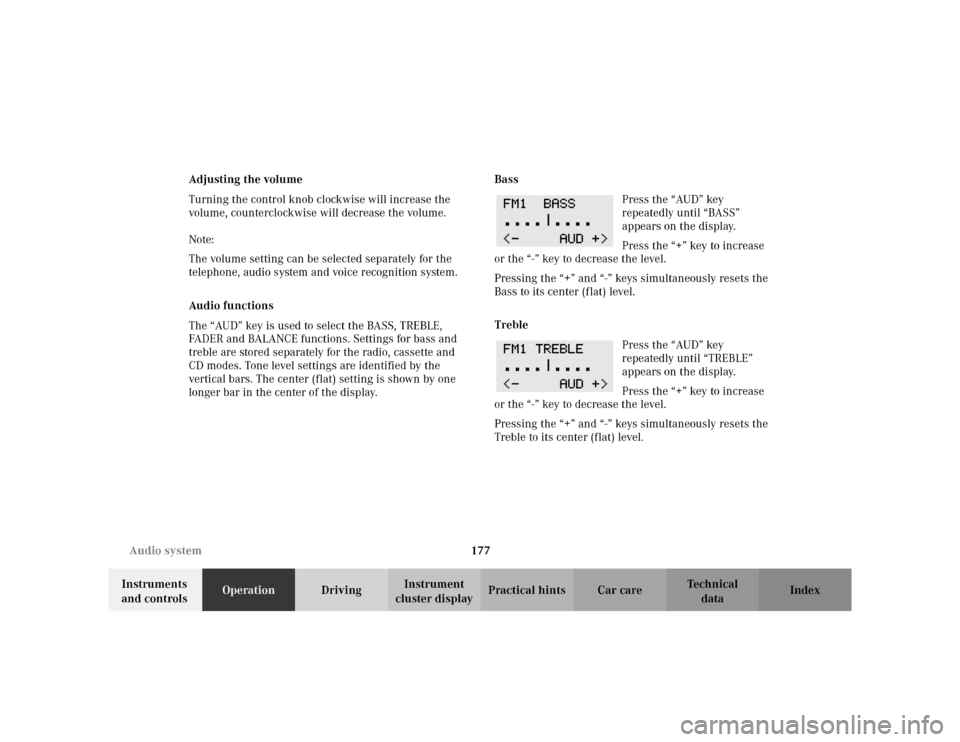
The “AUD” key is used to select the BASS, TREBLE,
FADER and BALANCE functions. Settings for bass and
treble are stored separately for the radio, cassette and
CD modes. Tone level settings are identified by the
vertical bars. The center (flat) setting is shown by one
longer bar in the center of the display.Bass
Press the “AUD” key
repeatedly until “BASS”
appears on the display.
Press the “+” key to increase
or the “-” key to decrease the level.
Pressing the “+” and “-” keys simultaneously resets the
Bass to its center (flat) level.
Treble
Press the “AUD” key
repeatedly until “TREBLE”
appears on the display.
Press the “+” key to increase
or the “-” key to decrease the level.
Pressing the “+” and “-” keys simultaneously resets the
Treble to its center (flat) level.
Page 182 of 399
179 Audio system
Te ch n i c a l
data Instruments
and controlsOperationDrivingInstrument
cluster displayPractical hints Car care Index Audio system tone level selection
To select the tone level
settings for radio, cassette,
and CD operation press the
key “AUD”. The tone level
settings menu is now
displayed. Press key “EXT”, and “SOUND” appears on
the display.
Press the key “DRV” to adjust the sound to the driver
and co-driver position.
The key “SP” is for “Speech”, optimizing the sound for
spoken language.
The key “AMB” offers “Ambience”, a three-dimensional
sound.
The key “OFF” switches off the tone level setting
selection.Radio mode
Selecting radio mode
Press button.
Selecting the band
Press the key located below
the desired band. The band
selected is shown in the top
line of the display.
Frequency ranges: FM 87.9 -107.9 MHz
AM 530 -1710 kHz
WB approx.162 MHz
Page 183 of 399
180 Audio system
Te ch n i c a l
data Instruments
and controlsOperationDrivingInstrument
cluster displayPractical hints Car care Index
Manual tuning
Press either the or
button. Step-by-step station
tuning in ascending or
descending order of
frequency will take place.
The first three tuning steps will take place without
muting. The radio will then be muted and high-speed
tuning will take place until the button is released.
The following tuning intervals will be shown on the
display:Seek tuning
Press either the or button. The radio will tune
to the next receivable station.
Scan tuning
Press the button. Each
strongly receivable station on
the band selected will be
tuned in for 8 seconds. The
first scan will tune only the
stations with a high signal strength. The second scan
wi ll tune eve ry r ece ivable station . By pr ess in g e it her t he
, , , buttons or the button the
scan mode can be cancelled. FM 200 kHz
AM 10 kHz
WB Channels 1-7
SC #
SC #
Page 186 of 399

183 Audio system
Te ch n i c a l
data Instruments
and controlsOperationDrivingInstrument
cluster displayPractical hints Car care Index The system will switch to
cassette mode. Track 1 will be
played and “SIDE 1”
displayed. Track 1 is the side
of the cassette which is facing
upwards. The cassette deck will automatically detect the
type of tape and switch the equalization automatically.
A cassette symbol on the display indicates that a tape is
in the mechanism. This symbol appears in all modes
except cassette mode.
The cassette will not be ejected when the system is
switched off or another mode is selected.
If a cassette is in the mechanism, cassette mode can be
selected by using the button.
If no cassette has been inserted, the display will show
“NO TAPE”.Cassette eject
Press the button. The display will fold down and
the cassette will be ejected. Remove the cassette, then
fold the display back up manually. The system will
switch back to radio mode automatically.
Notes:
The cassette will not be ejected when the system is
switched off. If a cassette is not ejected, continue to hold
the button for at least 5 seconds to eject the
cassette.
Important!
If the display is in the down position for more than
20 seconds, 2 successive beeps will be heard. This will
continue at 5 second intervals until the display is
returned to its normal position.
TAPE
EJ
EJ
Page 189 of 399

186 Audio system
Te ch n i c a l
data Instruments
and controlsOperationDrivingInstrument
cluster displayPractical hints Car care Index
CD mode
General notes on CD mode
Should excessive temperatures occur while in CD mode,
“CD TEMP HIGH” will appear on the display and muting
will take place. The unit will then switch back to radio
mode until the temperature has decreased to a safe
operating level.
Should temperatures occur while in CD mode which are
too low, “CD TEMP LOW” will be displayed, but the CD
will play. It will be sensitive to skipping if you are
driving over rough roads.
Handle CDs carefully to prevent interference during
playback.
Avoid fingerprints and dust on CDs. Do not write on the
CDs or apply any label or other material or devices to
the CDs.
Clean CDs from time to time with a commercially
available cleaning cloth. No solvents, anti-static sprays,
etc. should be used.
Replace the CD in its container after use. Protect CDs
from heat and direct sunlight.Only use CDs, which bear the
label shown and that conform to
the compact disc digital audio
standard (IEC 60908).
Use of CDs which do not meet this
standard may cause damage to the
CD changer. Do not play single-CDs (80 mm) with an
adapter.
1Optional equipmentWa r n i n g !
The CD changer
1 is a Class1 laser product. There is
a danger of invisible laser radiation if the cover is
opened or damaged.
Do not remove the cover. The CD changer
1 does not
contain any parts which can be serviced by the
user. For safety reasons, have any service work
which may be necessary performed only by
qualified personnel.
Page 190 of 399
187 Audio system
Te ch n i c a l
data Instruments
and controlsOperationDrivingInstrument
cluster displayPractical hints Car care Index CD changer
1 installed
1CD changer
2CD magazine
3CD tray
4CD
If a CD changer1 is installed, it can be operated from the
front control panel of the radio. A loaded magazine must
be installed for CD playing.
1 Optional equipment
Loading/emptying the CD magazine
Slide the changer door to the right until it latches open
and press the eject button . The magazine will be
ejected. Remove the magazine. Pull out the CD tray to its
stop and place the CDs in the recess of the tray, label
side up. Push the tray into the magazine in the direction
shown by the arrow. Insert the loaded magazine into the
changer.
Important!
Close the door after the magazine has been inserted.
3
2
2
1
4
Page 197 of 399

194 Audio system
Te ch n i c a l
data Instruments
and controlsOperationDrivingInstrument
cluster displayPractical hints Car care Index
Express-dialing
Press one of the number buttons - for more
than 1 second.
The phone number or the name stored at this memory
location will appear on the screen.
When the call is initiated, the call time will appear on
the display.
Note:
Please be aware that button might already be
reserved for an emergency call number, see page 196.
Call hold feature
While on the telephone, a second call can be accepted
by pressing the “SND” key. The first call will be put on
hold. Press “SND” to toggle between the calls.
An additional call can be accepted after ending one of
the previous calls.Accepting incoming call in telephone mode
With an incoming call, a
ringing tone can be heard and
the message “CALL” appears
on the display. Press the
“SND” key to answer the call.
Accepting incoming call in tape, CD or radio mode
If the telephone is activated in the background (symbol
“S” on the display), then a switch is made automatically
to the telephone mode when a call is received. The audio
source is muted, the ringing tone is heard and the
message “CALL” appears. Press the soft key “SND” to
answer the call. After the call has been terminated, the
previously selected audio source is resumed.
0OPR
Page 198 of 399
195 Audio system
Te ch n i c a l
data Instruments
and controlsOperationDrivingInstrument
cluster displayPractical hints Car care Index Terminating call
A current call can be terminated by pressing the “END”
button.
Muting a call
Pressing the “MUT” key will
silence the call. The caller can
no longer hear you. To return
to the conversation, press the
“MUT” key again.Component malfunctions
The radio, CD changer
1, and Mercedes-Benz integrated
cellular telephone
1 are part of a fiberoptic networked
system. Failure of one of the components can lead to
malfunctions of the other components. Please contact
your authorized Mercedes-Benz Center or call the
Mercedes-Benz Client Assistance Center (in the USA) at
1-800-FOR-MERCedes, or Customer Service (in Canada)
at 1-800-387-0100 for more information in the event of a
malfunction.
1Optional equipment