2002 LINCOLN CONTINENTAL ECU
[x] Cancel search: ECUPage 1 of 240

Introduction 4
Congratulations 4
Safety and environment protection 5
Symbol glossary 8
Instrument Cluster 10
Warning and control lights 10
Gauges 14
Entertainment Systems 16
AM/FM stereo cassette (CD changer compatible) 16
CD changer 28
Climate Controls 33
Electronic automatic temperature control 33
Lights 40
Headlamps 40
Bulb replacement 46
Driver Controls 53
Windshield wiper/washer control 53
Steering wheel adjustment 54
Power windows 57
Mirrors 58
Message center 76
Locks and Security 87
Keys 87
Locks 87
Anti-theft system 90
Table of Contents
1
Page 10 of 240

WARNING LIGHTS AND CHIMES
Warning lights and gauges can alert you to a vehicle condition that may
become serious enough to cause expensive repairs. A warning light may
illuminate when a problem exists with one of your vehicle's functions.
Many lights will illuminate when you start your vehicle to make sure the
bulb works.If any light remains on after starting the vehicle, have
the respective system inspected immediately.
Service engine soon
Illuminates briefly to ensure the
system is functional. If it comes on
after the engine is started, one of
the engine's emission control
systems may be malfunctioning. The
light may illuminate without a
driveability concern being noted. The vehicle will usually be drivable and
will not require towing.
Light turns on solid:
Temporary malfunctions may cause the light to illuminate. Examples are:
1. The vehicle has run out of fuel.
2. Poor fuel quality or water in the fuel.
3. The fuel cap may not have been properly installed and securely
tightened.
80
MPH km/h
ABS
P!BRAKE
+ –
RPMx1000NORM
T/C
OFF
CHEF
FILL ON RIGHT
SERVICE
ENGINE
SOON AIR
BAG TURN ON
HEAD
LAMPS0 123456
7
0 2060
80
100
120
0 204060100
120
140
160
180
200
40
000000.0
SERVICE
ENGINE
SOON
Instrument Cluster
10
Page 11 of 240

These temporary malfunctions can be corrected by filling the fuel tank
with high quality fuel of the recommended octane and/or properly
installing and securely tightening the fuel cap. After three driving cycles
without these or any other temporary malfunctions present, the light
should turn off. (A driving cycle consists of a cold engine startup
followed by mixed city/highway driving.) No additional vehicle service is
required.
If the light remains on, have your vehicle serviced at the first available
opportunity.
Light is blinking:
Engine misfire is occurring which could damage your catalytic converter.
You should drive in a moderate fashion (avoid heavy acceleration and
deceleration) and have your vehicle serviced at the first available
opportunity.
Under engine misfire conditions, excessive exhaust temperatures
could damage the catalytic converter, the fuel system, interior
floor coverings or other vehicle components, possibly causing a fire.
Brake system warning
Illuminates if the parking brake is
engaged. Also momentarily
illuminates at start up to ensure the
circuit is functional. If the brake
warning lamp does not illuminate at
these times, or illuminates after releasing the parking brake, seek service
immediately. Refer toBrakesin theDrivingchapter for more
information.
Anti-lock brake system (ABS)
Momentarily illuminates at start up
to ensure the circuit is functional. If
the light does not illuminate,
remains on or continues to flash, the
ABS needs to be serviced (refer to
Brakesin theDrivingchapter for more information). With the ABS light
on, the ABS is disabled and normal braking is still functional.
P!
BRAKE
ABS
Instrument Cluster
11
Page 50 of 240

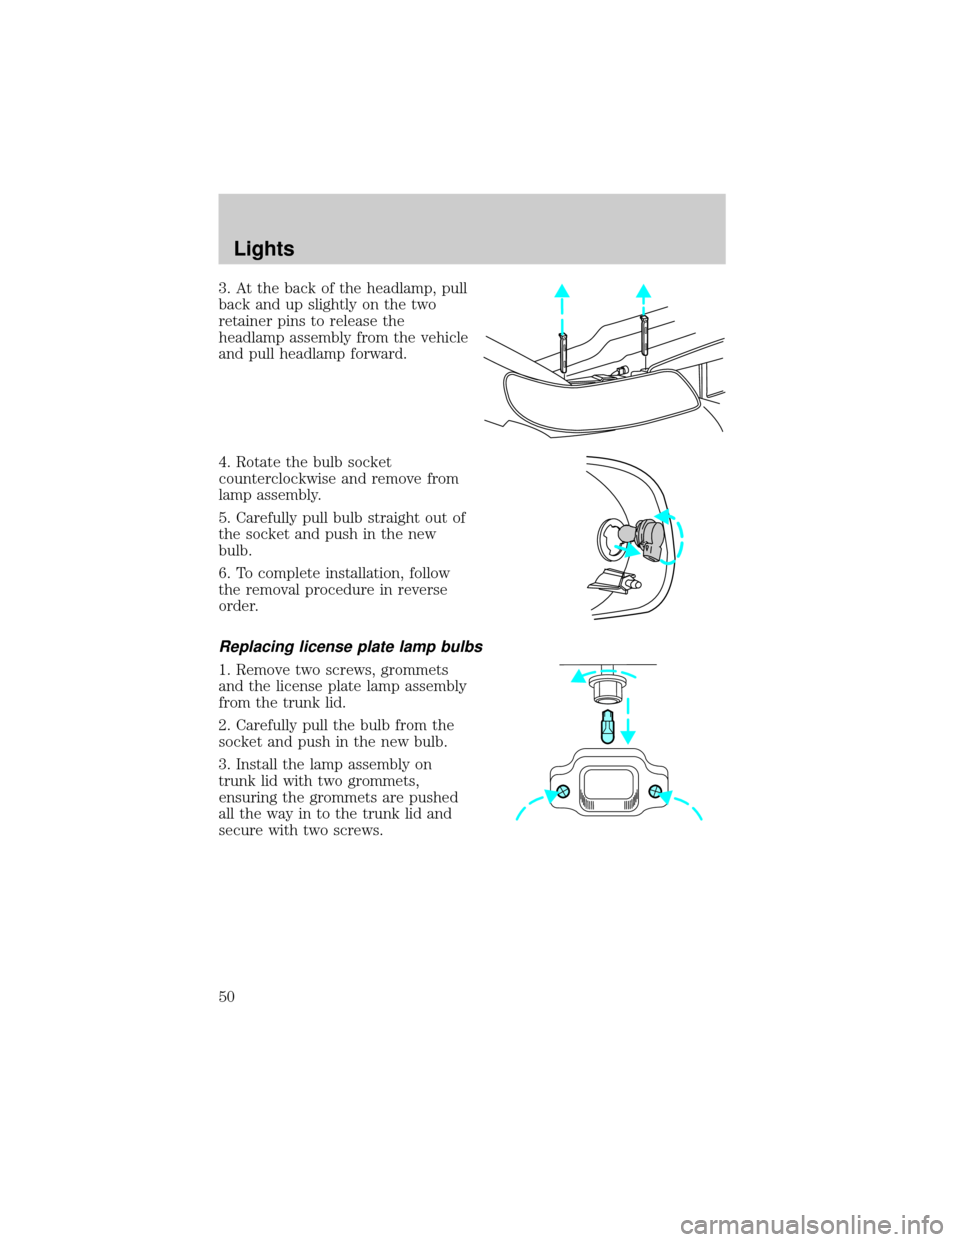
3. At the back of the headlamp, pull
back and up slightly on the two
retainer pins to release the
headlamp assembly from the vehicle
and pull headlamp forward.
4. Rotate the bulb socket
counterclockwise and remove from
lamp assembly.
5. Carefully pull bulb straight out of
the socket and push in the new
bulb.
6. To complete installation, follow
the removal procedure in reverse
order.
Replacing license plate lamp bulbs
1. Remove two screws, grommets
and the license plate lamp assembly
from the trunk lid.
2. Carefully pull the bulb from the
socket and push in the new bulb.
3. Install the lamp assembly on
trunk lid with two grommets,
ensuring the grommets are pushed
all the way in to the trunk lid and
secure with two screws.
Lights
50
Page 68 of 240

MOON ROOF (IF EQUIPPED)
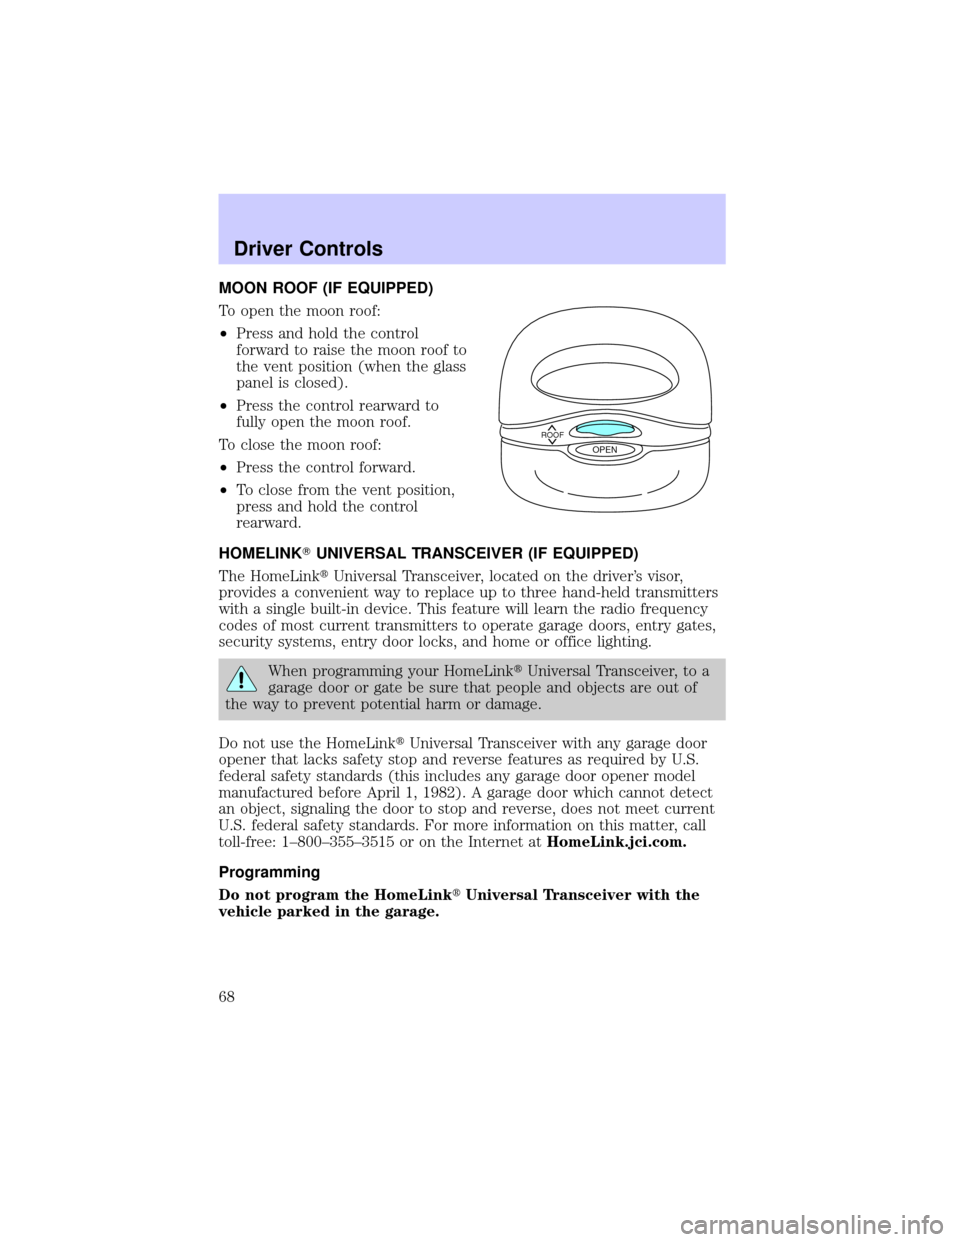
To open the moon roof:
²Press and hold the control
forward to raise the moon roof to
the vent position (when the glass
panel is closed).
²Press the control rearward to
fully open the moon roof.
To close the moon roof:
²Press the control forward.
²To close from the vent position,
press and hold the control
rearward.
HOMELINKTUNIVERSAL TRANSCEIVER (IF EQUIPPED)
The HomeLinktUniversal Transceiver, located on the driver's visor,
provides a convenient way to replace up to three hand-held transmitters
with a single built-in device. This feature will learn the radio frequency
codes of most current transmitters to operate garage doors, entry gates,
security systems, entry door locks, and home or office lighting.
When programming your HomeLinktUniversal Transceiver, to a
garage door or gate be sure that people and objects are out of
the way to prevent potential harm or damage.
Do not use the HomeLinktUniversal Transceiver with any garage door
opener that lacks safety stop and reverse features as required by U.S.
federal safety standards (this includes any garage door opener model
manufactured before April 1, 1982). A garage door which cannot detect
an object, signaling the door to stop and reverse, does not meet current
U.S. federal safety standards. For more information on this matter, call
toll-free: 1±800±355±3515 or on the Internet atHomeLink.jci.com.
Programming
Do not program the HomeLinktUniversal Transceiver with the
vehicle parked in the garage.
ROOFOPEN
Driver Controls
68
Page 77 of 240

The message center will display theMemory Profile Systemfeatures
(operator selectable features) which are selected from the MENU and
VEHICLE HANDLING controls.
The Memory Profile System allows for two primary drivers to save their
individual seat and outside rearview mirror position preferences. The
feature will then be set to the remote entry transmitter, that will
automatically recall the saved individualized preferences. Refer toBasic
Operation of Memory Profile Systemin this section.
Basic operation of Memory Profile System
In order for the system to be able to store or recall an individual's seat
and mirror position preferences, the Memory Profile must first recognize
who will be driving the vehicle. Drivers may identify themselves to the
system one of two ways:
²Pressing the unlock control on
the appropriate remote
transmitter (Memory position 1 or
Memory position 2 is identified by
the number on the back of the
remote transmitter) before
opening the driver's door.
²Entering either the Personality 1
or Personality 2 personalized
code into the keyless entry
keypad before opening the
driver's door.
For information on programming
personalized codes seeRemote and
Keyless entry systemsin theLocks and Securitysection.
Once the system has identified the driver (Memory position 1 or Memory
position 2), the seat and mirror will automatically begin to move to that
driver profile. Changes made to the seat and mirror positions will
automatically be saved to that profile.
If the driver should enter the vehicle without first identifying themselves,
all features will remain at their last setting or position and any settings
will be saved to the vehicle not individualized settings.
ON
MEMORY 1 RECALL
OFF
Driver Controls
77
Page 81 of 240

CHECK CHARGING SYSTEM.Displayed when the electrical system is
not maintaining proper voltage. If you are operating electrical accessories
when the engine is idling at a low speed, turn off as many of the
electrical loads as soon as possible. If the warning stays on or comes on
when the engine is operating at normal speeds, have the electrical
system checked as soon as possible.
LOW FUEL LEVEL.Displayed when you have approximately 80 km (50
miles) to empty.
LOW ENGINE COOLANT.Displayed when the engine coolant level is
low. Stop the vehicle as soon as safely possible, turn off the engine and
let it cool. Check the coolant and level. Refer toEngine coolantin the
Maintenance and specificationschapter.
LOW TIRE PRESSURE (if equipped).Displayed when the tire
pressure is low. Check the tire pressure. Refer toChecking the tire
pressurein theMaintenance and specificationschapter.
GEAR DISPLAY DATA ERR.Displayed when the data used to provide
the redundant gear selection display on the instrument cluster is missing
or invalid. In this case, the instrument cluster redundant gear selection
display is turned off. The driver should use the mechanical position
indication on the center console gear selector as temporary indication. If
this warning stays on, contact your dealer as soon as safely possible.
CHECK/TIGHTEN FUEL CAP.Displayed when the fuel filler cap is
not properly installed. Proper fuel filler cap installation is checked
automatically as the vehicle is driven but not until after some fuel is used
(fuel gauge drops below full). Once the fuel filler cap is properly
secured, the ªCHECK/TIGHTEN FUEL CAPº message will turn off after a
short period of driving. Refer toFuel Filler Capin theMaintenance
and specificationschapter.
BRAKE LAMP OUT.Displayed when the brake lamps are activated and
at least one is burned out. Check the lamps as soon as safely possible
and have the burned out lamp replaced. The center high-mount
brakelamp is not monitored.
CHECK TRACTION CONTROL.Displayed when the Traction
Controlysystem is not operating properly. If this message is displayed
on the message centerandthe amber T/C OFF light in the Traction
Controlyon/off switch isnotilluminated, the Traction Controlysystem
will be partially operable. If this warning stays on, contact your dealer for
service as soon as possible. For further information, refer toTraction
controlyin theDrivingchapter.
Driver Controls
81
Page 87 of 240

KEYS
The vehicle is equipped with a master key and valet key lock system.
The master key will access doors, trunk, glove box, ignition and remote
trunk release. The valet key (marked ªvaletº) will access doors and
ignition only. Before using this key, lock the trunk remote control to
disable theTrunk remote controlon the drivers door, then lock the
glove compartment with your master key.
Refer to theSecurilockyPassive Anti-Theft Systemsection in the
Locks and securitychapter for information on Securilockykeys.
POWER DOOR LOCKS
Press U to unlock all doors and L to
lock all doors.
Smart locks
With the key in the ignition, in any switch position, and either the
driver's or passenger's door open, the doors cannot be locked using the
power door lock switches.
CHILDPROOF DOOR LOCKS
When these locks are set, the rear
doors cannot be opened from the
inside. The rear doors can be
opened from the outside when the
doors are unlocked.
The childproof locks are located on
rear edge of each rear door and
must be set separately for each
door. Setting the lock for one door
will not automatically set the lock
for both doors.
Move lock control up to engage the childproof lock. Move control down
to disengage childproof locks.
U
L
Locks and Security
87