Page 127 of 240

When installing a child safety seat:
²Review and follow the information
presented in theAir Bag
Supplemental Restraint System
section in this chapter.
²Use the correct safety belt buckle
for that seating position.
²Insert the belt tongue into the
proper buckle until you hear a
snap and feel it latch. Make sure
the tongue is securely fastened in
the buckle.
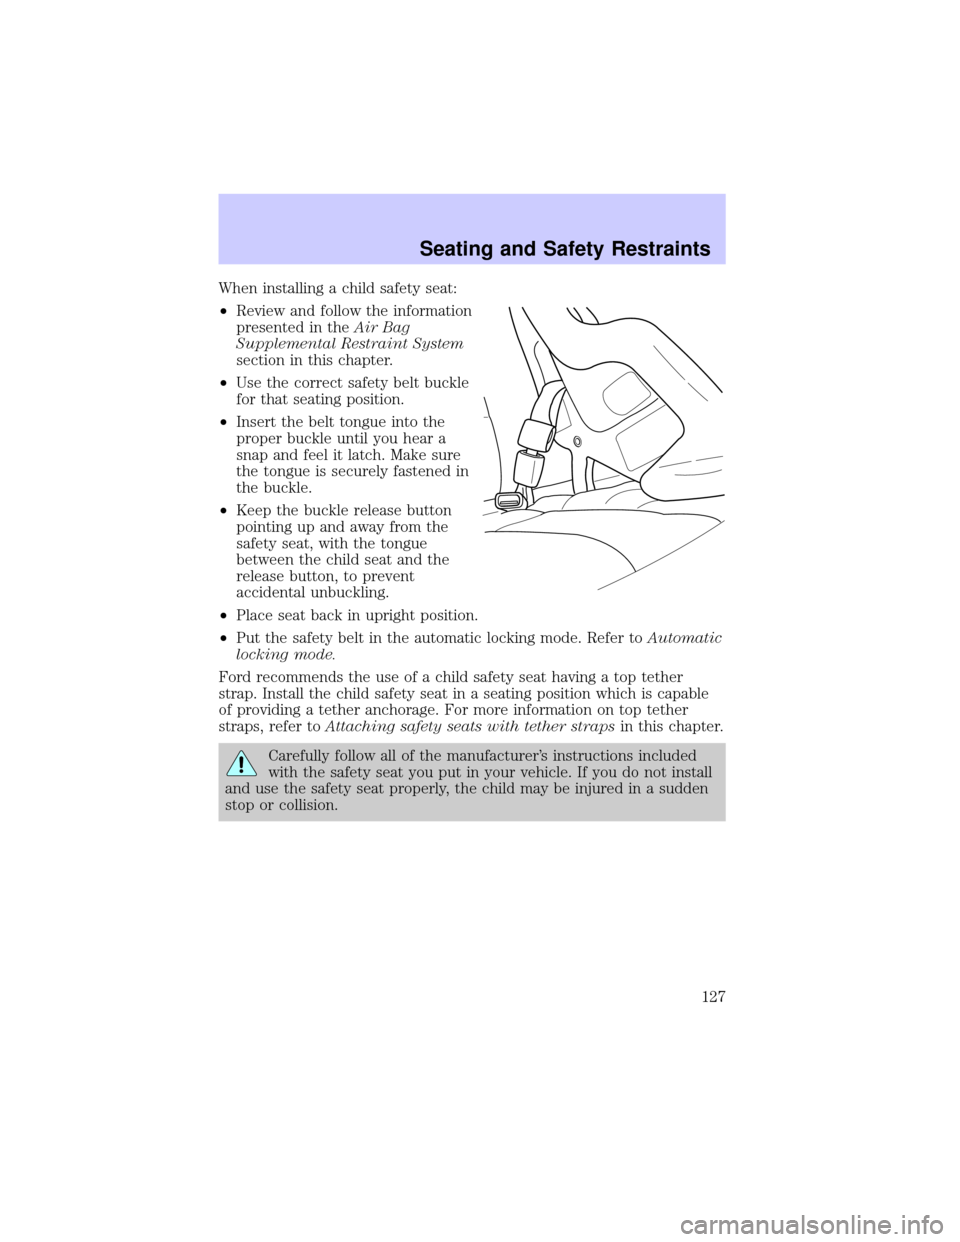
²Keep the buckle release button
pointing up and away from the
safety seat, with the tongue
between the child seat and the
release button, to prevent
accidental unbuckling.
²Place seat back in upright position.
²Put the safety belt in the automatic locking mode. Refer toAutomatic
locking mode.
Ford recommends the use of a child safety seat having a top tether
strap. Install the child safety seat in a seating position which is capable
of providing a tether anchorage. For more information on top tether
straps, refer toAttaching safety seats with tether strapsin this chapter.
Carefully follow all of the manufacturer's instructions included
with the safety seat you put in your vehicle. If you do not install
and use the safety seat properly, the child may be injured in a sudden
stop or collision.
Seating and Safety Restraints
127
Page 129 of 240
3. While holding the shoulder and
lap belt portions together, route the
tongue through the child seat
according to the child seat
manufacturer's instructions. Be sure
the belt webbing is not twisted.
4. Insert the belt tongue into the
proper buckle (the buckle closest to
the direction the tongue is coming
from) for that seating position until
you hear a snap and feel the latch
engage. Make sure the tongue is
latched securely by pulling on it.
5. To put the retractor in the
automatic locking mode, grasp the
shoulder portion of the belt and pull
downward until all of the belt is
extracted and a click is heard.
6. Allow the belt to retract. The belt will click as it retracts to indicate it
is in the automatic locking mode.
Seating and Safety Restraints
129
Page 130 of 240

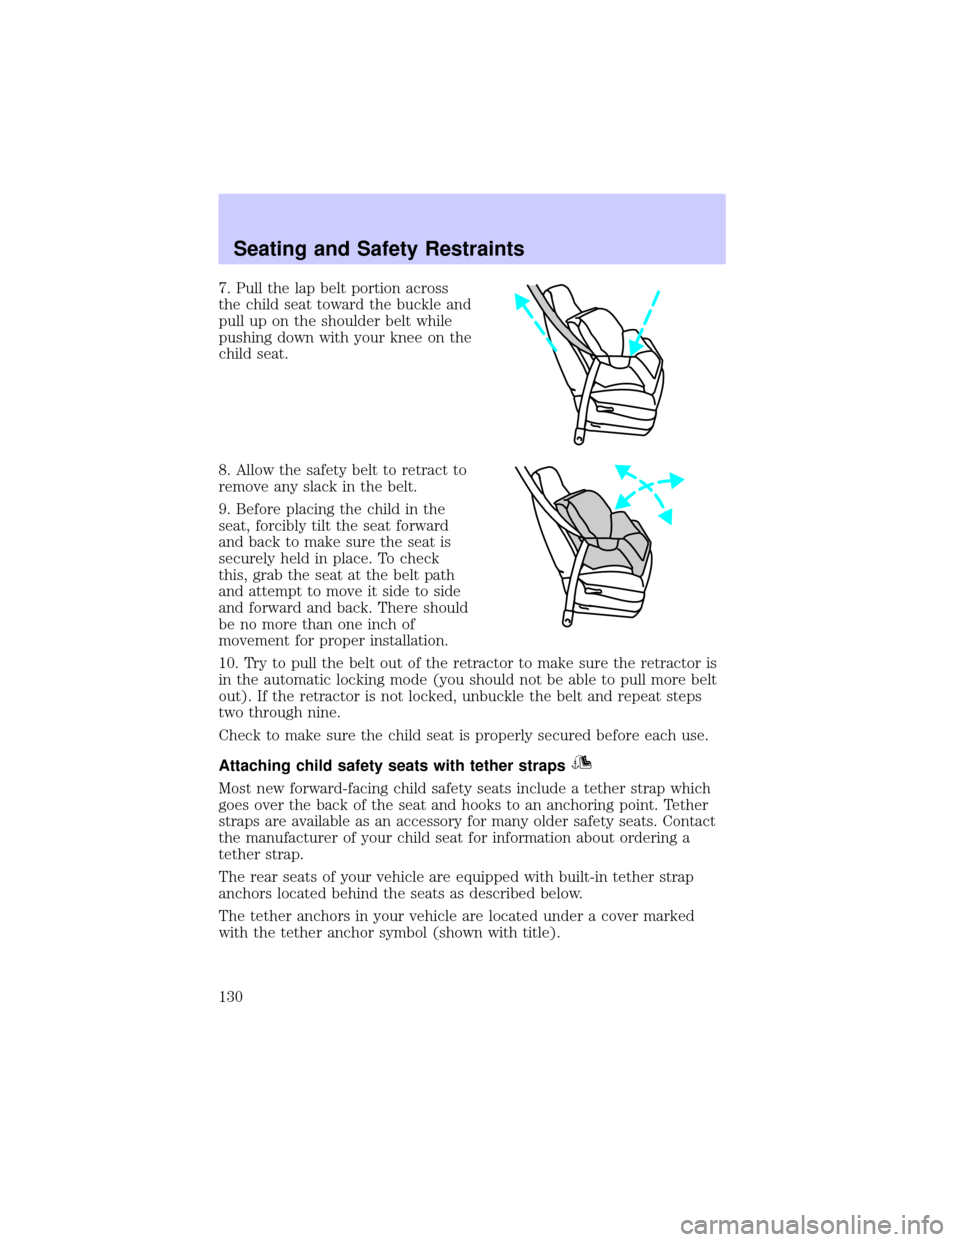
7. Pull the lap belt portion across
the child seat toward the buckle and
pull up on the shoulder belt while
pushing down with your knee on the
child seat.
8. Allow the safety belt to retract to
remove any slack in the belt.
9. Before placing the child in the
seat, forcibly tilt the seat forward
and back to make sure the seat is
securely held in place. To check
this, grab the seat at the belt path
and attempt to move it side to side
and forward and back. There should
be no more than one inch of
movement for proper installation.
10. Try to pull the belt out of the retractor to make sure the retractor is
in the automatic locking mode (you should not be able to pull more belt
out). If the retractor is not locked, unbuckle the belt and repeat steps
two through nine.
Check to make sure the child seat is properly secured before each use.
Attaching child safety seats with tether straps
Most new forward-facing child safety seats include a tether strap which
goes over the back of the seat and hooks to an anchoring point. Tether
straps are available as an accessory for many older safety seats. Contact
the manufacturer of your child seat for information about ordering a
tether strap.
The rear seats of your vehicle are equipped with built-in tether strap
anchors located behind the seats as described below.
The tether anchors in your vehicle are located under a cover marked
with the tether anchor symbol (shown with title).
Seating and Safety Restraints
130
Page 132 of 240
5. Clip the tether strap to the
anchor as shown.
If the tether strap is clipped
incorrectly, the child safety
seat may not be retained properly
in the event of a collision.
6. Refer to theInstalling child
safety seats in combination lap and shoulder belt seating positions
section of this chapter for further instructions to secure the child safety
seat.
7. Tighten the child safety seat tether strap according to the
manufacturer's instructions.
If the safety seat is not anchored properly, the risk of a child
being injured in a collision greatly increases.
Seating and Safety Restraints
132
Page 133 of 240

STARTING
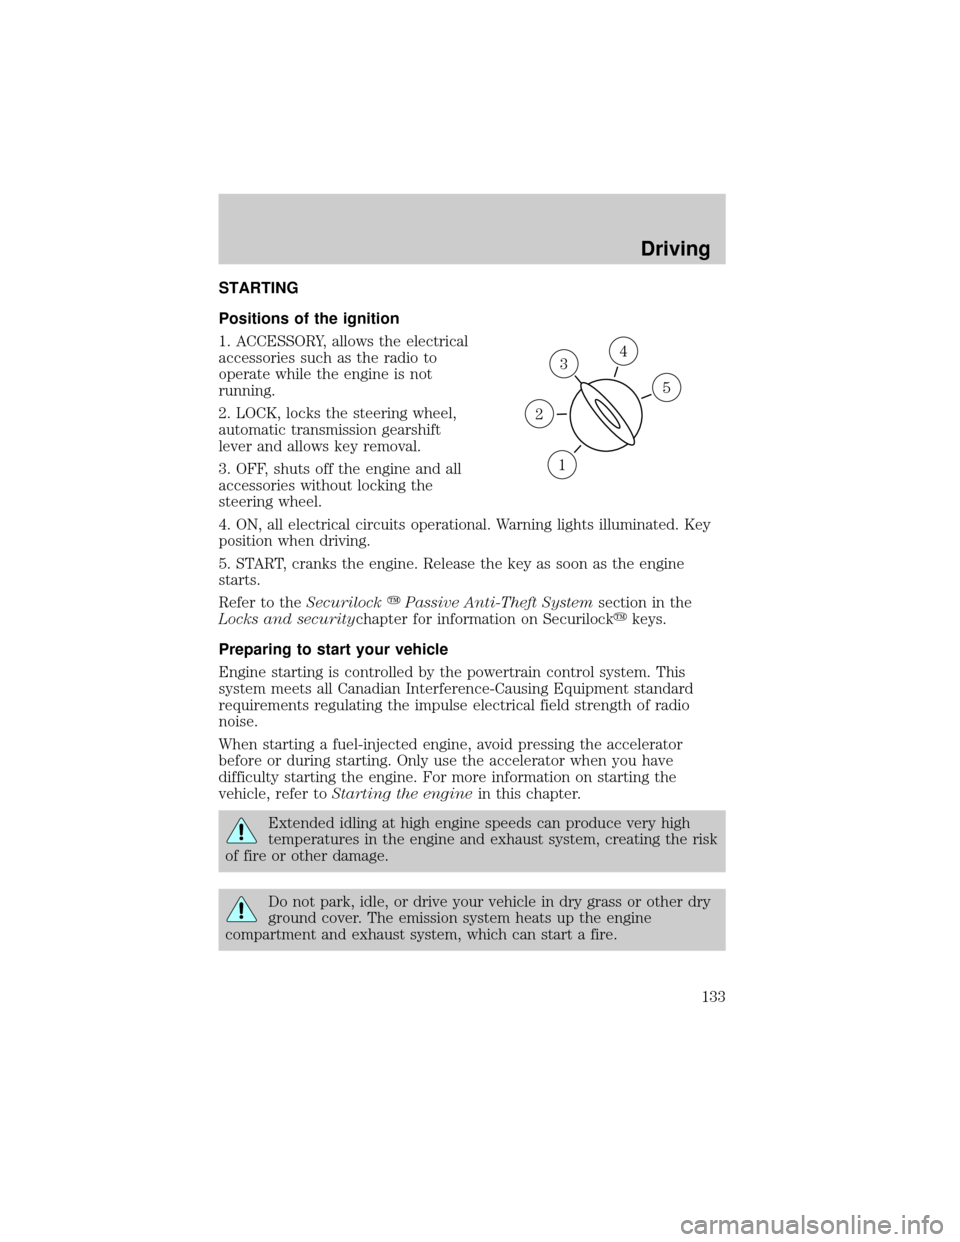
Positions of the ignition
1. ACCESSORY, allows the electrical
accessories such as the radio to
operate while the engine is not
running.
2. LOCK, locks the steering wheel,
automatic transmission gearshift
lever and allows key removal.
3. OFF, shuts off the engine and all
accessories without locking the
steering wheel.
4. ON, all electrical circuits operational. Warning lights illuminated. Key
position when driving.
5. START, cranks the engine. Release the key as soon as the engine
starts.
Refer to theSecurilockyPassive Anti-Theft Systemsection in the
Locks and securitychapter for information on Securilockykeys.
Preparing to start your vehicle
Engine starting is controlled by the powertrain control system. This
system meets all Canadian Interference-Causing Equipment standard
requirements regulating the impulse electrical field strength of radio
noise.
When starting a fuel-injected engine, avoid pressing the accelerator
before or during starting. Only use the accelerator when you have
difficulty starting the engine. For more information on starting the
vehicle, refer toStarting the enginein this chapter.
Extended idling at high engine speeds can produce very high
temperatures in the engine and exhaust system, creating the risk
of fire or other damage.
Do not park, idle, or drive your vehicle in dry grass or other dry
ground cover. The emission system heats up the engine
compartment and exhaust system, which can start a fire.
3
1
2
5
4
Driving
133
Page 145 of 240
Understanding gearshift positions
P (Park)
Always come to a complete stop
before shifting into P (Park). Make
sure the gearshift lever is securely
latched in P (Park). This locks the
transaxle and prevent the front
wheels from rotating.
Always set the parking
brake fully and make sure
the gearshift is securely latched in
P (Park).
Never leave your vehicle
unattended while it is
running.
R (Reverse)
With the gearshift lever in R
(Reverse), the vehicle will move
backward. You should always come
to a complete stop before shifting
into and out of R (Reverse).
Driving
145
Page 148 of 240

When parking, do not use the gearshift in place of the parking
brake. Always set the parking brake fully and make sure that the
gearshift is securely latched in Park (P). Turn off the ignition
whenever you leave your vehicle. Never leave your vehicle unattended
while it is running. If you do not take these precautions, your vehicle
may move unexpectedly and injure someone.
DRIVING THROUGH WATER
Do not drive quickly through standing water, especially if the depth is
unknown. Traction or brake capability may be limited and if the ignition
system gets wet, your engine may stall. Water may also enter your
engine's air intake and severely damage your engine.
If driving through deep or standing water is unavoidable, proceed very
slowly. Never drive through water that is higher than the bottom of the
hubs (for trucks) or the bottom of the wheel rims (for cars).
Once through the water, always try the brakes. Wet brakes do not stop
the vehicle as effectively as dry brakes. Drying can be improved by
moving your vehicle slowly while applying light pressure on the brake
pedal.
Driving through deep water where the transmission vent tube is
submerged may allow water into the transmission and cause
internal transmission damage.
VEHICLE LOADING
Before loading a vehicle, familiarize yourself with the following terms:
²Base Curb Weight:Weight of the vehicle including any standard
equipment, fluids, lubricants, etc. It does not include occupants or
aftermarket equipment.
²Payload:Combined maximum allowable weight of cargo, occupants
and optional equipment. The payload equals the gross vehicle weight
rating minus base curb weight.
²GVW (Gross Vehicle Weight):Base curb weight plus payload
weight. The GVW is not a limit or a specification.
²GVWR (Gross Vehicle Weight Rating):Maximum permissable total
weight of the base vehicle, occupants, optional equipment and cargo.
The GVWR is specific to each vehicle and is listed on the Safety
Certification Label on the driver's door pillar.
Driving
148
Page 174 of 240

GETTING THE SERVICES YOU NEED
At home
Ford Motor Company and Ford of Canada have authorized dealerships to
service your vehicle. It is preferred that you return to the Ford dealer
where your vehicle was purchased when warranty repairs are needed.
However, you may also take your vehicle to another Ford Motor
Company or Ford of Canada dealership authorized for warranty repairs.
Certain warranty repairs require special training though, so not all
dealers are authorized to perform all warranty repairs. That means that
depending on the warranty repair needed, the vehicle may need to be
taken to another dealer. If a particular dealership can not assist you,
then contact the Customer Relationship Center.
If you have questions or concerns, or are unsatisfied with the service you
are receiving, follow these steps:
1. Contact your Sales Representative or Service Advisor at your
selling/servicing dealership.
2. If your inquiry or concern remains unresolved, contact the Sales
Manager or Service Manager at the dealership.
3. If the inquiry or concern cannot be resolved at the dealership level,
please contact the Ford Customer Relationship Center.
Away from home
If you own a Ford or Mercury vehicle and are away from home when
your vehicle needs service, or if you need more help than the dealership
could provide, after following the steps described above, contact the
Ford Customer Relationship Center to find an authorized dealership to
help you. In the United States:
Ford Motor Company
Customer Relationship Center
16800 Executive Plaza Drive
P.O. Box 6248
Dearborn, Michigan 48121
1-800-392-3673 (FORD)
(TDD for the hearing impaired: 1-800-232-5952)
Customer Assistance
174