Page 62 of 248
One-touch moon roof
You can move the glass panel of the moon roof back to open or tilt up to
ventilate the vehicle.
To open the moon roof:
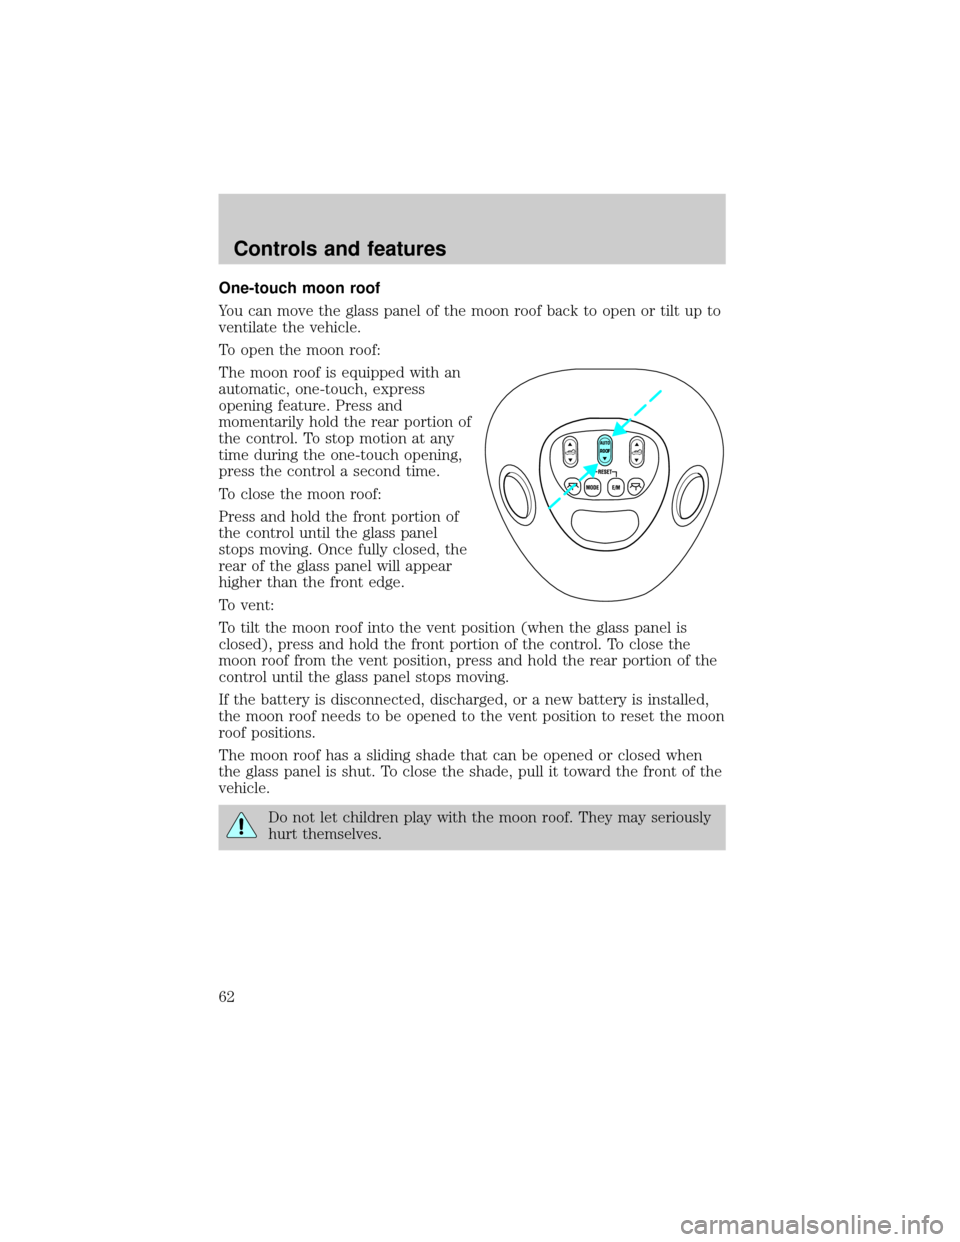
The moon roof is equipped with an
automatic, one-touch, express
opening feature. Press and
momentarily hold the rear portion of
the control. To stop motion at any
time during the one-touch opening,
press the control a second time.
To close the moon roof:
Press and hold the front portion of
the control until the glass panel
stops moving. Once fully closed, the
rear of the glass panel will appear
higher than the front edge.
To vent:
To tilt the moon roof into the vent position (when the glass panel is
closed), press and hold the front portion of the control. To close the
moon roof from the vent position, press and hold the rear portion of the
control until the glass panel stops moving.
If the battery is disconnected, discharged, or a new battery is installed,
the moon roof needs to be opened to the vent position to reset the moon
roof positions.
The moon roof has a sliding shade that can be opened or closed when
the glass panel is shut. To close the shade, pull it toward the front of the
vehicle.
Do not let children play with the moon roof. They may seriously
hurt themselves.
ROOF
Controls and features
62
Page 79 of 248
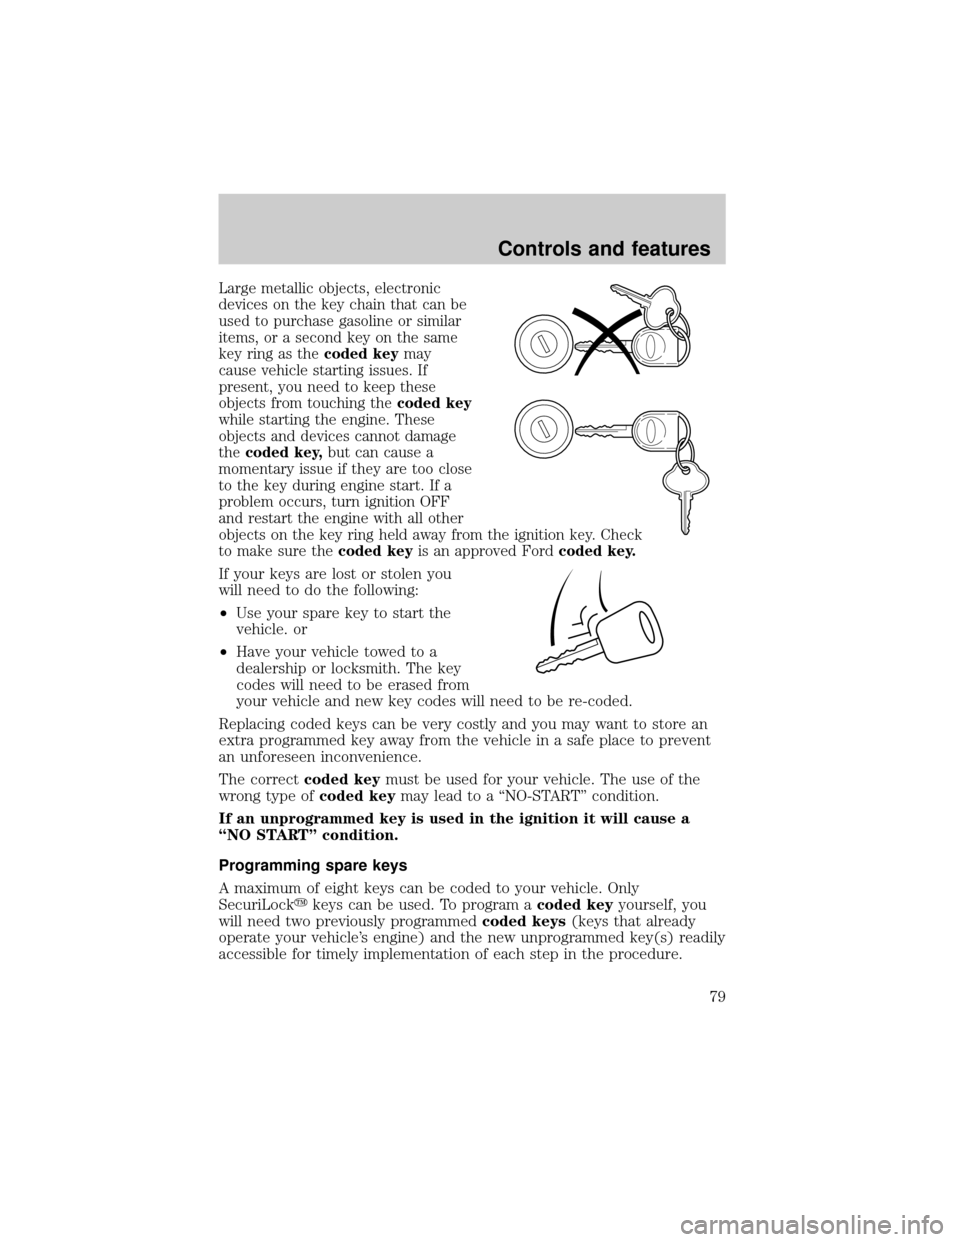
Large metallic objects, electronic
devices on the key chain that can be
used to purchase gasoline or similar
items, or a second key on the same
key ring as thecoded keymay
cause vehicle starting issues. If
present, you need to keep these
objects from touching thecoded key
while starting the engine. These
objects and devices cannot damage
thecoded key,but can cause a
momentary issue if they are too close
to the key during engine start. If a
problem occurs, turn ignition OFF
and restart the engine with all other
objects on the key ring held away from the ignition key. Check
to make sure thecoded keyis an approved Fordcoded key.
If your keys are lost or stolen you
will need to do the following:
²Use your spare key to start the
vehicle. or
²Have your vehicle towed to a
dealership or locksmith. The key
codes will need to be erased from
your vehicle and new key codes will need to be re-coded.
Replacing coded keys can be very costly and you may want to store an
extra programmed key away from the vehicle in a safe place to prevent
an unforeseen inconvenience.
The correctcoded keymust be used for your vehicle. The use of the
wrong type ofcoded keymay lead to a ªNO-STARTº condition.
If an unprogrammed key is used in the ignition it will cause a
ªNO STARTº condition.
Programming spare keys
A maximum of eight keys can be coded to your vehicle. Only
SecuriLockykeys can be used. To program acoded keyyourself, you
will need two previously programmedcoded keys(keys that already
operate your vehicle's engine) and the new unprogrammed key(s) readily
accessible for timely implementation of each step in the procedure.
Controls and features
79
Page 83 of 248
Sounding a panic alarm
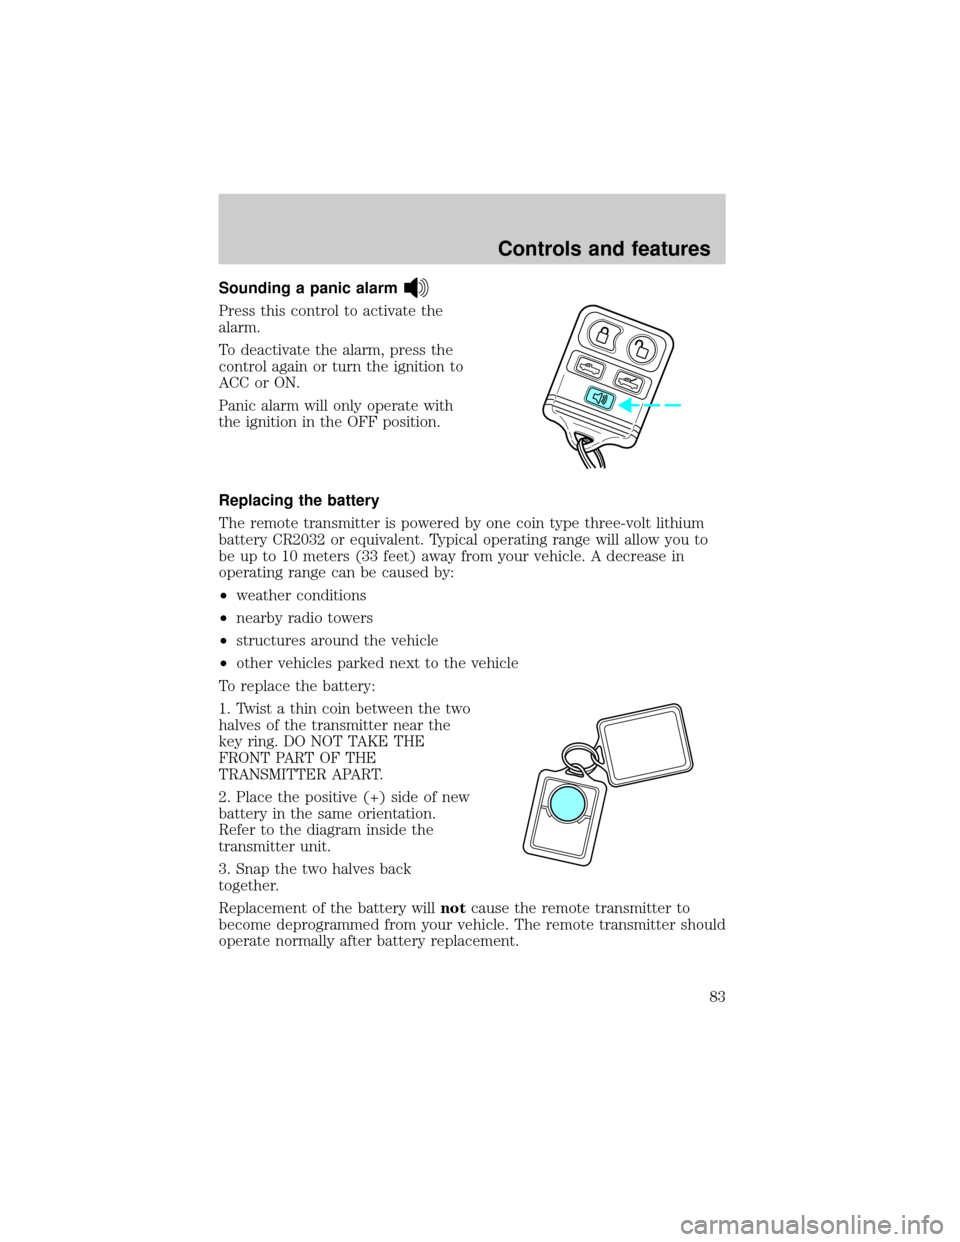
Press this control to activate the
alarm.
To deactivate the alarm, press the
control again or turn the ignition to
ACC or ON.
Panic alarm will only operate with
the ignition in the OFF position.
Replacing the battery
The remote transmitter is powered by one coin type three-volt lithium
battery CR2032 or equivalent. Typical operating range will allow you to
be up to 10 meters (33 feet) away from your vehicle. A decrease in
operating range can be caused by:
²weather conditions
²nearby radio towers
²structures around the vehicle
²other vehicles parked next to the vehicle
To replace the battery:
1. Twist a thin coin between the two
halves of the transmitter near the
key ring. DO NOT TAKE THE
FRONT PART OF THE
TRANSMITTER APART.
2. Place the positive (+) side of new
battery in the same orientation.
Refer to the diagram inside the
transmitter unit.
3. Snap the two halves back
together.
Replacement of the battery willnotcause the remote transmitter to
become deprogrammed from your vehicle. The remote transmitter should
operate normally after battery replacement.
Controls and features
83
Page 97 of 248
2. Pull control to release seat.
3. Pull seatback toward front seat
and down into load floor position.
Seating and safety restraints
97
Page 113 of 248

Do not put anything on or over the air bag module. Placing
objects on or over the air bag inflation area may cause those
objects to be propelled by the air bag into your face and torso causing
serious injury.
Do not attempt to service, repair, or modify the Air Bag
Supplemental Restraint System or its fuses. See your Ford or
Lincoln Mercury dealer.
Modifications to the front end of the vehicle, including frame,
bumper, front end body structure and tow hooks may affect the
performance of the air bag sensors increasing the risk of injury. Do not
modify the front end of the vehicle.
Additional equipment such as snowplow equipment may effect
the performance of the air bag sensors increasing the risk of
injury. Please refer to the Body Builders Layout Book for instructions
about the appropriate installation of additional equipment.
Removing the blocker beam without installing snow plow
attachment hardware may effect air bag deployment in a crash.
Do not operate the truck unless either the blocker beam or snow plow
attachment hardware is installed on the vehicle.
Seating and safety restraints
113
Page 121 of 248
5. To put the retractor in the
automatic locking mode, grasp the
shoulder portion of the belt and pull
downward until all of the belt is
extracted and a click is heard.
6. Allow the belt to retract. The belt will click as it retracts to indicate it
is in the automatic locking mode.
7. Pull the lap belt portion across
the child seat toward the buckle and
pull up on the shoulder belt while
pushing down with your knee on the
child seat.
8. Allow the safety belt to retract to
remove any slack in the belt.
9. Before placing the child in the
seat, forcibly tilt the seat forward
and back to make sure the seat is
securely held in place.
10. Try to pull the belt out of the retractor to make sure the retractor is
in the automatic locking mode (you should not be able to pull more belt
out). If the retractor is not locked, unbuckle the belt and repeat steps
two through nine.
Check to make sure the child seat is properly secured before each use.
Seating and safety restraints
121
Page 133 of 248
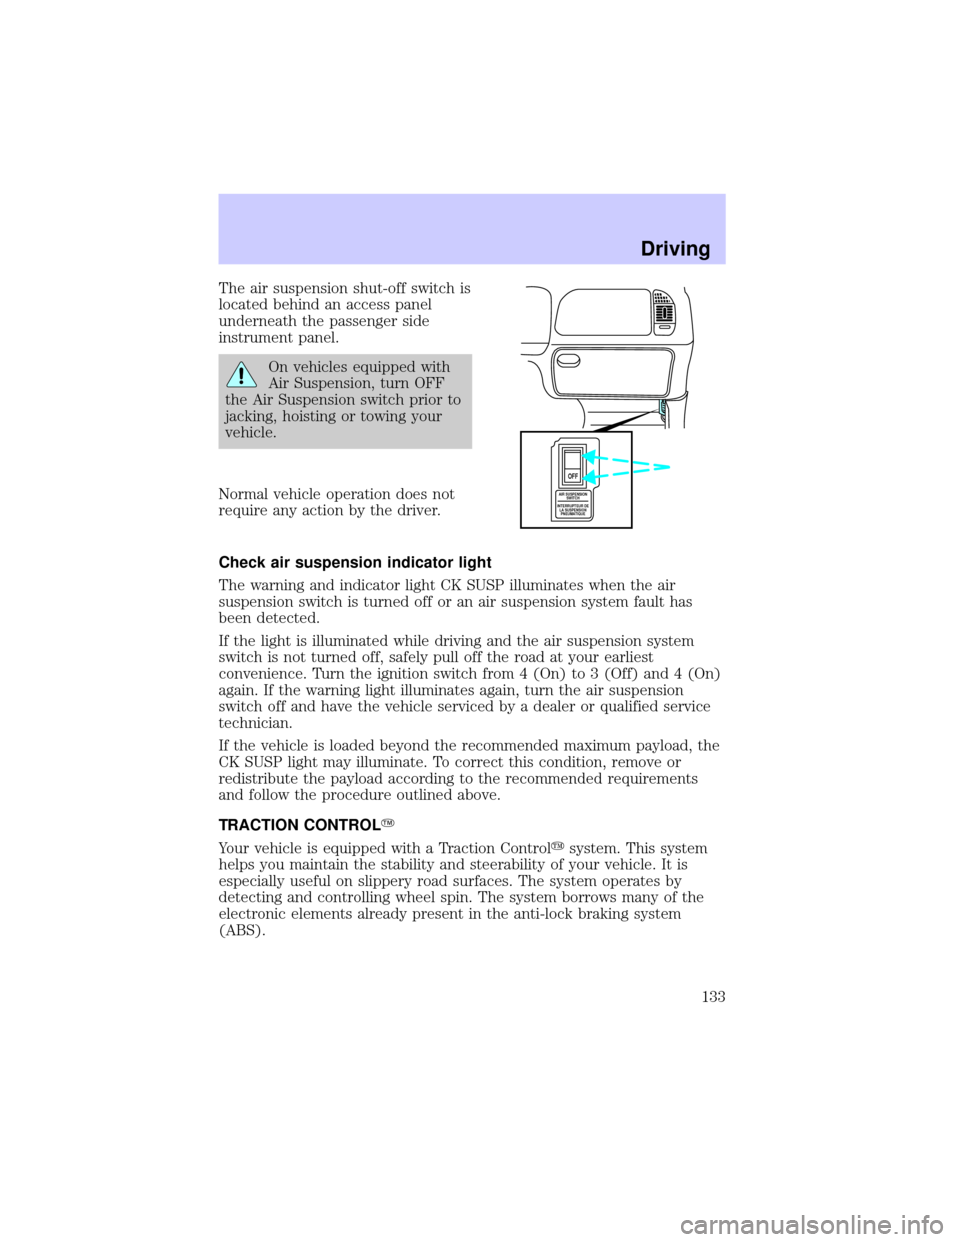
The air suspension shut-off switch is
located behind an access panel
underneath the passenger side
instrument panel.
On vehicles equipped with
Air Suspension, turn OFF
the Air Suspension switch prior to
jacking, hoisting or towing your
vehicle.
Normal vehicle operation does not
require any action by the driver.
Check air suspension indicator light
The warning and indicator light CK SUSP illuminates when the air
suspension switch is turned off or an air suspension system fault has
been detected.
If the light is illuminated while driving and the air suspension system
switch is not turned off, safely pull off the road at your earliest
convenience. Turn the ignition switch from 4 (On) to 3 (Off) and 4 (On)
again. If the warning light illuminates again, turn the air suspension
switch off and have the vehicle serviced by a dealer or qualified service
technician.
If the vehicle is loaded beyond the recommended maximum payload, the
CK SUSP light may illuminate. To correct this condition, remove or
redistribute the payload according to the recommended requirements
and follow the procedure outlined above.
TRACTION CONTROLY
Your vehicle is equipped with a Traction Controlysystem. This system
helps you maintain the stability and steerability of your vehicle. It is
especially useful on slippery road surfaces. The system operates by
detecting and controlling wheel spin. The system borrows many of the
electronic elements already present in the anti-lock braking system
(ABS).
AIR SUSPENSION
SWITCH
INTERRUPTEUR DE
LA SUSPENSION
PNEUMATIQUE
OFF
Driving
133
Page 138 of 248
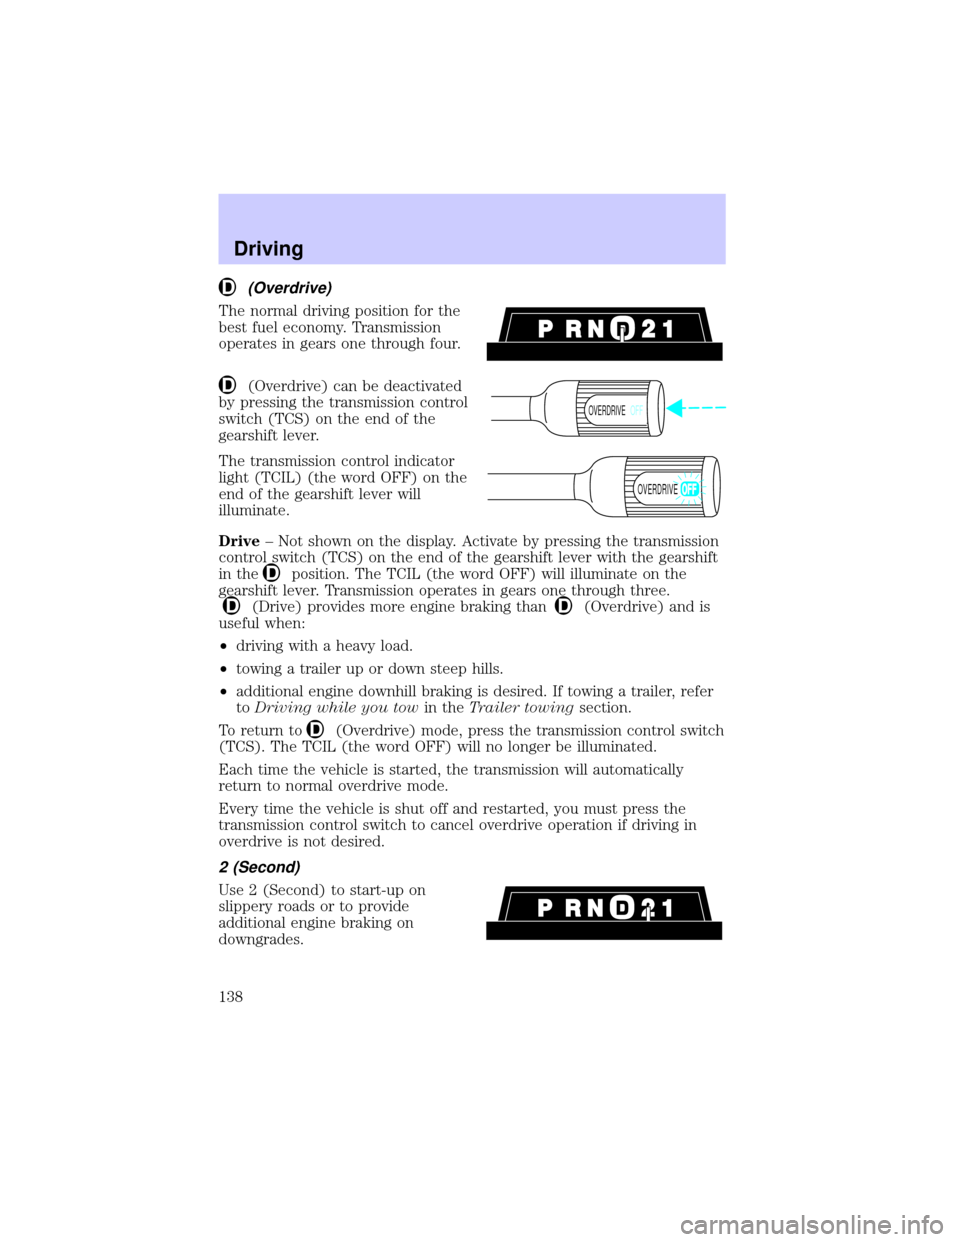
(Overdrive)
The normal driving position for the
best fuel economy. Transmission
operates in gears one through four.
(Overdrive) can be deactivated
by pressing the transmission control
switch (TCS) on the end of the
gearshift lever.
The transmission control indicator
light (TCIL) (the word OFF) on the
end of the gearshift lever will
illuminate.
Drive± Not shown on the display. Activate by pressing the transmission
control switch (TCS) on the end of the gearshift lever with the gearshift
in the
position. The TCIL (the word OFF) will illuminate on the
gearshift lever. Transmission operates in gears one through three.
(Drive) provides more engine braking than(Overdrive) and is
useful when:
²driving with a heavy load.
²towing a trailer up or down steep hills.
²additional engine downhill braking is desired. If towing a trailer, refer
toDriving while you towin theTrailer towingsection.
To return to
(Overdrive) mode, press the transmission control switch
(TCS). The TCIL (the word OFF) will no longer be illuminated.
Each time the vehicle is started, the transmission will automatically
return to normal overdrive mode.
Every time the vehicle is shut off and restarted, you must press the
transmission control switch to cancel overdrive operation if driving in
overdrive is not desired.
2 (Second)
Use 2 (Second) to start-up on
slippery roads or to provide
additional engine braking on
downgrades.
OVERDRIVEOFF
OVERDRIVE
Driving
138