2002 Hyundai Grandeur engine
[x] Cancel search: enginePage 197 of 230
6- 20 DO-IT-YOURSELF MAINTENANCE
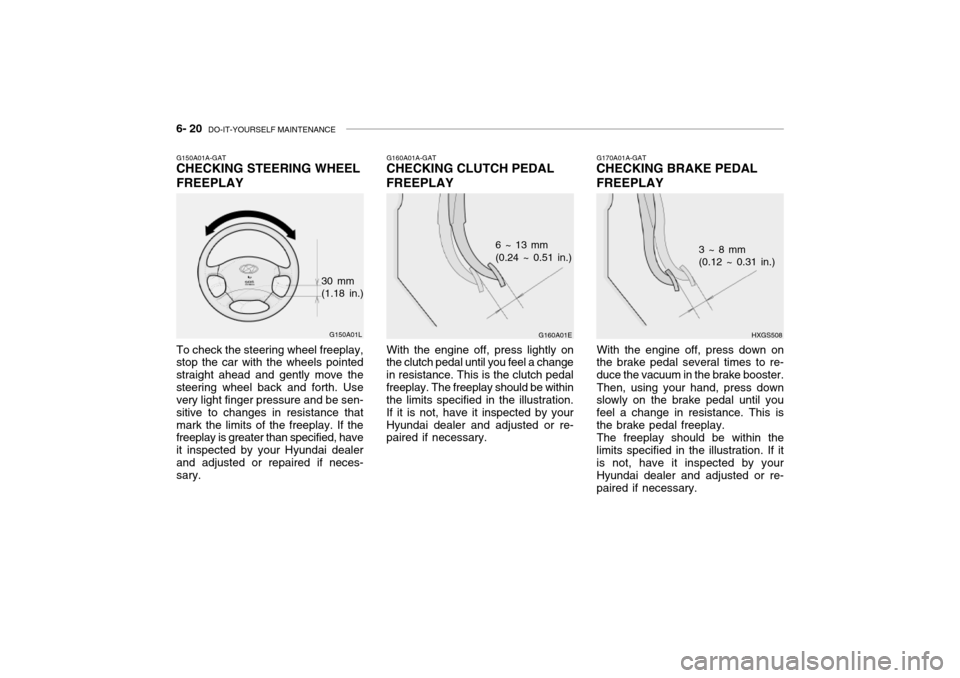
G170A01A-GAT
CHECKING BRAKE PEDAL FREEPLAY
HXGS508
3 ~ 8 mm (0.12 ~ 0.31 in.)
With the engine off, press down on
the brake pedal several times to re- duce the vacuum in the brake booster.
Then, using your hand, press down
slowly on the brake pedal until youfeel a change in resistance. This isthe brake pedal freeplay.
The freeplay should be within the
limits specified in the illustration. If it is not, have it inspected by your Hyundai dealer and adjusted or re-paired if necessary.G160A01A-GAT
CHECKING CLUTCH PEDAL FREEPLAY
G160A01E
6 ~ 13 mm (0.24 ~ 0.51 in.)
With the engine off, press lightly on
the clutch pedal until you feel a change in resistance. This is the clutch pedalfreeplay. The freeplay should be within the limits specified in the illustration. If it is not, have it inspected by yourHyundai dealer and adjusted or re- paired if necessary.G150A01A-GAT CHECKING STEERING WHEEL FREEPLAY
G150A01L
To check the steering wheel freeplay, stop the car with the wheels pointed straight ahead and gently move thesteering wheel back and forth. Use very light finger pressure and be sen- sitive to changes in resistance thatmark the limits of the freeplay. If the freeplay is greater than specified, have it inspected by your Hyundai dealerand adjusted or repaired if neces- sary. 30 mm(1.18 in.)
Page 198 of 230
DO-IT-YOURSELF MAINTENANCE 6- 21
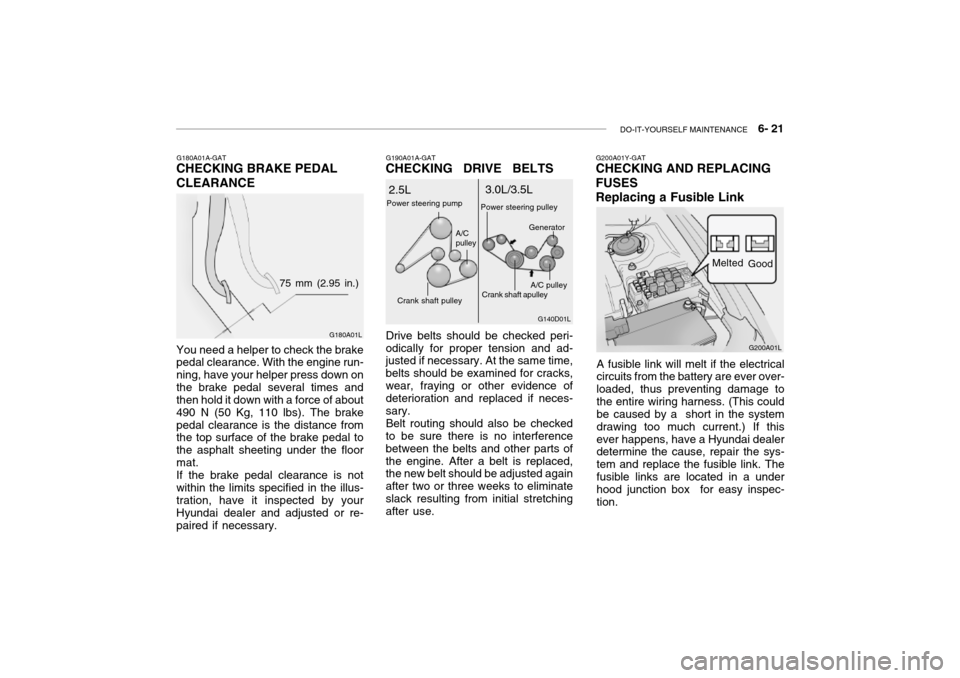
G190A01A-GAT
CHECKING DRIVE BELTS
Drive belts should be checked peri-
odically for proper tension and ad- justed if necessary. At the same time, belts should be examined for cracks,wear, fraying or other evidence of deterioration and replaced if neces- sary.
Belt routing should also be checked
to be sure there is no interferencebetween the belts and other parts ofthe engine. After a belt is replaced, the new belt should be adjusted again after two or three weeks to eliminateslack resulting from initial stretching after use.
G180A01A-GAT
CHECKING BRAKE PEDAL CLEARANCE
G180A01L
75 mm (2.95 in.)
You need a helper to check the brake pedal clearance. With the engine run- ning, have your helper press down onthe brake pedal several times and then hold it down with a force of about 490 N (50 Kg, 110 lbs). The brakepedal clearance is the distance from the top surface of the brake pedal to the asphalt sheeting under the floormat.If the brake pedal clearance is notwithin the limits specified in the illus-tration, have it inspected by your Hyundai dealer and adjusted or re- paired if necessary. G140D01L
2.5L
3.0L/3.5L
Power steering pump
Crank shaft pulley A/C pulley
Crank shaft apulley
A/C pulley
Power steering pulley
Generator
G200A01Y-GAT
CHECKING AND REPLACING FUSES Replacing a Fusible Link
A fusible link will melt if the electrical circuits from the battery are ever over- loaded, thus preventing damage tothe entire wiring harness. (This could be caused by a short in the system drawing too much current.) If thisever happens, have a Hyundai dealer determine the cause, repair the sys- tem and replace the fusible link. Thefusible links are located in a under hood junction box for easy inspec- tion. G200A01L
Melted
Good
Page 201 of 230
6- 24 DO-IT-YOURSELF MAINTENANCE
G240A01A-AAT
POWER STEERING HOSES
It is suggested that you check the
power steering hose connections for fluid leakage at regular intervals.
The power steering hoses should be
replaced if there is severe surface cracking, scuffing or worn spots. De- terioration of the hose could causepremature failure.
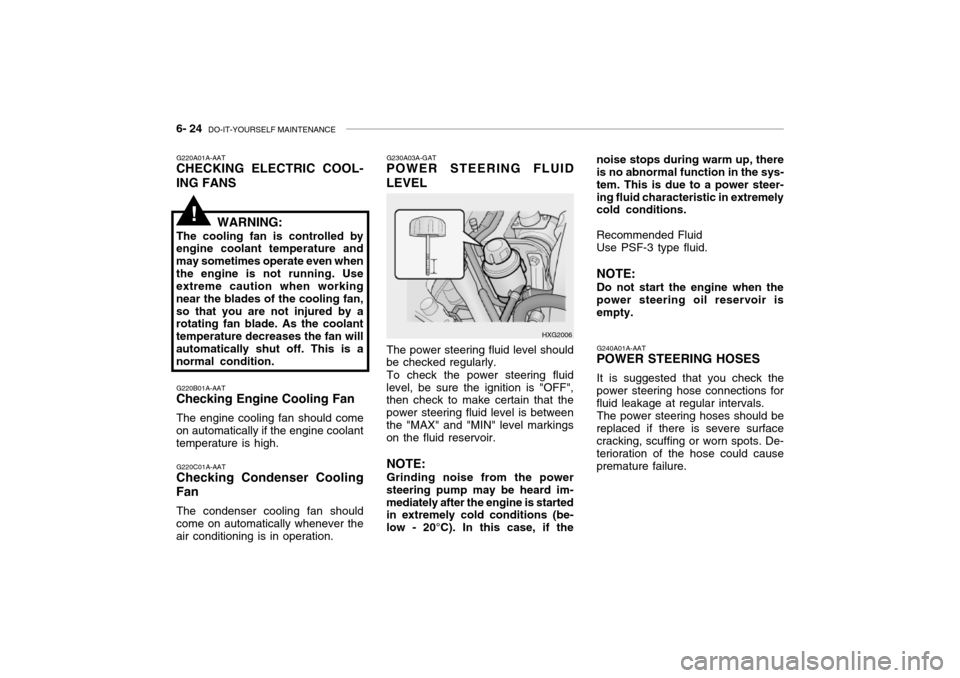
G230A03A-GAT
POWER STEERING FLUID LEVEL
HXG2006
The power steering fluid level should
be checked regularly.
To check the power steering fluid
level, be sure the ignition is "OFF", then check to make certain that the power steering fluid level is betweenthe "MAX" and "MIN" level markings on the fluid reservoir.
NOTE: Grinding noise from the power
steering pump may be heard im- mediately after the engine is started in extremely cold conditions (be- low - 20°C). In this case, if the noise stops during warm up, there is no abnormal function in the sys- tem. This is due to a power steer-ing fluid characteristic in extremely cold conditions. Recommended Fluid Use PSF-3 type fluid. NOTE: Do not start the engine when the power steering oil reservoir is empty.
G220A01A-AAT
CHECKING ELECTRIC COOL- ING FANS
WARNING:
The cooling fan is controlled by
engine coolant temperature and may sometimes operate even whenthe engine is not running. Use extreme caution when working near the blades of the cooling fan,so that you are not injured by a rotating fan blade. As the coolant temperature decreases the fan willautomatically shut off. This is a normal condition.
G220B01A-AAT
Checking Engine Cooling Fan
The engine cooling fan should come
on automatically if the engine coolanttemperature is high.
G220C01A-AAT
Checking Condenser Cooling Fan
The condenser cooling fan should
come on automatically whenever the air conditioning is in operation.
!
Page 202 of 230
DO-IT-YOURSELF MAINTENANCE 6- 25
G290A02L-GAT
HEADLIGHT AIMING ADJUST- MENT
HID Type (If installed)
WARNING:
If you need headlight aiming ad- justment, have your vehicle in- spected by your Hyundai Dealer. Don't attempt to replace or inspect the HID headlight bulb to prevent danger of an electric shock.
Vertical Aiming HorizontalAiming
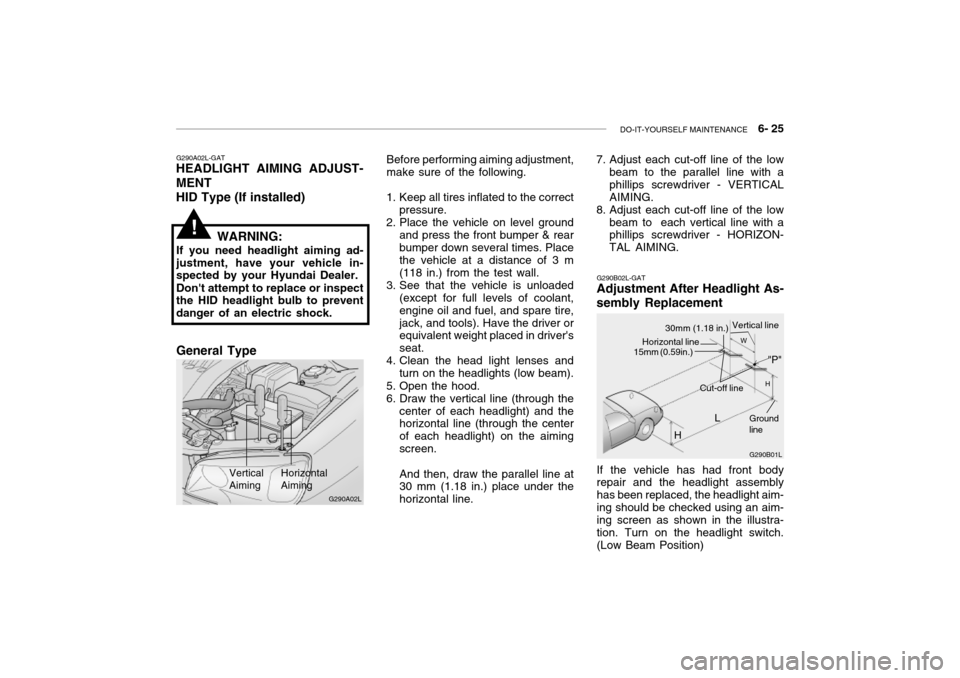
Before performing aiming adjustment, make sure of the following.
1. Keep all tires inflated to the correct pressure.
2. Place the vehicle on level ground
and press the front bumper & rear bumper down several times. Place the vehicle at a distance of 3 m (118 in.) from the test wall.
3. See that the vehicle is unloaded (except for full levels of coolant,engine oil and fuel, and spare tire,jack, and tools). Have the driver or equivalent weight placed in driver's seat.
4. Clean the head light lenses and
turn on the headlights (low beam).
5. Open the hood.
6. Draw the vertical line (through the center of each headlight) and the horizontal line (through the center of each headlight) on the aimingscreen. And then, draw the parallel line at 30 mm (1.18 in.) place under the horizontal line.
!
G290B02L-GAT
Adjustment After Headlight As- sembly Replacement
G290B01L
LW
H
H Cut-off line
Ground line
If the vehicle has had front body repair and the headlight assembly has been replaced, the headlight aim-ing should be checked using an aim- ing screen as shown in the illustra- tion. Turn on the headlight switch.(Low Beam Position)
"P"
Horizontal line15mm (0.59in.)
30mm (1.18 in.) Vertical line
7. Adjust each cut-off line of the low
beam to the parallel line with a phillips screwdriver - VERTICALAIMING.
8. Adjust each cut-off line of the low
beam to each vertical line with a phillips screwdriver - HORIZON- TAL AIMING.
G290A02L
General Type
Page 211 of 230

6- 34 DO-IT-YOURSELF MAINTENANCE
G200C01L-GAT JUNCTION BOX DESCRIPTION Under Hood Junction Box
G200C01L
NOTE: Not all junction box description in this manual
may be applicable to your vehicle. It is accurate at the time of printing. When you inspect the junction box on your vehicle, refer to the junction box label. DESCRIPTION
FUEL PUMP
HEAD LIGHT(Lo-LH) ABS
INJECTOR
A/C COMPRESSOR A/T
MAIN
IGNITION COIL
OXYGEN SENSOR EGR
HORN
HEAD LIGHT(HI)
HEAD LIGHT(Lo-RH) DRL
FOG LIGHT DIODE 1
SPARE
SPARE
SPARE
SPARE
DIODE 2
BLOWER
POWER FUSE 2 POWER AMPSUNROOF
TAIL LIGHT
POWER FUSE 1 ECU
REAR DEFOGGER CONDENSER
POWER WINDOW IGNITION1/2ABS 1/2
RADIATOR FUSE
RATING
20A15A10A10A10A20A30A 20A 15A 15A10A15A20A15A15A 30A 20A15A10A 30A 30A20A15A20A30A10A30A20A40A
30A/30A30A/30A 30A PROTECTED COMPONENTS
Fuel pump relay
Head light relay (Low-LH)
ABS controls, Cruise control module, ETS control module
Limp home valve, ETS controls, Injector
A/C relay
A/T control relay, TCM, Engine control relayMFI controls
Ignition coil, A/T pulse generator, ECM, Ignition failure
sensor, E/TCM
ETS relay, MFI controls
A/C relay, MFI controls, EGR solenoid
Horn relay
Head light relay (High)
HID head light relay
DRL control module, Siren
Fog light relay - -----
Blower relayFuse 4, 20, 24, 25
Audio amp module
Data link connector, Sunroof relay, Home link connector
Tail light relayFuse 1, 7, 17, 18, 19
ETS control module, ECM, E/TCM, Generator
Rear window defogger relay
A/C fan relay #1
Power window relay, IMS controls
Ignition switchABS controlsRadiator fan relay
Page 214 of 230

7- 2 EMISSION CONTROL SYSTEMS
H010A01A-GAT
EMISSION CONTROL SYSTEM (If Installed)
Your Hyundai is equipped with an
emission control system to meet all requirements of the Emission prohibi-tion rules of your province.
There are three emission control sys-
tems which are as follows.
1) Crankcase emission control sys-
tem
2) Evaporative emission control sys-
tem
3) Exhaust emission control system
In order to assure the proper function
of the emission control systems, it is recommended that you have your car inspected and maintained by an au-thorized Hyundai dealer in accordance with the maintenance schedule in this manual. H010B01A-AAT
1. Crankcase Emission Control
System
The positive crankcase ventilation
system is employed to prevent airpollution caused by blow-by gasesbeing emitted from the crankcase. This system supplies fresh air to the crankcase through the air intake hose.Inside the crankcase, the fresh air mixes with blow-by gases, which then pass through the PCV valve and intothe induction system.
H010C02Y-GAT
2. Evaporative Emission
Control System
The Evaporative Emission Control
System is designed to prevent fuel vapors from escaping into the atmo- sphere. Canister
While the engine is inoperative, fuel
vapors generated inside the fuel tank are absorbed and stored in the canis- ter. When the engine is running, the fuel vapors absorbed in the canisterare drawn into the induction system through the purge control solenoidvalve. Purge Control Solenoid Valve
The purge control solenoid valve is
controlled by the ECM; when the en- gine coolant temperature is low, and during idling, it closes, so that evapo- rated fuel is not taken into the surgetank. After engine warm-up, during ordinary driving, it opens so as to introduce evaporated fuel to the surgetank.
H010D01A-AAT
3. Exhaust Emission Control
System
The exhaust emission control system
is a highly effective system whichcontrols exhaust emission while main- taining good vehicle performance.
H010E01Y-GAT
EGR System
This system helps control nitrogen
oxides by recirculating a part of the exhaust gas into the engine, therebyreducing cylinder combustion tem- perature.
Page 215 of 230
EMISSION CONTROL SYSTEMS 7- 3
WARNING:
o Use unleaded fuel only.
o Maintain the engine in good operating condition. Extremelyhigh catalytic converter tempera- tures can result from improper operation of the electrical, igni-tion or multiport electronic fuel injection.
o If your engine stalls, pings, knocks, or is hard to start, haveyour Hyundai dealer inspect and repair the problem as soon as possible.
o Avoid driving with a very low fuel level. Running out of gaso-line may cause the engine to misfire and result in damage tothe catalytic converter.
o Avoid idling the engine for peri- ods longer than 10 minutes.
o The vehicle should not be pushed or pulled to get started.This may cause the catalytic con- verter to overheat and create a fire hazard.
H020A01A-AAT
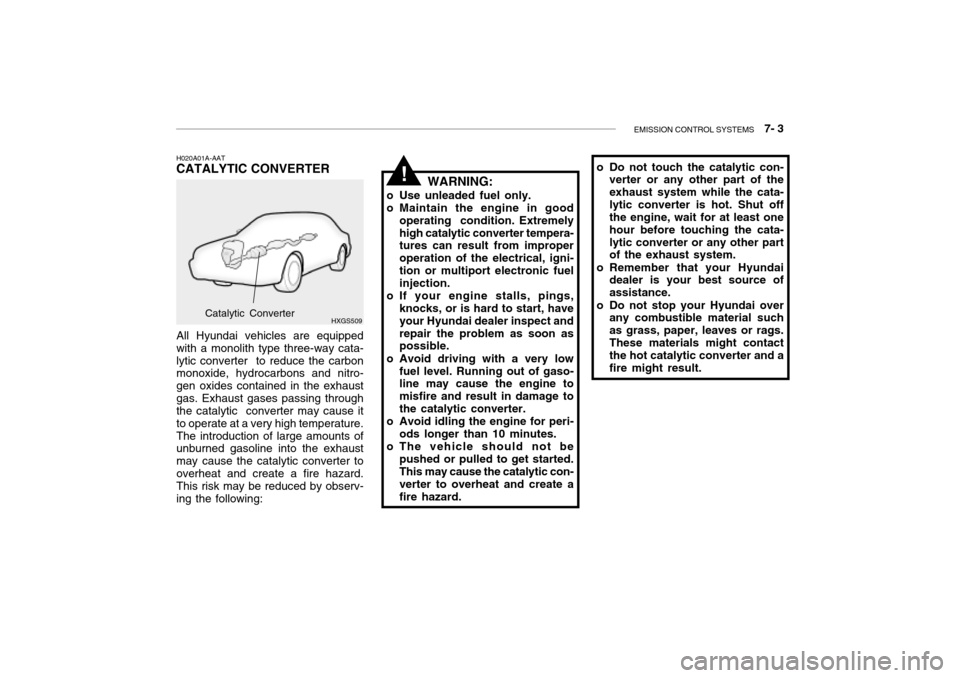
CATALYTIC CONVERTER
HXGS509
All Hyundai vehicles are equippedwith a monolith type three-way cata-lytic converter to reduce the carbon monoxide, hydrocarbons and nitro- gen oxides contained in the exhaustgas. Exhaust gases passing through the catalytic converter may cause it to operate at a very high temperature.The introduction of large amounts of unburned gasoline into the exhaust may cause the catalytic converter tooverheat and create a fire hazard. This risk may be reduced by observ- ing the following:
Catalytic Converter o Do not touch the catalytic con-
verter or any other part of the exhaust system while the cata-lytic converter is hot. Shut off the engine, wait for at least one hour before touching the cata-lytic converter or any other part of the exhaust system.
o Remember that your Hyundai dealer is your best source of assistance.
o Do not stop your Hyundai over any combustible material suchas grass, paper, leaves or rags.These materials might contact the hot catalytic converter and a fire might result.
!
Page 216 of 230

8. CONSUMER INFORMATION
Vehicle Identification Number (VIN) .............................................. 8-2
Engine Number .............................................................................. 8-2
Recommended Inflation Pressures ................................................ 8-2
Snow Tires ...................................................................................... 8-3
Tire Chains ..................................................................................... 8-4
Tire Rotation ................................................................................... 8-4
Tire Balancing ................................................................................. 8-4
Tire Traction ................................................................................... 8-5
When to Replace Tires .................................................................. 8-5
Spare Tire and Tools ..................................................................... 8-5
8