2002 Hyundai Atos ECO mode
[x] Cancel search: ECO modePage 159 of 249
FEATURES OF YOUR HYUNDAI
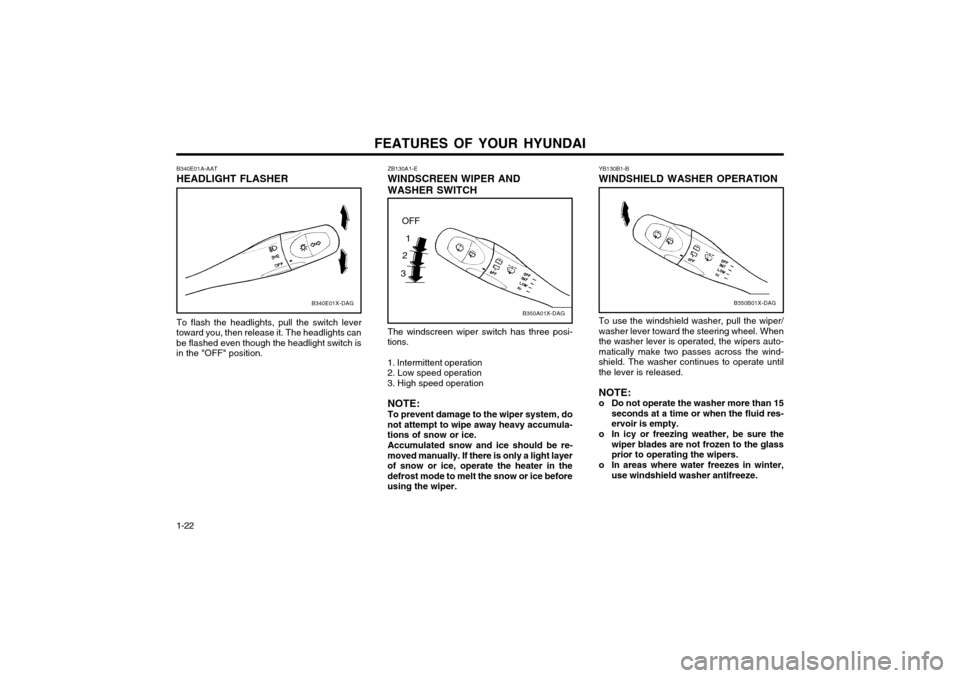
1-22 YB130B1-B WINDSHIELD WASHER OPERATION
B350B01X-DAG
To use the windshield washer, pull the wiper/ washer lever toward the steering wheel. Whenthe washer lever is operated, the wipers auto-matically make two passes across the wind-shield. The washer continues to operate untilthe lever is released. NOTE:
o Do not operate the washer more than 15 seconds at a time or when the fluid res-ervoir is empty.
o In icy or freezing weather, be sure the wiper blades are not frozen to the glassprior to operating the wipers.
o In areas where water freezes in winter, use windshield washer antifreeze.
ZB130A1-E WINDSCREEN WIPER ANDWASHER SWITCH
B350A01X-DAG
The windscreen wiper switch has three posi-
tions. 1. Intermittent operation 2. Low speed operation 3. High speed operation
NOTE:To prevent damage to the wiper system, do
not attempt to wipe away heavy accumula- tions of snow or ice.
Accumulated snow and ice should be re-
moved manually. If there is only a light layerof snow or ice, operate the heater in thedefrost mode to melt the snow or ice beforeusing the wiper.
OFF
1
2
3
B340E01A-AAT HEADLIGHT FLASHER
B340E01X-DAG
To flash the headlights, pull the switch lever
toward you, then release it. The headlights can be flashed even though the headlight switch isin the "OFF" position.
Page 160 of 249
FEATURES OF YOUR HYUNDAI 1-23
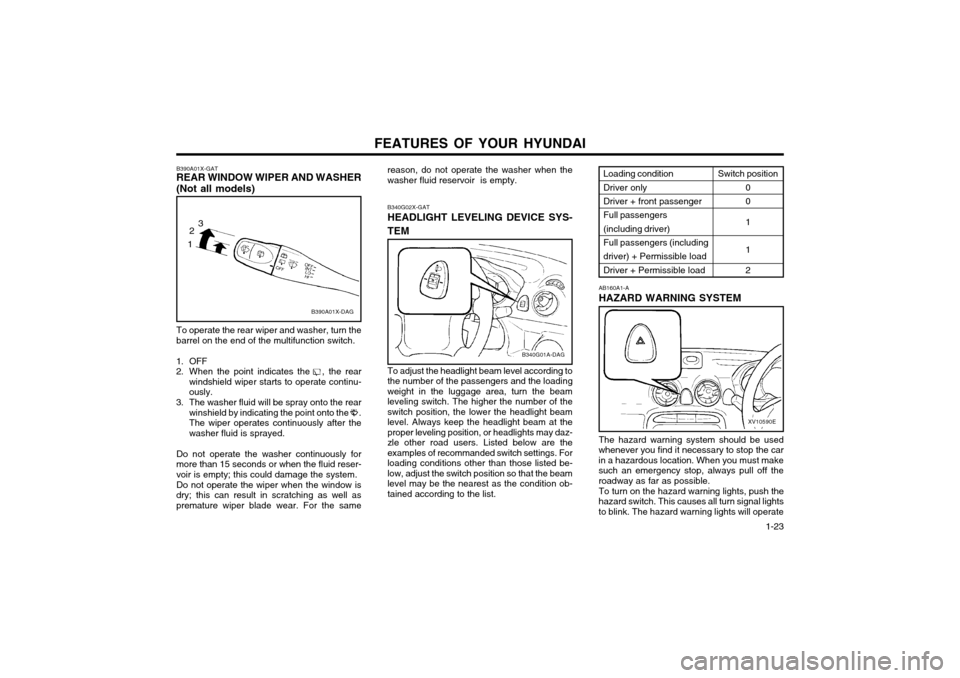
reason, do not operate the washer when the washer fluid reservoir is empty. B340G02X-GAT HEADLIGHT LEVELING DEVICE SYS- TEM To adjust the headlight beam level according to the number of the passengers and the loadingweight in the luggage area, turn the beamleveling switch. The higher the number of theswitch position, the lower the headlight beamlevel. Always keep the headlight beam at the
proper leveling position, or headlights may daz-zle other road users. Listed below are theexamples of recommanded switch settings. Forloading conditions other than those listed be-
low, adjust the switch position so that the beamlevel may be the nearest as the condition ob-tained according to the list.
B340G01A-DAG
B390A01X-GAT REAR WINDOW WIPER AND WASHER (Not all models)
B390A01X-DAG
To operate the rear wiper and washer, turn the barrel on the end of the multifunction switch.
1. OFF
2. When the point indicates the , the rear windshield wiper starts to operate continu-ously.
3. The washer fluid will be spray onto the rear winshield by indicating the point onto the .The wiper operates continuously after thewasher fluid is sprayed.
Do not operate the washer continuously formore than 15 seconds or when the fluid reser-voir is empty; this could damage the system. Do not operate the wiper when the window is dry; this can result in scratching as well aspremature wiper blade wear. For the same
1 2
3
The hazard warning system should be used
whenever you find it necessary to stop the car in a hazardous location. When you must makesuch an emergency stop, always pull off theroadway as far as possible.
To turn on the hazard warning lights, push the
hazard switch. This causes all turn signal lightsto blink. The hazard warning lights will operate AB160A1-A HAZARD WARNING SYSTEM
XV10590E
Loading condition Driver only Driver + front passenger Full passengers(including driver)Full passengers (including driver) + Permissible load Driver + Permissible load
Switch position
0 0 1 1 2
Page 161 of 249
FEATURES OF YOUR HYUNDAI
1-24 ZB210A1-A CIGAR LIGHTER
B420A01X.DAG
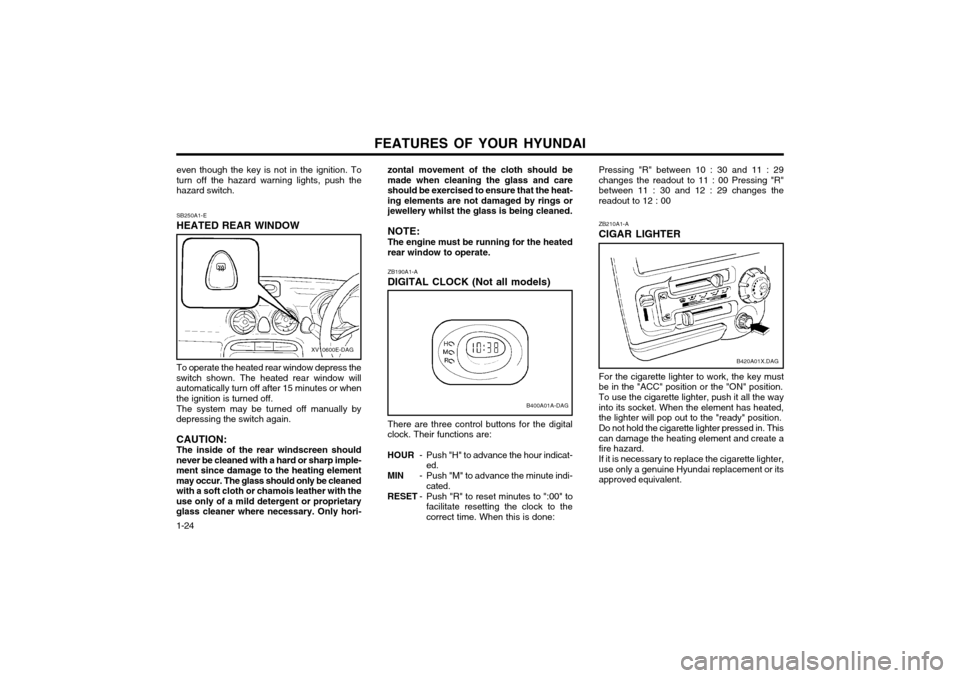
For the cigarette lighter to work, the key must be in the "ACC" position or the "ON" position. To use the cigarette lighter, push it all the way into its socket. When the element has heated,the lighter will pop out to the "ready" position. Do not hold the cigarette lighter pressed in. This can damage the heating element and create afire hazard. If it is necessary to replace the cigarette lighter, use only a genuine Hyundai replacement or itsapproved equivalent.
Pressing "R" between 10 : 30 and 11 : 29changes the readout to 11 : 00 Pressing "R"between 11 : 30 and 12 : 29 changes thereadout to 12 : 00
ZB190A1-A DIGITAL CLOCK (Not all models)
B400A01A-DAG
There are three control buttons for the digital clock. Their functions are:
HOUR - Push "H" to advance the hour indicat-
ed.
MIN - Push "M" to advance the minute indi-
cated.
RESET - Push "R" to reset minutes to ":00" to
facilitate resetting the clock to thecorrect time. When this is done:
zontal movement of the cloth should bemade when cleaning the glass and careshould be exercised to ensure that the heat-ing elements are not damaged by rings orjewellery whilst the glass is being cleaned. NOTE: The engine must be running for the heated rear window to operate.
SB250A1-E HEATED REAR WINDOW
XV10600E-DAG
To operate the heated rear window depress the
switch shown. The heated rear window will automatically turn off after 15 minutes or whenthe ignition is turned off.
The system may be turned off manually by
depressing the switch again. CAUTION: The inside of the rear windscreen should
never be cleaned with a hard or sharp imple- ment since damage to the heating elementmay occur. The glass should only be cleanedwith a soft cloth or chamois leather with theuse only of a mild detergent or proprietaryglass cleaner where necessary. Only hori- even though the key is not in the ignition. Toturn off the hazard warning lights, push thehazard switch.
Page 166 of 249
FEATURES OF YOUR HYUNDAI 1-29
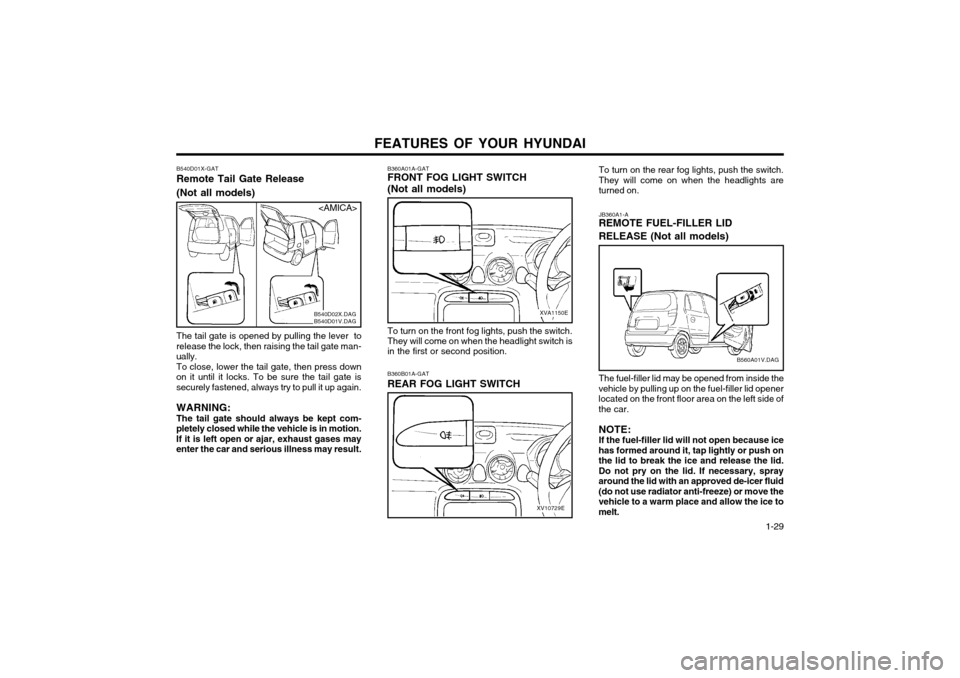
To turn on the rear fog lights, push the switch.
They will come on when the headlights areturned on. JB360A1-A REMOTE FUEL-FILLER LID RELEASE (Not all models) The fuel-filler lid may be opened from inside the
vehicle by pulling up on the fuel-filler lid opener located on the front floor area on the left side ofthe car.
NOTE:If the fuel-filler lid will not open because ice
has formed around it, tap lightly or push onthe lid to break the ice and release the lid.Do not pry on the lid. If necessary, sprayaround the lid with an approved de-icer fluid(do not use radiator anti-freeze) or move thevehicle to a warm place and allow the ice tomelt.
B560A01V.DAG
To turn on the front fog lights, push the switch. They will come on when the headlight switch is in the first or second position.
XV10729E
B360B01A-GAT REAR FOG LIGHT SWITCH
B540D01X-GATRemote Tail Gate Release (Not all models)
The tail gate is opened by pulling the lever to release the lock, then raising the tail gate man-ually.To close, lower the tail gate, then press down
on it until it locks. To be sure the tail gate issecurely fastened, always try to pull it up again. WARNING: The tail gate should always be kept com-
pletely closed while the vehicle is in motion.If it is left open or ajar, exhaust gases may
enter the car and serious illness may result. B360A01A-GAT FRONT FOG LIGHT SWITCH (Not all models)
XVA1150E
B540D02X.DAG B540D01V.DAG
Page 168 of 249
FEATURES OF YOUR HYUNDAI 1-31
o Always drive your vehicle at a moderate
speed.
o To use the roof rails as a roof rack, you must fit the roof rails with two or more crossrails or equivalent.
WARNING:
o In case of hectical steering movements or bad fixation the luggage can fall fromthe vehicle and injure persons or prop-erty. Make sure that the luggage is prop-erly fixed and avoid sudden movement(e.g.dashing start, fast turningmanoeuvres, hard cornering, suddenbraking) Check frequently whether theroof rack is properly fastened.
o Voluminous, large, long or flat objects can change the aerodynamic drag of ve-hicle or can suddenly been lifted by thewind. The driver could lose control of thecar and provoke an accident and injuries.For this reason, drive at reduced speedwhen you transport such objects.
o The maximum load limit of the roof rack including luggage load is 66 lb.
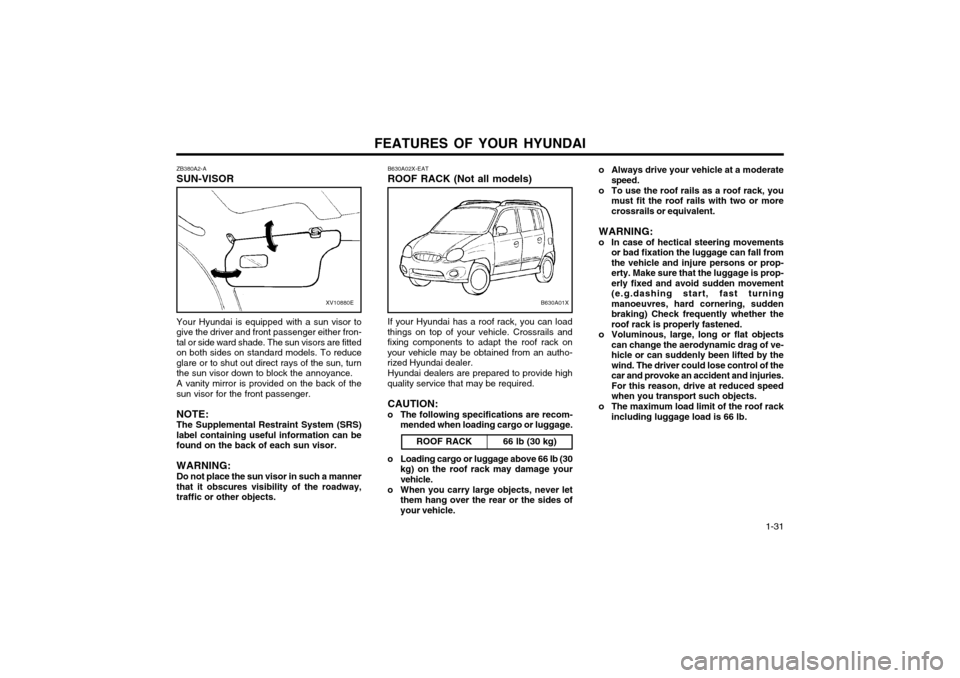
ZB380A2-A SUN-VISOR
XV10880E
Your Hyundai is equipped with a sun visor to give the driver and front passenger either fron-tal or side ward shade. The sun visors are fittedon both sides on standard models. To reduceglare or to shut out direct rays of the sun, turnthe sun visor down to block the annoyance. A vanity mirror is provided on the back of the sun visor for the front passenger. NOTE: The Supplemental Restraint System (SRS)label containing useful information can befound on the back of each sun visor. WARNING: Do not place the sun visor in such a manner that it obscures visibility of the roadway,traffic or other objects. B630A02X-EAT ROOF RACK (Not all models)
ROOF RACKIf your Hyundai has a roof rack, you can load
things on top of your vehicle. Crossrails and fixing components to adapt the roof rack onyour vehicle may be obtained from an autho-rized Hyundai dealer.
Hyundai dealers are prepared to provide high
quality service that may be required.
CAUTION:
o The following specifications are recom- mended when loading cargo or luggage.
66 lb (30 kg)
B630A01X
o Loading cargo or luggage above 66 lb (30kg) on the roof rack may damage your vehicle.
o When you carry large objects, never let them hang over the rear or the sides ofyour vehicle.
Page 170 of 249
FEATURES OF YOUR HYUNDAI 1-33
B670C02A-AAT Air Intake Control
B670C03A-DAG
This is used to select fresh outside air or
recirculation inside air.
Fresh Recirculation
With the " " mode selected, air enters the
vehicle from outside and is heated or cooled according to the other functions selected.
With the " " mode selected, air from within
the passenger compartment is drawn throughthe heating system and heated or cooled ac-cording to the other functions selected.
NOTE:It should be noted that prolonged operation
of the heating system in " " mode will giverise to misting of the windshield and sidewindows and the air within the passenger
compartment becoming stale. In addition prolonged use of the air conditioning withthe " " mode selected may result in theair within the passenger compartment be-coming excessively dry.
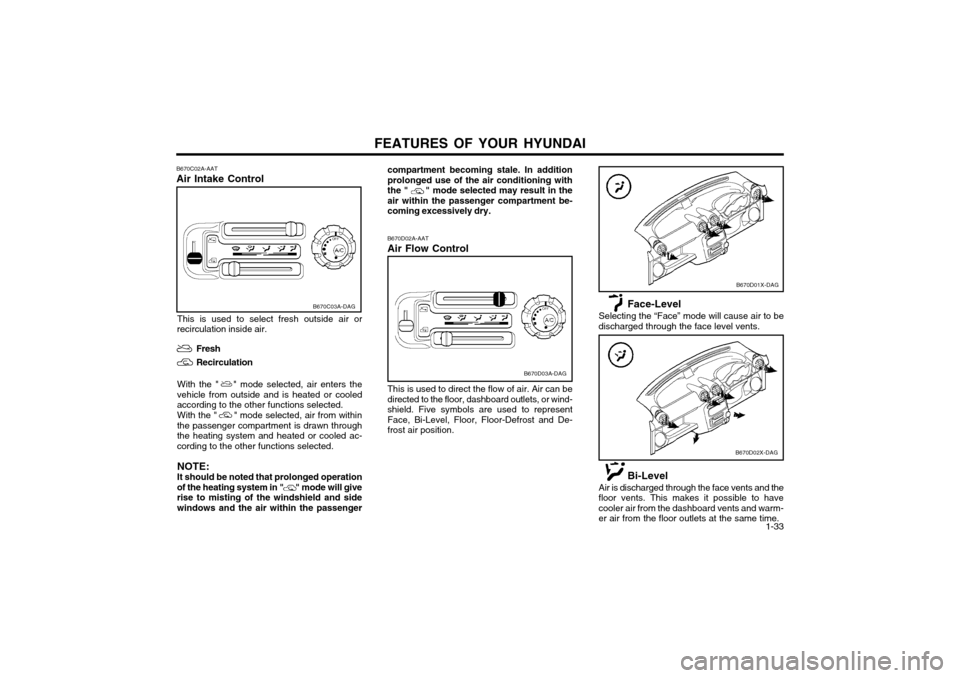
B670D02A-AAT Air Flow Control
B670D03A-DAG
This is used to direct the flow of air. Air can be directed to the floor, dashboard outlets, or wind-
shield. Five symbols are used to representFace, Bi-Level, Floor, Floor-Defrost and De-frost air position.
B670D01X-DAG
B670D02X-DAG
Face-Level
Selecting the “Face” mode will cause air to be
discharged through the face level vents.
Bi-Level
Air is discharged through the face vents and the
floor vents. This makes it possible to have cooler air from the dashboard vents and warm-
er air from the floor outlets at the same time.
Page 178 of 249
FEATURES OF YOUR HYUNDAI 1-41
3. BAND Selector Pressing the button changes the AM, FM1
and FM2 bands. The mode selected is dis- played on LCD.
4. TUNE (Manual) Select Button Press the (+) side or (-) side to increase or to
decrease the frequency. With the button held down for 0.5 sec. or more, the stop signal(broadcasting radio wave) is ignored and chan-nel selection continues.
SEEK Operation (Automatic Channel
Selection) Press the TUNE select button 1 sec. or more.
When the (+) side is pressed, the unit willautomatically tune to the next higher frequencyand when the (-) side is pressed, it will automat-ically tune to the next lower frequency.
5. PRESET STATION SELECT Six (6) stations for AM, FM and FM2 respec-
tively can be preset in the electronic memory circuit on this unit.
HOW TO PRESET STATIONS Six AM and twelve FM stations may be pro-
grammed into the memory of the radio. Then, by simply pressing the band select button and/or one of the six station select buttons, you mayrecall any of these stations instantly. To pro-gram the stations, follow these steps:
B901B02X-GAT
1. POWER ON-OFF/VOLUME CON-
TROL KNOB
The radio unit may be operated when the igni-
tion key is in the "ACC" or "ON" position. Rotate the knob clockwise to switch the radio unit on,
and to increase the volume.
The LCD shows the radio frequency in the radio
mode. Turn the knob counterclockwise to re-duce the volume, and to switch the radio unitoff.
BAL (Balance Control) Knob Pull and turn the control knob clockwise to
emphasize right speaker sound (Left speaker sound will be attenuated). When the controlknob is turned counterclockwise, left speakersound will be emphasized (Right speaker sound
will be attenuated). 2. BASS Control Knob Press to pop the knob out and turn to the left or
right for the desired bass tone.
TREBLE Control Knob Further pull-lock position of popped-up knob.
Turn to the left or right for the desired treble tone.
FM
AMo Press band selector to set the band for AM,
FM and FM2.
o Select the desired station to be stored by seek, scan or manual tuning.
o Determine the preset station select button you wish to use to access that station.
o Press the station select button for more than two seconds. A select button indicator will show in the display indicating which selectbutton you have depressed. The frequencydisplay will flash after it has been stored intothe memory. You should then release thebutton, and proceed to program the nextdesired station. A total of 18 stations can beprogrammed by selecting one AM and twoFM stations per button.
o When completed, any preset station may be recalled by selecting AM, FM or FM2 bandand the appropriate station button.
Page 180 of 249
FEATURES OF YOUR HYUNDAI 1-43
B900B02X-GAT
1. POWER ON-OFF/VOLUME CON-
TROL KNOB
The radio unit may be operated when the igni-
tion key is in the "ACC" or "ON" position. Rotate the knob clockwise to switch the radio unit on
and to increase the volume.
The LCD shows the radio frequency in the radio
mode, or the tape direction indicator in the tape mode. Turn the knob counterclockwise to re-duce the volume and to switch the radio unit off.
BAL (Balance Control) Knob Pull and turn the control knob clockwise to
emphasize right speaker sound. (Left speaker sound will be attenuated) When the controlknob is turned counterclockwise, left speakersound will be emphasized. (Right speaker sound
will be attenuated) 2. BASS Control Knob Press to pop the knob out and turn to the left or
right for the desired bass tone.
TREBLE Control Knob Further pull-lock position of popped-up knob.
Turn to the left or right for the desired treble tone. 3. BAND Selector Pressing the button changes the AM, FM1
and FM2 bands. The mode selected is dis- played on LCD.
4. TUNE (manual) Select Button Press the (+) side or (-) side to increase or to
decrease the frequency. With the button held down for 0.5 sec. or more, the stop signal(broadcasting radio wave) is ignored and chan-nel selection continues.
SEEK Operation (Automatic Channel
Selection) Press the TUNE select button 1 sec. or more.
When the (+) side is pressed, the unit willautomatically tune to the next higher frequencyand when the (-) side is pressed, it will automat-ically tune to the next lower frequency.
5. PRESET STATION SELECT Button Six (6) stations for AM, FM and FM2 respec-
tively can be preset in the electronic memory circuit on this unit.
HOW TO PRESET STATIONS Six AM and twelve FM stations may be pro-
grammed into the memory of the radio. Then, by simply pressing the band select button and/or one of the six station select buttons, you mayrecall any of these stations instantly. To pro-gram the stations, follow these steps:
FM AMo Press band selector to set the band for AM, FM, and FM2.
o Select the desired station to be stored by seek, scan or manual tuning.
o Determine the preset station select button you wish to use to access that station.
o Press the station select button for more than two seconds. A select button indicator will show in the display indicating which selectbutton you have depressed. The frequencydisplay will flash after it has been stored intothe memory. You should then release thebutton, and proceed to program the nextdesired station. A total of 18 stations can beprogrammed by selecting one AM and oneFM station per button.
o When completed, any preset station may be recalled by selecting AM, FM or FM2 bandand the appropriate station button.
6. TAPE EJECT Button To elect the tape, press the button. 7. TAPE PROGRAM When you press the button whose arrow is in
the same direction as the tape play arrow in the display the tape will advance at high speed.When you press the button whose arrow is inthe opposite direction to the tape play arrow inthe display the tape will rewind at high speed. To stop FF or REW action, press the opposite
button. When you press two buttons simulta-neously you play the reverse side of the tape