Page 49 of 399

Third Seat Installation:
Attach the tether strap hook to the
tether attachment point and tighten
the strap according to the child seat
maker’s instructions. Make sure the
strap is not twisted.There are three attachment points
on the tailgate sill. The tether
hardware is installed on the center
attachment point.If you want to use either of the
outside attachment points, remove
the tether hardware f rom the center
attachment point, remove the plug
from the attachment point you are
going to use with a small f lat-tipped
screwdriver, then install the tether
hardware.
If you are not sure how to install the
tether, or you need mounting
hardware, contact your Honda dealer. To attach the tether to the child seat,
f ollow the child seat maker’s
instructions. If a torque wrench was not used, see
your Honda dealer as soon as
possible to verif y proper installation. When installing tether hardware,
make sure the toothed washer is on
the bottom of the bolt. Tighten the
bolt to:
Driver and Passenger Saf ety
Protecting Children
46
16 lbf·ft (22 N·m , 2.2 kgf·m)
Page 251 of 399
This indicator on the instrument
panel shows which position the shif t
lever is in.
Your Honda’s transmission has f ive
f orward speeds, and is electronically
controlled f or smoother shif ting. It
also has a ‘‘lock-up’’ torque converter
forbetterfueleconomy.Youmay
f eel what seems like another shif t
when the converter locks.
The ‘‘D’’ indicator comes on f or a
f ew seconds when you turn the
ignition switch ON (II). If it f lashes
while driving (in any shif t position),
it indicates a possible problem in the
transmission. Avoid rapid acceler-
ation and have the transmission
checkedbyanauthorizedHonda
dealer as soon as possible.
The malf unction indicator lamp may
come on along with the ‘‘D’’ indicator
if there is a problem in the automatic
transmission control system.
Automatic Transmission
Driving
Shif t L ever Position Indicator
248
Page 295 of 399
When the coolant stops draining,
tightenthedrainplugatthe
bottom of the radiator.
Tighten the drain bolt at the rear
of the engine cylinder block
securely.
Tightening torque:
Remove the reserve tank f rom its
holder by pulling it straight up.
Drain the coolant, then put the
tank back in its holder.
Install a rubber hose on the drain
bolt in the back of the engine
block. Loosen the drain bolt. 6.
4. 5. 7.
Cooling Syst em
Maint enance292
R RE
ES
SE ER
RV V E
E T
TA
A N
NK K R
REES
SE ER
RV V E
E
T
T A
A N
NK K C
CAA P
P
H
H O
OL LDD E
ER
R
7 lbf·ft (10 N·m , 1.0 kgf·m)
Page 305 of 399
�´
�µ
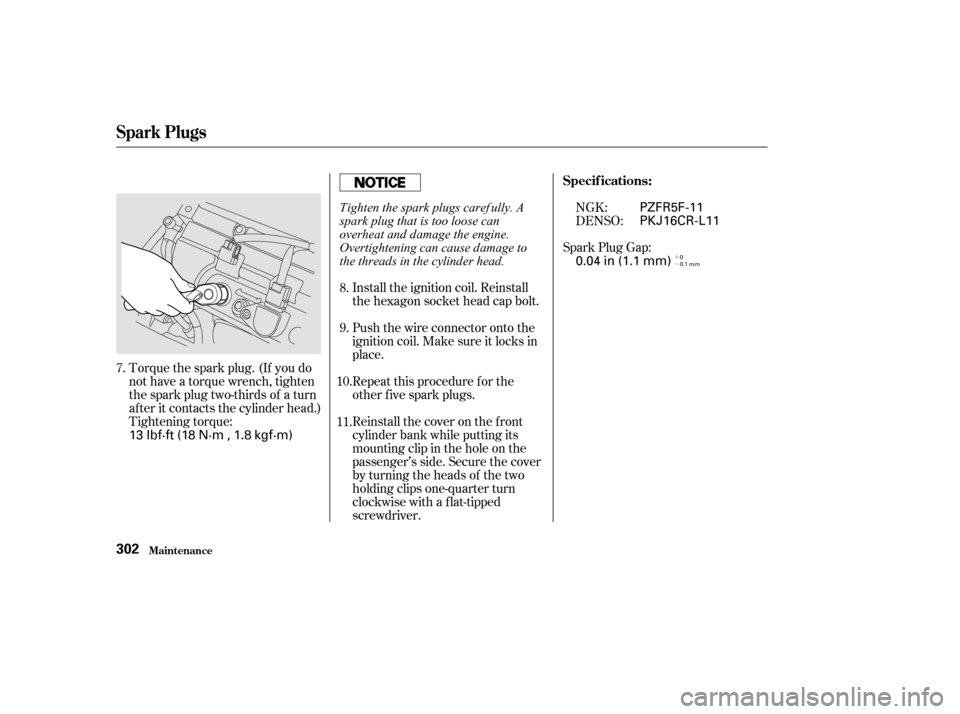
Torque the spark plug. (If you do
not have a torque wrench, tighten
the spark plug two-thirds of a turn
af ter it contacts the cylinder head.)
Tightening torque:Spark Plug Gap:
Install the ignition coil. Reinstall
the hexagon socket head cap bolt.
Push the wire connector onto the
ignition coil. Make sure it locks in
place.
Repeat this procedure f or the
other f ive spark plugs.
Reinstall the cover on the front
cylinder bank while putting its
mounting clip in the hole on the
passenger’s side. Secure the cover
by turning the heads of the two
holding clips one-quarter turn
clockwise with a f lat-tipped
screwdriver. NGK:
DENSO:
7. 8.
9.
10.
11. Specif ications:
Spark Plugs
Maint enance302
13 lbf·ft (18 N·m , 1.8 kgf·m)
0.04 in (1.1 mm)
PKJ16CR-L11 PZFR5F-11
0
0.1 mm
Tighten the spark plugs caref ully. A
spark plug that is too loose can
overheat and damage the engine.
Overtightening can cause damage to
the threads in the cylinder head.
Page 347 of 399
Tighten the wheel nuts securely in
the same crisscross pattern. Have
the wheel nut torque checked at
the nearest automotive service
f acility.
Tighten the wheel nuts to:
Lower the vehicle to the ground
and remove the jack.
Put the flat tire in the supplied
vinyl bag. This bag is stored in the
rear compartment on the driver’s
side panel in the third row. Knot
the top of the vinyl bag.
18.
19.
20.
Changing a Flat T ire
T aking Care of t he Unexpect ed344
80 lbf·ft (108 N·m , 11 kgf·m)