Page 111 of 399
Unhook the f ront of the seat f rom
the f loor by pulling it back slightly,
then pivoting it upward.
Always remove an unlocked seat
f rom the vehicle bef ore driving. A
seat that is not locked in place could
f ly around and cause injury in a
sudden stop or crash.
Both seats can be removed to give
more cargo capacity.
To remove a seat:
Pull up the seat-back angle
adjustment lever, and fold the seat-
back f orward.
Unlock the seat f rom the f loor by
pulling the lock release lever under
the seat cushion’s f ront edge and
lifting the rear of the seat. To reinstall the seat, hook the f ront
of the seat to the f loor, then push the
back into the locks. Make sure both
the f ront and the back of the seat are
securely latched bef ore driving.
Seats
Inst rument s and Cont rols
Removing the Bucket Seats in the
Second Row
108
L LO
OC CKK R
REEL
LEE A
A S
SEE L
LEE V
V E
ER
R
Page 112 of 399
CONT INUED
Remove the head restraints by
pushing the release buttons and
pulling the restraints out.
To create more cargo space, you can
f old the third row ‘‘Magic Seat’’ into
the f loor recess.
To fold the seat:
Make sure the head restraint legs
areinsidethecargonetsotheydo
not damage the seat as you fold it. Store the head restraints in the
sidecargonet.Toinstalltheside
cargo net, hook the f our loops on
the net to the tabs on the left side
panel.Unlock the seat-back by pulling
the handle. Push the seat-back
forward.
1. 2.
3.
Seats
Inst rument s and Cont rols
Folding the T hird Row ‘‘Magic
Seat’’
109
R REEL
LEE A
A S
SEE B
BUUT TT
TO
ON N H
H
A
AN
ND DL
LEE
Page 113 of 399
Make sure the center shoulder belt
is stored in the holder and the outer
shoulder belts are positioned on each
hook whenever the third seat is
f olded.
Make sure all items in the cargo area
are secured. Loose items can f ly
f orward and cause injury if you have
to brake hard. See
on page .
Pull the handle on the back of the
seat cushion while you pull the
entire seat towards you with the
strap. Pivot the seat into the f loor
recess. Pull the seat out of the recess by
pulling on the handle and the strap.
Pivot the seat forward all the way.
To return the seat to the upright
position:
4.
1.
241
Carrying Cargo
Seats
Inst rument s and Cont rols110
H H
A
AN
ND DL
LEE
Page 114 of 399
Reinstall the head restraints. Pull up on the handle on the seat-
back, and pull the seat-back
upright with the strap. Make sure
the seat is securely locked in place.
2.
3.
Seats
Inst rument s and Cont rols111
H H
A
AN
ND DL
LEE
Page 115 of 399

The HI or LO indicator lights and
remains lit until you turn it of f by
pushing the opposite side of the
switch lightly. The indicator will turn
off.
In HI, the heater turns of f when the
seat gets warm, and turns back on
after the seat’s temperature drops. It
continues to cycle as long as you
leave it set on HI. The HI indicator
remains lit as a reminder that you
have the heater on.
In LO, the heater runs continuously.
It does not cycle with temperature
changes.Do not use the seat heaters, even
on the LO setting, if the engine is
lef t idling f or an extended period.
They can weaken the battery,
causing hard starting. Use the HI setting only to heat the
seats quickly. Select the LO
setting when the seats f eel warm.
The HI setting draws large
amounts of current f rom the
battery.
Follow these precautions whenever
you use the seat heaters:
Because of the sensors f or the side
airbag system, there is no heater in
the passenger’s seat-back.
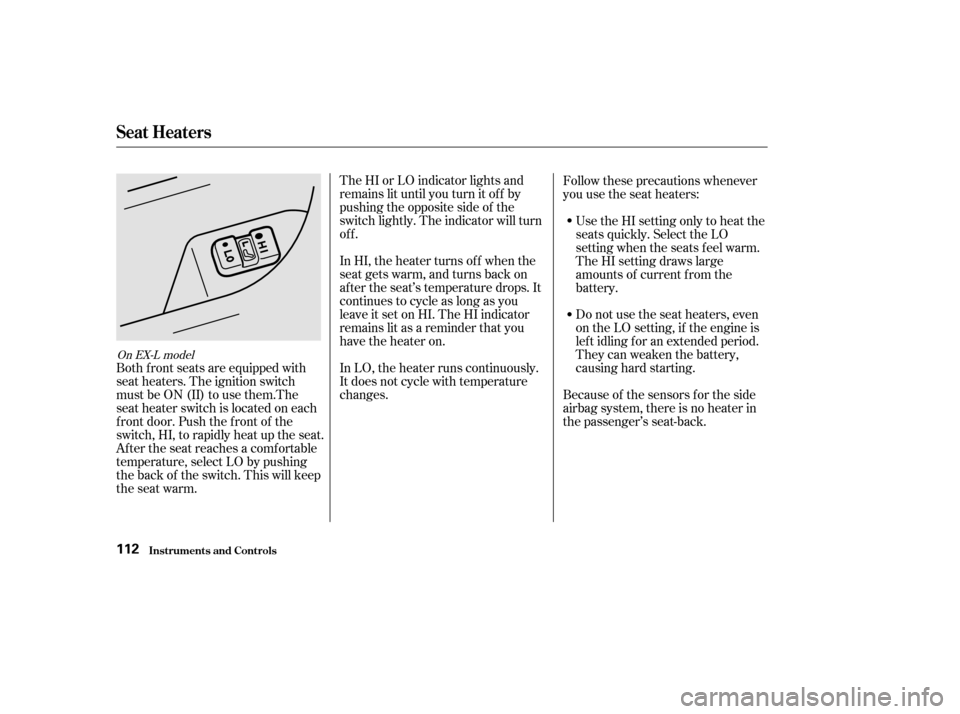
Both f ront seats are equipped with
seat heaters. The ignition switch
must be ON (II) to use them.The
seat heater switch is located on each
f ront door. Push the f ront of the
switch, HI, to rapidly heat up the seat.
After the seat reaches a comfortable
temperature, select LO by pushing
the back of the switch. This will keep
the seat warm.
On EX-L model
Seat Heaters
Inst rument s and Cont rols112
Page 222 of 399

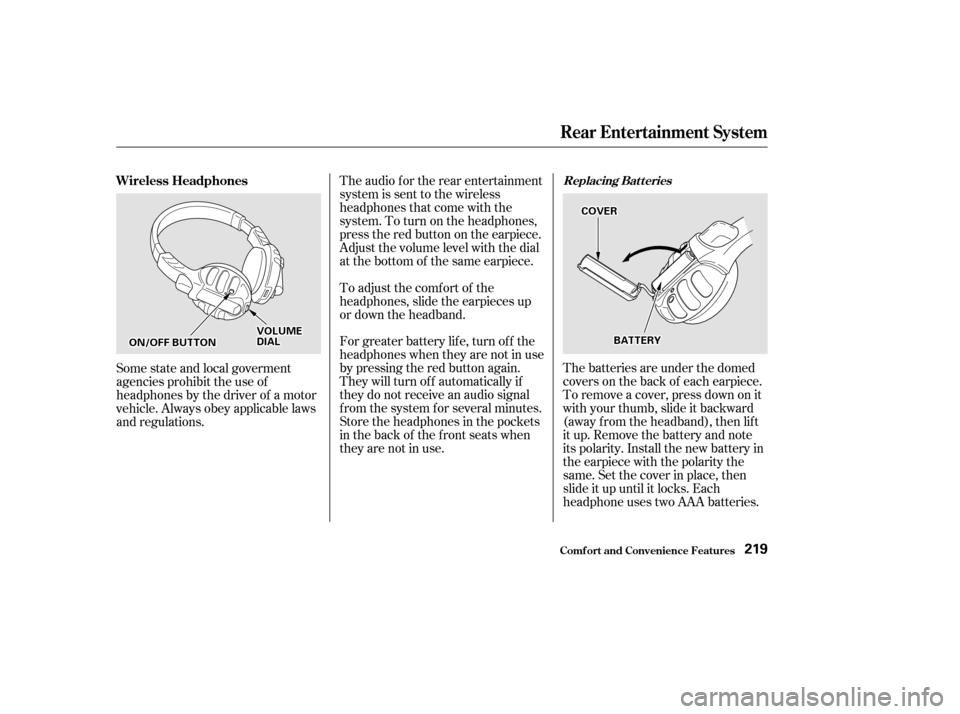
The batteries are under the domed
covers on the back of each earpiece.
To remove a cover, press down on it
with your thumb, slide it backward
(away f rom the headband), then lif t
it up. Remove the battery and note
its polarity. Install the new battery in
theearpiecewiththepolaritythe
same. Set the cover in place, then
slide it up until it locks. Each
headphone uses two AAA batteries.
The audio f or the rear entertainment
system is sent to the wireless
headphones that come with the
system. To turn on the headphones,
presstheredbuttonontheearpiece.
Adjust the volume level with the dial
at the bottom of the same earpiece.
To adjust the comf ort of the
headphones, slide the earpieces up
or down the headband.
For greater battery lif e, turn of f the
headphones when they are not in use
by pressing the red button again.
They will turn of f automatically if
they do not receive an audio signal
f rom the system f or several minutes.
Store the headphones in the pockets
in the back of the front seats when
they are not in use.
Some state and local goverment
agencies prohibit the use of
headphones by the driver of a motor
vehicle. Always obey applicable laws
and regulations. Wireless Headphones
Replacing Bat t eries
Rear Entertainment System
Comf ort and Convenience Feat ures219
O ON
N//O
OF FFF B
BUUT TT
TO
ON N V
V
O
OL LUUM M E
E
D
D I
IAA L
L B
BA
A T
TT
TE
ER
RY Y
C
CO
OV VE
ER
R
Page 244 of 399

�Î
�Î
�Î
�Î
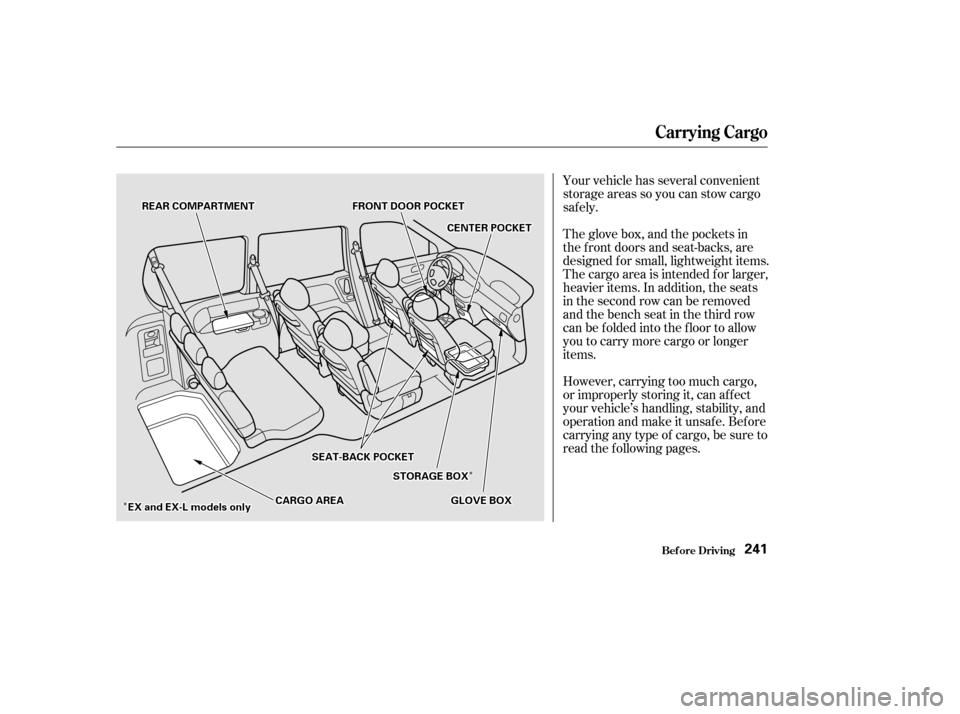
Your vehicle has several convenient
storage areas so you can stow cargo
saf ely.
The glove box, and the pockets in
the f ront doors and seat-backs, are
designed f or small, lightweight items.
The cargo area is intended f or larger,
heavier items. In addition, the seats
in the second row can be removed
andthebenchseatinthethirdrow
can be f olded into the f loor to allow
you to carry more cargo or longer
items.
However, carrying too much cargo,
or improperly storing it, can af f ect
your vehicle’s handling, stability, and
operation and make it unsafe. Before
carrying any type of cargo, be sure to
read the f ollowing pages.
Carrying Cargo
Bef ore Driving241
F FR RO ON NTT D
DO
OO ORR P
PO
OC CKKEET
T
G
GL LOOV VE
E B
BOOX X
S
SE
EA
A T
T-
-B
BA A C
CKK P
PO
OC CKKEET
T
S
ST TO
OR RAA G
GE E B
BOOX X
R
RE
EA
A R
R C
COOM M P
PA
A R
RTTM
M E
EN
NT T
C
CEEN
NT TE
ER
R P
PO
OC CKKEET
T
E
E X
X a
ann d
d E
EX
X -
-L
L m
m o
od
de
ellss o
on
nl
lyy C
CA
A R
RGGO O A
AR
REEA
A
Page 245 of 399

Store or secure all items that could
be thrown around and hurt
someone during a crash.
Be sure items placed on the f loor
behind the f ront seats cannot roll
under the seats and interf ere with
the driver’s ability to operate the
pedals, or with the proper
operation of the seats.
Keep the glove box closed while
driving. If the lid is open, a
passenger could injure their knees
during a crash or sudden stop.
This f igure includes the total weight
of all occupants, cargo, accessories,
and the tongue weight if you are
towing a trailer.
The f inal number is the total weight
of cargo you can carry.
If you are towing a trailer, add the
tongue weight to the number
above. Add up the weight of all occupants.
To f igure out how much cargo you
can carry: When you load luggage, the total
weight of the vehicle, all passengers,
cargo, and trailer tongue load must
not exceed the Gross Vehicle
Weight Rating (GVWR). The load
for the front and rear axles also must
not exceed the Gross Axle Weight
Rating (GAWR). The GVWR and
GAWRareprintedonthetire
information label attached to the
driver’s doorjamb (see page ).
Subtract the total f rom 1,267 lbs
(575 kg).
The maximum load f or your vehicle
is 1,267 lbs (575 kg).
370Carrying Items in the Passenger
Compartment
Load Limit
Carrying Cargo
Bef ore Driving242
Overloading or improper
loading can affect handling and
stability and cause a crash in
which you can be hurt or killed.
Follow all load limits and other
loading guidelines in this
manual.