Page 61 of 319

This light has two f unctions:This indicator comes on when you
turn the ignition switch ON (II). It
is a reminder to check the parking
brake. Driving with the parking
brake not f ully released can
damage the brakes and tires.
If the indicator remains lit after
you have f ully released the
parking brake while the engine is
running, or if it comes on while
driving, it can indicate a problem
in the brake system. For complete
inf ormation, see page . This light normally comes on f or a
f ew seconds when you turn the
ignition switch ON (II), and when
the ignition switch is turned to
START (III). If this light comes on at
any other time, there is a problem in
theABS.If thishappens,takethe
cartoyourdealertohaveitchecked.
With the light on, your car still has
normal braking ability but no anti-
lock. For complete inf ormation, see
page .
This indicator lights when you turn
the ignition switch to ON (II) with
the headlight switch of f and the
parking brake set. It should go of f if
youturnontheheadlightsorrelease
the parking brake. If it comes on at
any other time, it means there is a
problem with the DRL. There may
also be a problem with the high
beam headlights.
1. 2.
282192
Only on models equipped with ABS (see
page ) Canadian models only
190
Indicator L ights
Inst rument s and Cont rols
Parking Brake
and Brake
System
Indicator Anti-lock Brake
System (A BS)
Indicator
‘‘Daytime Running
Lights’’ Indicator
62
U.S. Canada U.S. Canada
Page 72 of 319
In intermittent, the wipers operate
every f ew seconds. In low speed and
high speed, the wipers run continu-
ously.To operate the wipers in mist mode,
push the control lever up f rom the
OFF position. The wipers run at high
speed until you release the lever.
This gives you a quick way to clear
the windshield.To clean the windshield, pull back on
the wiper control lever. The washers
spray until you release the lever.
The wipers run at low speed while
you’re pulling the lever, then
complete one more sweep of the
windshield af ter you release it.
Windshield Washers
Controls Near the Steering Wheel
Inst rument s and Cont rols73
Page 80 of 319

CONT INUED
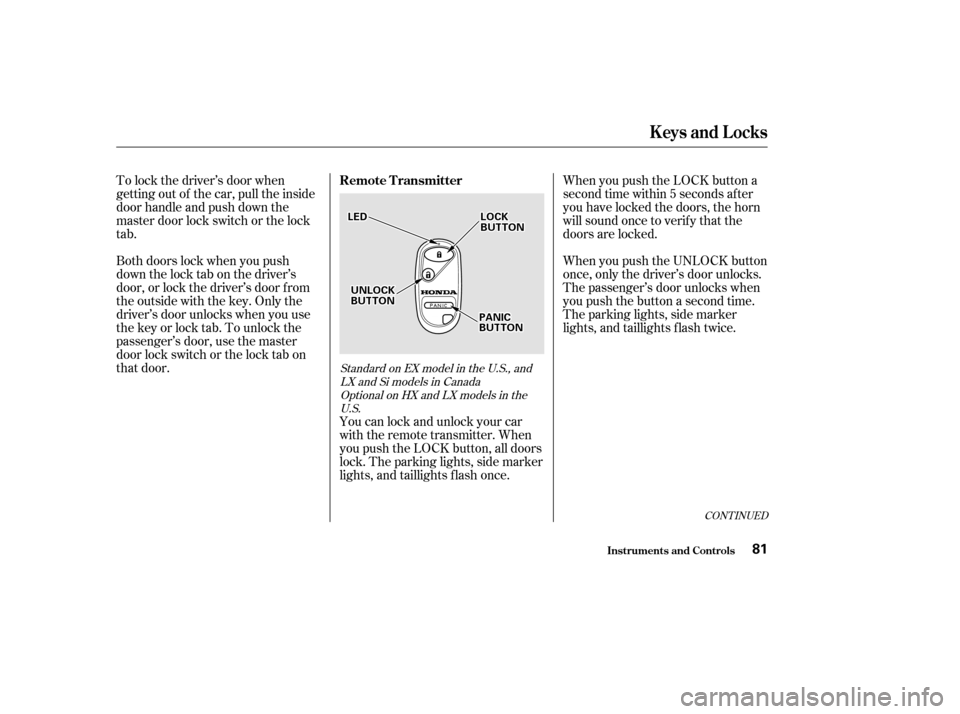
To lock the driver’s door when
getting out of the car, pull the inside
door handle and push down the
master door lock switch or the lock
tab.You can lock and unlock your car
with the remote transmitter. When
you push the LOCK button, all doors
lock. The parking lights, side marker
lights, and taillights f lash once.When you push the LOCK button a
second time within 5 seconds after
you have locked the doors, the horn
will sound once to verify that the
doors are locked.
Both doors lock when you push
down the lock tab on the driver’s
door, or lock the driver’s door f rom
the outside with the key. Only the
driver’s door unlocks when you use
the key or lock tab. To unlock the
passenger’s door, use the master
door lock switch or the lock tab on
that door. When you push the UNLOCK button
once, only the driver’s door unlocks.
The passenger’s door unlocks when
you push the button a second time.
The parking lights, side marker
lights, and taillights f lash twice.
Standard on EX model in the U.S., and
LXandSimodelsinCanada
Optional on HX and LX models in theU.S.
Keys and Locks
Inst rument s and Cont rols
Remote Transmitter
81
LLEEDD
PPAANNIICCBBUUTTTTOONN
UUNNLLOOCCKKBBUUTTTTOONN
LLOOCCKKBBUUTTTTOONN
Page 81 of 319

The ceiling light (if the ceiling light
switch is in the center position) will
come on when you press the
UNLOCK button. If you do not open
any of the doors, the light will go out
in about 30 seconds and the doors
will automatically relock. If you
relock the doors with the remote
transmitter before 30 seconds have
elapsed, the light will go of f
immediately.
You cannot lock or unlock the doors
with the remote transmitter if any
door is not f ully closed or the key is
in the ignition switch.Panic mode allows you to remotely
activate your car’s horn and exterior
lights to attract attention. When
activated, the horn will sound, and
the exterior lights will f lash, f or
about 30 seconds. To activate panic
mode,pressandholdthePANIC
button f or about one second.
To cancel PANIC mode bef ore 30
seconds, press any button on the
remote transmitter. You can also
turn the ignition switch to
ACCESSORY (I) or ON (II).
Panic mode will not activate if the
ignition switch is in the
ACCESSORY (I) or ON (II) position.
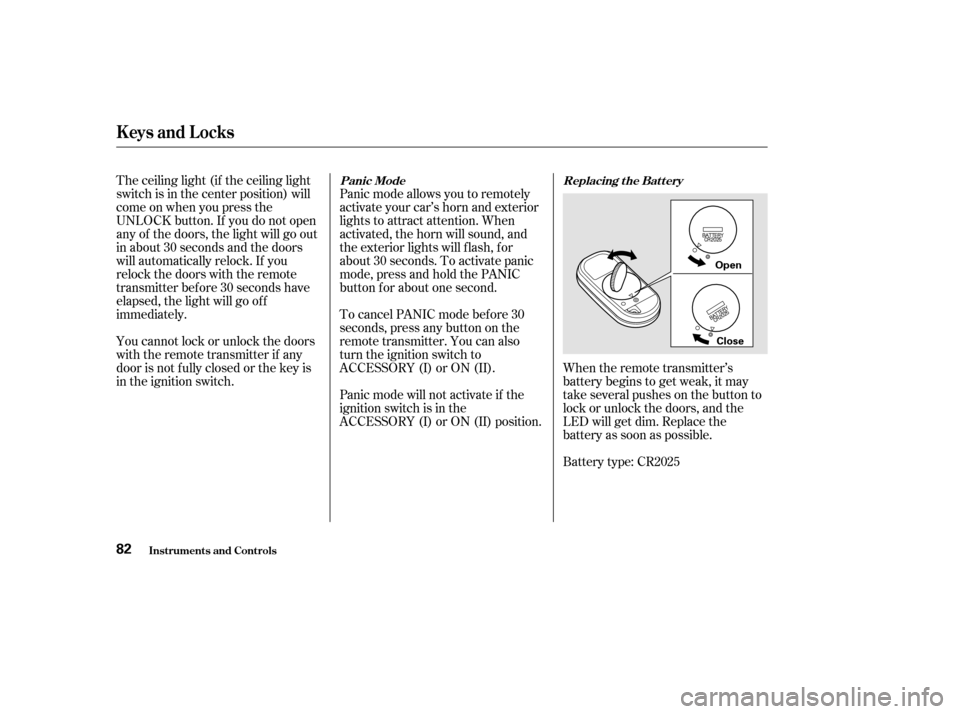
When the remote transmitter’s
battery begins to get weak, it may
take several pushes on the button to
lock or unlock the doors, and the
LED will get dim. Replace the
battery as soon as possible.
Battery type: CR2025Panic Mode Replacing t he Bat t ery
Keys and Locks
Inst rument s and Cont rols82
Open
Close
Page 100 of 319
The ceiling light (with the switch in
the center position) comes on when
you remove the key f rom the ignition
switch. If you do not open a door, the
light stays on, then f ades out in
about 10 seconds.
The ceiling light (with the switch in
the center position) also comes on
when you unlock the door with the
key or the remote transmitter (see
page ).Turn on the spotlight by pushing the
button next to each light. Push the
button again to turn it off. You can
use the spotlights at all times.Turn on the spotlight by pushing the
lens. Push the lens again to turn it
of f . You can use the spotlights at all
times.
84
On EX model in the U.S., and Si model
in Canada On LX model
Interior Lights
Inst rument s and Cont rols
Spotlights
101
LLXX
Page 101 of 319
Your car also has a courtesy light in
the ignition switch. This light comes
on when you open the driver’s door.
It remains on f or several seconds
af ter the door is closed.
On EX model in the U.S., and S modelin Canada
Interior Lights
Inst rument s and Cont rols
Courtesy Lights
102
Page 114 of 319

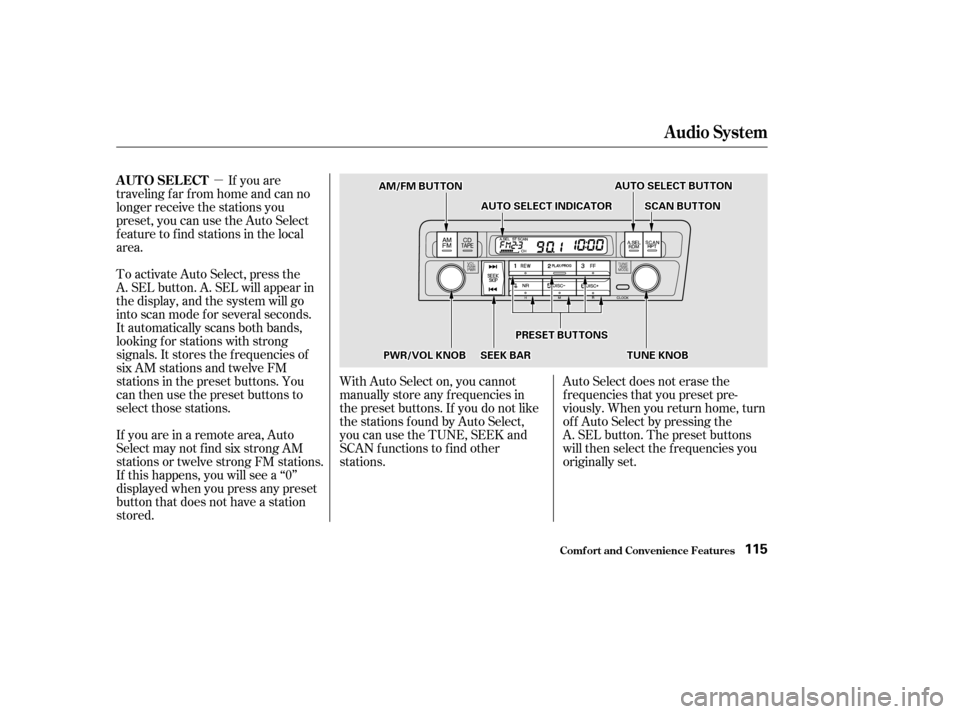
�µIf you are
traveling far from home and can no
longer receive the stations you
preset, you can use the Auto Select
feature to find stations in the local
area.
To activate Auto Select, press the
A. SEL button. A. SEL will appear in
the display, and the system will go
into scan mode f or several seconds.
It automatically scans both bands,
looking f or stations with strong
signals. It stores the f requencies of
six AM stations and twelve FM
stations in the preset buttons. You
can then use the preset buttons to
select those stations.
If you are in a remote area, Auto
Select may not f ind six strong AM
stations or twelve strong FM stations.
If this happens, you will see a ‘‘0’’
displayed when you press any preset
button that does not have a station
stored. Auto Select does not erase the
f requencies that you preset pre-
viously. When you return home, turn
of f Auto Select by pressing the
A. SEL button. The preset buttons
will then select the f requencies you
originally set.
With Auto Select on, you cannot
manually store any f requencies in
the preset buttons. If you do not like
the stations found by Auto Select,
you can use the TUNE, SEEK and
SCAN f unctions to f ind other
stations.
Audio System
Comf ort and Convenience Feat ures
AUTO SELECT
115
PPRREESSEETTBBUUTTTTOONNSS
AAMM//FFMMBBUUTTTTOONNAAUUTTOOSSEELLEECCTTBBUUTTTTOONN
SSCCAANNBBUUTTTTOONN
PPWWRR//VVOOLLKKNNOOBBSSEEEEKKBBAARRTTUUNNEEKKNNOOBB
AAUUTTOOSSEELLEECCTTIINNDDIICCAATTOORR
Page 115 of 319

�µ�µ
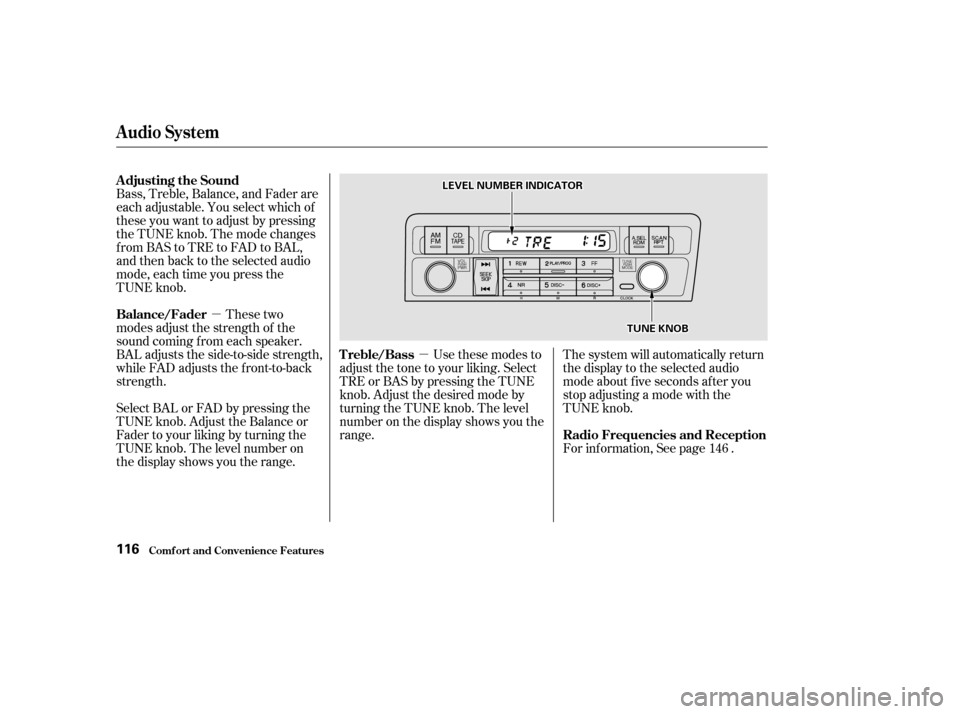
Bass, Treble, Balance, and Fader are
each adjustable. You select which of
these you want to adjust by pressing
the TUNE knob. The mode changes
fromBAStoTREtoFADtoBAL,
and then back to the selected audio
mode, each time you press the
TUNE knob.
These two
modes adjust the strength of the
sound coming f rom each speaker.
BAL adjusts the side-to-side strength,
while FAD adjusts the f ront-to-back
strength.
Select BAL or FAD by pressing the
TUNE knob. Adjust the Balance or
Fader to your liking by turning the
TUNE knob. The level number on
the display shows you the range. Use these modes to
adjust the tone to your liking. Select
TRE or BAS by pressing the TUNE
knob. Adjust the desired mode by
turning the TUNE knob. The level
number on the display shows you the
range. The system will automatically return
the display to the selected audio
mode about f ive seconds af ter you
stop adjusting a mode with the
TUNE knob.
For inf ormation, See page .
146
Comf ort and Convenience Feat ures
Audio System
Adjusting the Sound
Balance/Fader
Treble/Bass
Radio Frequencies and Reception
116
LLEEVVEELLNNUUMMBBEERRIINNDDIICCAATTOORR
TTUUNNEEKKNNOOBB