2002 FORD SUPER DUTY steering wheel
[x] Cancel search: steering wheelPage 46 of 264
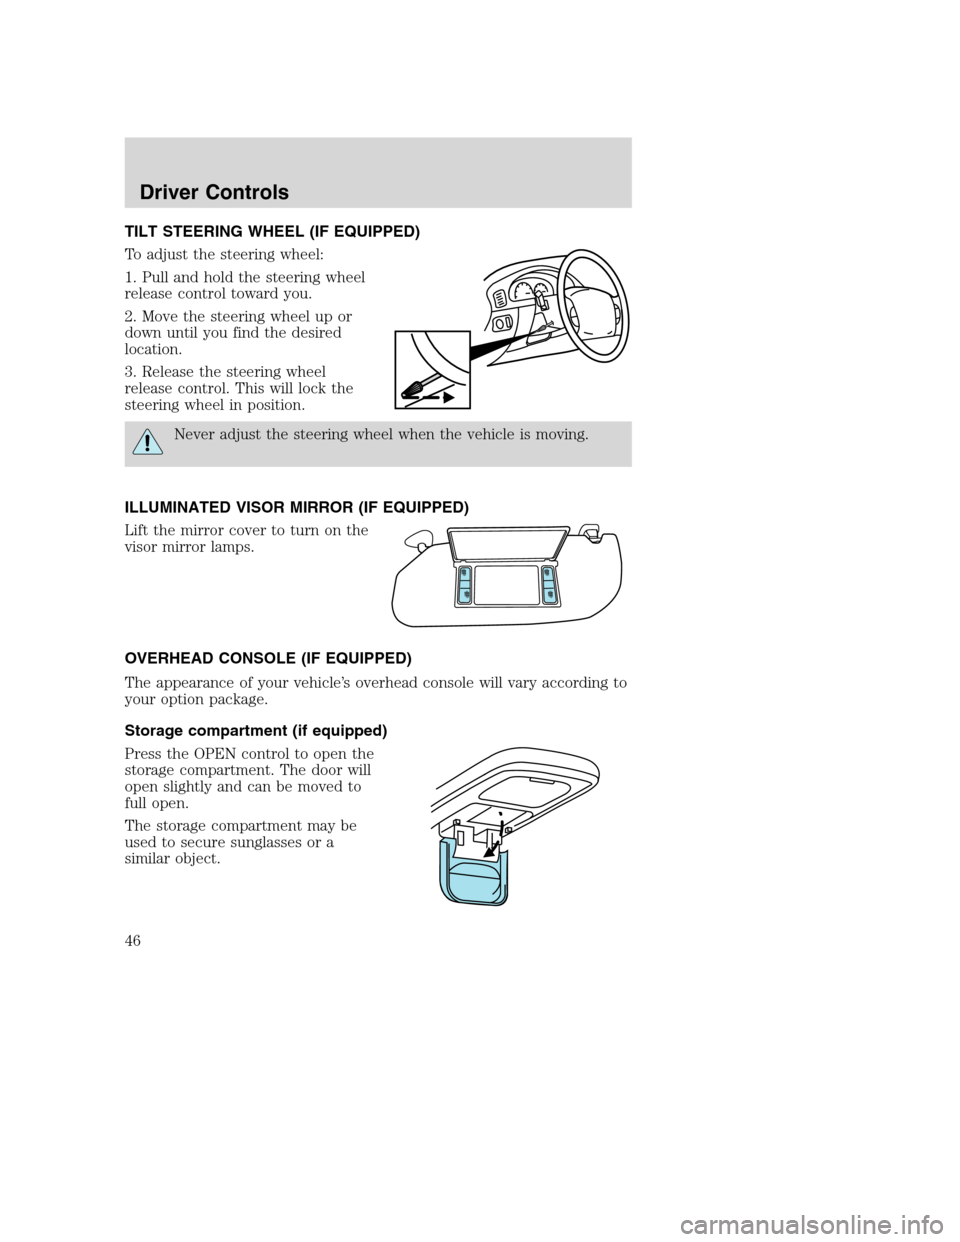
TILT STEERING WHEEL (IF EQUIPPED)
To adjust the steering wheel:
1. Pull and hold the steering wheel
release control toward you.
2. Move the steering wheel up or
down until you find the desired
location.
3. Release the steering wheel
release control. This will lock the
steering wheel in position.
Never adjust the steering wheel when the vehicle is moving.
ILLUMINATED VISOR MIRROR (IF EQUIPPED)
Lift the mirror cover to turn on the
visor mirror lamps.
OVERHEAD CONSOLE (IF EQUIPPED)
The appearance of your vehicle’s overhead console will vary according to
your option package.
Storage compartment (if equipped)
Press the OPEN control to open the
storage compartment. The door will
open slightly and can be moved to
full open.
The storage compartment may be
used to secure sunglasses or a
similar object.
Driver Controls
46
Page 50 of 264
Never adjust the accelerator and brake pedal with feet on pedals
or while the vehicle is moving.
SPEED CONTROL (IF EQUIPPED)
With speed control set, you can maintain a speed of 48 km/h (30 mph)
or more without keeping your foot on the pedal. Speed control does not
work at speeds below 48 km/h (30 mph).
Do not use the speed control in heavy traffic or on roads that
are winding, slippery or unpaved.
Setting speed control
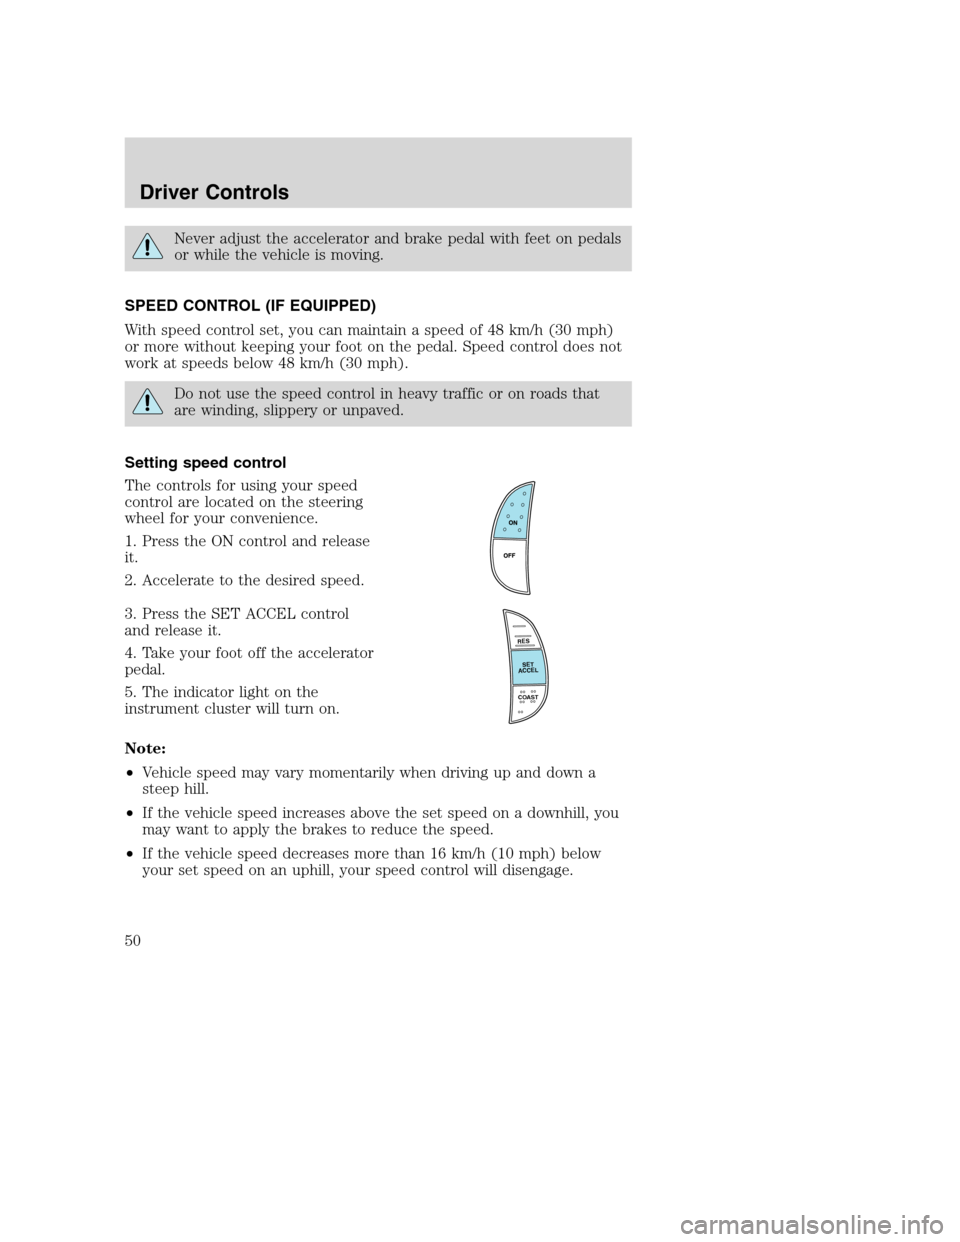
The controls for using your speed
control are located on the steering
wheel for your convenience.
1. Press the ON control and release
it.
2. Accelerate to the desired speed.
3. Press the SET ACCEL control
and release it.
4. Take your foot off the accelerator
pedal.
5. The indicator light on the
instrument cluster will turn on.
Note:
•Vehicle speed may vary momentarily when driving up and down a
steep hill.
•If the vehicle speed increases above the set speed on a downhill, you
may want to apply the brakes to reduce the speed.
•If the vehicle speed decreases more than 16 km/h (10 mph) below
your set speed on an uphill, your speed control will disengage.
R
E
S
S
E
T
A
C
C
E
L
COAST
Driver Controls
50
Page 101 of 264
STARTING
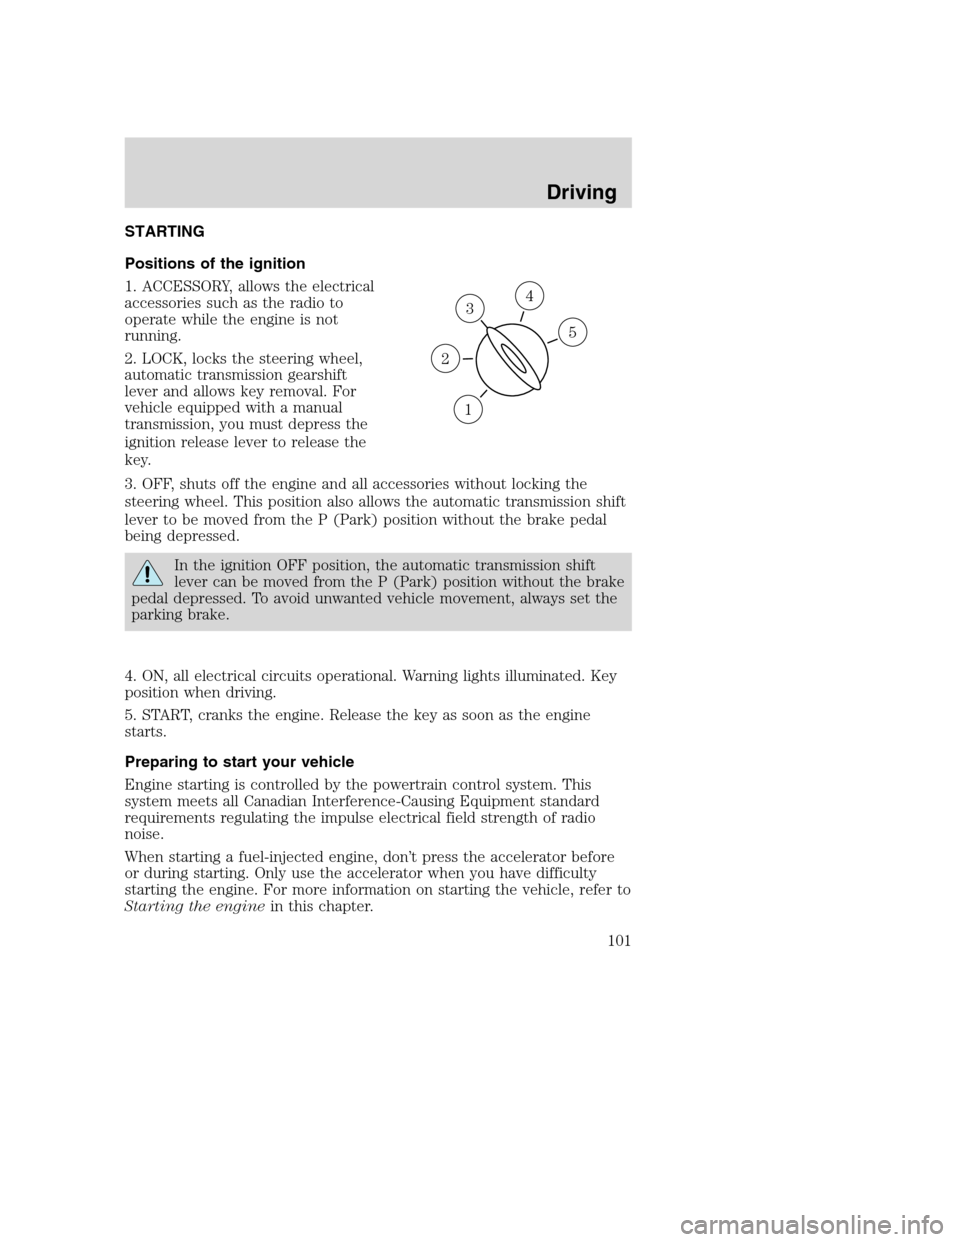
Positions of the ignition
1. ACCESSORY, allows the electrical
accessories such as the radio to
operate while the engine is not
running.
2. LOCK, locks the steering wheel,
automatic transmission gearshift
lever and allows key removal. For
vehicle equipped with a manual
transmission, you must depress the
ignition release lever to release the
key.
3. OFF, shuts off the engine and all accessories without locking the
steering wheel. This position also allows the automatic transmission shift
lever to be moved from the P (Park) position without the brake pedal
being depressed.
In the ignition OFF position, the automatic transmission shift
lever can be moved from the P (Park) position without the brake
pedal depressed. To avoid unwanted vehicle movement, always set the
parking brake.
4. ON, all electrical circuits operational. Warning lights illuminated. Key
position when driving.
5. START, cranks the engine. Release the key as soon as the engine
starts.
Preparing to start your vehicle
Engine starting is controlled by the powertrain control system. This
system meets all Canadian Interference-Causing Equipment standard
requirements regulating the impulse electrical field strength of radio
noise.
When starting a fuel-injected engine, don’t press the accelerator before
or during starting. Only use the accelerator when you have difficulty
starting the engine. For more information on starting the vehicle, refer to
Starting the enginein this chapter.
3
1
2
5
4
Driving
101
Page 105 of 264
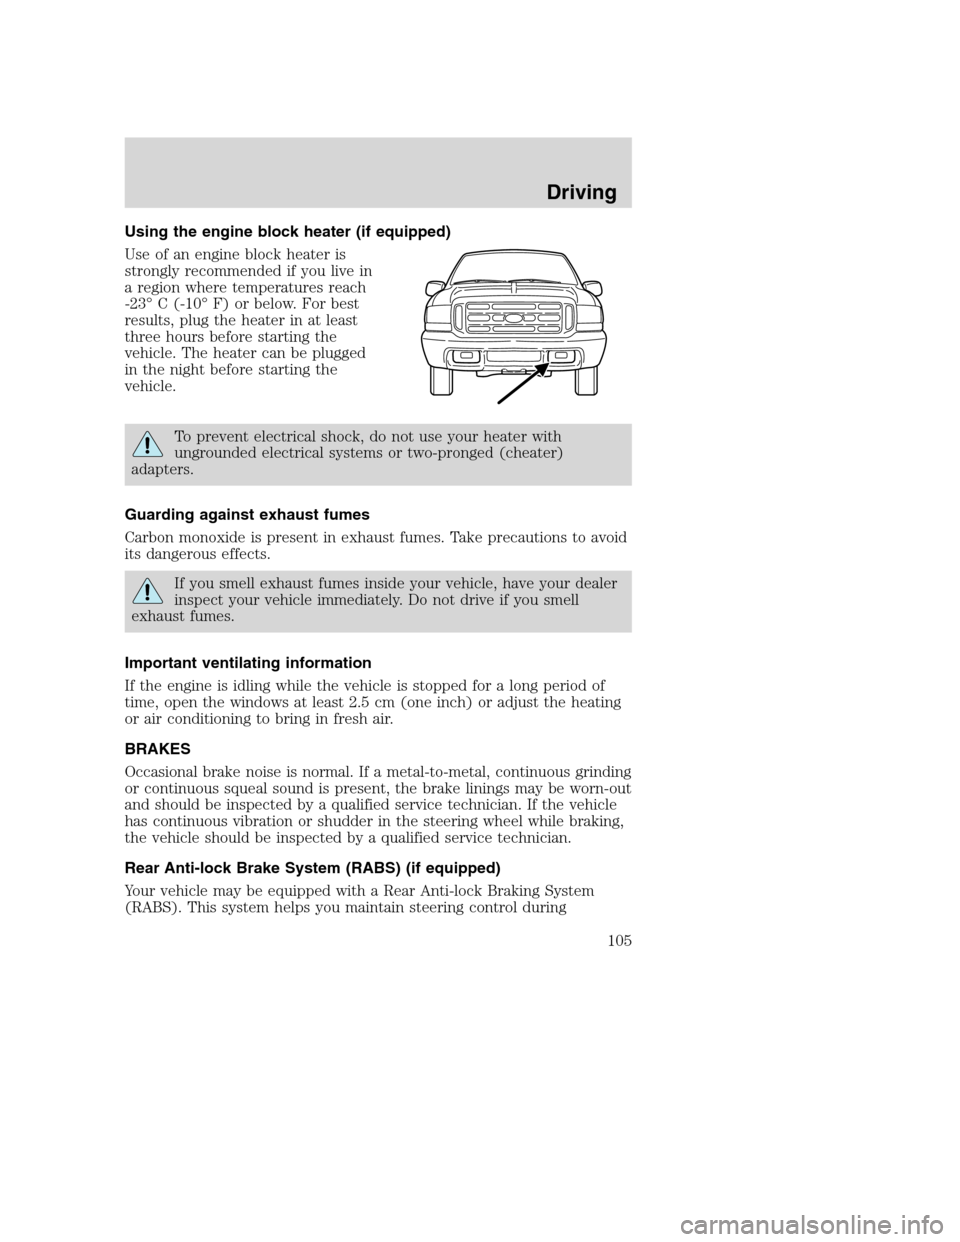
Using the engine block heater (if equipped)
Use of an engine block heater is
strongly recommended if you live in
a region where temperatures reach
-23° C (-10° F) or below. For best
results, plug the heater in at least
three hours before starting the
vehicle. The heater can be plugged
in the night before starting the
vehicle.
To prevent electrical shock, do not use your heater with
ungrounded electrical systems or two-pronged (cheater)
adapters.
Guarding against exhaust fumes
Carbon monoxide is present in exhaust fumes. Take precautions to avoid
its dangerous effects.
If you smell exhaust fumes inside your vehicle, have your dealer
inspect your vehicle immediately. Do not drive if you smell
exhaust fumes.
Important ventilating information
If the engine is idling while the vehicle is stopped for a long period of
time, open the windows at least 2.5 cm (one inch) or adjust the heating
or air conditioning to bring in fresh air.
BRAKES
Occasional brake noise is normal. If a metal-to-metal, continuous grinding
or continuous squeal sound is present, the brake linings may be worn-out
and should be inspected by a qualified service technician. If the vehicle
has continuous vibration or shudder in the steering wheel while braking,
the vehicle should be inspected by a qualified service technician.
Rear Anti-lock Brake System (RABS) (if equipped)
Your vehicle may be equipped with a Rear Anti-lock Braking System
(RABS). This system helps you maintain steering control during
Driving
105
Page 106 of 264
emergency stops by keeping the rear brakes from locking. The front
wheels, however, may still lock since they are not controlled by the
RABS. Noise from the ABS pump motor and brake pedal pulsation may
be observed during ABS braking; this is normal.
RABS warning lamp
The
ABSwarning lamp in the instrument cluster momentarily illuminates
when the ignition is turned to the ON position. If the light does not
illuminate momentarily at start up, remains on or continues to flash, the
ABS needs to be serviced.
With the ABS light on, the anti-lock
brake system is disabled and normal
braking is still effective unless the
brake warning light also remains
illuminated with parking brake released. (If your brake warning lamp
illuminates, have your vehicle serviced immediately.)
Using RABS
In an emergency, applying full pressure may cause the front wheels to
lock.If the front brakes lock, the vehicle cannot be steered.Yo u
should apply the brakes with steadily increasing force, as if “squeezing”
the brakes. If you feel the front wheels begin to lock, momentarily
release the pedal and repeat the “squeeze” technique.
Four-wheel anti-lock brake system (ABS)
Your vehicle is equipped with an Anti-lock Braking System (ABS). This
system helps you maintain steering control during emergency stops by
keeping the brakes from locking. Noise from the ABS pump motor and
brake pedal pulsation may be observed during ABS braking; any
pulsations or mechanical noise you may feel or hear is normal.
ABS warning lamp
ABS
TheABSlamp in the instrument cluster momentarily illuminates when
the ignition is turned to ON. If the light does not illuminate during start
up, remains on or flashes, the ABS may be disabled and the ABS may
need to be serviced
Even when the ABS is disabled,
normal braking is still effective. (If
your BRAKE warning lamp
illuminates with the parking brake
released, have your brake system serviced immediately.)
Driving
106
Page 107 of 264
Using ABS
When hard braking is required, apply continuous force on the brake
pedal; do not pump the brake pedal since this will reduce the
effectiveness of the ABS and will increase your vehicle’s stopping
distance. The ABS will be activated immediately, allowing you to retain
full steering control during hard braking and on slippery surfaces.
However, the ABS does not decrease stopping distance.
Parking brake
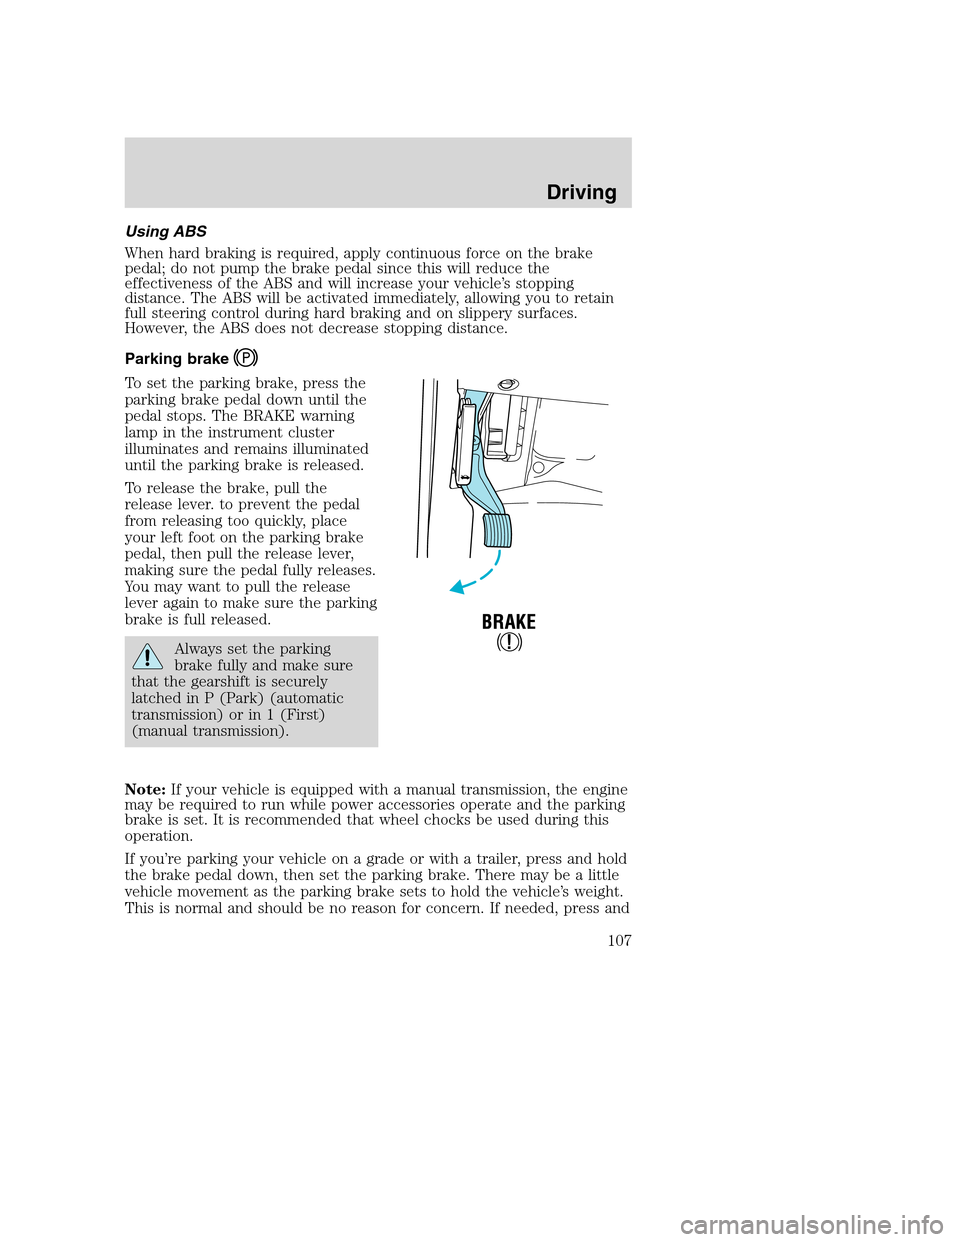
To set the parking brake, press the
parking brake pedal down until the
pedal stops. The BRAKE warning
lamp in the instrument cluster
illuminates and remains illuminated
until the parking brake is released.
To release the brake, pull the
release lever. to prevent the pedal
from releasing too quickly, place
your left foot on the parking brake
pedal, then pull the release lever,
making sure the pedal fully releases.
You may want to pull the release
lever again to make sure the parking
brake is full released.
Always set the parking
brake fully and make sure
that the gearshift is securely
latched in P (Park) (automatic
transmission) or in 1 (First)
(manual transmission).
Note:If your vehicle is equipped with a manual transmission, the engine
may be required to run while power accessories operate and the parking
brake is set. It is recommended that wheel chocks be used during this
operation.
If you’re parking your vehicle on a grade or with a trailer, press and hold
the brake pedal down, then set the parking brake. There may be a little
vehicle movement as the parking brake sets to hold the vehicle’s weight.
This is normal and should be no reason for concern. If needed, press and
Driving
107
Page 108 of 264

hold the brake pedal down, release the parking brake, then try pushing
the parking brake pedal further down. Chock the wheels if required. If
the parking brake cannot hold the weight of the vehicle, the parking
brake may need to be serviced.
STEERING
To prevent damage to the power steering system:
•Never hold the steering wheel at it’s furthest turning points (until it
stops) for more than a few seconds when the engine is running.
•Do not operate the vehicle with a low power steering pump fluid level
(below the MIN mark on the reservoir).
If the power steering system breaks down (or if the engine is turned
off), you can steer the vehicle manually, but it takes more effort.
If the steering wanders or pulls, check for:
•an underinflated tire
•uneven tire wear
•loose or worn suspension components
•loose or worn steering components
•improper steering alignment
TRACTION-LOK AXLE (IF EQUIPPED)
This axle provides added traction on slippery surfaces, particularly when
one wheel is on a poor traction surface. Under normal conditions, the
Traction-Lok axle functions like a standard rear axle.
To reduce the risk of injury, never run the engine with one wheel
off the ground, such as when changing a tire.
PREPARING TO DRIVE YOUR VEHICLE
Utility vehicles have a significantly higher rollover rate than
other types of vehicles.
In a rollover crash, an unbelted person is significantly more likely
to die than a person wearing a safety belt.
Your vehicle has larger tires and increased ground clearance, giving the
vehicle a higher center of gravity than a passenger car.
Driving
108
Page 119 of 264
4X4 LOW (4WD Low)- Uses extra gearing to provide maximum power
to all four wheels. Intended only for off-road applications such as deep
sand, steep grades or pulling heavy objects. 4L (4WD Low) will not
engage while the vehicle is moving; this is normal and should be no
reason for concern. Refer toShifting to/from 4L (4WD Low)for proper
operation.
Shifting between 2WD (2WD High) and 4X4 HIGH (4WD High)
•Move the 4WD control between 2WD and 4X4 HIGH at any forward
speed.
Note:Do not perform this operation at speeds above 72 km/h (45 mph)
if the outside temperature is below 0°C (32°F).
Note:Do not perform this operation if the rear wheels are slipping.
Shifting to/from 4X4 LOW (4WD Low)
1. Bring the vehicle to a complete stop
2. Depress the brake
3. On vehicles equipped with an automatic transmission, place the
transmission in N (Neutral); on vehicles equipped with a manual
transmission, depress the clutch.
4. Move the 4WD control to the desired position.
•If shifting into 4X4 LOW (4WD Low), wait for the LOW RANGE light
in the instrument cluster to turnonindicating the shift is complete.
•If shifting out of 4X4 LOW (4WD Low), wait for the LOW RANGE light
in the instrument cluster to turnoffindicating the shift is complete.
Driving off-road with truck and utility vehicles
4WD vehicles are specially equipped for driving on sand, snow, mud and
rough terrain and have operating characteristics that are somewhat
different from conventional vehicles, both on and off the road.
How your vehicle differs from other vehicles
Truck and utility vehicles can differ from some other vehicles. Your
vehicle may be higher to allow it to travel over rough terrain without
getting hung up or damaging underbody components.
The differences that make your vehicle so versatile also make it handle
differently than an ordinary passenger car.
Maintain steering wheel control at all times, especially in rough terrain.
Since sudden changes in terrain can result in abrupt steering wheel
motion, make sure you grip the steering wheel from the outside. Do not
grip the spokes.
Driving
119