Page 78 of 264
3. Connect the electrical connector into the plastic
base until it snaps, locking it into position.
4. Install the headlamp on vehicle by aligning the
lamp with the rear snap retainers, push to seat and
secure with two retainer pins.
5. Turn the headlamps on and make sure they work
properly. If the headlamp was correctly aligned
before you changed the bulb, you should not need to
align it again.
Replacing front parking lamp/turn signal bulbs
1. Make sure the headlamp control is in the OFF
position.
2. Open the hood.
3. At the back of the
headlamp, pull two
retainer pins up to
release the headlamp
assembly.
4. Pull headlamp
assembly forward
disengaging the lamp
from the rear snap retainers to expose the back of
the bulb.
5. Rotate the bulb
socket
counterclockwise and
remove from lamp
assembly.
6. Carefully pull the
bulb straight out from
the socket and push in
the new bulb.
7. To complete installation, follow the removal
procedure in reverse order.
Lights
78
Page 79 of 264
Replacing high-mount brakelamp bulbs
1. Open trunk.
2. Inside trunk, locate
access hole under the
rear decklid.
3. Remove the bulb
socket by rotating it 45
degrees and pulling it
out of the lamp
assembly.
4. Carefully pull bulb
straight out of socket and push in new bulb.
5. To complete installation, follow the removal
procedure in reverse order.
Replacing foglamp bulbs
The halogen bulb contains gas under pressure.
The bulb may shatter if the glass envelope is
scratched or if the bulb is dropped. Handle the
bulb carefully. Grasp the bulb only by its base.
Avoid touching the glass envelope.
1. Rotate the foglamp
bulb counterclockwise
and remove from
foglamp (the rear side
of the foglamp is
shown).
2. Disconnect the
electrical connector
from the foglamp bulb.
3. Connect the electrical connector to the new
foglamp bulb.
4. Install the foglamp bulb in foglamp by rotating
clockwise.
Lights
79
Page 80 of 264
Replacing license plate lamp bulbs
1. Open trunk and
remove bulb socket
from the trunk lid by
turning
counterclockwise.
2. Pull the bulb straight
out of the socket and
push in the new bulb.
3. Install the bulb socket in trunk lid by turning
clockwise.
Replacing tail lamp/backup bulbs
For bulb replacement, see a dealer or qualified
technician.
Lights
80
Page 89 of 264

OVERDRIVE CONTROL (IF EQUIPPED)
Activating overdrive
(Overdrive) is the normal drive position for the
best fuel economy.
The overdrive function allows automatic upshifts and
downshifts through all available gears.
Deactivating overdrive
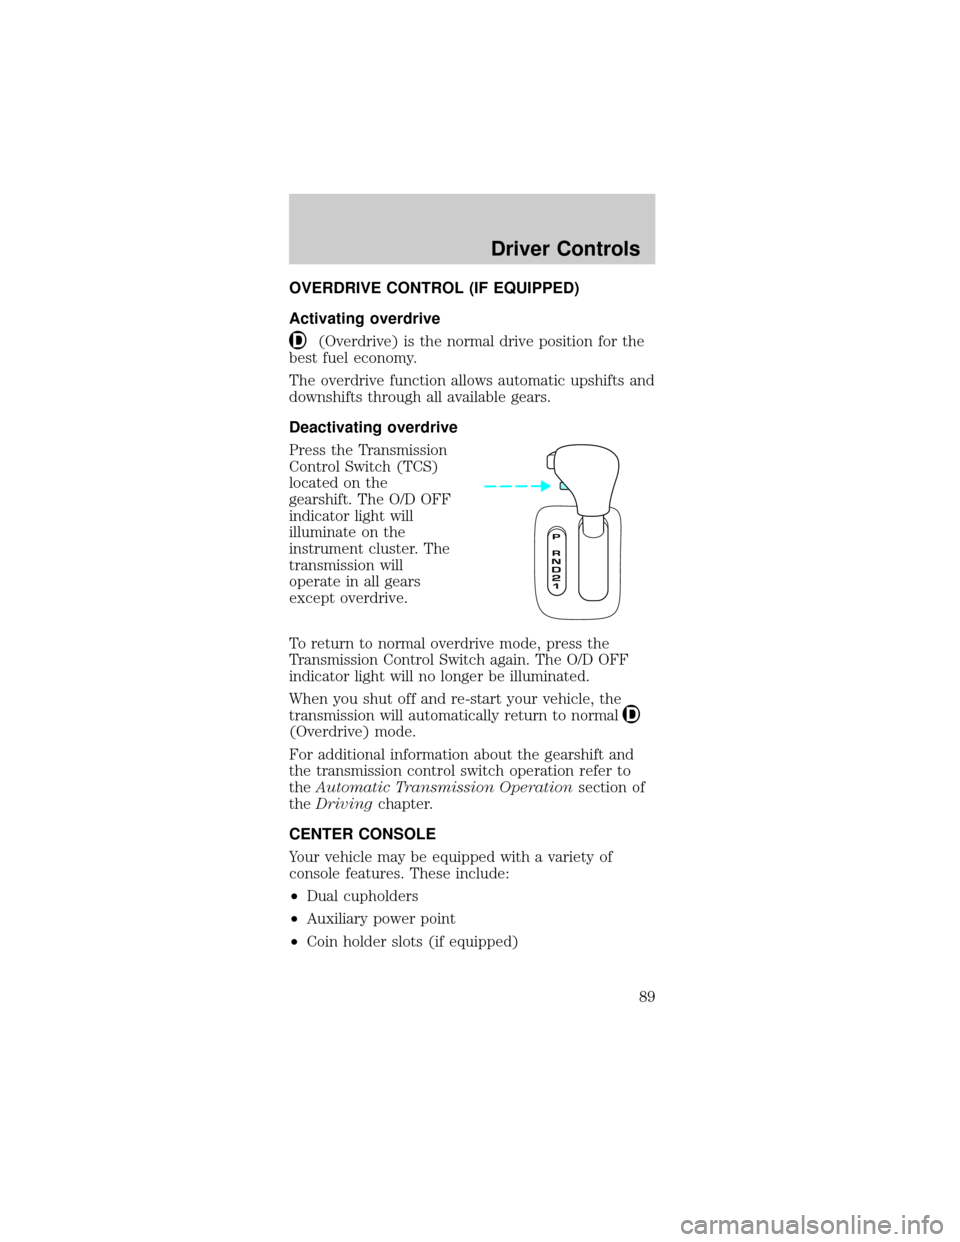
Press the Transmission
Control Switch (TCS)
located on the
gearshift. The O/D OFF
indicator light will
illuminate on the
instrument cluster. The
transmission will
operate in all gears
except overdrive.
To return to normal overdrive mode, press the
Transmission Control Switch again. The O/D OFF
indicator light will no longer be illuminated.
When you shut off and re-start your vehicle, the
transmission will automatically return to normal
(Overdrive) mode.
For additional information about the gearshift and
the transmission control switch operation refer to
theAutomatic Transmission Operationsection of
theDrivingchapter.
CENTER CONSOLE
Your vehicle may be equipped with a variety of
console features. These include:
²Dual cupholders
²Auxiliary power point
²Coin holder slots (if equipped)
Driver Controls
89
Page 91 of 264
To lower the convertible top:
1. Bring vehicle to a complete stop. Engage the
parking brake. Key must be in the ON position.
2. Check the convertible top stowage compartment
behind the rear seat to be sure it is empty and ready
to receive the top.
3. Unclamp the top from the windshield header at
both the right and left sides by pulling each clamp
rearward until the hook in the windshield header is
free. The clamps are flush with the header when in
the closed position.
4. Close the windshield header clamps immediately
after disengagement, to avoid cutting the top
material and to permit installation of the vinyl boot.
5. If the top has not
been lowered for some
time and sticks to the
windshield header,
push the front of the
top up slightly with
your hand to loosen it.
6. Push the convertible
top switch on the
console in front of the
armrest and hold until
the top is completely
stored.
7. Disengage the
parking brake.
SETPARKBRAKE
Driver Controls
91
Page 95 of 264
To open the luggage
compartment door
(lid) from the inside,
pull the illuminated ªTº
shaped handle and
push up on the trunk
lid. The material that
the handle is made of
will glow for hours in
the darkness of the
luggage compartment
following brief
exposure to ambient
light.
The ªTº shaped handle will be located either on the
luggage compartment door (lid) or inside the
luggage compartment near the tail lamps.
Keep vehicle
doors and
luggage compartment
locked and keep keys
out of a child's reach.
Unsupervised
children could lock
themselves in an
open trunk and risk
injury. Children
should be taught not
to play in vehicles.
Locks and Security
95
Page 100 of 264

The inside lights will not turn off if:
²they have been turned on with the dimmer
control or
²any door is open
The battery saver will shut off the interior lamps 30
minutes after the ignition has been turned to the
OFF position, 10 minutes after if the door is left
open, and 30 minutes after if the trunk is left open
or the dome lamp switch is left on.
SECURILOCKYPASSIVE ANTI-THEFT SYSTEM
SecuriLockypassive anti-theft system is an engine
immobilization system. This system prevents the
engine from being started unless acoded key
programmed to your vehicleis used.
The SecuriLockypassive anti-theft system is not
compatible with non-Ford aftermarket remote start
systems. Use of these systems may result in vehicle
starting problems and a loss of security protection.
Automatic arming
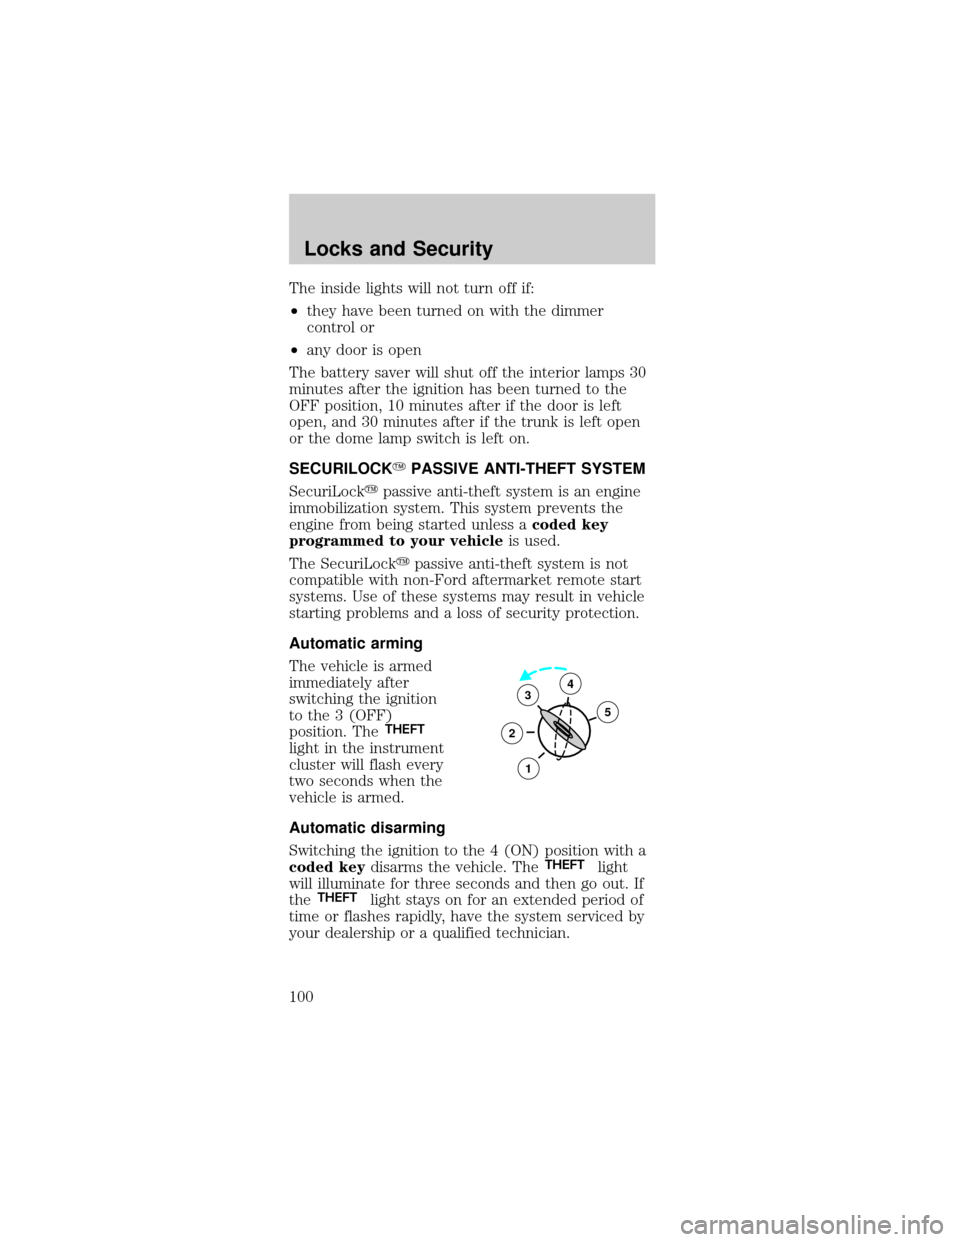
The vehicle is armed
immediately after
switching the ignition
to the 3 (OFF)
position. The
THEFT
light in the instrument
cluster will flash every
two seconds when the
vehicle is armed.
Automatic disarming
Switching the ignition to the 4 (ON) position with a
coded keydisarms the vehicle. The
THEFTlight
will illuminate for three seconds and then go out. If
the
THEFTlight stays on for an extended period of
time or flashes rapidly, have the system serviced by
your dealership or a qualified technician.
3
2
1
5
4
Locks and Security
100
Page 113 of 264

How to disengage the automatic locking mode
Ford Motor Company recommends that all
safety belt assemblies and attaching
hardware should be inspected by a qualified
technician after any collision. Safety belt
assemblies not in use during a collision should also
be inspected and replaced if either damage or
improper operation is noted.
Disconnect the combination lap/shoulder belt and
allow it to retract completely to disengage the
automatic locking mode and activate the vehicle
sensitive (emergency) locking mode.
After any vehicle collision, the front
passenger and rear outboard seat belt
systems must be checked by a qualified technician
to verify that the ªautomatic locking retractorº
feature for child seats is still functioning properly.
In addition, all seat belts should be checked for
proper function.
BELT AND RETRACTOR ASSEMBLY MUST
BE REPLACED if the seat belt assembly
ªautomatic locking retractorº feature or any other
seat belt function is not operating properly when
checked according to the procedures in Workshop
Manual.
Failure to replace the Belt and Retractor
assembly could increase the risk of injury in
collisions.
Safety belt warning light and indicator
chime
The seat belt warning light illuminates in the
instrument cluster and a chime sounds to remind
the occupants to fasten their safety belts.
Seating and Safety Restraints
113