Page 97 of 320

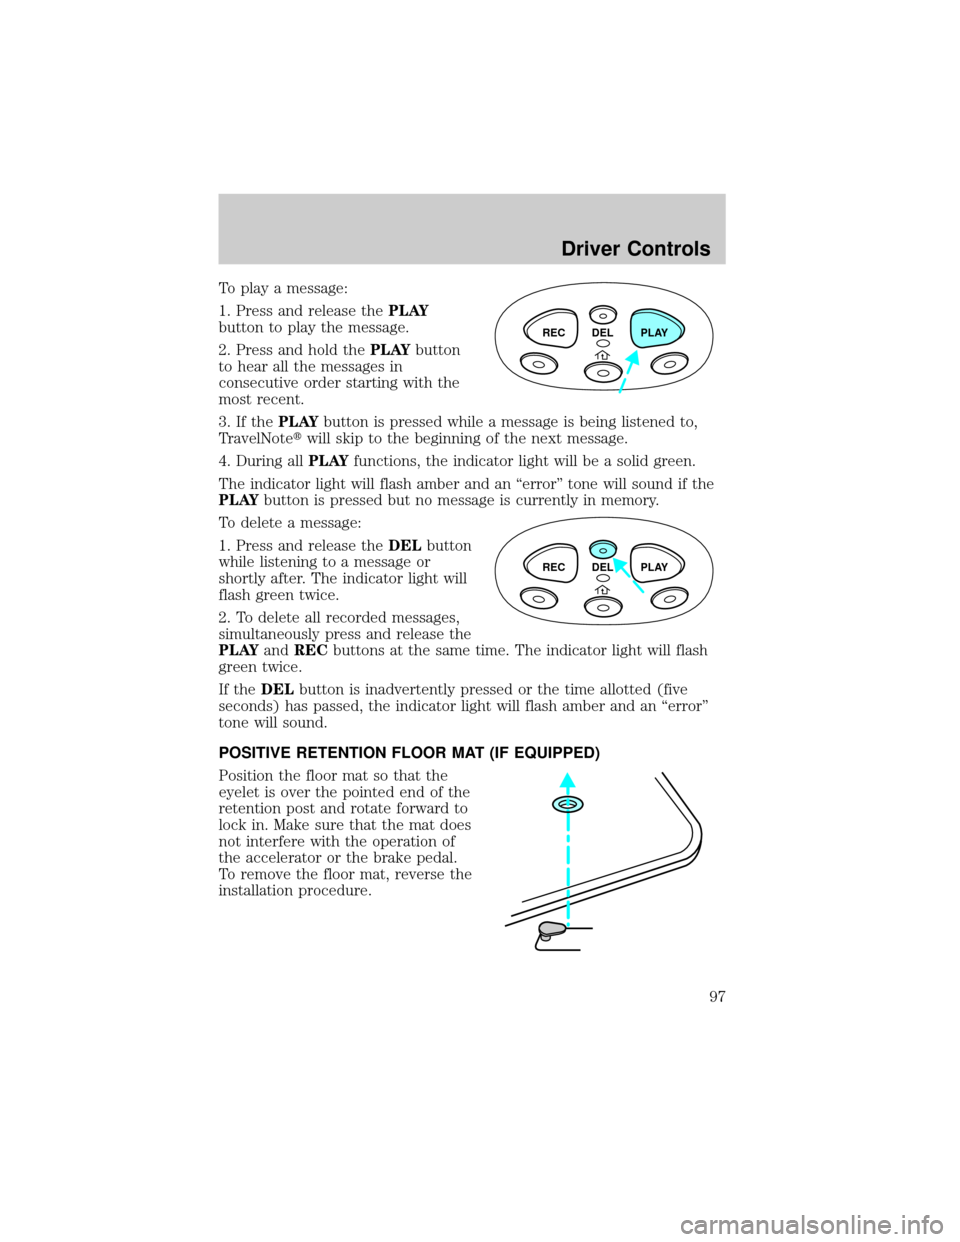
To play a message:
1. Press and release thePLAY
button to play the message.
2. Press and hold thePLAYbutton
to hear all the messages in
consecutive order starting with the
most recent.
3. If thePLAYbutton is pressed while a message is being listened to,
TravelNotetwill skip to the beginning of the next message.
4. During allPLAYfunctions, the indicator light will be a solid green.
The indicator light will flash amber and an ªerrorº tone will sound if the
PLAYbutton is pressed but no message is currently in memory.
To delete a message:
1. Press and release theDELbutton
while listening to a message or
shortly after. The indicator light will
flash green twice.
2. To delete all recorded messages,
simultaneously press and release the
PLAYandRECbuttons at the same time. The indicator light will flash
green twice.
If theDELbutton is inadvertently pressed or the time allotted (five
seconds) has passed, the indicator light will flash amber and an ªerrorº
tone will sound.
POSITIVE RETENTION FLOOR MAT (IF EQUIPPED)
Position the floor mat so that the
eyelet is over the pointed end of the
retention post and rotate forward to
lock in. Make sure that the mat does
not interfere with the operation of
the accelerator or the brake pedal.
To remove the floor mat, reverse the
installation procedure.
REC DEL PLAY
REC DEL PLAY
Driver Controls
97
Page 108 of 320

To open the tonneau cover from the
inside, pull the ªTº shaped handle
and push up on the tonneau cover
panel. The material that the handle
is made of will glow for hours in the
darkness of the pickup box following
brief exposure to ambient light.
The ªTº shaped handle is located on
the tonneau cover panel.
Keep vehicle doors and tonneau cover locked and keep keys out
of a child's reach. Unsupervised children could lock themselves
in an open pickup box and risk injury. Children should be taught not to
play in vehicles.
On hot days, the temperature in the pickup box can rise very
quickly. Exposure of people or animals to these high
temperatures for even a short time can cause death or serious
heat-related injuries, including brain damage. Small children are
particularly at risk.
REMOTE ENTRY SYSTEM (IF EQUIPPED)
This device complies with part 15 of the FCC rules and with RS-210 of
Industry Canada. Operation is subject to the following two conditions:
(1) This device may not cause harmful interference, and (2) This device
must accept any interference received, including interference that may
cause undesired operation.
Changes or modifications not expressly approved by the party
responsible for compliance could void the user's authority to
operate the equipment.
Locks and Security
108
Page 112 of 320

Programming remote transmitters
It is necessary to haveall(maximum of four Ð original and/or new) of
your remote transmitters available prior to beginning this procedure.
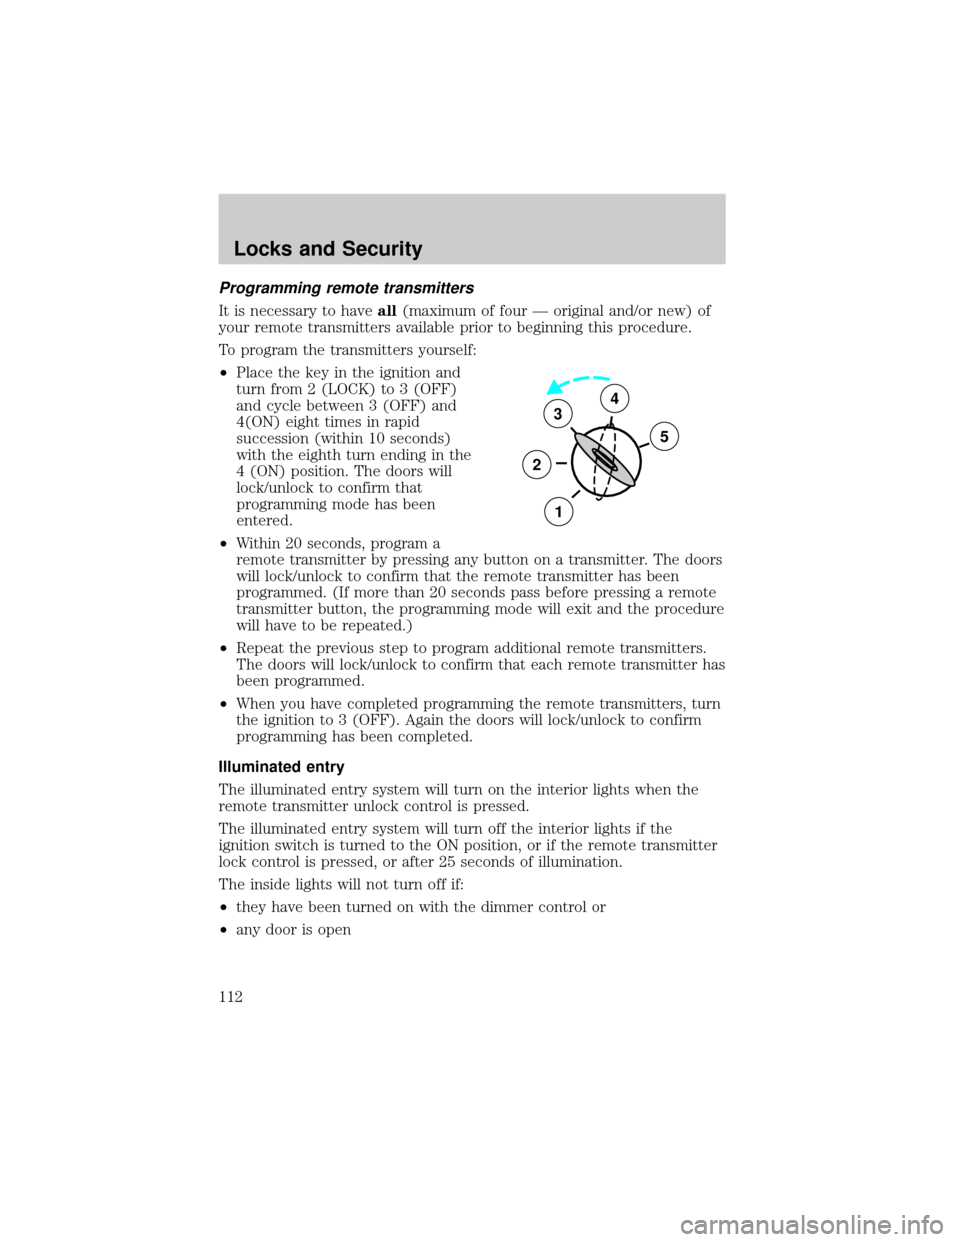
To program the transmitters yourself:
²Place the key in the ignition and
turn from 2 (LOCK) to 3 (OFF)
and cycle between 3 (OFF) and
4(ON) eight times in rapid
succession (within 10 seconds)
with the eighth turn ending in the
4 (ON) position. The doors will
lock/unlock to confirm that
programming mode has been
entered.
²Within 20 seconds, program a
remote transmitter by pressing any button on a transmitter. The doors
will lock/unlock to confirm that the remote transmitter has been
programmed. (If more than 20 seconds pass before pressing a remote
transmitter button, the programming mode will exit and the procedure
will have to be repeated.)
²Repeat the previous step to program additional remote transmitters.
The doors will lock/unlock to confirm that each remote transmitter has
been programmed.
²When you have completed programming the remote transmitters, turn
the ignition to 3 (OFF). Again the doors will lock/unlock to confirm
programming has been completed.
Illuminated entry
The illuminated entry system will turn on the interior lights when the
remote transmitter unlock control is pressed.
The illuminated entry system will turn off the interior lights if the
ignition switch is turned to the ON position, or if the remote transmitter
lock control is pressed, or after 25 seconds of illumination.
The inside lights will not turn off if:
²they have been turned on with the dimmer control or
²any door is open
3
2
1
5
4
Locks and Security
112
Page 113 of 320

The battery save feature will turn off the interior lights 45 minutes after
the last door is closed, even if the dimmer control is on.
Autolock (if equipped)
This feature automatically locks all vehicle doors when:
²all doors are closed
²the engine is running
²you shift into any gear putting the vehicle in motion.
Relock
The autolock feature repeats when:
²any door is opened then closed while the engine is running and
²you put the vehicle in motion.
Deactivating/activating the autolock feature
Before following the procedure, make sure that the ignition is OFF and
all vehicle doors are closed.
You must complete steps 1-7 within 30 seconds or the procedure will
have to be repeated. If the procedure needs to be repeated, you must
wait 30 seconds.
1. Turn the ignition key to ON.
2. Press the power door unlock control three times.
3. Turn the ignition key from ON to OFF.
4. Press the power door unlock control three times.
5. Turn the ignition back to ON. The horn will chirp.
6. Press the unlock control, then press the lock control. The horn will
chirp once if autolock was deactivated or twice (one short and one long
chirp) if autolock was activated.
7. Turn the ignition to OFF. The horn will chirp once to confirm the
procedure is complete.
Keyless entry system (if equipped)
With the keyless entry keypad, you can:
²lock or unlock the vehicle doors without using the key.
Locks and Security
113
Page 116 of 320

Activating/deactivating autolock with the keyless entry system
Before following the activation or deactivation procedures, make sure
that the anti-theft system (if equipped) is not armed, ignition is off, and
all vehicle doors and liftgate window are closed.
1. Enter 5 digit entry code
2. Press and hold 7/8 control
3. Press and release 3/4 control while holding 7/8 control
4. Release 7/8 control.
The horn will chirp once if autolock was deactivated or twice (one short
and one long chirp) if autolock was activated.
To re-activate autolock, repeat steps 1±4.
SECURILOCKYPASSIVE ANTI-THEFT SYSTEM
SecuriLockypassive anti-theft system is an engine immobilization
system. This system prevents the engine from being started unless a
coded key programmed to your vehicleis used.
The SecuriLockypassive anti-theft system is not compatible with
non-Ford aftermarket remote start systems. Use of these systems may
result in vehicle starting problems and a loss of security protection.
Automatic arming
The vehicle is armed immediately
after switching the ignition to the 3
(OFF) position. The
THEFTlight in
the instrument cluster will flash
every two seconds when the vehicle
is armed.3
2
1
5
4
Locks and Security
116
Page 117 of 320

Automatic disarming
Switching the ignition to the 4 (ON) position with acoded keydisarms
the vehicle. The
THEFTlight will illuminate for three seconds and then
go out. If theTHEFTlight stays on for an extended period of time or
flashes rapidly, have the system serviced by your dealership or a
qualified technician.
Key information
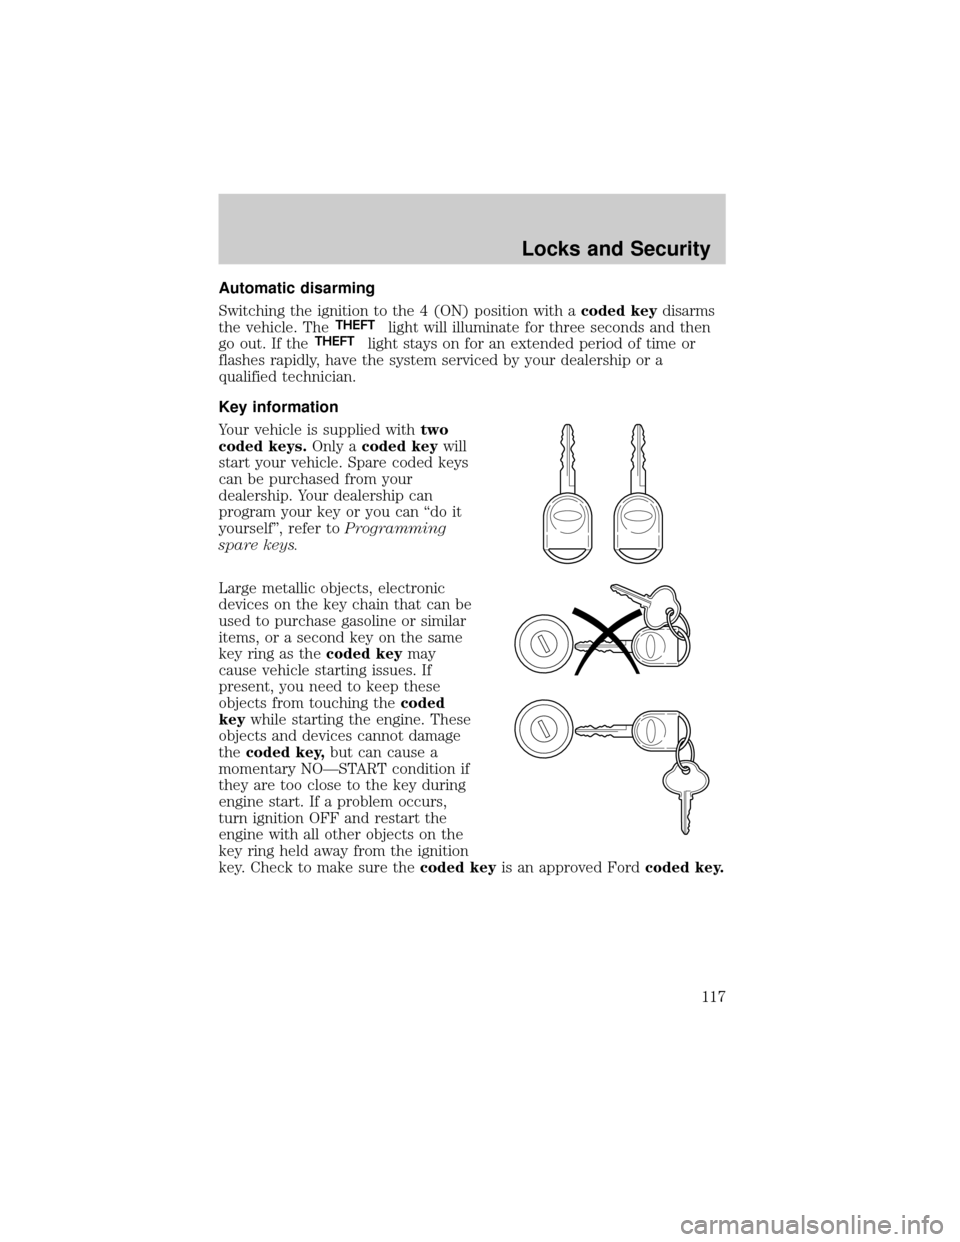
Your vehicle is supplied withtwo
coded keys.Only acoded keywill
start your vehicle. Spare coded keys
can be purchased from your
dealership. Your dealership can
program your key or you can ªdo it
yourselfº, refer toProgramming
spare keys.
Large metallic objects, electronic
devices on the key chain that can be
used to purchase gasoline or similar
items, or a second key on the same
key ring as thecoded keymay
cause vehicle starting issues. If
present, you need to keep these
objects from touching thecoded
keywhile starting the engine. These
objects and devices cannot damage
thecoded key,but can cause a
momentary NOÐSTART condition if
they are too close to the key during
engine start. If a problem occurs,
turn ignition OFF and restart the
engine with all other objects on the
key ring held away from the ignition
key. Check to make sure thecoded keyis an approved Fordcoded key.
Locks and Security
117
Page 125 of 320
²Type B
Press the control to move the seat
forward, backward, up or down.
²Type A
²Type B
Heated seats (if equipped)
To operate the heated seats:
²Push control located on the side
of the seat to activate.
²Push again to deactivate.
The indicator light on the control will illuminate when activated.
Seating and Safety Restraints
125
Page 139 of 320

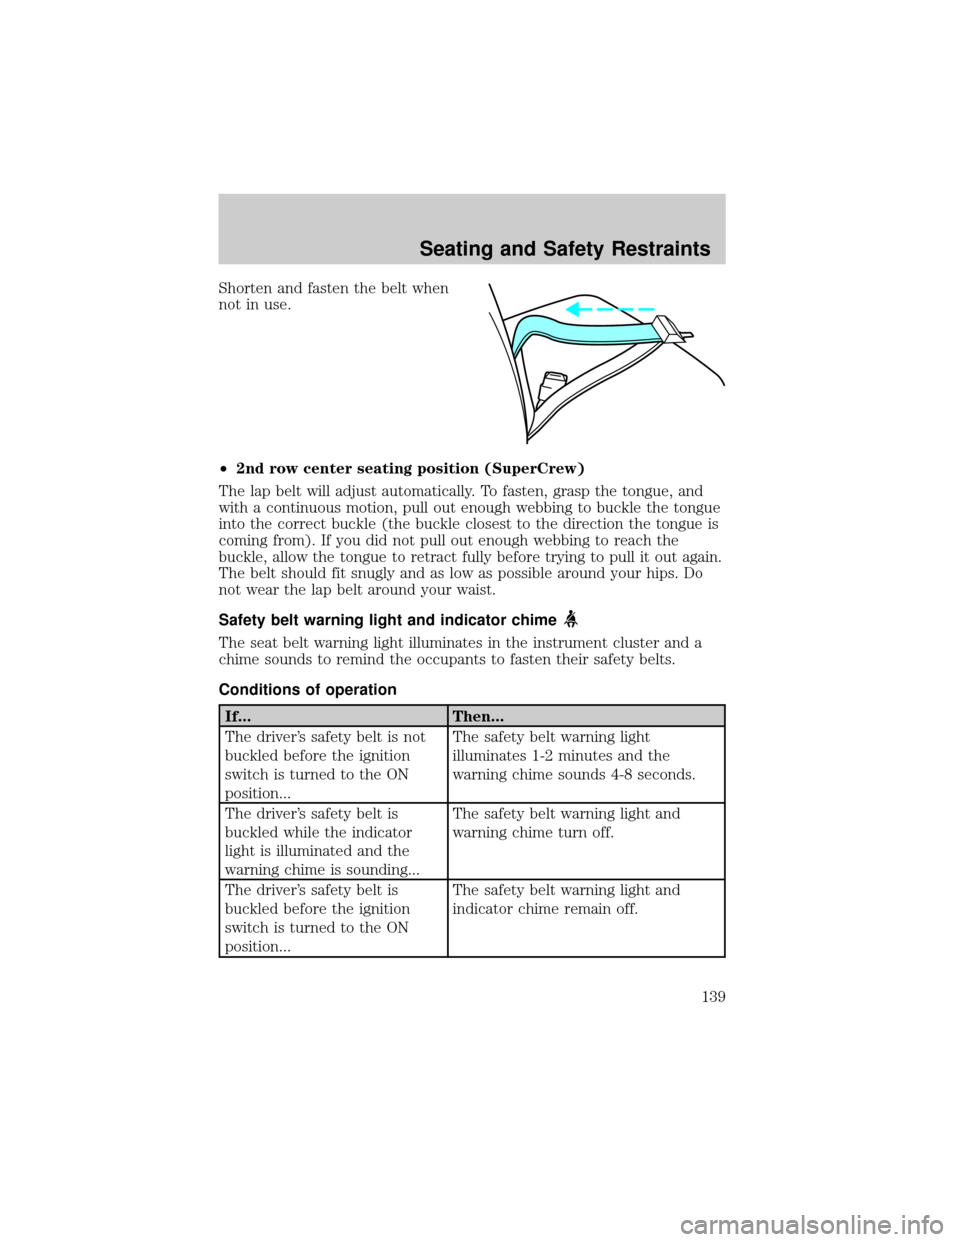
Shorten and fasten the belt when
not in use.
²2nd row center seating position (SuperCrew)
The lap belt will adjust automatically. To fasten, grasp the tongue, and
with a continuous motion, pull out enough webbing to buckle the tongue
into the correct buckle (the buckle closest to the direction the tongue is
coming from). If you did not pull out enough webbing to reach the
buckle, allow the tongue to retract fully before trying to pull it out again.
The belt should fit snugly and as low as possible around your hips. Do
not wear the lap belt around your waist.
Safety belt warning light and indicator chime
The seat belt warning light illuminates in the instrument cluster and a
chime sounds to remind the occupants to fasten their safety belts.
Conditions of operation
If... Then...
The driver's safety belt is not
buckled before the ignition
switch is turned to the ON
position...The safety belt warning light
illuminates 1-2 minutes and the
warning chime sounds 4-8 seconds.
The driver's safety belt is
buckled while the indicator
light is illuminated and the
warning chime is sounding...The safety belt warning light and
warning chime turn off.
The driver's safety belt is
buckled before the ignition
switch is turned to the ON
position...The safety belt warning light and
indicator chime remain off.
Seating and Safety Restraints
139