Page 177 of 312
ABS warning lampABS
TheABSwarning lamp in the instrument cluster momentarily illuminates
when the ignition is turned to the ON position. If the light does not
illuminate momentarily at start up, remains on or continues to flash, the
ABS needs to be serviced.
With the ABS light on, the anti-lock
brake system is disabled and normal
braking is still effective unless the
brake warning light also remains
illuminated with parking brake
released. (If your brake warning lamp illuminates, have your vehicle
serviced immediately.)
Using ABS
²In an emergency or when maximum efficiency from the four wheel
ABS is required, apply continuous force on the brake. The four wheel
ABS will be activated immediately, thus allowing you to retain full
steering control of your vehicle and, providing there is sufficient
space, will enable you to avoid obstacles and bring the vehicle to a
controlled stop.
²The Anti-Lock system does not decrease the time necessary to apply
the brakes or always reduce stopping distance. Always leave enough
room between your vehicle and the vehicle in front of you to stop.
²We recommend that you familiarize yourself with this braking
technique. However, avoid taking any unnecessary risks.
Parking brake
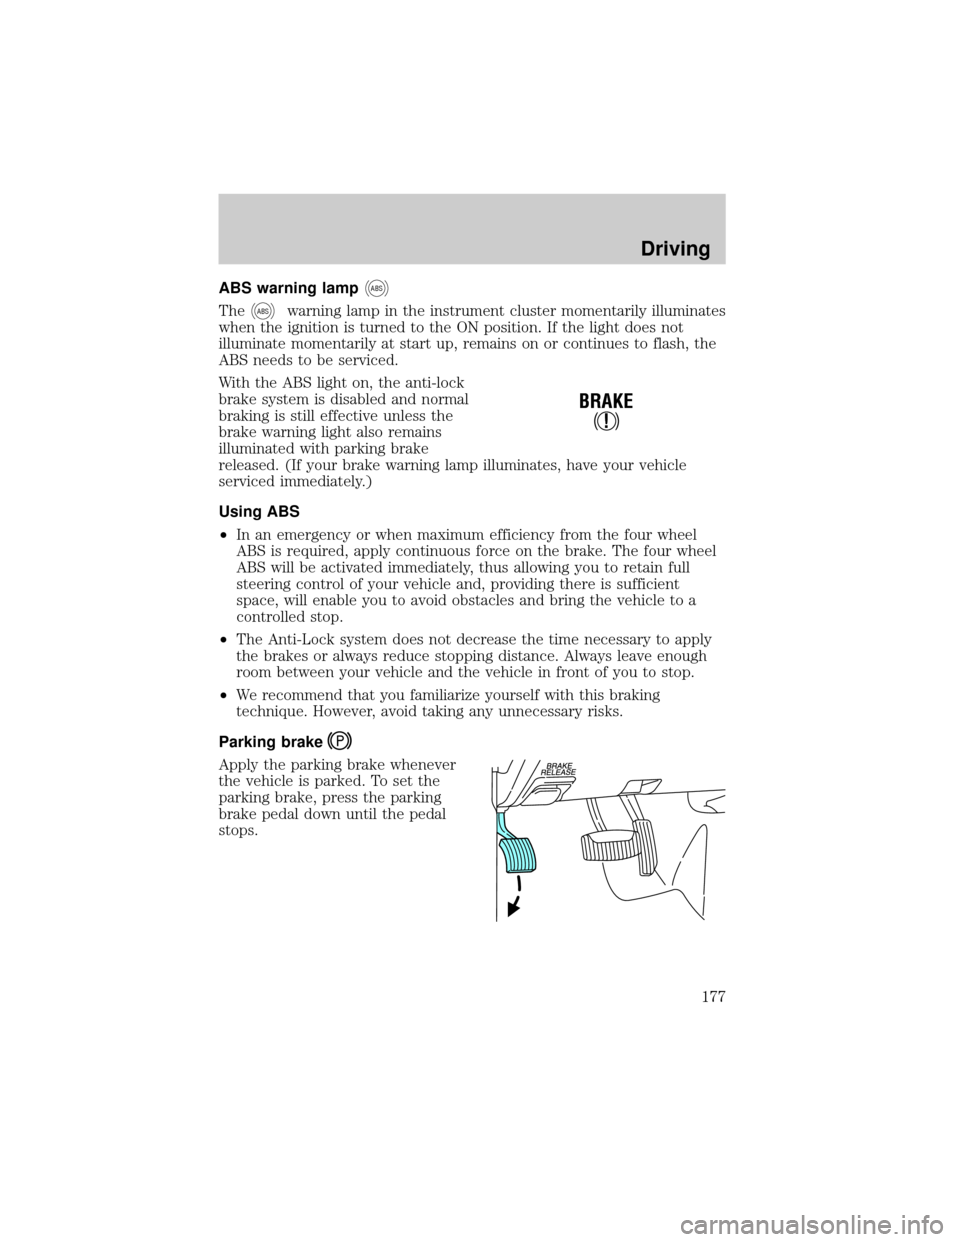
Apply the parking brake whenever
the vehicle is parked. To set the
parking brake, press the parking
brake pedal down until the pedal
stops.
!
BRAKE
Driving
177
Page 178 of 312
The BRAKE warning lamp in the
instrument cluster illuminates and
remains illuminated (when the
ignition is turned ON) until the
parking brake is released.
Always set the parking brake fully and make sure that the
gearshift is securely latched in P (Park) (automatic
transmission) or in 1 (First) (manual transmission).
The parking brake is not recommended to stop a moving vehicle.
However, if the normal brakes fail, the parking brake can be used to stop
your vehicle in an emergency. Since the parking brake applies only the
rear brakes, the vehicle's stopping distance will increase greatly and the
handling of your vehicle will be adversely affected.
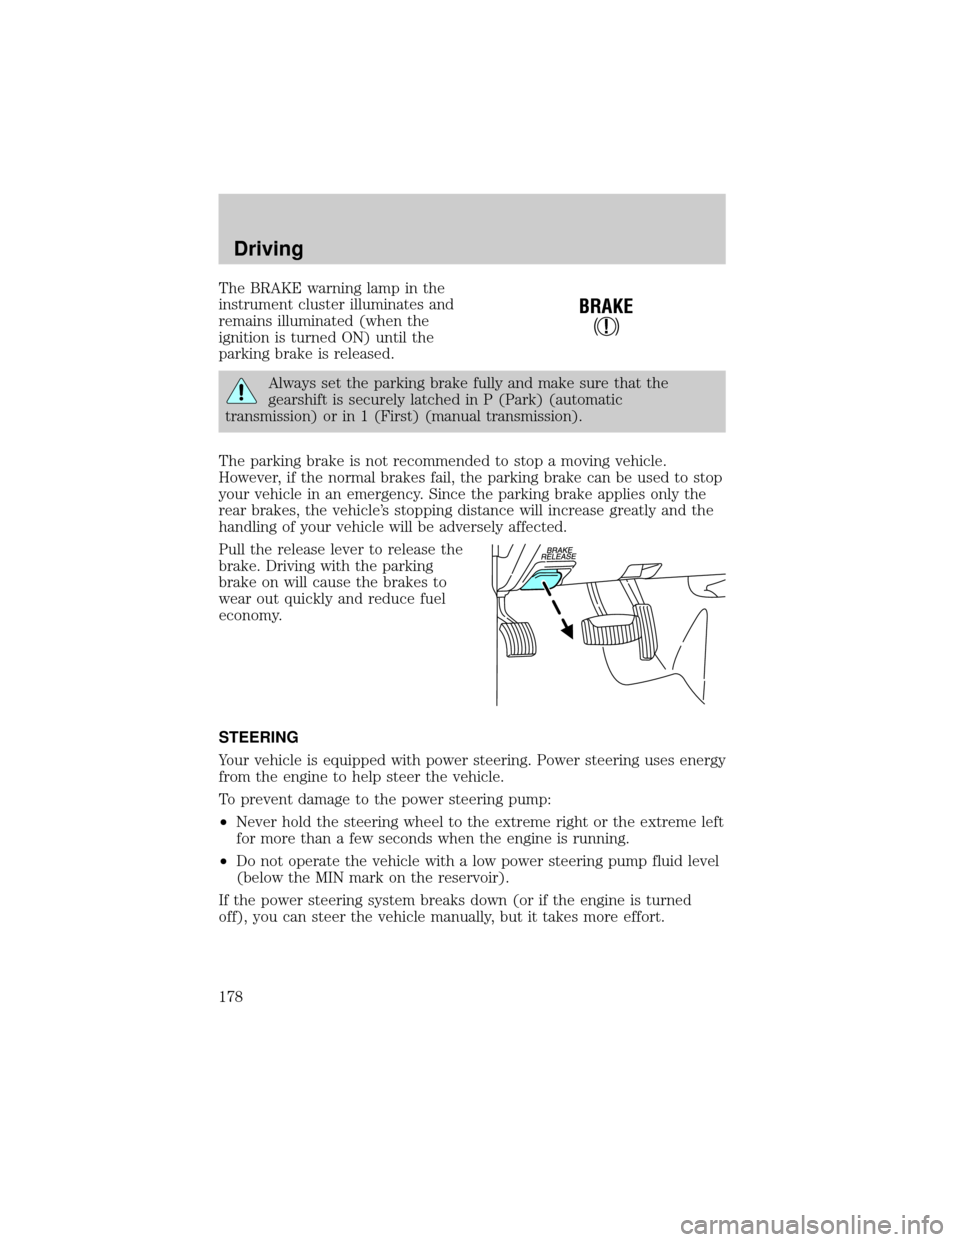
Pull the release lever to release the
brake. Driving with the parking
brake on will cause the brakes to
wear out quickly and reduce fuel
economy.
STEERING
Your vehicle is equipped with power steering. Power steering uses energy
from the engine to help steer the vehicle.
To prevent damage to the power steering pump:
²Never hold the steering wheel to the extreme right or the extreme left
for more than a few seconds when the engine is running.
²Do not operate the vehicle with a low power steering pump fluid level
(below the MIN mark on the reservoir).
If the power steering system breaks down (or if the engine is turned
off), you can steer the vehicle manually, but it takes more effort.
!
BRAKE
Driving
178
Page 179 of 312
If the steering wanders or pulls, the condition could be caused by any of
the following:
²underinflated tire(s) on any wheel(s)
²uneven vehicle loading
²high crown in center of road
²high crosswinds
²wheels out of alignment
²loose or worn components suspension components
PREPARING TO DRIVE YOUR VEHICLE
Utility vehicles have a significantly higher rollover rate than
other types of vehicles.
In a rollover crash, an unbelted person is significantly more likely
to die than a person wearing a seat belt.
Your vehicle has special design and equipment features to make it
capable of performing in a wide variety of circumstances. These special
design features, such as larger tires and increased ground clearance, give
the vehicle a higher center of gravity than a passenger car.
Vehicles with a higher center of gravity such as utility and
four-wheel drive vehicles handle differently than vehicles with a
lower center of gravity. Utility and four-wheel drive vehicles arenot
designed for cornering at speeds as high as passenger cars any more
than low-slung sports cars are designed to perform satisfactorily under
off-road conditions. Avoid sharp turns, excessive speed and abrupt
maneuvers in these vehicles. Failure to drive cautiously could result in
an increased risk of vehicle rollover, personal injury and death.
Loaded vehicles, with a higher center of gravity, may handle
differently than unloaded vehicles. Extra precautions, such as
slower speeds and increased stopping distance, should be taken when
driving a heavily loaded vehicle.
Driving
179
Page 183 of 312
Understanding gearshift positions
Hold the brake pedal down while you move the gearshift lever
from P (Park) to another position. If you do not hold the brake
pedal down, your vehicle may move unexpectedly and injure someone.
P (Park)
To put your vehicle in gear, start the engine, depress the brake pedal,
then move gearshift lever out of P (Park).
Always come to a complete stop
before shifting into P (Park). Make
sure the gearshift lever is securely
latched in P (Park). This position locks the transmission and prevents
the rear wheels from turning.
Always set the parking brake fully and make sure the gearshift is
latched in P (Park). Turn off the ignition whenever you leave
your vehicle.
R (Reverse)
With the gearshift lever in R
(Reverse), the vehicle will move
backward. Always come to a
complete stop before shifting into and out of R (Reverse).
N (Neutral)
With the gearshift lever in N
(Neutral), the vehicle can be started
and is free to roll. Hold the brake
pedal down while in this position.
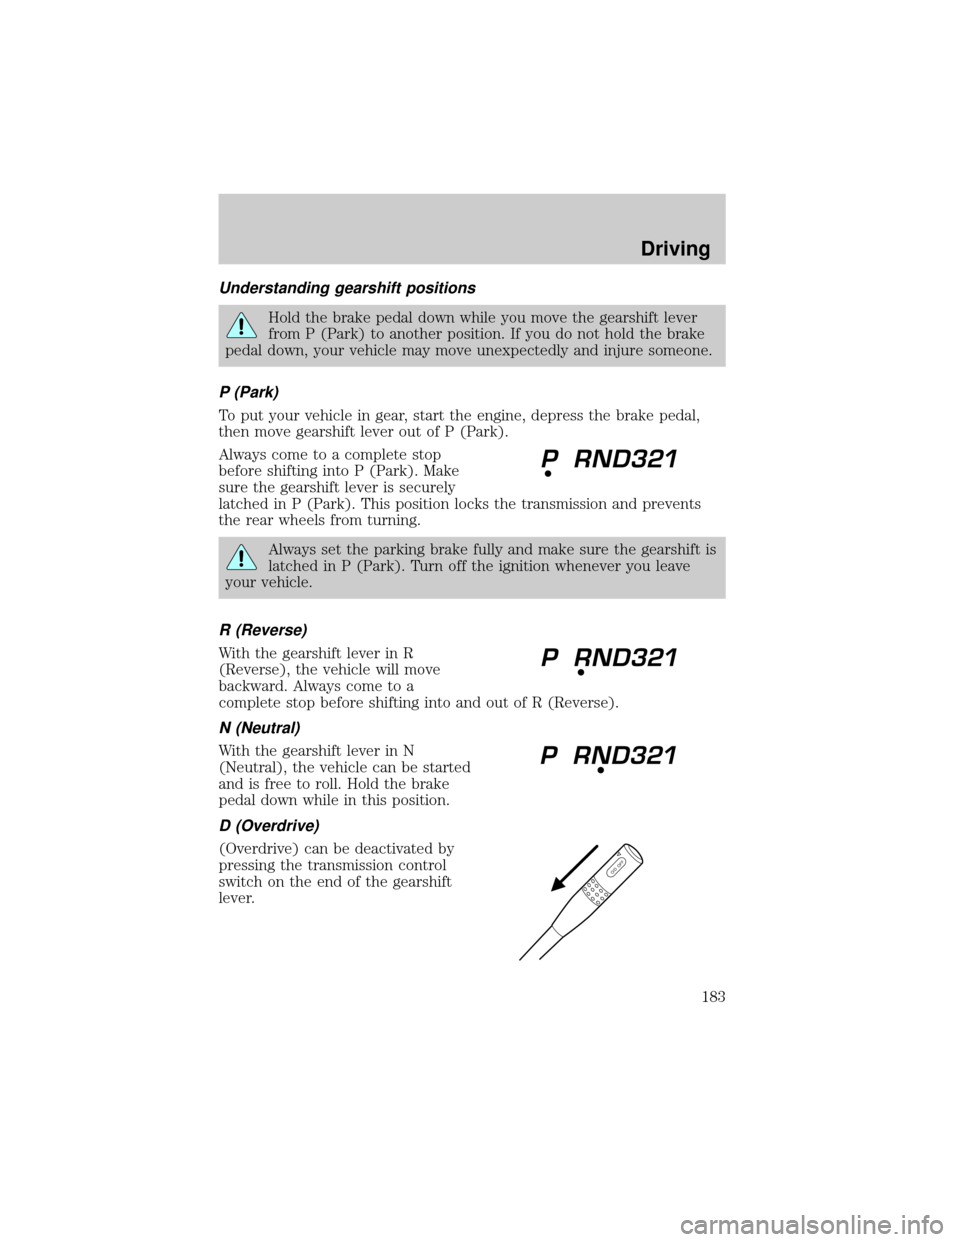
D (Overdrive)
(Overdrive) can be deactivated by
pressing the transmission control
switch on the end of the gearshift
lever.
O/D OFF
Driving
183
Page 187 of 312
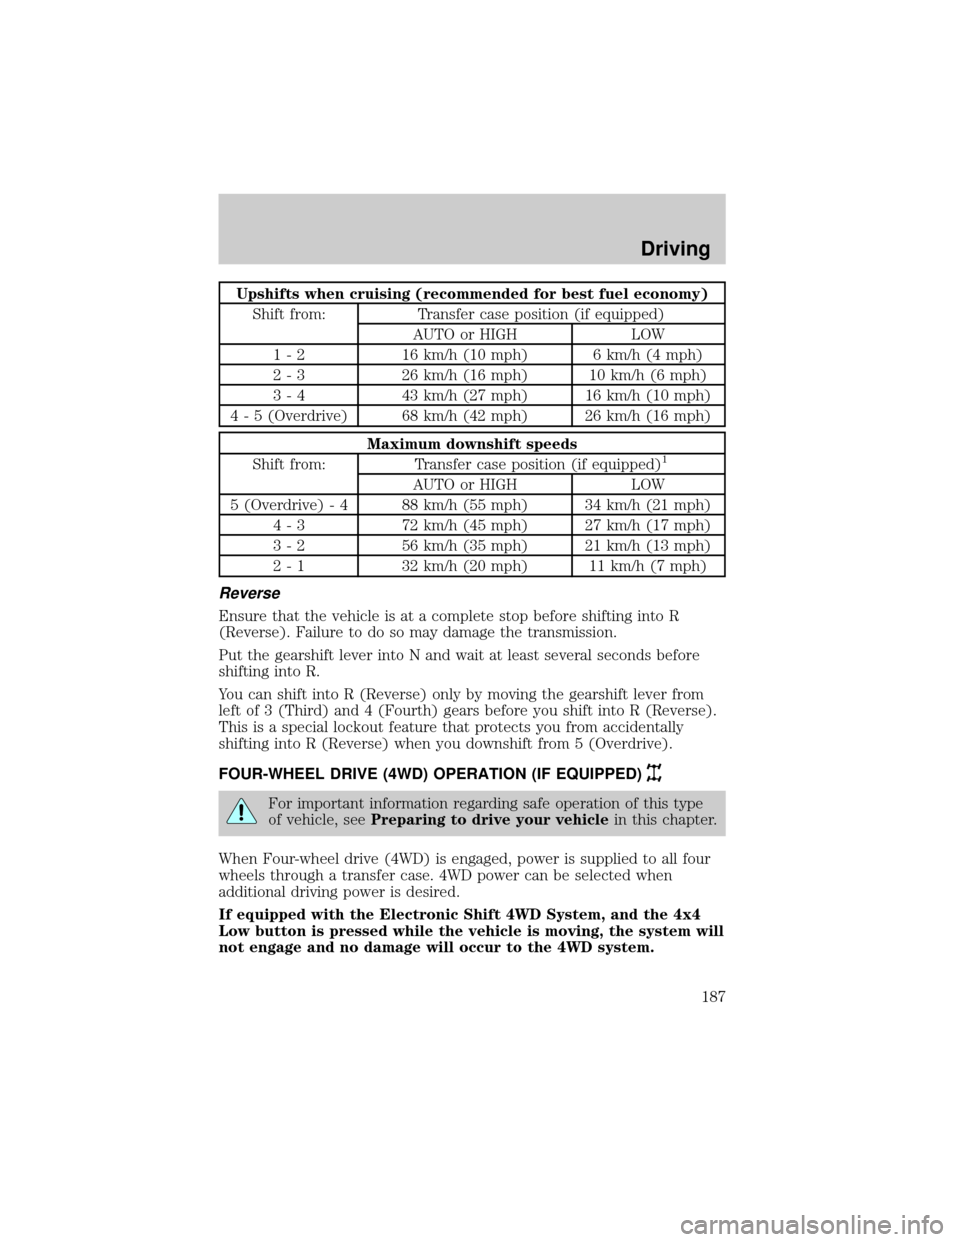
Upshifts when cruising (recommended for best fuel economy)
Shift from: Transfer case position (if equipped)
AUTO or HIGH LOW
1 - 2 16 km/h (10 mph) 6 km/h (4 mph)
2 - 3 26 km/h (16 mph) 10 km/h (6 mph)
3 - 4 43 km/h (27 mph) 16 km/h (10 mph)
4 - 5 (Overdrive) 68 km/h (42 mph) 26 km/h (16 mph)
Maximum downshift speeds
Shift from: Transfer case position (if equipped)1
AUTO or HIGH LOW
5 (Overdrive) - 4 88 km/h (55 mph) 34 km/h (21 mph)
4 - 3 72 km/h (45 mph) 27 km/h (17 mph)
3 - 2 56 km/h (35 mph) 21 km/h (13 mph)
2 - 1 32 km/h (20 mph) 11 km/h (7 mph)
Reverse
Ensure that the vehicle is at a complete stop before shifting into R
(Reverse). Failure to do so may damage the transmission.
Put the gearshift lever into N and wait at least several seconds before
shifting into R.
You can shift into R (Reverse) only by moving the gearshift lever from
left of 3 (Third) and 4 (Fourth) gears before you shift into R (Reverse).
This is a special lockout feature that protects you from accidentally
shifting into R (Reverse) when you downshift from 5 (Overdrive).
FOUR-WHEEL DRIVE (4WD) OPERATION (IF EQUIPPED)
For important information regarding safe operation of this type
of vehicle, seePreparing to drive your vehiclein this chapter.
When Four-wheel drive (4WD) is engaged, power is supplied to all four
wheels through a transfer case. 4WD power can be selected when
additional driving power is desired.
If equipped with the Electronic Shift 4WD System, and the 4x4
Low button is pressed while the vehicle is moving, the system will
not engage and no damage will occur to the 4WD system.
Driving
187
Page 188 of 312

4x4 High and 4x4 Low operation is not recommended on dry
pavement. Doing so could result in difficult disengagement of the
transfer case, increased tire wear and decreased fuel economy.
Control-Trac automatic four-wheel drive system (if equipped)
The 4WD system uses all four wheels to power the vehicle. This
increases traction, enabling you to drive your 4x4 over terrain and road
conditions not normally traveled by two-wheel drive vehicles.
Power is supplied to all four wheels through a transfer case that allows
you to select a four-wheel drive mode best suited for your current
driving conditions.
Positions of the Control-Trac system
The Control-Trac system functions in three modes:
²The 4x4 Auto mode provides
four-wheel drive with full power
delivered to the rear axle, and to
the front axle as required for
increased traction. This is
appropriate for normal on-road
operating conditions, such as dry
road surfaces, wet pavement,
snow and gravel.
4X4
Low4X4
High4X4
Auto
Driving
188
Page 189 of 312
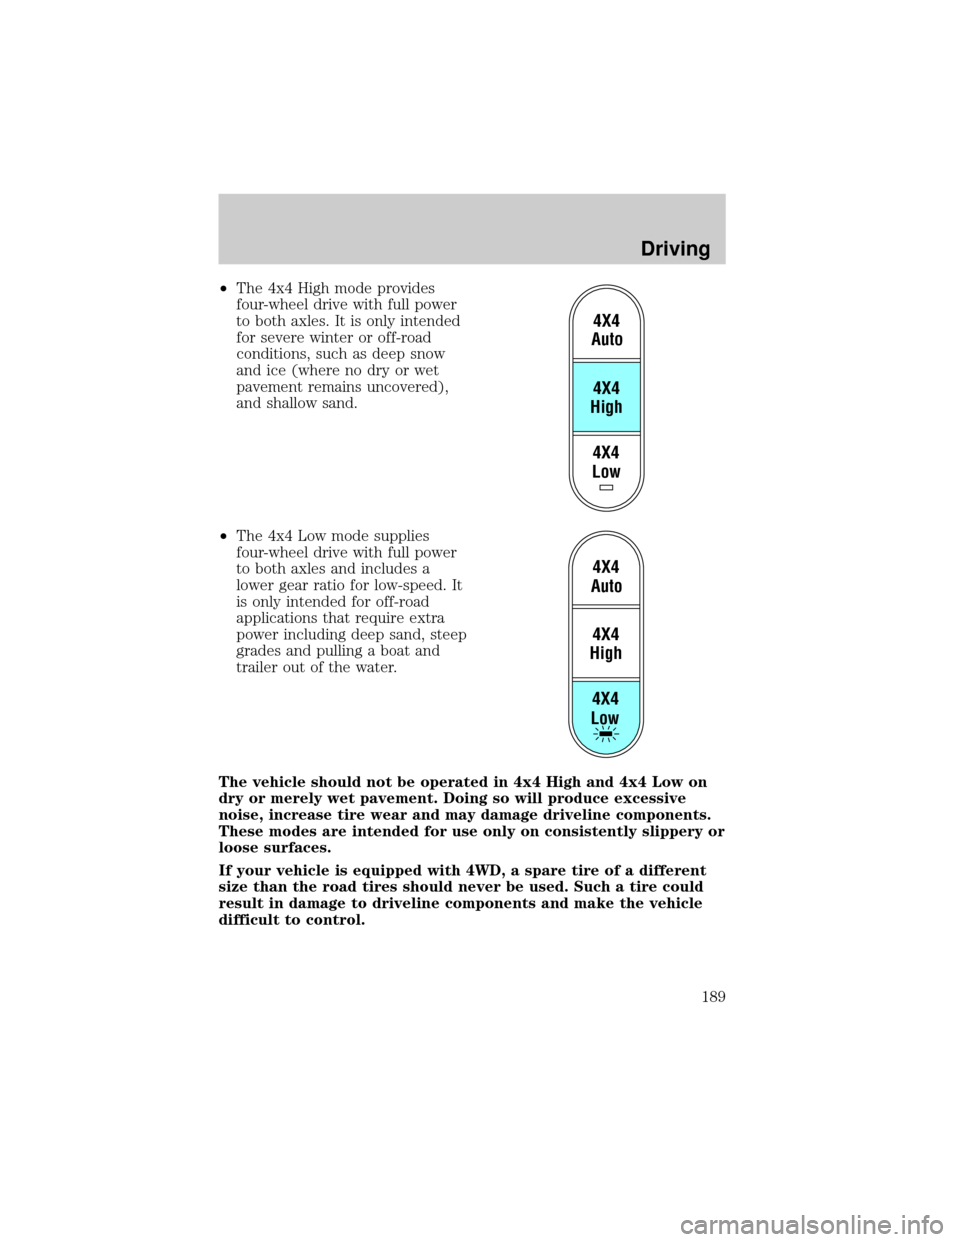
²The 4x4 High mode provides
four-wheel drive with full power
to both axles. It is only intended
for severe winter or off-road
conditions, such as deep snow
and ice (where no dry or wet
pavement remains uncovered),
and shallow sand.
²The 4x4 Low mode supplies
four-wheel drive with full power
to both axles and includes a
lower gear ratio for low-speed. It
is only intended for off-road
applications that require extra
power including deep sand, steep
grades and pulling a boat and
trailer out of the water.
The vehicle should not be operated in 4x4 High and 4x4 Low on
dry or merely wet pavement. Doing so will produce excessive
noise, increase tire wear and may damage driveline components.
These modes are intended for use only on consistently slippery or
loose surfaces.
If your vehicle is equipped with 4WD, a spare tire of a different
size than the road tires should never be used. Such a tire could
result in damage to driveline components and make the vehicle
difficult to control.
4X4
Low4X4
High4X4
Auto
4X4
Low4X4
High4X4
Auto
Driving
189
Page 190 of 312
Utility and four-wheel drive vehicles arenotdesigned for
cornering at speeds as high as passenger cars any more than
low-slung sports cars are designed to perform satisfactorily under
off-road conditions. Avoid sharp turns or abrupt maneuvers in these
vehicles.
Using the Control-Trac system
Shifting between 4x4 Auto and 4x4 High
When you press the 4x4 High
button, the indicator light will
illuminate in the instrument cluster.
When you press the 4x4 Auto
button, the indicator light will turn
off.
Either shift can be done at a stop or
while driving at any speed.
Shifting from 4x4 Auto or 4x4 High to 4x4 Low
1. Bring the vehicle to a stop.
2. Depress the brake.
3. Place the gearshift in N (Neutral)
(automatic transmission) or depress
the clutch (manual transmission).
4. Press the 4x4 Low button. When
engaged the 4x4 Low instrument
cluster light and the 4x4 Low button
will illuminate.
4X4
Low4X4
High4X4
Auto
4X4
Low4X4
High4X4
Auto
Driving
190