2002 FORD EXPEDITION second row seat
[x] Cancel search: second row seatPage 55 of 280
²Under snowy or dirty weather conditions, your vehicle's climate
control system should be left in the OFF position when the vehicle is
parked. This allows the climate control system to be free from
contamination of outside pollutants.
²If your vehicle has been parked with the windows closed during warm
weather conditions, the air conditioner will perform more efficiently in
cooling the vehicle if driven for two or three minutes with the
windows open. This will force most of the hot, stale air out of the
vehicle. Once the vehicle has been ªaired outº, operate the climate
control system as desired.
²Don't put objects under the front seat that will interfere with the
airflow to the rear seats.
²Remove any snow, ice or leaves from the air intake area at the base of
the windshield.
²Do not place objects over the defroster outlets. These objects can
block airflow and reduce your ability to see through your windshield.
Avoid placing small objects on top of the instrument panel. These
objects may fall down into the defroster outlets and block airflow, in
addition to damaging the climate control system.
To aid in side window defogging/demisting in cold weather conditions:
1. Select PNL²FLR
2. Set the temperature control to full heat
3. Set the fan speed control to HI
4. Direct the outer panel vents towards the side windows.
To increase airflow to the outer panel vents, close the central panel
vents.
Do not place objects on top of the instrument panel, as these
objects may become projectiles in a collision or sudden stop.
AUXILIARY A/C-HEATER CONTROLS (IF EQUIPPED)
Depending on your equipment package, your vehicle may be equipped
with auxiliary A/C-heater controls. The auxiliary A/C-heater feature
provides increased capacity to quickly heat or cool the vehicle. Besides
the driver's control panel for the front seat occupants, the second row
auxiliary A/C-heater controls allow the rear passengers to control the
Climate controls
55
Page 113 of 280
REAR SEATS
Adjustable head restraints
Your vehicle's seats may be equipped with head restraints which are
vertically adjustable. The purpose of these head restraints is to help limit
head motion in the event of a rear collision. To properly adjust your head
restraints, lift the head restraint so that it is located directly behind your
head or as close to that position as possible. Refer to the following to
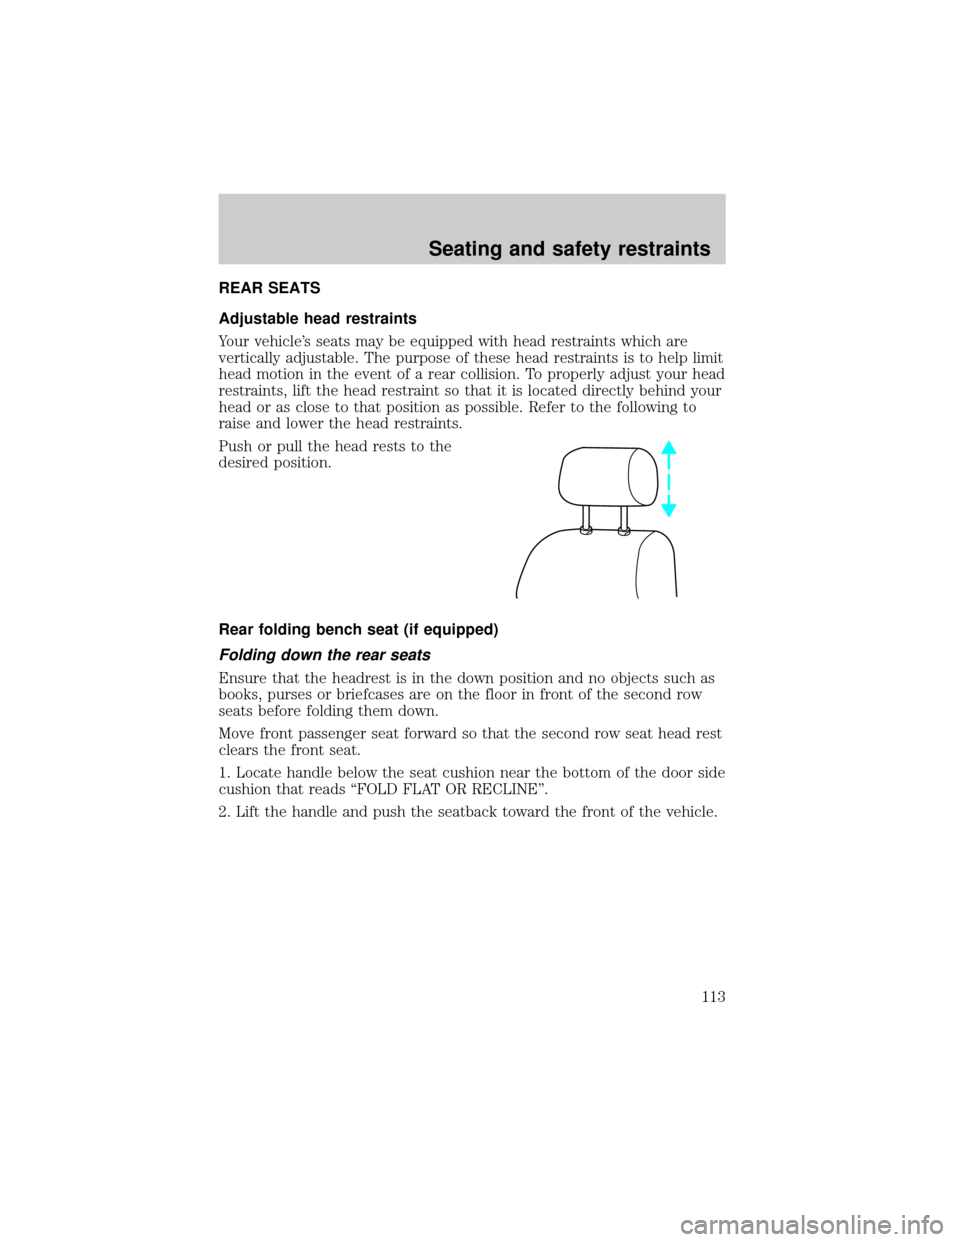
raise and lower the head restraints.
Push or pull the head rests to the
desired position.
Rear folding bench seat (if equipped)
Folding down the rear seats
Ensure that the headrest is in the down position and no objects such as
books, purses or briefcases are on the floor in front of the second row
seats before folding them down.
Move front passenger seat forward so that the second row seat head rest
clears the front seat.
1. Locate handle below the seat cushion near the bottom of the door side
cushion that reads ªFOLD FLAT OR RECLINEº.
2. Lift the handle and push the seatback toward the front of the vehicle.
Seating and safety restraints
113
Page 114 of 280
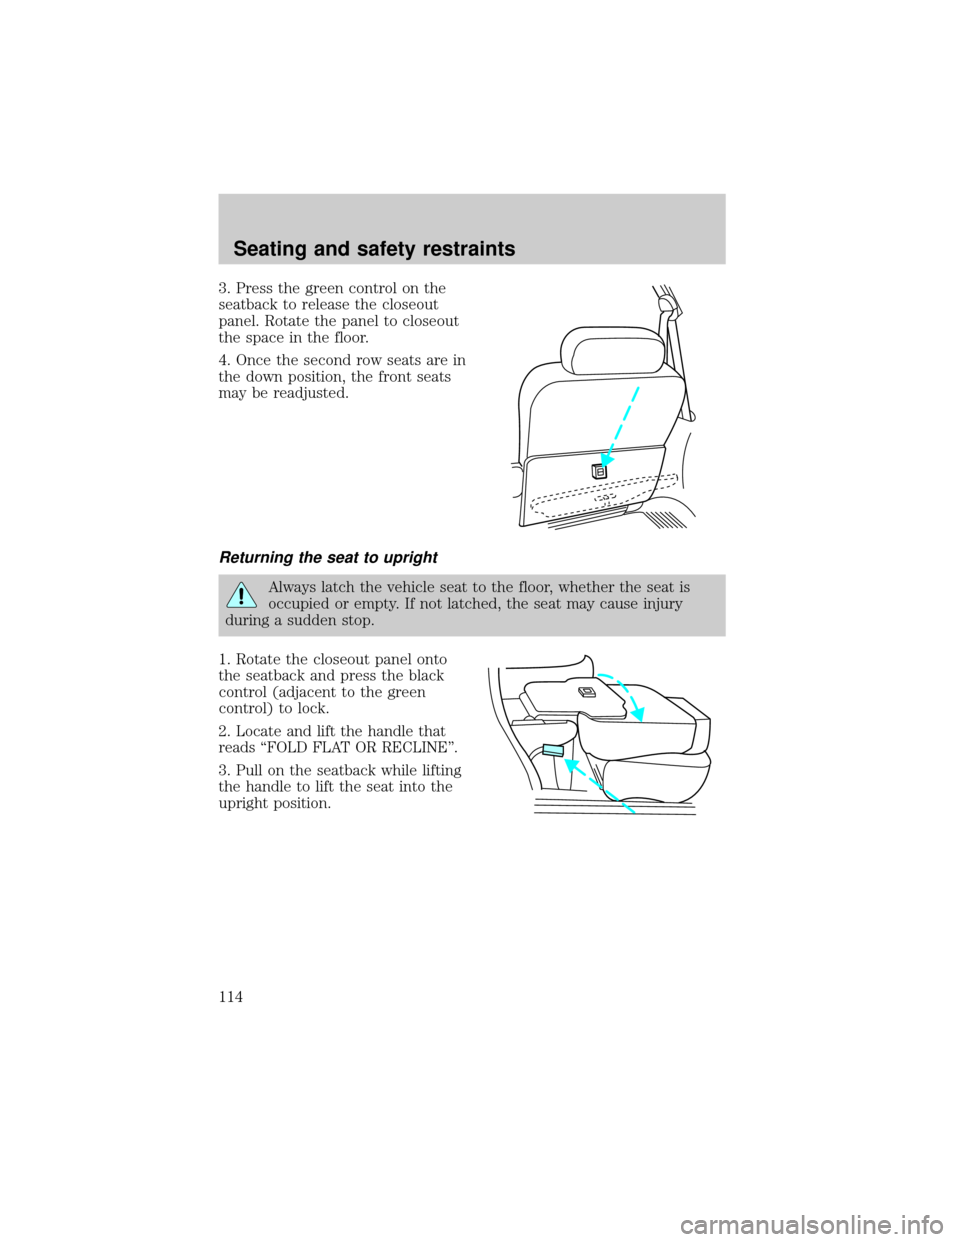
3. Press the green control on the
seatback to release the closeout
panel. Rotate the panel to closeout
the space in the floor.
4. Once the second row seats are in
the down position, the front seats
may be readjusted.
Returning the seat to upright
Always latch the vehicle seat to the floor, whether the seat is
occupied or empty. If not latched, the seat may cause injury
during a sudden stop.
1. Rotate the closeout panel onto
the seatback and press the black
control (adjacent to the green
control) to lock.
2. Locate and lift the handle that
reads ªFOLD FLAT OR RECLINEº.
3. Pull on the seatback while lifting
the handle to lift the seat into the
upright position.
Seating and safety restraints
114
Page 115 of 280
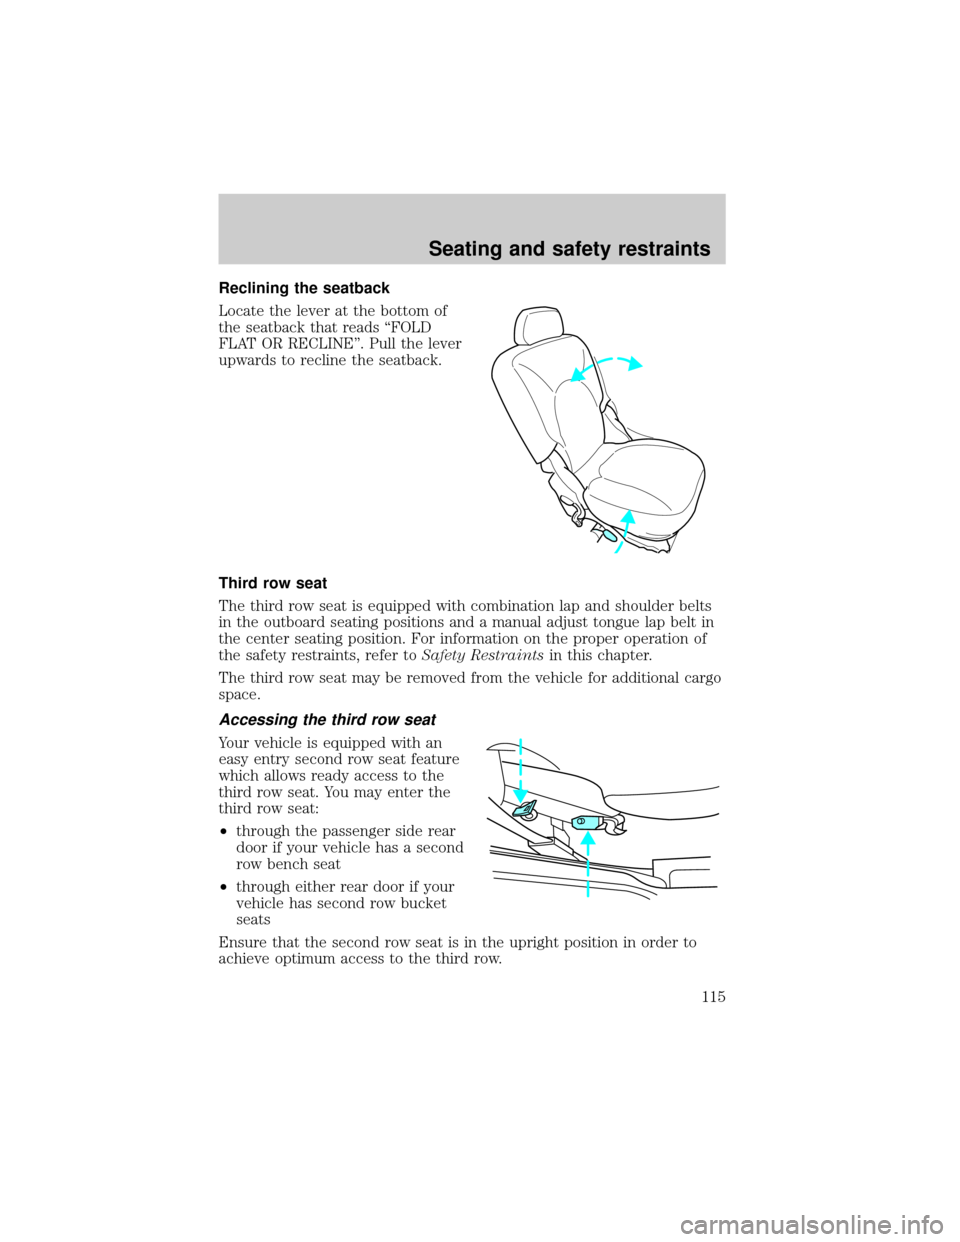
Reclining the seatback
Locate the lever at the bottom of
the seatback that reads ªFOLD
FLAT OR RECLINEº. Pull the lever
upwards to recline the seatback.
Third row seat
The third row seat is equipped with combination lap and shoulder belts
in the outboard seating positions and a manual adjust tongue lap belt in
the center seating position. For information on the proper operation of
the safety restraints, refer toSafety Restraintsin this chapter.
The third row seat may be removed from the vehicle for additional cargo
space.
Accessing the third row seat
Your vehicle is equipped with an
easy entry second row seat feature
which allows ready access to the
third row seat. You may enter the
third row seat:
²through the passenger side rear
door if your vehicle has a second
row bench seat
²through either rear door if your
vehicle has second row bucket
seats
Ensure that the second row seat is in the upright position in order to
achieve optimum access to the third row.
Seating and safety restraints
115
Page 126 of 280
Front and second row safety belt height adjustment
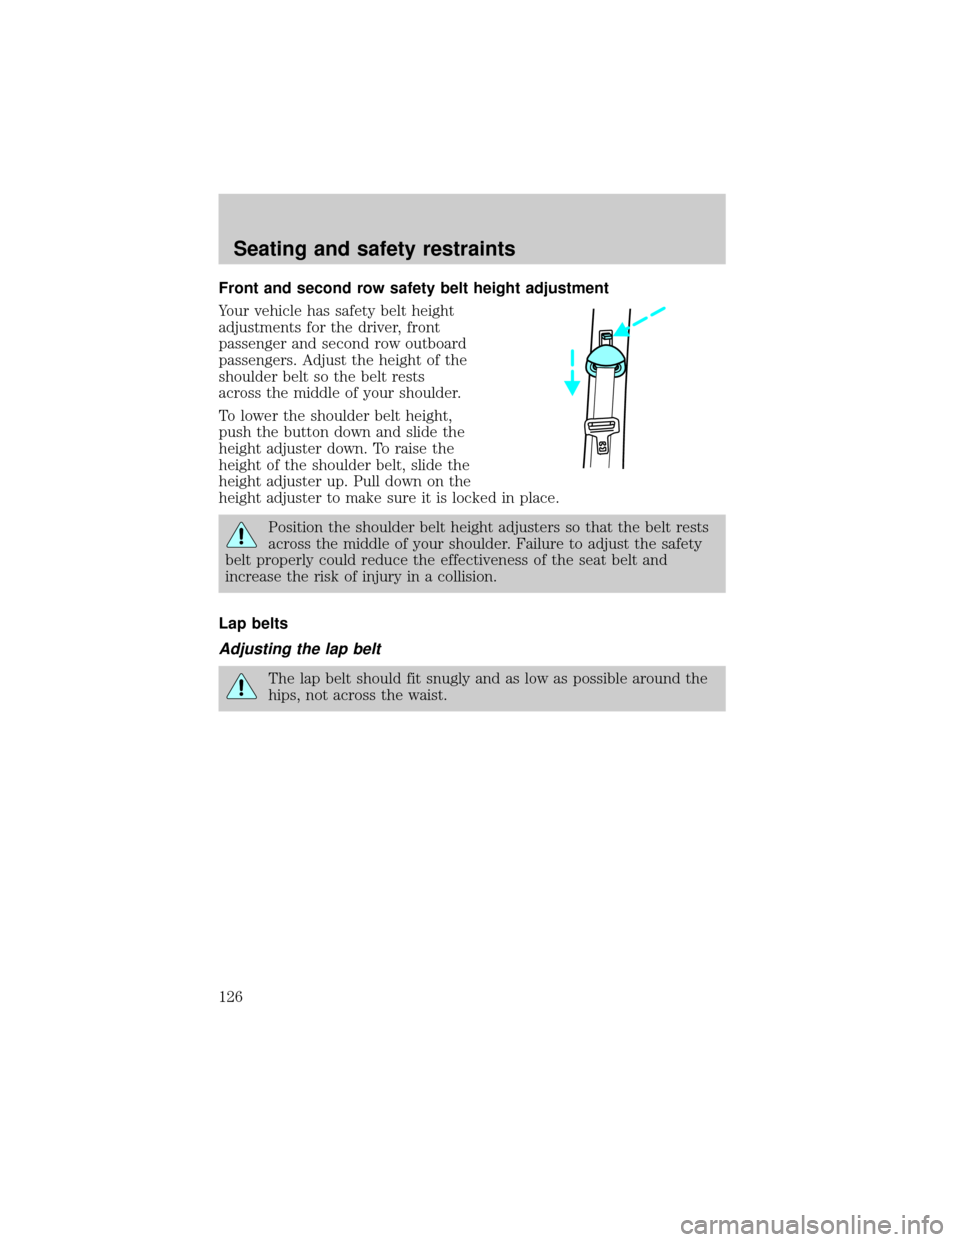
Your vehicle has safety belt height
adjustments for the driver, front
passenger and second row outboard
passengers. Adjust the height of the
shoulder belt so the belt rests
across the middle of your shoulder.
To lower the shoulder belt height,
push the button down and slide the
height adjuster down. To raise the
height of the shoulder belt, slide the
height adjuster up. Pull down on the
height adjuster to make sure it is locked in place.
Position the shoulder belt height adjusters so that the belt rests
across the middle of your shoulder. Failure to adjust the safety
belt properly could reduce the effectiveness of the seat belt and
increase the risk of injury in a collision.
Lap belts
Adjusting the lap belt
The lap belt should fit snugly and as low as possible around the
hips, not across the waist.
Seating and safety restraints
126
Page 129 of 280
The following are reasons most often given for not wearing safety belts:
(All statistics based on U.S. data)
Reasons given... Consider...
ªCrashes are rare
eventsº
36 700 crashes occur every day.The more we
drive, the more we are exposed to ªrareº events,
even for good drivers.1 in 4 of us will be
seriously injured in a crash during our lifetime.
ªI'm not going farº3of4fatal crashes occur within25miles of home.
ªBelts are
uncomfortableºWe design our safety belts to enhance comfort. If
you are uncomfortable - try different positions for
the safety belt upper anchorage and seatback
which should be as upright as possible; this can
improve comfort.
ªI was in a hurryºPrime time for an accident.BeltMinder reminds
us to take a few seconds to buckle up.
ªSeat belts don't
workºSafety belts,when used properly,reduce risk of
deathto front seat occupants by45% in cars,
and by60% in light trucks.
ªTraffic is lightºNearly 1 of 2 deaths occur in single-vehicle
crashes,many when no other vehicles are around.
ªBelts wrinkle my
clothesºPossibly, but a serious crash can do much more
than wrinkle your clothes, particularly if you are
unbelted.
ªThe people I'm
with don't wear
beltsºSet the example, teen deaths occur 4 times more
often in vehicles with TWO or MORE people.
Children and younger brothers/sisters imitate
behavior they see.
ªI have an air bagº Air bags offer greater protection when used with
safety belts. Frontal airbags are not designed to
inflate in rear and side crashes or rollovers.
ªI'd rather be
thrown clearºNot a good idea.Peoplewho areejected are 40
times more likely to DIE.Safety belts help
prevent ejection, WE CAN'T ªPICK OUR CRASHº.
Do not sit on top of a buckled safety belt to avoid the Belt
Minder chime. Sitting on the safety belt will increase the risk of
injury in an accident. To disable (one-time) or deactivate the Belt
Minder feature please follow the directions stated below.
Seating and safety restraints
129
Page 145 of 280
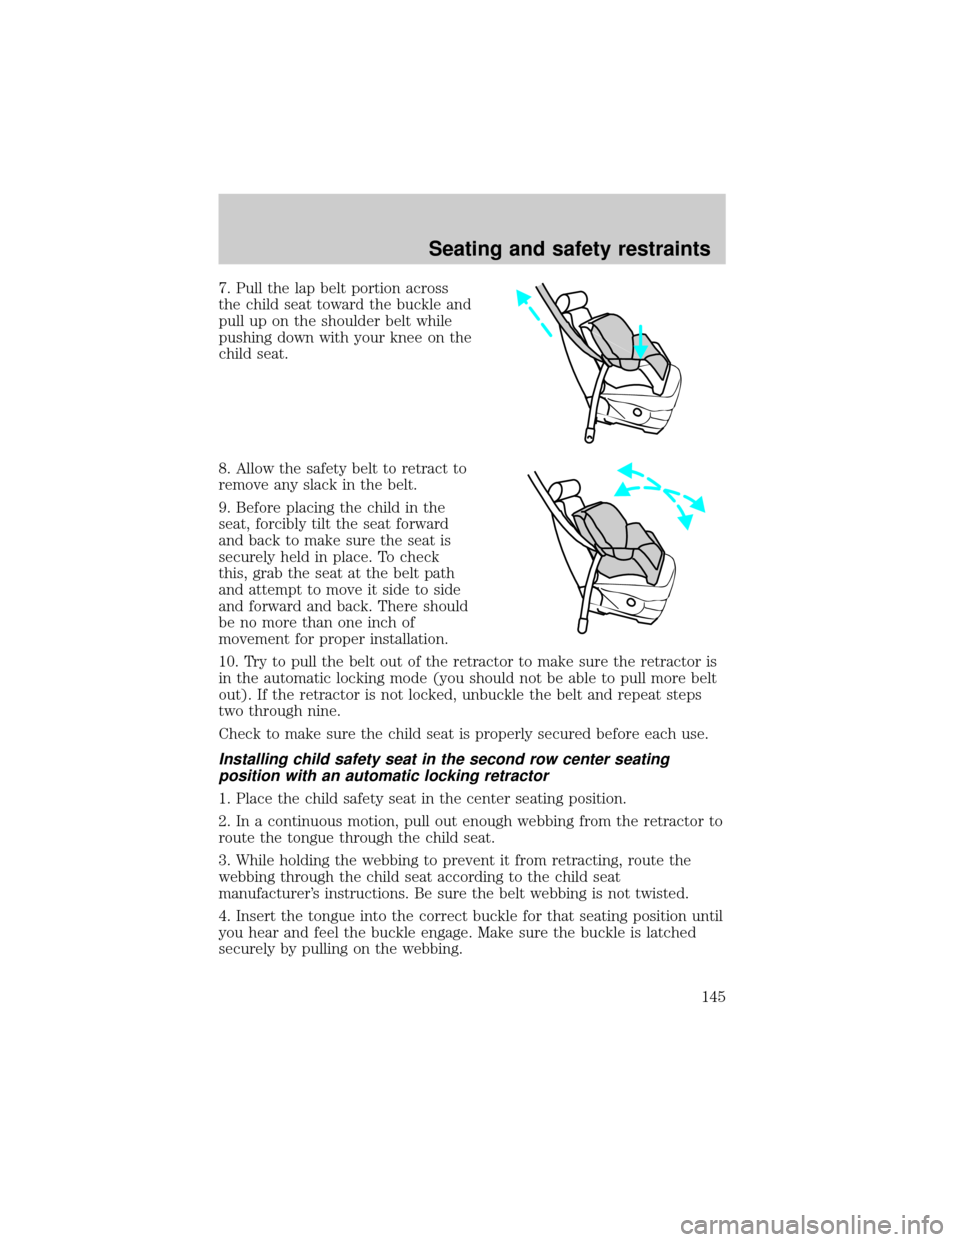
7. Pull the lap belt portion across
the child seat toward the buckle and
pull up on the shoulder belt while
pushing down with your knee on the
child seat.
8. Allow the safety belt to retract to
remove any slack in the belt.
9. Before placing the child in the
seat, forcibly tilt the seat forward
and back to make sure the seat is
securely held in place. To check
this, grab the seat at the belt path
and attempt to move it side to side
and forward and back. There should
be no more than one inch of
movement for proper installation.
10. Try to pull the belt out of the retractor to make sure the retractor is
in the automatic locking mode (you should not be able to pull more belt
out). If the retractor is not locked, unbuckle the belt and repeat steps
two through nine.
Check to make sure the child seat is properly secured before each use.
Installing child safety seat in the second row center seating
position with an automatic locking retractor
1. Place the child safety seat in the center seating position.
2. In a continuous motion, pull out enough webbing from the retractor to
route the tongue through the child seat.
3. While holding the webbing to prevent it from retracting, route the
webbing through the child seat according to the child seat
manufacturer's instructions. Be sure the belt webbing is not twisted.
4. Insert the tongue into the correct buckle for that seating position until
you hear and feel the buckle engage. Make sure the buckle is latched
securely by pulling on the webbing.
Seating and safety restraints
145
Page 147 of 280
Tether anchorage hardware
All second row and one third row seating position have a fabric strap
installed near the bottom of the rear face of the seatback. These straps
have a loop at the top, and are to be used for child seat tether
anchorages.
A tethered seat can be installed in the front passenger seat. Put the
tether strap over the seatback and attach it to an anchor bracket.
Anchor brackets can be bolted to the rear edge of the front passenger
seat cushion. The bolt holes are in the bottom of the rear edge of the
front passenger seat cushion frame. The anchor bracket must be
installed using the instructions provided with the kit.
Tether anchorage hardware kits (part number 613D74) including
instructions, may be obtained at no charge from any Ford or
Lincoln/Mercury dealer.
Tighten the anchor according to specifications. Otherwise, the
safety seat may not be properly secured and the child may be
injured in a sudden stop or collision.
Attaching child safety seats with tether straps
Most new forward-facing child safety seats include a tether strap which
goes over the back of the seat and hooks to an anchoring point. Tether
straps are available as an accessory for many older safety seats. Contact
the manufacturer of your child seat for information about ordering a
tether strap.
The rear seats of your vehicle are equipped with built-in tether strap
anchors located behind the seats as described below.
The tether anchors in your vehicle are straps on the seatback.
Seating and safety restraints
147