Page 1 of 280
Introduction 4
Congratulations 4
Safety and environment protection 5
Symbol glossary 8
Instrument cluster 10
Warning and control lights 10
Gauges 14
Entertainment systems 18
AM/FM stereo cassette (CD changer compatible) 18
AM/FM stereo with CD 30
Rear seat controls 39
CD changer 42
Climate controls 47
Manual heating and air conditioning 47
Electronic automatic temperature control 50
Lights 59
Headlamps 59
Bulb replacement 62
Driver controls 69
Steering wheel adjustment 71
Power windows 79
Mirrors 80
Locks and security 95
Keys 95
Locks 95
Anti-theft system 96
Table of contents
1
Page 10 of 280

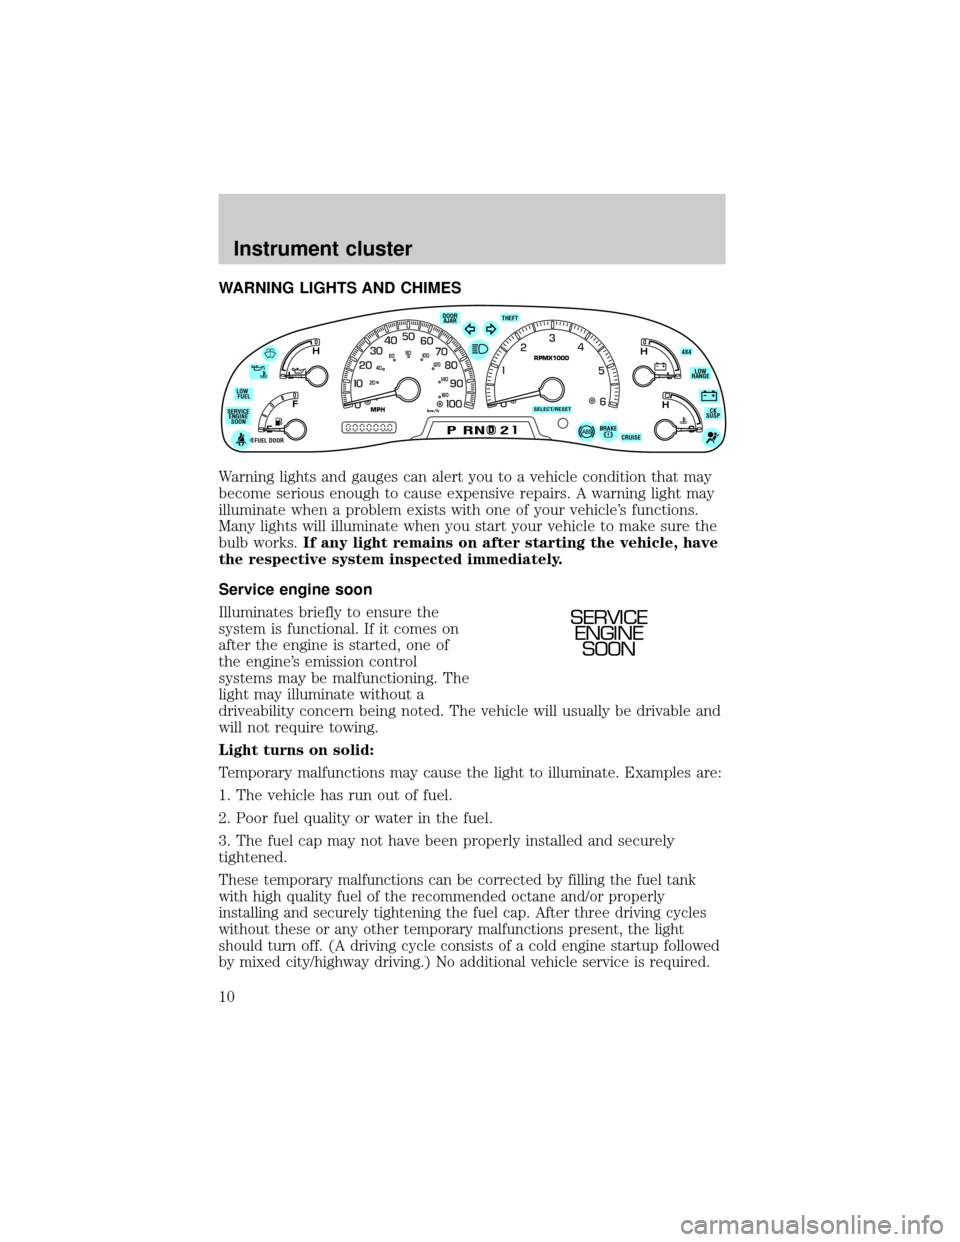
WARNING LIGHTS AND CHIMES
Warning lights and gauges can alert you to a vehicle condition that may
become serious enough to cause expensive repairs. A warning light may
illuminate when a problem exists with one of your vehicle's functions.
Many lights will illuminate when you start your vehicle to make sure the
bulb works.If any light remains on after starting the vehicle, have
the respective system inspected immediately.
Service engine soon
Illuminates briefly to ensure the
system is functional. If it comes on
after the engine is started, one of
the engine's emission control
systems may be malfunctioning. The
light may illuminate without a
driveability concern being noted. The vehicle will usually be drivable and
will not require towing.
Light turns on solid:
Temporary malfunctions may cause the light to illuminate. Examples are:
1. The vehicle has run out of fuel.
2. Poor fuel quality or water in the fuel.
3. The fuel cap may not have been properly installed and securely
tightened.
These temporary malfunctions can be corrected by filling the fuel tank
with high quality fuel of the recommended octane and/or properly
installing and securely tightening the fuel cap. After three driving cycles
without these or any other temporary malfunctions present, the light
should turn off. (A driving cycle consists of a cold engine startup followed
by mixed city/highway driving.) No additional vehicle service is required.
D
L
H
L
H
E
F
C
H
BRAKEPRND2CRUISE DOOR
AJAR
SELECT/RESET
4X4
LOW
RANGE
CK
SUSP THEFT
FUEL DOOR SERVICE
ENGINE
SOONLOW
FUEL
0MPHRPMX1000km/h
20406080
00
20
40
60
SERVICE
ENGINE
SOON
Instrument cluster
10
Page 13 of 280
Oil pressure/Engine coolant
Illuminates when the engine coolant
temperature is above the normal
range or the engine oil pressure is
below normal range. Check the
engine oil and coolant level refer to
Adding engine oilandAdding coolantin theMaintenance and
specifications chapter.
Turn signals
Illuminates when the turn signals or
the hazard lights are turned on. If
the lights stay on continuously or
flash faster, check for a burned-out
bulb.
High beams
Illuminates when the high beam
headlamps are turned on.
Door ajar
Illuminates when any door is open
(or not fully closed).
SecuriLockYanti-theft system
Illuminates when the anti-theft
alarm system is armed. If the light
fails to illuminate, continues to flash
or remains on, have the system
serviced.
Refer toSecuriLockypassive anti-theft systemin theLocks and
Securitychapter.
DOOR
AJAR
THEFT
Instrument cluster
13
Page 66 of 280

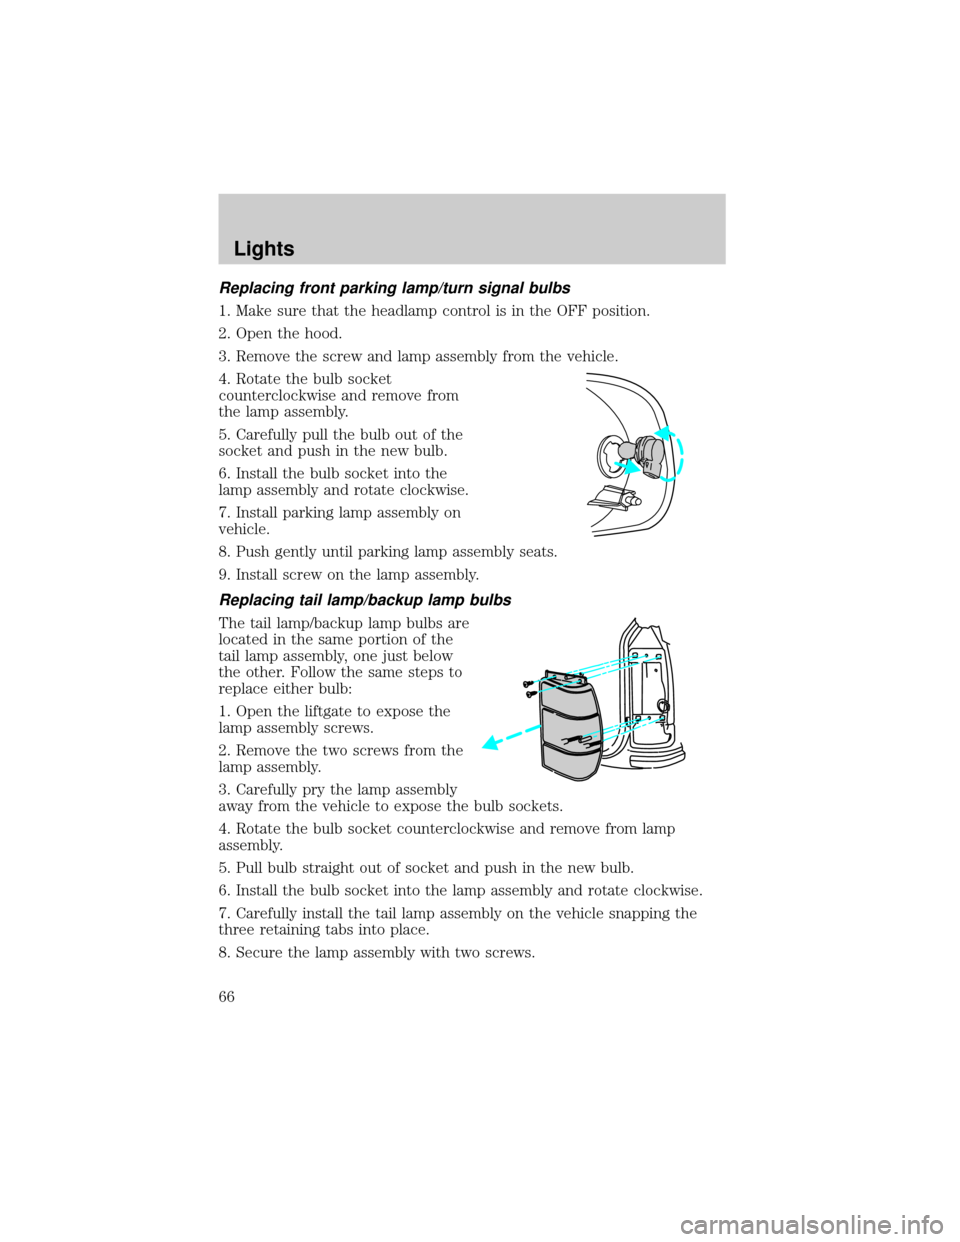
Replacing front parking lamp/turn signal bulbs
1. Make sure that the headlamp control is in the OFF position.
2. Open the hood.
3. Remove the screw and lamp assembly from the vehicle.
4. Rotate the bulb socket
counterclockwise and remove from
the lamp assembly.
5. Carefully pull the bulb out of the
socket and push in the new bulb.
6. Install the bulb socket into the
lamp assembly and rotate clockwise.
7. Install parking lamp assembly on
vehicle.
8. Push gently until parking lamp assembly seats.
9. Install screw on the lamp assembly.
Replacing tail lamp/backup lamp bulbs
The tail lamp/backup lamp bulbs are
located in the same portion of the
tail lamp assembly, one just below
the other. Follow the same steps to
replace either bulb:
1. Open the liftgate to expose the
lamp assembly screws.
2. Remove the two screws from the
lamp assembly.
3. Carefully pry the lamp assembly
away from the vehicle to expose the bulb sockets.
4. Rotate the bulb socket counterclockwise and remove from lamp
assembly.
5. Pull bulb straight out of socket and push in the new bulb.
6. Install the bulb socket into the lamp assembly and rotate clockwise.
7. Carefully install the tail lamp assembly on the vehicle snapping the
three retaining tabs into place.
8. Secure the lamp assembly with two screws.
Lights
66
Page 72 of 280
Forward storage bin (if equipped)
Press the release control to open
the storage compartment. The door
will open slightly and can be moved
to full open.
The storage compartment may be
used to secure sunglasses or a
similar object.
Installing a garage door opener (if equipped)
The storage compartment can be converted to accommodate a variety of
aftermarket garage door openers:
²Place Velcro hook onto back side of aftermarket transmitter opposite
of actuator control.
²Place transmitter into storage compartment, control down.
²Place the provided height adaptors onto the back of the storage bin
door as needed.
²Press the storage compartment door to activate the transmitter.
Driver controls
72
Page 86 of 280
Pressing OFF will erase the
previously programmed set speed.
To return to a previously set speed
²Press RES. For RES to operate,
the vehicle speed must be faster
than 48 km/h (30 mph).
Indicator light
This light comes on when either the
SET ACCEL or RES controls are
pressed. The vehicle speed must be
at or above 48 km/h (30 mph). It
turns off when the speed control
OFF control is pressed, the brake or
clutch is applied, or the ignition is turned to the OFF position.
HOMELINKTUNIVERSAL TRANSCEIVER (IF EQUIPPED)
The HomeLinktUniversal Transceiver, located on the driver's visor,
provides a convenient way to replace up to three hand-held transmitters
with a single built-in device. This feature will learn the radio frequency
codes of most current transmitters to operate garage doors, entry gates,
security systems, entry door locks, and home or office lighting.
ON
OFF
RES
SET
ACCEL
COAST
Driver controls
86
Page 94 of 280

Make sure that the liftgate door and/or window are closed to
prevent exhaust fumes from being drawn into the vehicle. This
will also prevent passengers and cargo from falling out. If you must
drive with the liftgate door or window open, keep the vents open so
outside air comes into the vehicle.
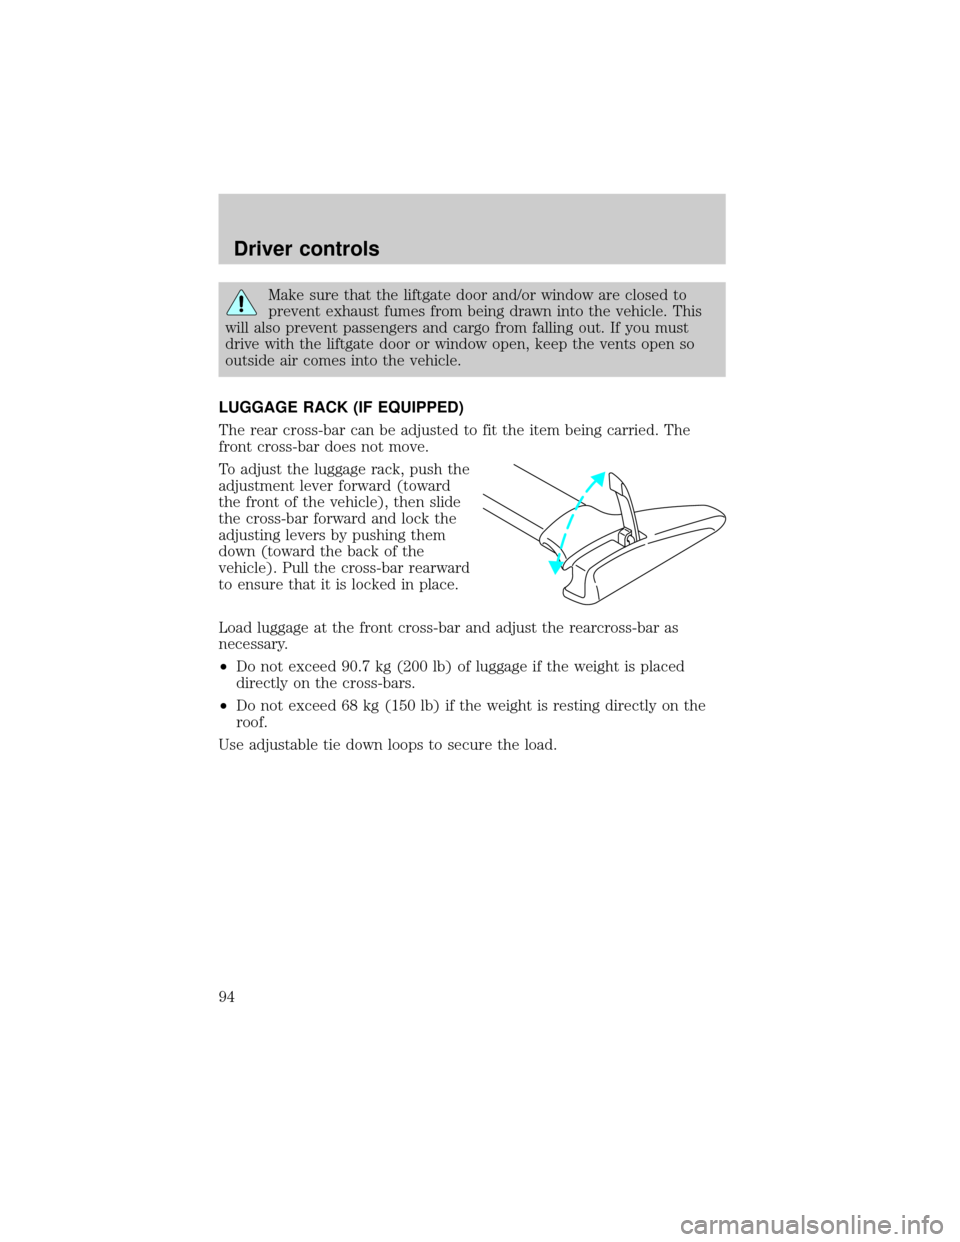
LUGGAGE RACK (IF EQUIPPED)
The rear cross-bar can be adjusted to fit the item being carried. The
front cross-bar does not move.
To adjust the luggage rack, push the
adjustment lever forward (toward
the front of the vehicle), then slide
the cross-bar forward and lock the
adjusting levers by pushing them
down (toward the back of the
vehicle). Pull the cross-bar rearward
to ensure that it is locked in place.
Load luggage at the front cross-bar and adjust the rearcross-bar as
necessary.
²Do not exceed 90.7 kg (200 lb) of luggage if the weight is placed
directly on the cross-bars.
²Do not exceed 68 kg (150 lb) if the weight is resting directly on the
roof.
Use adjustable tie down loops to secure the load.
Driver controls
94
Page 95 of 280
KEYS
The key operates all locks on your
vehicle. In case of loss, replacement
keys are available from your dealer.
You should always carry a second
key with you in a safe place in case
you require it in an emergency.
Refer toSecuriLockyPassive
Anti-Theft Systemfor more
information.
POWER DOOR LOCKS
If the door does not unlock when
the U is pressed, seePower door
disable featurein theRemote entry
sectionin this chapter.
Press U to unlock all doors and L to
lock all doors.
Childproof door locks
When these locks are set, the rear
doors cannot be opened from the
inside. The rear doors can be
opened from the outside when the
doors are unlocked.
The childproof locks are located on
rear edge of each rear door and
must be set separately for each
door. Setting the lock for one door
will not automatically set the lock
for both doors.
Move lock control up to engage the childproof lock. Move control down
to disengage childproof locks.
UL
Locks and security
95