2002 FORD EXPEDITION ECU
[x] Cancel search: ECUPage 145 of 280
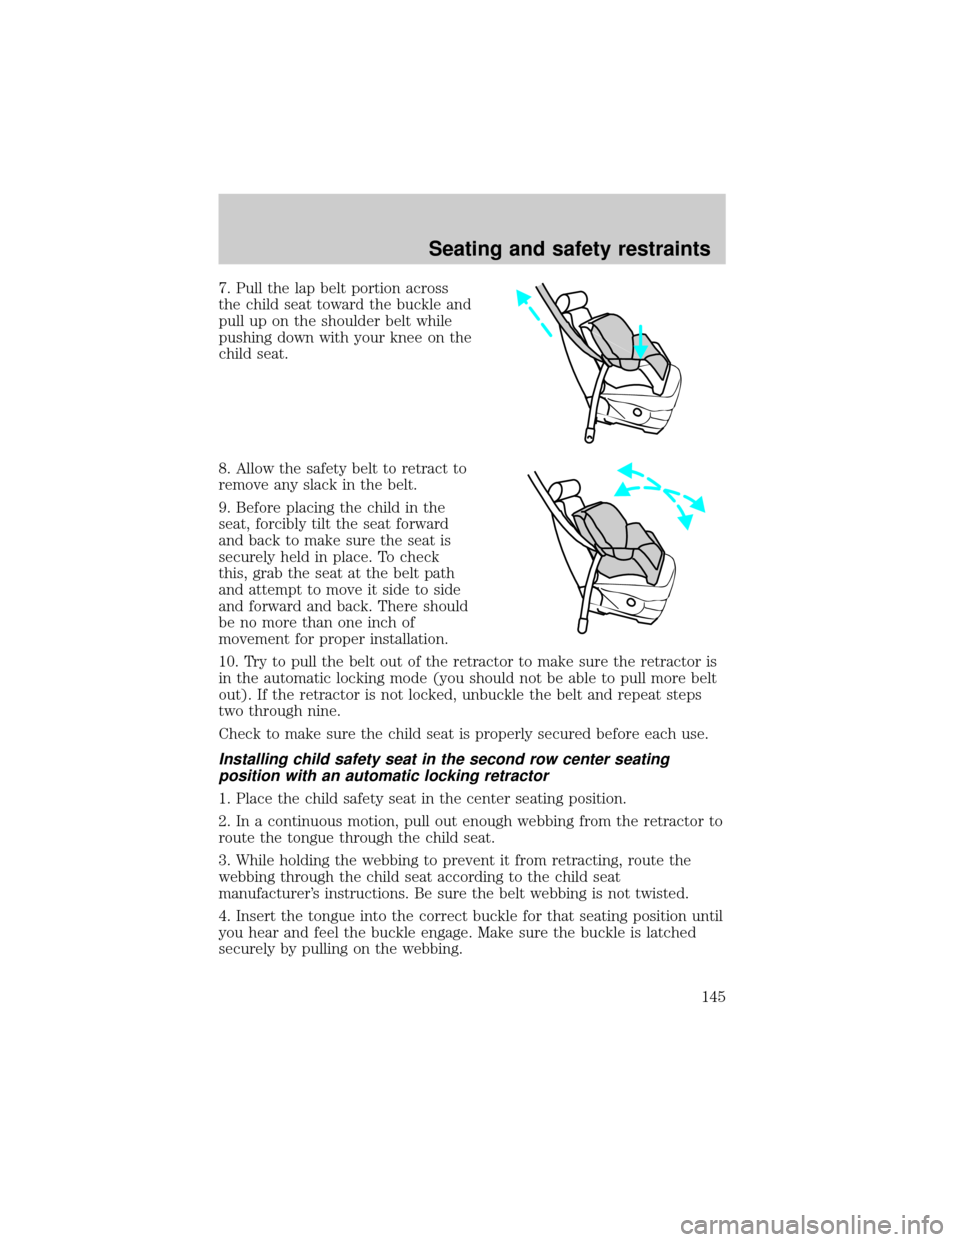
7. Pull the lap belt portion across
the child seat toward the buckle and
pull up on the shoulder belt while
pushing down with your knee on the
child seat.
8. Allow the safety belt to retract to
remove any slack in the belt.
9. Before placing the child in the
seat, forcibly tilt the seat forward
and back to make sure the seat is
securely held in place. To check
this, grab the seat at the belt path
and attempt to move it side to side
and forward and back. There should
be no more than one inch of
movement for proper installation.
10. Try to pull the belt out of the retractor to make sure the retractor is
in the automatic locking mode (you should not be able to pull more belt
out). If the retractor is not locked, unbuckle the belt and repeat steps
two through nine.
Check to make sure the child seat is properly secured before each use.
Installing child safety seat in the second row center seating
position with an automatic locking retractor
1. Place the child safety seat in the center seating position.
2. In a continuous motion, pull out enough webbing from the retractor to
route the tongue through the child seat.
3. While holding the webbing to prevent it from retracting, route the
webbing through the child seat according to the child seat
manufacturer's instructions. Be sure the belt webbing is not twisted.
4. Insert the tongue into the correct buckle for that seating position until
you hear and feel the buckle engage. Make sure the buckle is latched
securely by pulling on the webbing.
Seating and safety restraints
145
Page 146 of 280
5. If you have not pulled out enough webbing to reach, allow the
webbing to fully retract before attempting to pull it out again and repeat
steps 2 through 4.
6. Pull the webbing through the child seat toward the buckle while
pushing down with your knee on the child seat.
7. Allow the safety belt to retract to remove any slack in the belt. It will
make a clicking noise while doing this.
8. Before placing the child in the seat, forcibly tilt the seat forward and
back to make sure the seat is securely held in place.
9. Check to make sure the child seat is properly secured before each
use.
Installing child safety seat in the third row center seating position
(if equipped)
1. Place the child safety seat in the center seating position.
2. Route the tongue end through the child seat according to the child
seat manufacturers instructions. If the tongue will not reach the buckle,
lengthen the amount of belt by turning the tongue at a right angle to the
belt and pulling on it until it reaches the buckle. Be sure the belt
webbing is not twisted.
3. Insert the tongue into the correct buckle for that seating position
(buckle closest to the direction the tongue is coming from) until you
hear and feel the buckle engage. To tighten the belt, pull the loose end
of the belt through the tongue until all the slack is removed from the
belt. Make sure the buckle is latched securely by pulling on the webbing.
4. Before placing the child in the seat, forcibly tilt the seat forward and
back to make sure the seat is securely held in place.
5. Check to make sure the child seat is properly secured before each
use.
Attaching safety seats with tether straps
Most forward-facing child safety seats include a tether strap which goes
over the back of the set and hooks to an anchoring point. Tether straps
are available as an accessory for many older safety seats. Contact the
manufacturer of your child safety seat for information about ordering a
tether strap.
Seating and safety restraints
146
Page 147 of 280
Tether anchorage hardware
All second row and one third row seating position have a fabric strap
installed near the bottom of the rear face of the seatback. These straps
have a loop at the top, and are to be used for child seat tether
anchorages.
A tethered seat can be installed in the front passenger seat. Put the
tether strap over the seatback and attach it to an anchor bracket.
Anchor brackets can be bolted to the rear edge of the front passenger
seat cushion. The bolt holes are in the bottom of the rear edge of the
front passenger seat cushion frame. The anchor bracket must be
installed using the instructions provided with the kit.
Tether anchorage hardware kits (part number 613D74) including
instructions, may be obtained at no charge from any Ford or
Lincoln/Mercury dealer.
Tighten the anchor according to specifications. Otherwise, the
safety seat may not be properly secured and the child may be
injured in a sudden stop or collision.
Attaching child safety seats with tether straps
Most new forward-facing child safety seats include a tether strap which
goes over the back of the seat and hooks to an anchoring point. Tether
straps are available as an accessory for many older safety seats. Contact
the manufacturer of your child seat for information about ordering a
tether strap.
The rear seats of your vehicle are equipped with built-in tether strap
anchors located behind the seats as described below.
The tether anchors in your vehicle are straps on the seatback.
Seating and safety restraints
147
Page 149 of 280
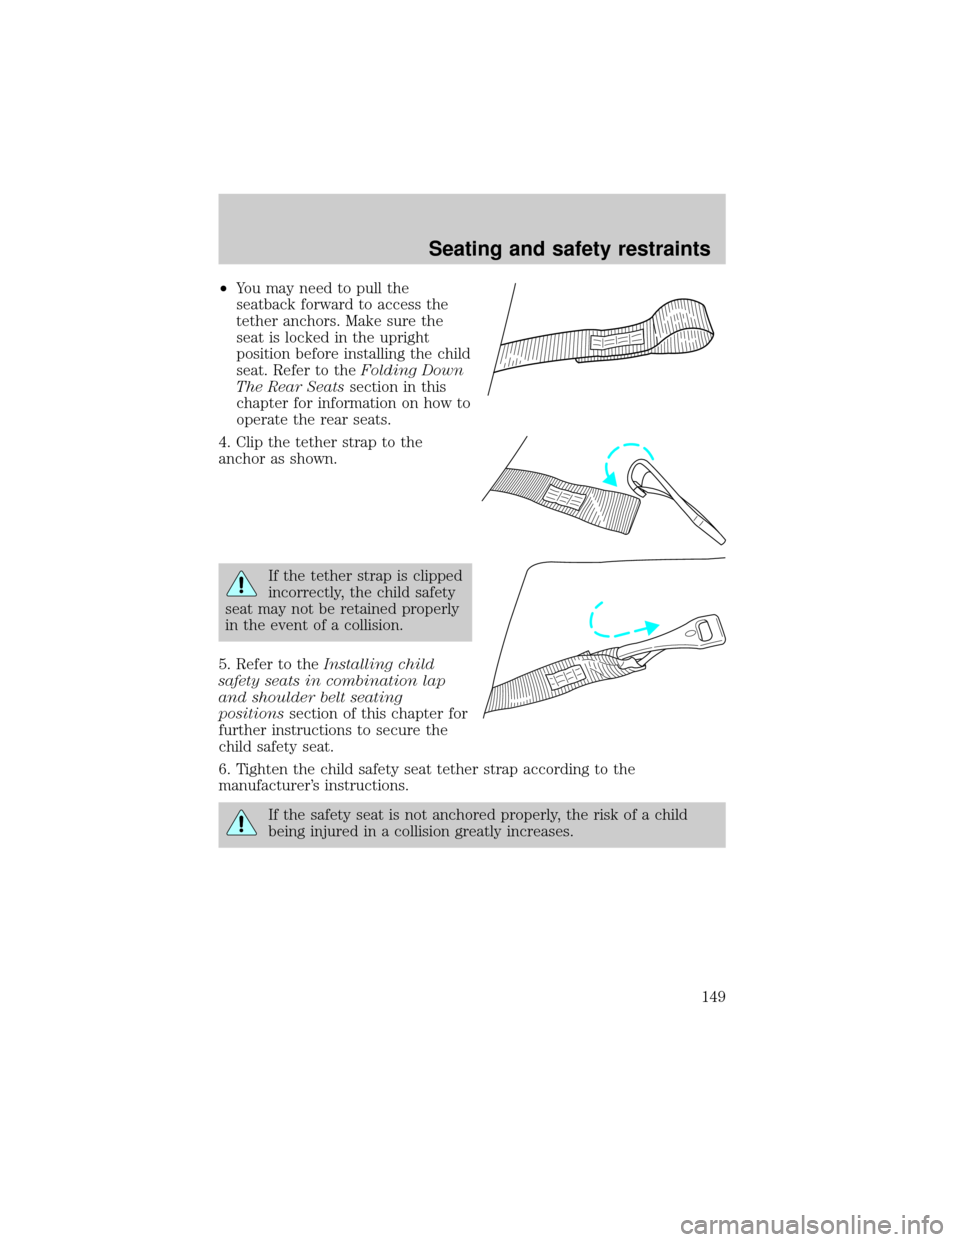
²You may need to pull the
seatback forward to access the
tether anchors. Make sure the
seat is locked in the upright
position before installing the child
seat. Refer to theFolding Down
The Rear Seatssection in this
chapter for information on how to
operate the rear seats.
4. Clip the tether strap to the
anchor as shown.
If the tether strap is clipped
incorrectly, the child safety
seat may not be retained properly
in the event of a collision.
5. Refer to theInstalling child
safety seats in combination lap
and shoulder belt seating
positionssection of this chapter for
further instructions to secure the
child safety seat.
6. Tighten the child safety seat tether strap according to the
manufacturer's instructions.
If the safety seat is not anchored properly, the risk of a child
being injured in a collision greatly increases.
Seating and safety restraints
149
Page 156 of 280
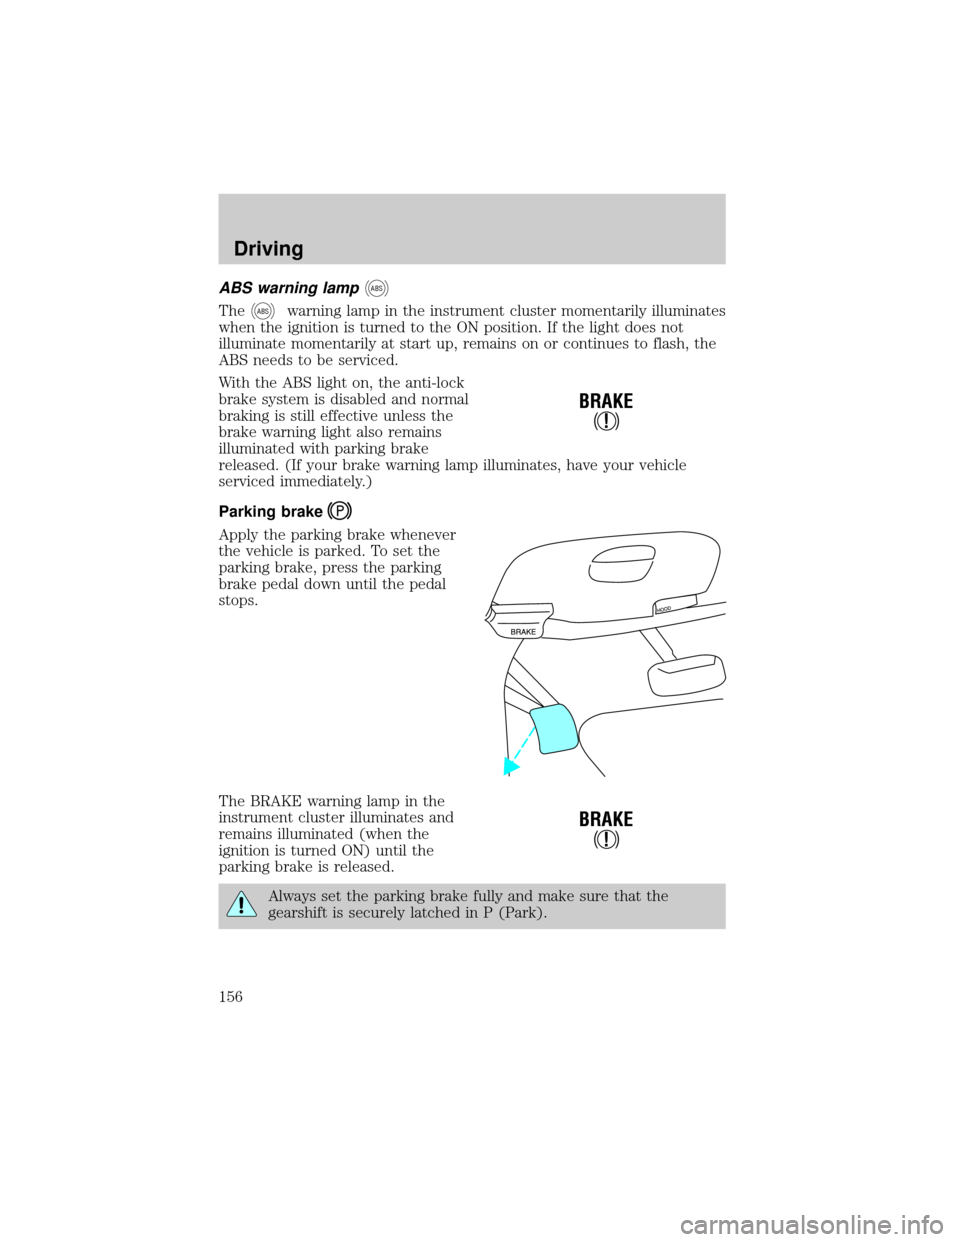
ABS warning lampABS
TheABSwarning lamp in the instrument cluster momentarily illuminates
when the ignition is turned to the ON position. If the light does not
illuminate momentarily at start up, remains on or continues to flash, the
ABS needs to be serviced.
With the ABS light on, the anti-lock
brake system is disabled and normal
braking is still effective unless the
brake warning light also remains
illuminated with parking brake
released. (If your brake warning lamp illuminates, have your vehicle
serviced immediately.)
Parking brake
Apply the parking brake whenever
the vehicle is parked. To set the
parking brake, press the parking
brake pedal down until the pedal
stops.
The BRAKE warning lamp in the
instrument cluster illuminates and
remains illuminated (when the
ignition is turned ON) until the
parking brake is released.
Always set the parking brake fully and make sure that the
gearshift is securely latched in P (Park).
!
BRAKE
!
BRAKE
Driving
156
Page 162 of 280
Driving with a 4±speed automatic transmission
Your vehicle's automatic transmission is equipped with a special shift
strategy that insures maximum heater performance during cold weather
operation.
When ambient temperature is ±5É C (23É F) or below and the engine
coolant temperature is below 38É C (100É F), light throttle upshifts may
be slightly delayed. Once the engine coolant temperature reaches 71É C
(160É F) the normal shift strategy will resume. This is normal operation
and will not affect the function or the durability of the transmission.
If the normal shift strategy does not resume once the engine
coolant temperature reaches the normal operating temperature,
or if the downshifts and other throttle conditions do not function
normally, see your dealer or a qualified service technician as soon
as possible.
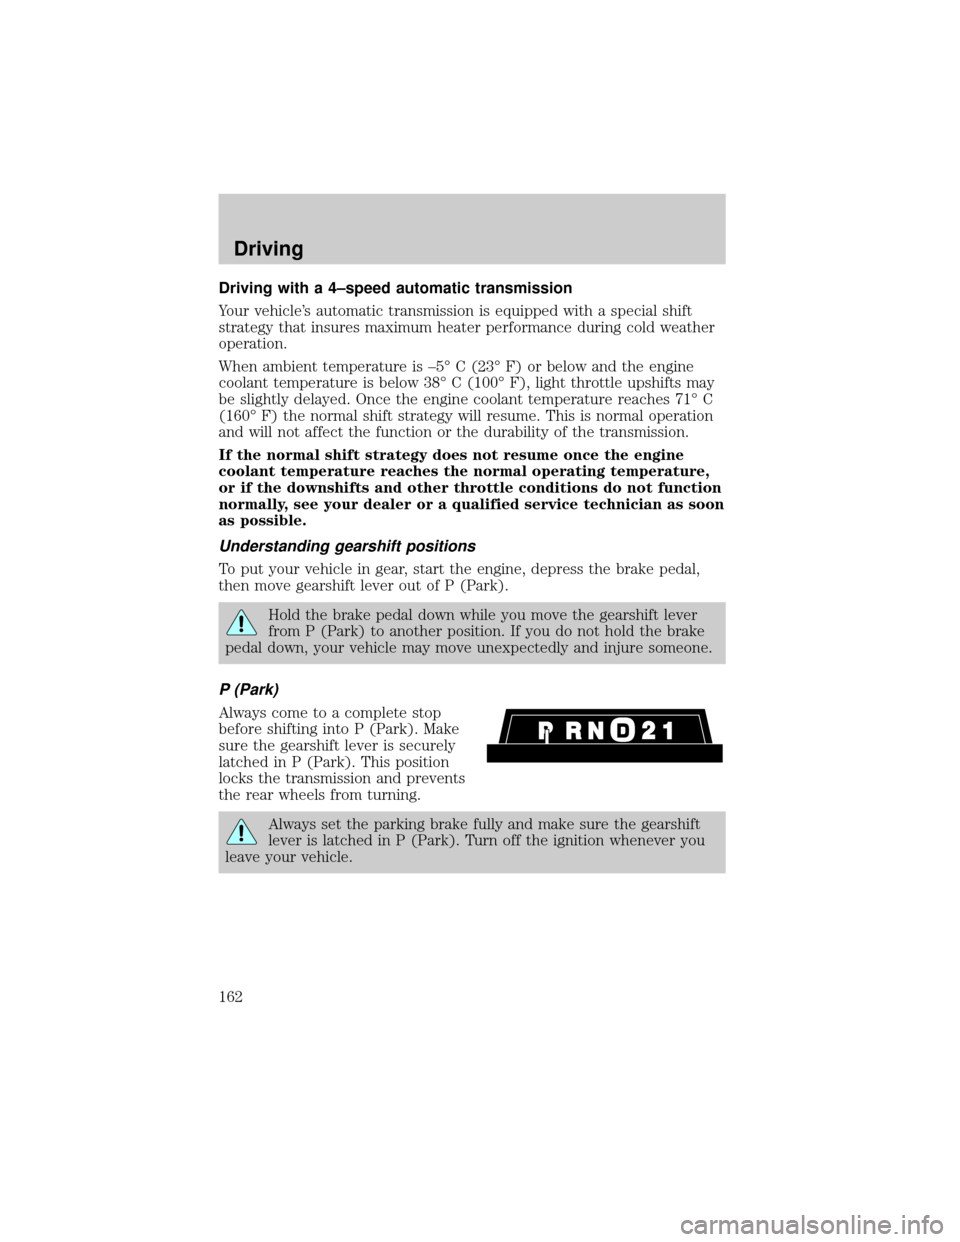
Understanding gearshift positions
To put your vehicle in gear, start the engine, depress the brake pedal,
then move gearshift lever out of P (Park).
Hold the brake pedal down while you move the gearshift lever
from P (Park) to another position. If you do not hold the brake
pedal down, your vehicle may move unexpectedly and injure someone.
P (Park)
Always come to a complete stop
before shifting into P (Park). Make
sure the gearshift lever is securely
latched in P (Park). This position
locks the transmission and prevents
the rear wheels from turning.
Always set the parking brake fully and make sure the gearshift
lever is latched in P (Park). Turn off the ignition whenever you
leave your vehicle.
Driving
162
Page 208 of 280

GETTING THE SERVICES YOU NEED
At home
Ford Motor Company and Ford of Canada have authorized dealerships to
service your vehicle. It is preferred that you return to the Ford dealer
where your vehicle was purchased when warranty repairs are needed.
However, you may also take your vehicle to another Ford Motor
Company or Ford of Canada dealership authorized for warranty repairs.
Certain warranty repairs require special training though, so not all
dealers are authorized to perform all warranty repairs. That means that
depending on the warranty repair needed, the vehicle may need to be
taken to another dealer. If a particular dealership can not assist you,
then contact the Customer Relationship Center.
If you have questions or concerns, or are unsatisfied with the service you
are receiving, follow these steps:
1. Contact your Sales Representative or Service Advisor at your
selling/servicing dealership.
2. If your inquiry or concern remains unresolved, contact the Sales
Manager or Service Manager at the dealership.
3. If the inquiry or concern cannot be resolved at the dealership level,
please contact the Ford Customer Relationship Center.
Away from home
If you own a Ford or Mercury vehicle and are away from home when
your vehicle needs service, or if you need more help than the dealership
could provide, after following the steps described above, contact the
Ford Customer Relationship Center to find an authorized dealership to
help you. In the United States:
Ford Motor Company
Customer Relationship Center
16800 Executive Plaza Drive
P.O. Box 6248
Dearborn, Michigan 48121
1-800-392-3673 (FORD)
(TDD for the hearing impaired: 1-800-232-5952)
Customer assistance
208
Page 209 of 280

In Canada:
Customer Relationship Centre
Ford Motor Company of Canada, Limited
P.O. Box 2000
Oakville, Ontario L6J 5E4
1-800-565-3673 (FORD)
If you own a Lincoln vehicle and are away from home when your vehicle
needs service, or if you need more help than the dealership could
provide, after following the steps described above, contact the Ford
Customer Relationship Center to find an authorized dealership to help
you.
In the United States:
Ford Motor Company
Customer Relationship Center
16800 Executive Plaza Drive
P.O. Box 6248
Dearborn, Michigan 48121
1-800-521-4140
(TDD for the hearing impaired: 1-800-232-5952)
In Canada:
Customer Relationship Centre
Ford Motor Company of Canada, Limited
P.O. Box 2000
Oakville, Ontario L6J 5E4
1-800-565-3673 (FORD)
In order to help you service your Ford or Lincoln Mercury vehicle, please
have the following information available when contacting a Customer
Relationship Center:
²Your telephone number (home and business).
²The name of the dealer and the city where the dealership is located.
²The year and make of your vehicle.
²The date of vehicle purchase.
²The current odometer reading.
²The vehicle identification number (VIN).
If you still have a complaint involving a warranty dispute, you may wish
to contact the Dispute Settlement Board (U.S.).
Customer assistance
209