2002 FORD EXPEDITION brake
[x] Cancel search: brakePage 176 of 280
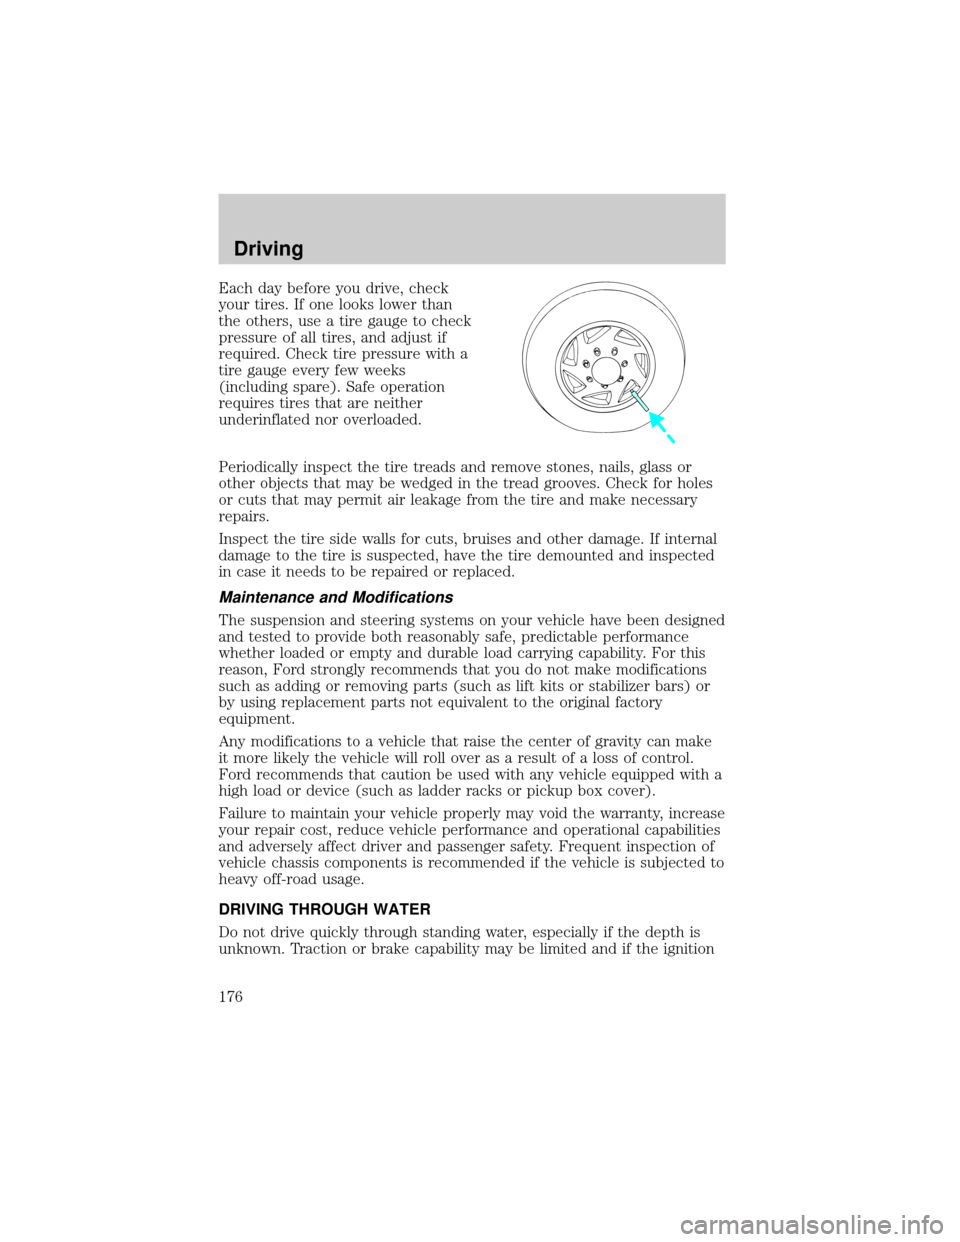
Each day before you drive, check
your tires. If one looks lower than
the others, use a tire gauge to check
pressure of all tires, and adjust if
required. Check tire pressure with a
tire gauge every few weeks
(including spare). Safe operation
requires tires that are neither
underinflated nor overloaded.
Periodically inspect the tire treads and remove stones, nails, glass or
other objects that may be wedged in the tread grooves. Check for holes
or cuts that may permit air leakage from the tire and make necessary
repairs.
Inspect the tire side walls for cuts, bruises and other damage. If internal
damage to the tire is suspected, have the tire demounted and inspected
in case it needs to be repaired or replaced.
Maintenance and Modifications
The suspension and steering systems on your vehicle have been designed
and tested to provide both reasonably safe, predictable performance
whether loaded or empty and durable load carrying capability. For this
reason, Ford strongly recommends that you do not make modifications
such as adding or removing parts (such as lift kits or stabilizer bars) or
by using replacement parts not equivalent to the original factory
equipment.
Any modifications to a vehicle that raise the center of gravity can make
it more likely the vehicle will roll over as a result of a loss of control.
Ford recommends that caution be used with any vehicle equipped with a
high load or device (such as ladder racks or pickup box cover).
Failure to maintain your vehicle properly may void the warranty, increase
your repair cost, reduce vehicle performance and operational capabilities
and adversely affect driver and passenger safety. Frequent inspection of
vehicle chassis components is recommended if the vehicle is subjected to
heavy off-road usage.
DRIVING THROUGH WATER
Do not drive quickly through standing water, especially if the depth is
unknown. Traction or brake capability may be limited and if the ignition
Driving
176
Page 177 of 280

system gets wet, your engine may stall. Water may also enter your
engine's air intake and severely damage your engine.
If driving through deep or standing water is unavoidable, proceed very
slowly. Never drive through water that is higher than the bottom of the
hubs (for trucks) or the bottom of the wheel rims (for cars).
Once through the water, always try the brakes. Wet brakes do not stop
the vehicle as effectively as dry brakes. Drying can be improved by
moving your vehicle slowly while applying light pressure on the brake
pedal.
Driving through deep water where the transmission vent tube is
submerged may allow water into the transmission and cause
internal transmission damage.
VEHICLE LOADING
Before loading a vehicle, familiarize yourself with the following terms:
²Base Curb Weight:Weight of the vehicle including any standard
equipment, fluids, lubricants, etc. It does not include occupants or
aftermarket equipment.
²Payload:Combined maximum allowable weight of cargo, occupants
and optional equipment. The payload equals the gross vehicle weight
rating minus base curb weight.
²GVW (Gross Vehicle Weight):Base curb weight plus payload
weight. The GVW is not a limit or a specification.
²GVWR (Gross Vehicle Weight Rating):Maximum permissable total
weight of the base vehicle, occupants, optional equipment and cargo.
The GVWR is specific to each vehicle and is listed on the Safety
Certification Label on the driver's door pillar.
²GAWR (Gross Axle Weight Rating):Carrying capacity for each axle
system. The GAWR is specific to each vehicle and is listed on the
Safety Certification Label on the driver's door pillar.
²GCW (Gross Combined Weight):The combined weight of the
towing vehicle (including occupants and cargo) and the loaded trailer.
²GCWR (Gross Combined Weight Rating):Maximum permissable
combined weight of towing vehicle (including occupants and cargo)
and the loaded trailer
²Maximum Trailer Weight Rating:Maximum weight of a trailer the
vehicle is permitted to tow. The maximum trailer weight rating is
Driving
177
Page 180 of 280
TRAILER TOWING
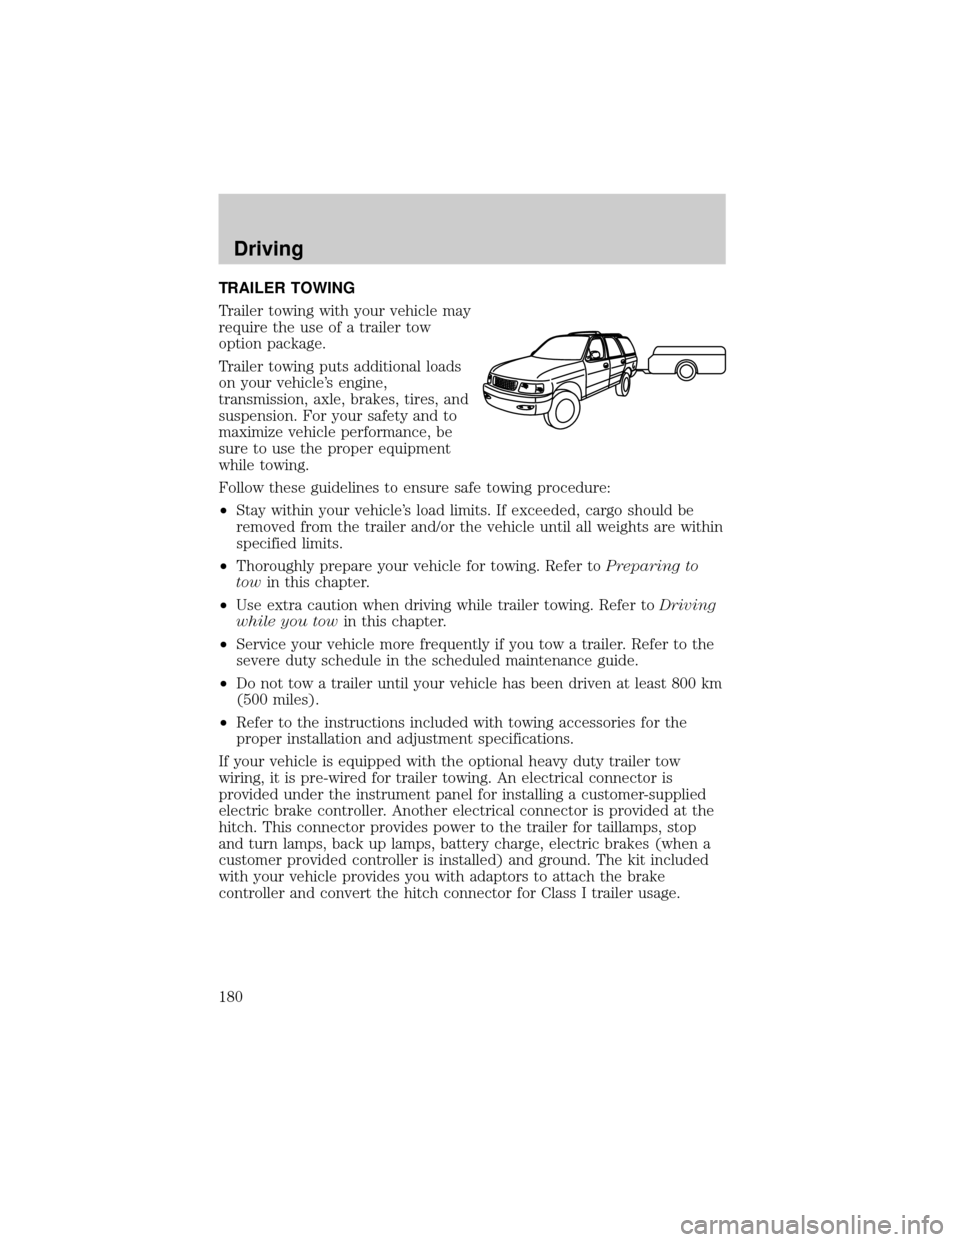
Trailer towing with your vehicle may
require the use of a trailer tow
option package.
Trailer towing puts additional loads
on your vehicle's engine,
transmission, axle, brakes, tires, and
suspension. For your safety and to
maximize vehicle performance, be
sure to use the proper equipment
while towing.
Follow these guidelines to ensure safe towing procedure:
²Stay within your vehicle's load limits. If exceeded, cargo should be
removed from the trailer and/or the vehicle until all weights are within
specified limits.
²Thoroughly prepare your vehicle for towing. Refer toPreparing to
towin this chapter.
²Use extra caution when driving while trailer towing. Refer toDriving
while you towin this chapter.
²Service your vehicle more frequently if you tow a trailer. Refer to the
severe duty schedule in the scheduled maintenance guide.
²Do not tow a trailer until your vehicle has been driven at least 800 km
(500 miles).
²Refer to the instructions included with towing accessories for the
proper installation and adjustment specifications.
If your vehicle is equipped with the optional heavy duty trailer tow
wiring, it is pre-wired for trailer towing. An electrical connector is
provided under the instrument panel for installing a customer-supplied
electric brake controller. Another electrical connector is provided at the
hitch. This connector provides power to the trailer for taillamps, stop
and turn lamps, back up lamps, battery charge, electric brakes (when a
customer provided controller is installed) and ground. The kit included
with your vehicle provides you with adaptors to attach the brake
controller and convert the hitch connector for Class I trailer usage.
Driving
180
Page 183 of 280
Trailer brakes
Electric brakes and manual, automatic or surge-type trailer brakes are
safe if installed properly and adjusted to the manufacturer's
specifications. The trailer brakes must meet local and Federal
regulations.
Do not connect a trailer's hydraulic brake system directly to your
vehicle's brake system. Your vehicle may not have enough
braking power and your chances of having a collision greatly increase.
The braking system of the tow vehicle is rated for operation at the
GVWR not GCWR.
Trailer lamps
Trailer lamps are required on most towed vehicles. Make sure your
trailer lamps conform to local and Federal regulations. See your dealer or
trailer rental agency for proper instructions and equipment for hooking
up trailer lamps.
Using a step bumper
The rear bumper is equipped with an integral hitch and requires only a
ball with a 25.4 mm (one inch) shank diameter. The bumper hasa1814
kg (4 000 lb.) trailer weight and 181 kg (400 lb.) tongue weight
capability.
Use a frame-mounted weight distributing hitch for trailers over 1 814 kg
(4 000 lb).
Driving while you tow
When towing a trailer:
²Ensure that you turn off your speed control. The speed control may
shut off automatically when you are towing on long, steep grades.
²Consult your local motor vehicle speed regulations for towing a trailer.
²Use a lower gear when towing up or down steep hills. This will
eliminate excessive downshifting and upshifting for optimum fuel
economy and transmission cooling.
²Anticipate stops and brake gradually.
Exceeding the GCWR rating may cause internal transmission
damage and void your warranty coverage.
Driving
183
Page 184 of 280

Servicing after towing
If you tow a trailer for long distances, your vehicle will require more
frequent service intervals. Refer to your scheduled maintenance guide for
more information.
Trailer towing tips
²Practice turning, stopping and backing up before starting on a trip to
get the feel of the vehicle trailer combination. When turning, make
wider turns so the trailer wheels will clear curbs and other obstacles.
²Allow more distance for stopping with a trailer attached.
²If you are driving down a long or steep hill, shift to a lower gear. Do
not apply the brakes continuously, as they may overheat and become
less effective.
²The trailer tongue weight should be 10% of the loaded trailer weight.
²After you have traveled 80 km (50 miles), thoroughly check your
hitch, electrical connections and trailer wheel lug nuts.
²When stopped in traffic for long periods of time in hot weather, place
the gearshift in P (Park) and increase idle speed. This aids engine
cooling and air conditioner efficiency.
²Vehicles with trailers should not be parked on a grade. If you must
park on a grade, place wheel chocks under the trailer's wheels.
Launching or retrieving a boat
When backing down a ramp during boat launching or retrieval:
²do not allow the static water level to rise above the bottom edge of
the rear bumper and
²do not allow waves to break higher than 15 cm (6 inches) above the
bottom edge of the rear bumper.
Exceeding these limits may allow water to enter critical vehicle
components, adversely affecting driveability, emissions, reliability and
causing internal transmission damage.
Replace the rear axle lubricant any time the axle has been submerged in
water. Rear axle lubricant quantities are not to be checked or changed
unless a leak is suspected or repair required.
Disconnect the wiring to the trailer before backing the trailer into the
water. Reconnect the wiring to the trailer after the trailer is removed
from the water.
Driving
184
Page 190 of 280
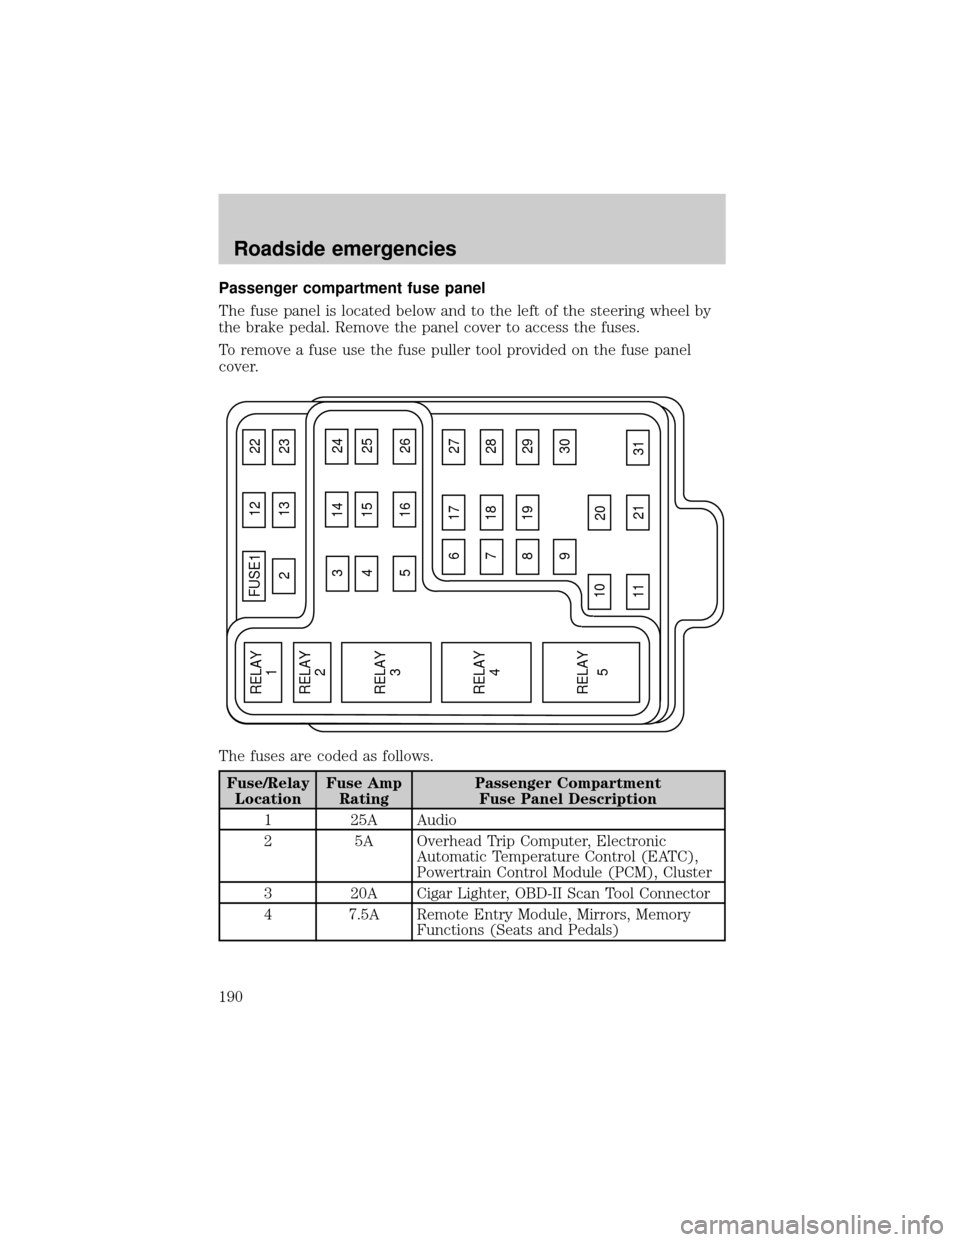
Passenger compartment fuse panel
The fuse panel is located below and to the left of the steering wheel by
the brake pedal. Remove the panel cover to access the fuses.
To remove a fuse use the fuse puller tool provided on the fuse panel
cover.
The fuses are coded as follows.
Fuse/Relay
LocationFuse Amp
RatingPassenger Compartment
Fuse Panel Description
1 25A Audio
2 5A Overhead Trip Computer, Electronic
Automatic Temperature Control (EATC),
Powertrain Control Module (PCM), Cluster
3 20A Cigar Lighter, OBD-II Scan Tool Connector
4 7.5A Remote Entry Module, Mirrors, Memory
Functions (Seats and Pedals)
FUSE1 12 22
21323
617 27
718 28
819 29
930
20
31 21 11 10
RELAY
5 RELAY
4 RELAY
3 RELAY
2 RELAY
1
31424
41525
51626
Roadside emergencies
190
Page 191 of 280

Fuse/Relay
LocationFuse Amp
RatingPassenger Compartment
Fuse Panel Description
5 15A Speed Control Module, Reverse Lamp, EVO
Module, Climate Mode Switch (Front
Blower Relay), Daytime Running Lamp
Relay, Reverse Sensing System, Autolock,
E/C Mirror
6 5A Cluster, Overhead Trip Computer, Compass,
Brake Shift Interlock Solenoid, Air
Suspension Module, GEM Module, EVO
Steering Sensor, Heated Mirror, Rear
Defroster, Reverse Sensing System
7 5A Aux A/C Blower Relay (via fuse 22)
8 5A Radio, Remote Entry Module, GEM Module
9 Ð Not Used
10 Ð Not Used
11 30A Front Washer Pump Relay, Wiper Run/Park
Relay, Wiper Hi/LO Relay, Windshield Wiper
Motor, Rear Washer Pump Relay
12 15A Air Suspension Switch
13 20A Stop Lamp Switch (Lamps), Turn/Hazard
Flasher, Speed Control Module
14 15A Rear Wipers, Running Board Lamps,
Battery Saver Relay, Interior Lamp Relay,
Accessory Delay Relay (Power Windows,
Moonroof, Flip Windows)
15 5A Stop Lamp Switch, (Speed Control, Brake
Shift Interlock, ABS, PCM Module Inputs,
Air Suspension Module, Autolock), GEM
Module
16 20A Headlamps (Hi Beams), Cluster (Hi Beam
Indicator)
17 10A Heated Mirrors, Heated Grid Switch
Indicator
18 5A Instrument Illumination (Dimmer Switch
Power)
19 Ð Not Used
Roadside emergencies
191
Page 192 of 280
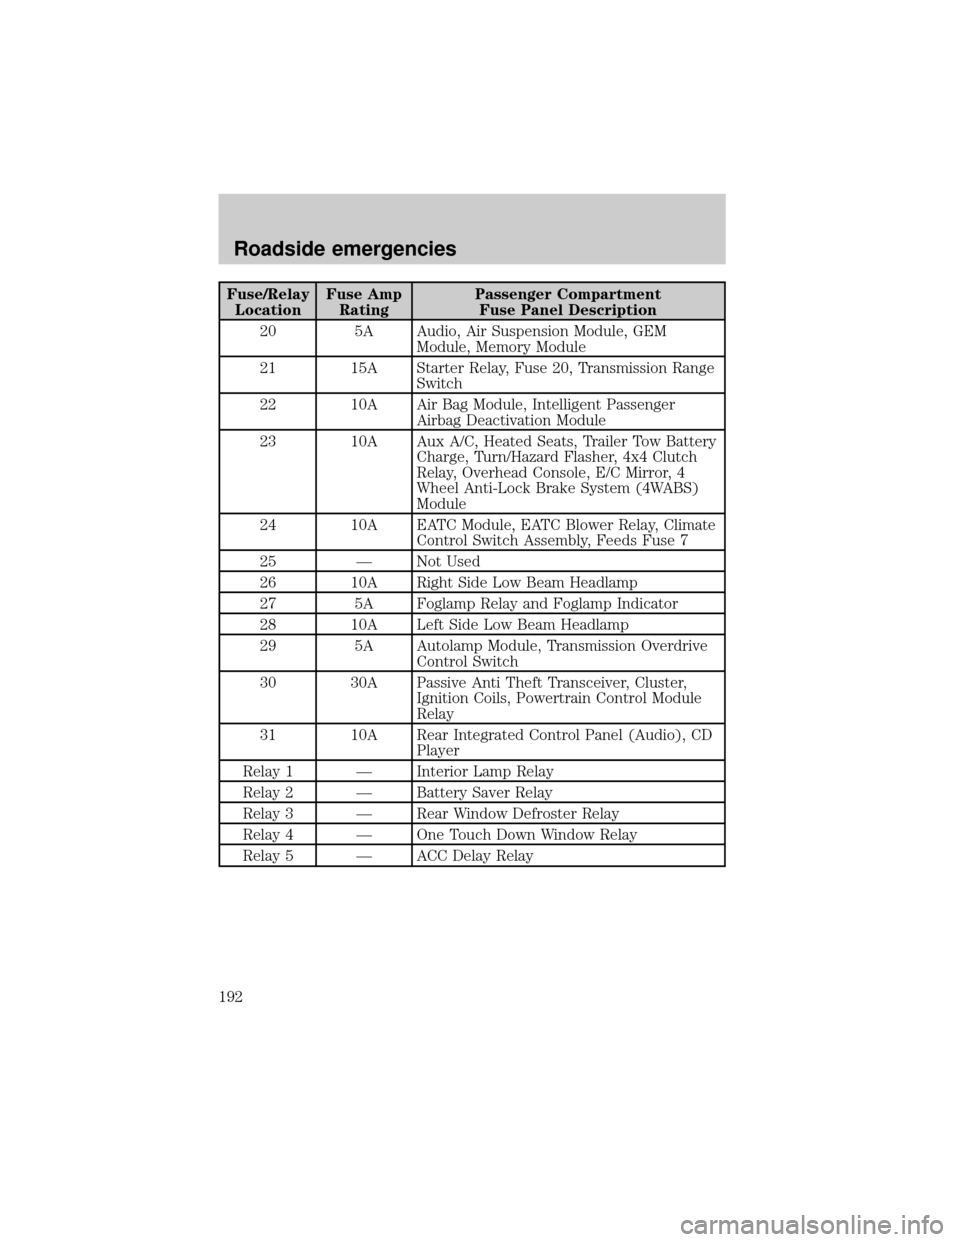
Fuse/Relay
LocationFuse Amp
RatingPassenger Compartment
Fuse Panel Description
20 5A Audio, Air Suspension Module, GEM
Module, Memory Module
21 15A Starter Relay, Fuse 20, Transmission Range
Switch
22 10A Air Bag Module, Intelligent Passenger
Airbag Deactivation Module
23 10A Aux A/C, Heated Seats, Trailer Tow Battery
Charge, Turn/Hazard Flasher, 4x4 Clutch
Relay, Overhead Console, E/C Mirror, 4
Wheel Anti-Lock Brake System (4WABS)
Module
24 10A EATC Module, EATC Blower Relay, Climate
Control Switch Assembly, Feeds Fuse 7
25 Ð Not Used
26 10A Right Side Low Beam Headlamp
27 5A Foglamp Relay and Foglamp Indicator
28 10A Left Side Low Beam Headlamp
29 5A Autolamp Module, Transmission Overdrive
Control Switch
30 30A Passive Anti Theft Transceiver, Cluster,
Ignition Coils, Powertrain Control Module
Relay
31 10A Rear Integrated Control Panel (Audio), CD
Player
Relay 1 Ð Interior Lamp Relay
Relay 2 Ð Battery Saver Relay
Relay 3 Ð Rear Window Defroster Relay
Relay 4 Ð One Touch Down Window Relay
Relay 5 Ð ACC Delay Relay
Roadside emergencies
192