2002 FORD EXPEDITION ECO mode
[x] Cancel search: ECO modePage 99 of 280

Replacing lost transmitters
If a remote transmitter has been lost
and you would like to remove it
from the vehicle's memory, or you
would like to purchase additional
remote transmitters and have them
programmed to your vehicle:
²Takeallyour vehicle's
transmitters to your dealer for
programming, or
²Perform the programming
procedure yourself
Programming remote transmitters
It is necessary to haveall(maximum of four Ð original and/or new) of
your remote transmitters available prior to beginning this procedure.
To program the transmitters yourself:
²Place the key in the ignition and
turn from 2 (LOCK) to 3 (OFF)
and cycle between 3 (OFF) and
4(ON) eight times in rapid
succession (within 10 seconds)
with the eighth turn ending in the
4 (ON) position. The doors will
lock/unlock to confirm that
programming mode has been
entered.
²Within 20 seconds, program a
remote transmitter by pressing any button on a transmitter. The doors
will lock/unlock to confirm that the remote transmitter has been
programmed. (If more than 20 seconds pass before pressing a remote
transmitter button, the programming mode will exit and the procedure
will have to be repeated.)
²Repeat the previous step to program additional remote transmitters.
The doors will lock/unlock to confirm that each remote transmitter has
been programmed.
²When you have completed programming the remote transmitters, turn
the ignition to 3 (OFF). Again the doors will lock/unlock to confirm
programming has been completed.
3
2
1
5
4
Locks and security
99
Page 103 of 280
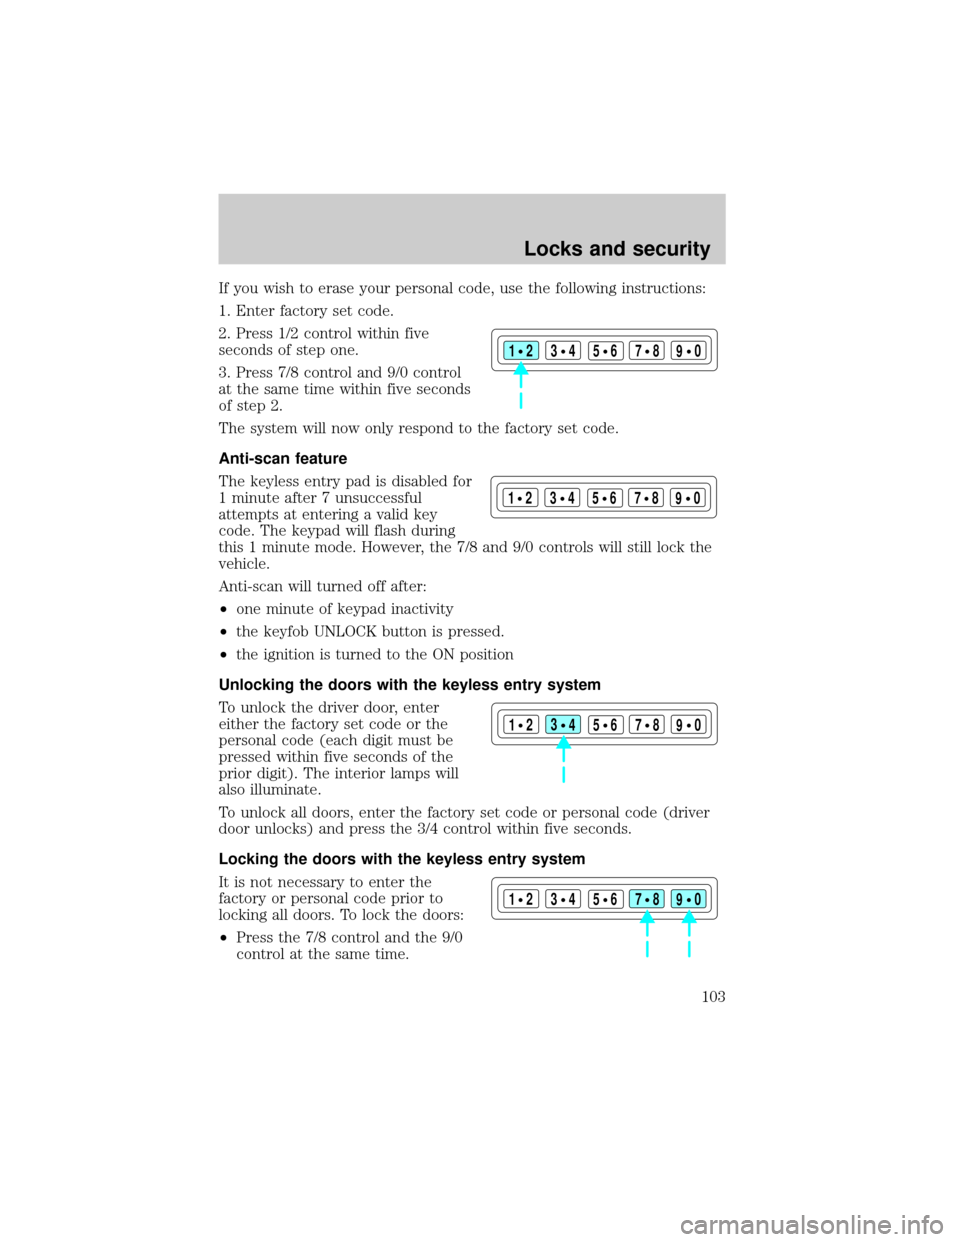
If you wish to erase your personal code, use the following instructions:
1. Enter factory set code.
2. Press 1/2 control within five
seconds of step one.
3. Press 7/8 control and 9/0 control
at the same time within five seconds
of step 2.
The system will now only respond to the factory set code.
Anti-scan feature
The keyless entry pad is disabled for
1 minute after 7 unsuccessful
attempts at entering a valid key
code. The keypad will flash during
this 1 minute mode. However, the 7/8 and 9/0 controls will still lock the
vehicle.
Anti-scan will turned off after:
²one minute of keypad inactivity
²the keyfob UNLOCK button is pressed.
²the ignition is turned to the ON position
Unlocking the doors with the keyless entry system
To unlock the driver door, enter
either the factory set code or the
personal code (each digit must be
pressed within five seconds of the
prior digit). The interior lamps will
also illuminate.
To unlock all doors, enter the factory set code or personal code (driver
door unlocks) and press the 3/4 control within five seconds.
Locking the doors with the keyless entry system
It is not necessary to enter the
factory or personal code prior to
locking all doors. To lock the doors:
²Press the 7/8 control and the 9/0
control at the same time.
123
45678
90
123
45678
90
123
45678
90
123
45678
90
Locks and security
103
Page 124 of 280
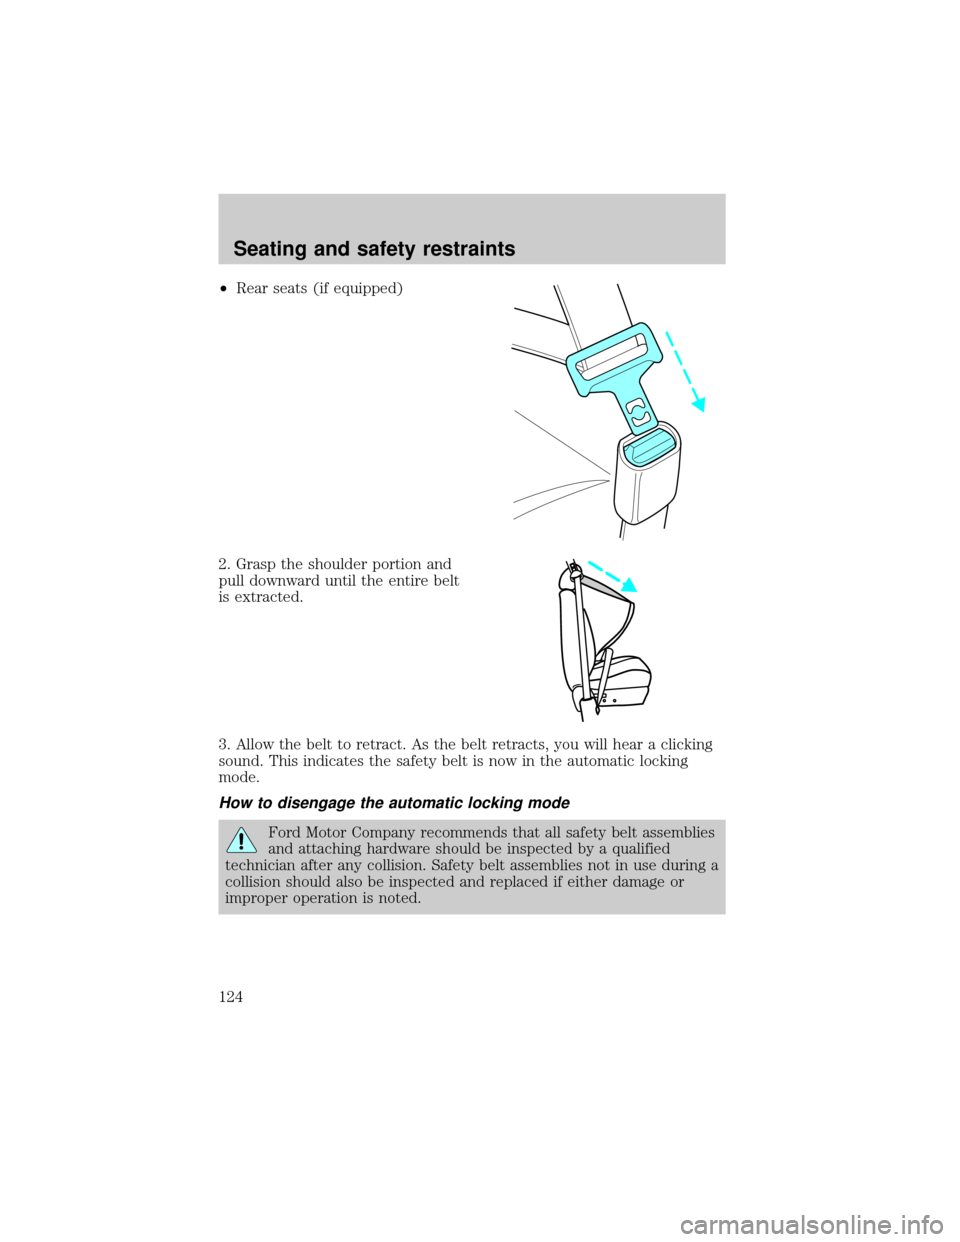
²Rear seats (if equipped)
2. Grasp the shoulder portion and
pull downward until the entire belt
is extracted.
3. Allow the belt to retract. As the belt retracts, you will hear a clicking
sound. This indicates the safety belt is now in the automatic locking
mode.
How to disengage the automatic locking mode
Ford Motor Company recommends that all safety belt assemblies
and attaching hardware should be inspected by a qualified
technician after any collision. Safety belt assemblies not in use during a
collision should also be inspected and replaced if either damage or
improper operation is noted.
Seating and safety restraints
124
Page 142 of 280
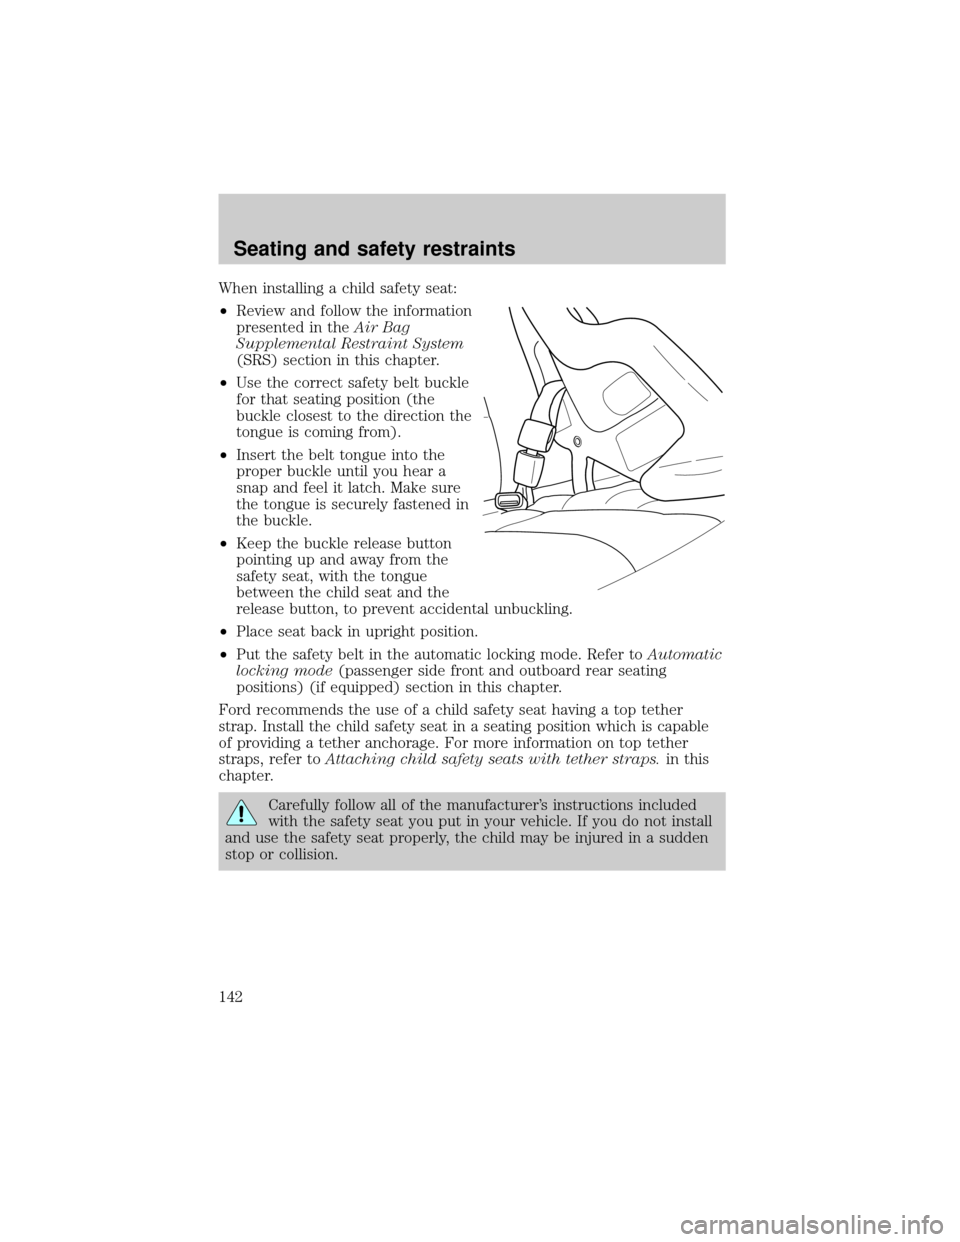
When installing a child safety seat:
²Review and follow the information
presented in theAir Bag
Supplemental Restraint System
(SRS) section in this chapter.
²Use the correct safety belt buckle
for that seating position (the
buckle closest to the direction the
tongue is coming from).
²Insert the belt tongue into the
proper buckle until you hear a
snap and feel it latch. Make sure
the tongue is securely fastened in
the buckle.
²Keep the buckle release button
pointing up and away from the
safety seat, with the tongue
between the child seat and the
release button, to prevent accidental unbuckling.
²Place seat back in upright position.
²Put the safety belt in the automatic locking mode. Refer toAutomatic
locking mode(passenger side front and outboard rear seating
positions) (if equipped) section in this chapter.
Ford recommends the use of a child safety seat having a top tether
strap. Install the child safety seat in a seating position which is capable
of providing a tether anchorage. For more information on top tether
straps, refer toAttaching child safety seats with tether straps.in this
chapter.
Carefully follow all of the manufacturer's instructions included
with the safety seat you put in your vehicle. If you do not install
and use the safety seat properly, the child may be injured in a sudden
stop or collision.
Seating and safety restraints
142
Page 145 of 280
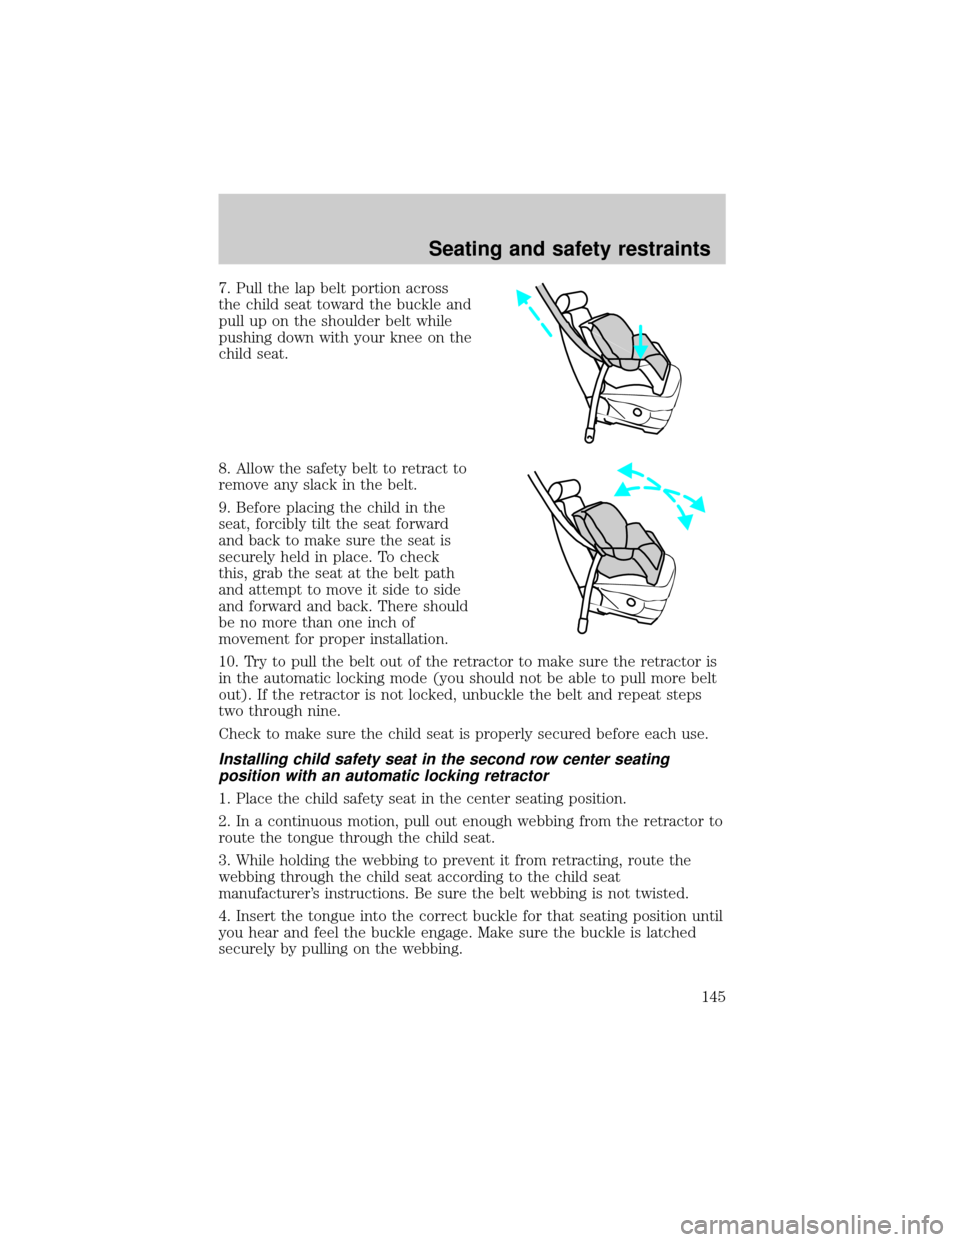
7. Pull the lap belt portion across
the child seat toward the buckle and
pull up on the shoulder belt while
pushing down with your knee on the
child seat.
8. Allow the safety belt to retract to
remove any slack in the belt.
9. Before placing the child in the
seat, forcibly tilt the seat forward
and back to make sure the seat is
securely held in place. To check
this, grab the seat at the belt path
and attempt to move it side to side
and forward and back. There should
be no more than one inch of
movement for proper installation.
10. Try to pull the belt out of the retractor to make sure the retractor is
in the automatic locking mode (you should not be able to pull more belt
out). If the retractor is not locked, unbuckle the belt and repeat steps
two through nine.
Check to make sure the child seat is properly secured before each use.
Installing child safety seat in the second row center seating
position with an automatic locking retractor
1. Place the child safety seat in the center seating position.
2. In a continuous motion, pull out enough webbing from the retractor to
route the tongue through the child seat.
3. While holding the webbing to prevent it from retracting, route the
webbing through the child seat according to the child seat
manufacturer's instructions. Be sure the belt webbing is not twisted.
4. Insert the tongue into the correct buckle for that seating position until
you hear and feel the buckle engage. Make sure the buckle is latched
securely by pulling on the webbing.
Seating and safety restraints
145
Page 163 of 280
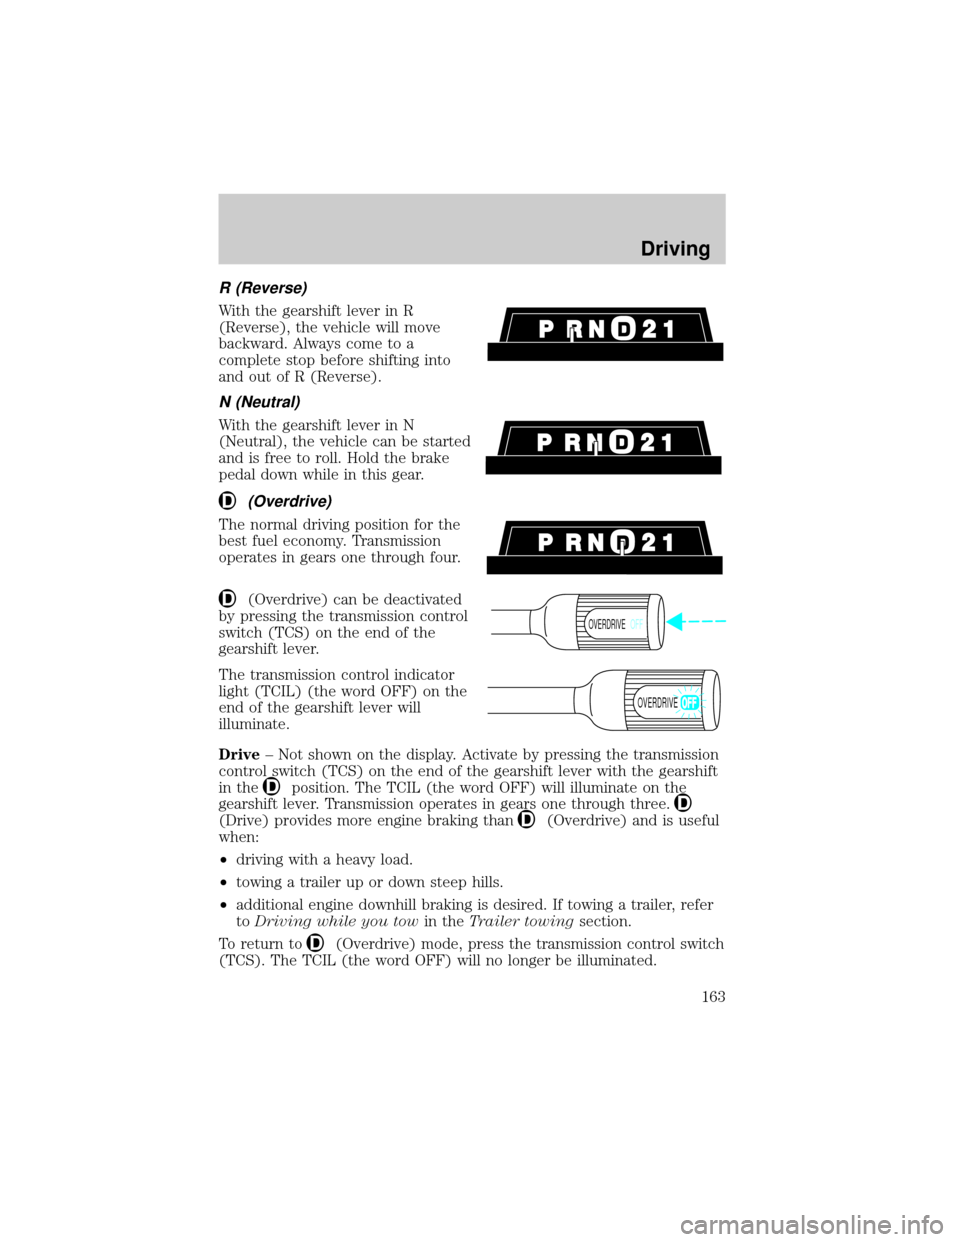
R (Reverse)
With the gearshift lever in R
(Reverse), the vehicle will move
backward. Always come to a
complete stop before shifting into
and out of R (Reverse).
N (Neutral)
With the gearshift lever in N
(Neutral), the vehicle can be started
and is free to roll. Hold the brake
pedal down while in this gear.
(Overdrive)
The normal driving position for the
best fuel economy. Transmission
operates in gears one through four.
(Overdrive) can be deactivated
by pressing the transmission control
switch (TCS) on the end of the
gearshift lever.
The transmission control indicator
light (TCIL) (the word OFF) on the
end of the gearshift lever will
illuminate.
Drive± Not shown on the display. Activate by pressing the transmission
control switch (TCS) on the end of the gearshift lever with the gearshift
in the
position. The TCIL (the word OFF) will illuminate on the
gearshift lever. Transmission operates in gears one through three.
(Drive) provides more engine braking than(Overdrive) and is useful
when:
²driving with a heavy load.
²towing a trailer up or down steep hills.
²additional engine downhill braking is desired. If towing a trailer, refer
toDriving while you towin theTrailer towingsection.
To return to
(Overdrive) mode, press the transmission control switch
(TCS). The TCIL (the word OFF) will no longer be illuminated.
OVERDRIVEOFF
OVERDRIVE
Driving
163
Page 164 of 280
Each time the vehicle is started, the transmission will automatically
return to normal overdrive mode.
Every time the vehicle is shut off and restarted, you must press the
transmission control switch to cancel overdrive operation if driving in
overdrive is not desired.
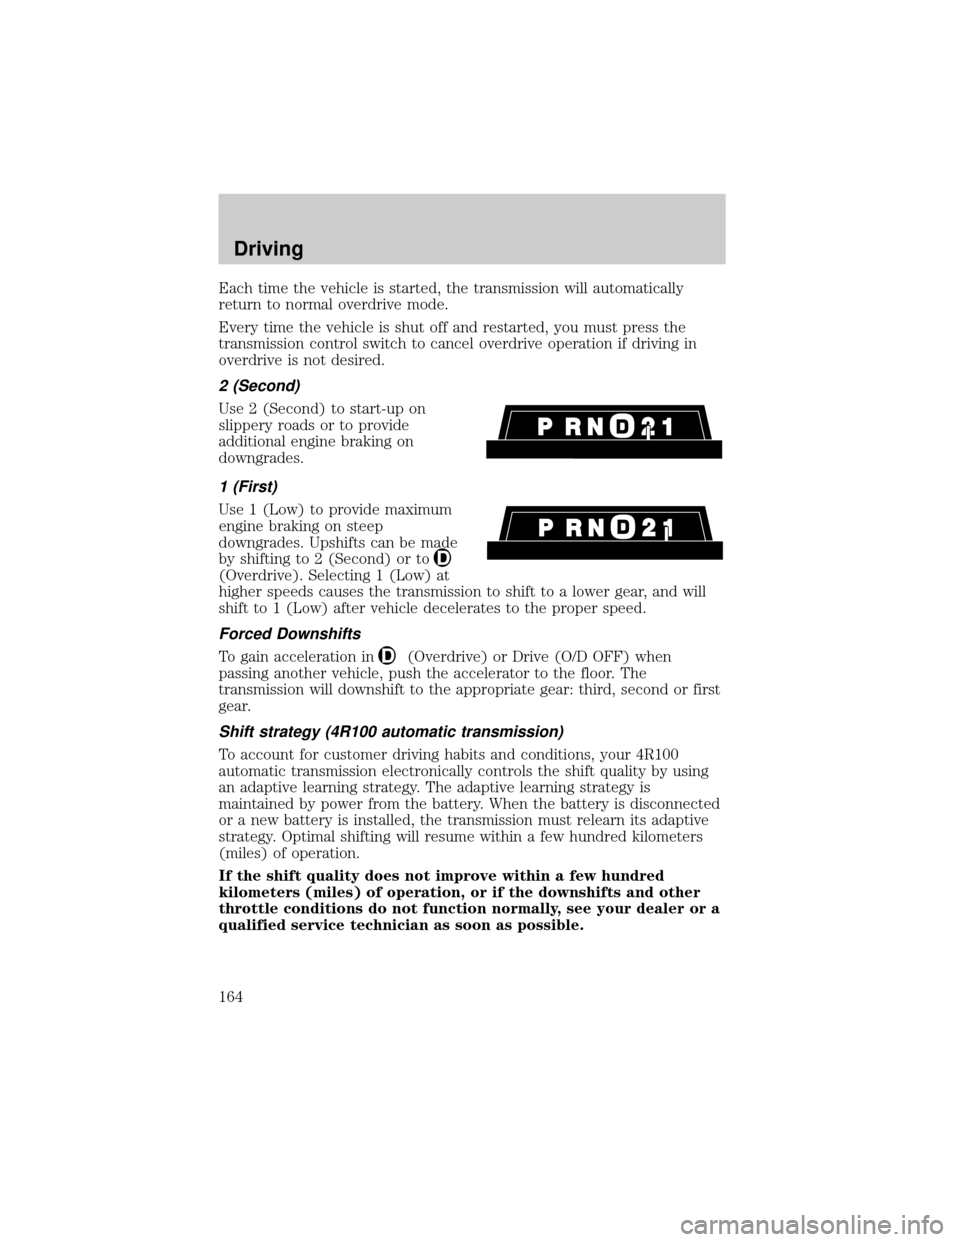
2 (Second)
Use 2 (Second) to start-up on
slippery roads or to provide
additional engine braking on
downgrades.
1 (First)
Use 1 (Low) to provide maximum
engine braking on steep
downgrades. Upshifts can be made
by shifting to 2 (Second) or to
(Overdrive). Selecting 1 (Low) at
higher speeds causes the transmission to shift to a lower gear, and will
shift to 1 (Low) after vehicle decelerates to the proper speed.
Forced Downshifts
To gain acceleration in(Overdrive) or Drive (O/D OFF) when
passing another vehicle, push the accelerator to the floor. The
transmission will downshift to the appropriate gear: third, second or first
gear.
Shift strategy (4R100 automatic transmission)
To account for customer driving habits and conditions, your 4R100
automatic transmission electronically controls the shift quality by using
an adaptive learning strategy. The adaptive learning strategy is
maintained by power from the battery. When the battery is disconnected
or a new battery is installed, the transmission must relearn its adaptive
strategy. Optimal shifting will resume within a few hundred kilometers
(miles) of operation.
If the shift quality does not improve within a few hundred
kilometers (miles) of operation, or if the downshifts and other
throttle conditions do not function normally, see your dealer or a
qualified service technician as soon as possible.
Driving
164
Page 167 of 280
FOUR-WHEEL DRIVE (4WD) OPERATION (IF EQUIPPED)
For important information regarding safe operation of this type
of vehicle, seePreparing to drive your vehiclein this chapter.
When Four±wheel drive (4WD) is engaged, power is supplied to all four
wheels through a transfer case. 4WD power can be selected when
additional driving power is desired.
If equipped with the Electronic Shift 4WD System, and the
instrument panel control is moved to 4WD Low while the vehicle
is moving, the system will not engage and no damage will occur to
the 4WD system. Before 4WD Low can be engaged, the vehicle
must be at a complete stop with the brake pedal depressed and
the transmission in N (Neutral).
4H or 4L operation is not recommended on dry pavement. Doing
so could result in difficult disengagement of the transfer case,
damage to the transfer case, increased tire wear, decreased fuel
economy and difficulty turning.
Control-Trac automatic four-wheel drive system (if equipped)
Your 4x4 features the heavy-duty Control-Trac system which includes a
computer-operated transfer case. This unique system is interactive with
the road, continually monitoring and adjusting torque delivery to the
front and rear wheels to optimize vehicle control.
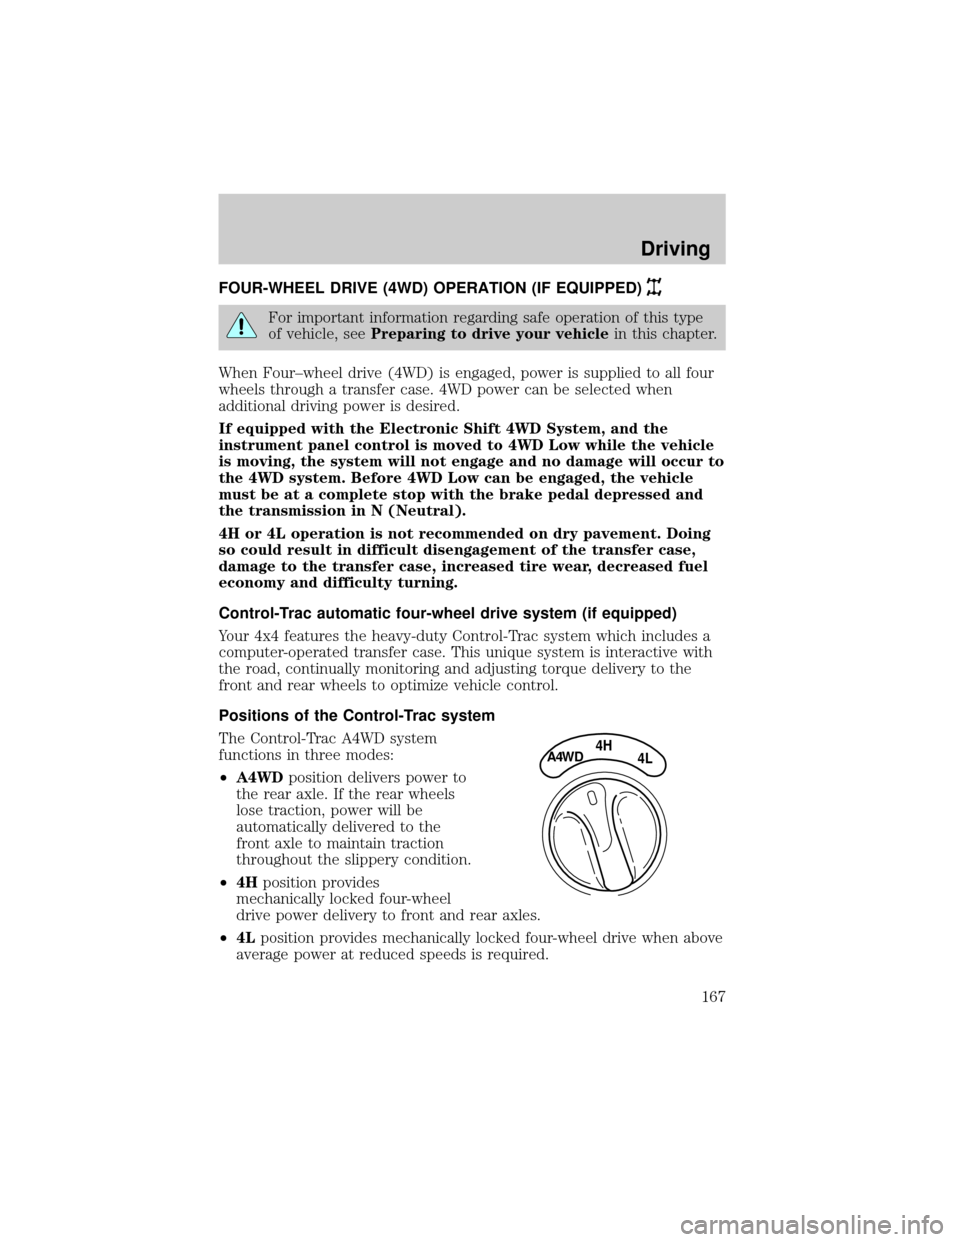
Positions of the Control-Trac system
The Control-Trac A4WD system
functions in three modes:
²A4WDposition delivers power to
the rear axle. If the rear wheels
lose traction, power will be
automatically delivered to the
front axle to maintain traction
throughout the slippery condition.
²4Hposition provides
mechanically locked four-wheel
drive power delivery to front and rear axles.
²4Lposition provides mechanically locked four-wheel drive when above
average power at reduced speeds is required.
4HA4WD4L
Driving
167