Page 21 of 216
Radio station memory preset
The radio is equipped with six station memory preset controls. These
controls can be used to select up to six preset AM stations and twelve
FM stations (six in FM1 and six in FM2).
Setting memory preset stations
1. Select the frequency band with
the AM/FM select control.
2. Select a station. Refer toTune adjustorSeek functionfor more
information on selecting a station.
3. Press and hold a memory preset
control until the sound returns,
indicating the station is held in
memory on the control you selected.
Setting the clock
To set the hour, press the hour (h)
control and press :
²(+) to increase hour and
²(þ) to decrease hour
To set the minute, press the minute
(m) control and press:
²(+) to increase minutes and
²(þ) to decrease minutes.
AM
FM
1SIDE 1-223456
+
H
M12:
+
H
M :01
Entertainment Systems
21
Page 28 of 216
AM/FM select in CD mode
Press this control to stop CD play and begin radio play.
You can switch from CD play to tape play by simply inserting a tape into
the cassette deck.
Radio station memory preset
The radio is equipped with six station memory preset controls. These
controls can be used to select up to six preset AM stations and twelve
FM stations (six in FM1 and six in FM2).
Setting memory preset stations
1. Select the frequency band with
the AM/FM select control.
2. Select a station. Refer toTune adjustorSeek functionfor more
information on selecting a station.
3. Press and hold a memory preset
control until the sound returns,
indicating the station is held in
memory on the control you selected.
Setting the clock
To set the hour, press the hour (h)
control and press :
²(+) to increase the hour and
²(þ) to decrease the hour
AM
FM
1SIDE 1-223456 COMP
SHUF
+
H
M12:
Entertainment Systems
28
Page 46 of 216
3. The ªUPº and ªDNº on the bubble
indicate the directional change (up
or down) of the vertical aim.
4.Usea4mmwrench or socket to
turn the vertical adjusting screw
clockwise or counterclockwise until
the bubble is centered between the
lines.
Repeat the above process to the other headlamp, if necessary.
TURN SIGNAL CONTROL
²Push down to activate the left
turn signal.
²Push up to activate the right turn
signal.
INTERIOR LAMPS
Dome lamp and map lamps (if equipped)
The dome lamp is located overhead
between the driver and passenger
seats.
The dome lamp will stay on if the
control is moved to the ON position.
When the control is moved to the
DOOR position, the lamp will only
come on if a door is opened. If the
control is moved to the OFF
position, the lamp will not come on
at all.
The map lamps and controls are
located on the dome lamp. Press the
controls on either side of each map
lamp to activate the lamps.
DNUP
OFF
OFF DOOR ON
Lights
46
Page 49 of 216
Map lamps
For bulb replacement, see a qualified service technician or your dealer.
Replacing headlamp bulbs
1. Make sure that the headlamps are turned OFF.
2. Open the hood and disconnect the headlamp wiring socket from the
in-line connector. This will make it easier to change the bulb.
3. Remove the protective dust shield
from the housing by turning the
dust shield counterclockwise (when
viewed from the rear).
4. Disconnect the electrical connector from the bulb by pulling rearward.
5. Remove the bulb retaining ring by
rotating it counterclockwise.
6. Without turning, remove the old
bulb from the lamp assembly by
pulling it straight back out of the
lamp assembly and replace.
Handle a halogen headlamp bulb carefully and keep out of
children's reach. Grasp the bulb only by its plastic base and do
not touch the glass. The oil from your hand could cause the bulb to
break the next time the headlamps are operated.
Lights
49
Page 50 of 216

7. Install the new bulb in lamp assembly by pushing straight in with the
bulb's plastic base facing upward. Turn the bulb slightly to align the
grooves in the plastic base with the tabs in the lamp assembly.
8. Install the bulb retaining ring over the plastic base and lock the ring
by rotating it clockwise until it snaps into place.
9. Connect the electrical connector into the plastic base until it ªsnaps.º
10. Install the protective dust shield and lock the shield by rotating it
clockwise until it locks into position.
11. Connect the headlamp wiring socket to the in-line connector.
12. Turn the headlamps on and make sure they work properly. If the
headlamp was correctly aligned before you changed the bulb, you should
not need to align it again.
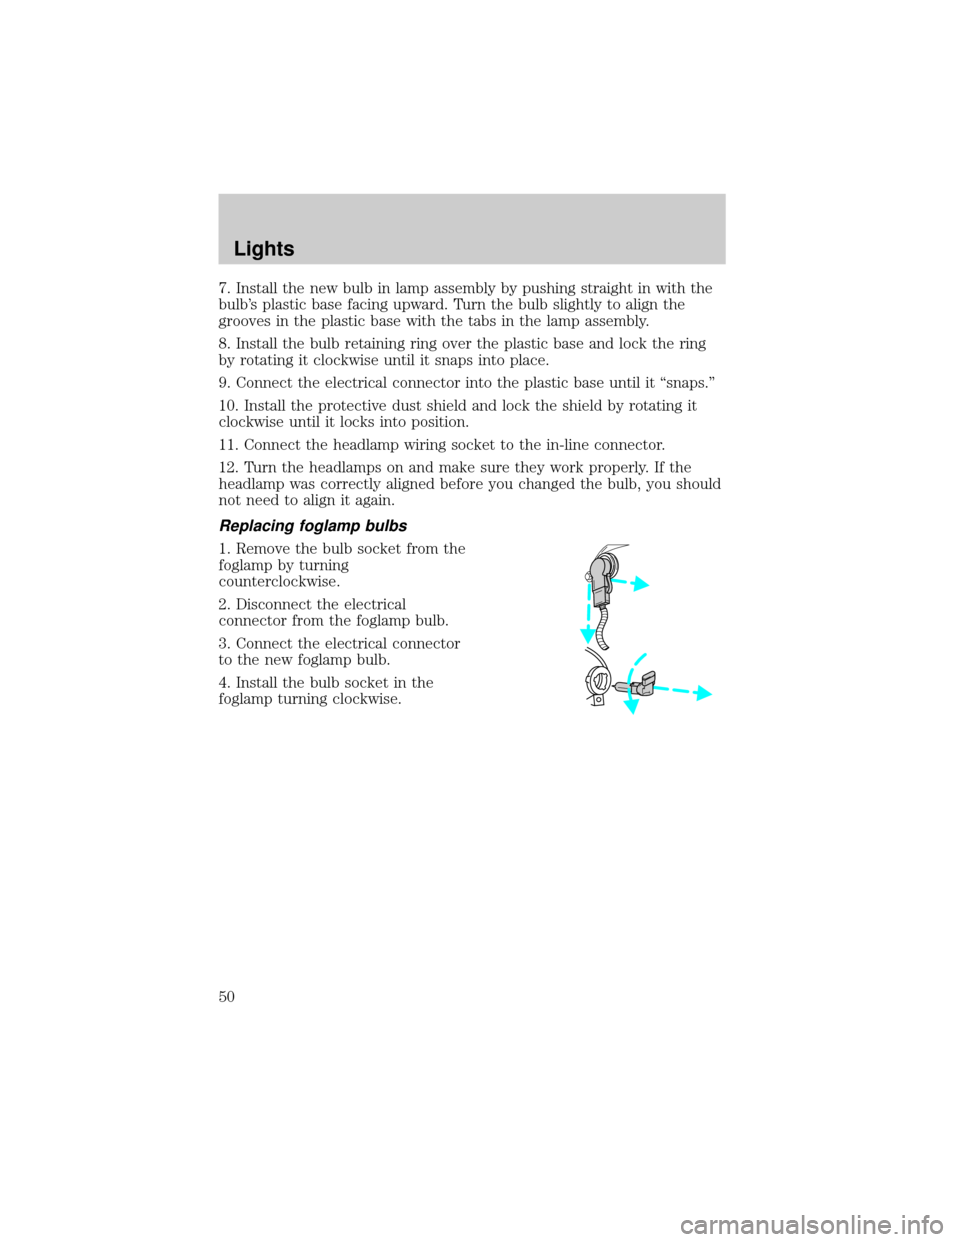
Replacing foglamp bulbs
1. Remove the bulb socket from the
foglamp by turning
counterclockwise.
2. Disconnect the electrical
connector from the foglamp bulb.
3. Connect the electrical connector
to the new foglamp bulb.
4. Install the bulb socket in the
foglamp turning clockwise.
Lights
50
Page 51 of 216

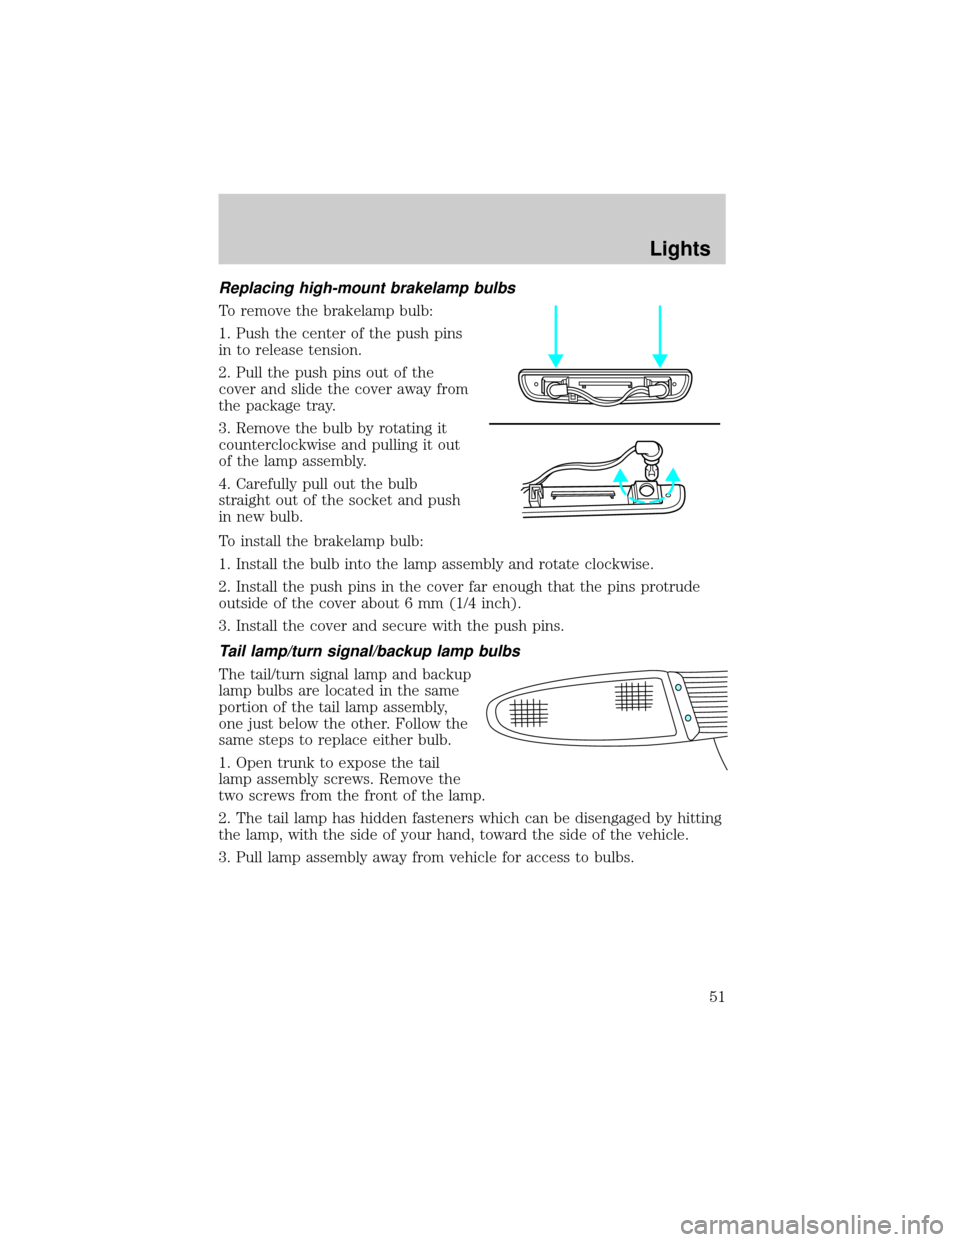
Replacing high-mount brakelamp bulbs
To remove the brakelamp bulb:
1. Push the center of the push pins
in to release tension.
2. Pull the push pins out of the
cover and slide the cover away from
the package tray.
3. Remove the bulb by rotating it
counterclockwise and pulling it out
of the lamp assembly.
4. Carefully pull out the bulb
straight out of the socket and push
in new bulb.
To install the brakelamp bulb:
1. Install the bulb into the lamp assembly and rotate clockwise.
2. Install the push pins in the cover far enough that the pins protrude
outside of the cover about 6 mm (1/4 inch).
3. Install the cover and secure with the push pins.
Tail lamp/turn signal/backup lamp bulbs
The tail/turn signal lamp and backup
lamp bulbs are located in the same
portion of the tail lamp assembly,
one just below the other. Follow the
same steps to replace either bulb.
1. Open trunk to expose the tail
lamp assembly screws. Remove the
two screws from the front of the lamp.
2. The tail lamp has hidden fasteners which can be disengaged by hitting
the lamp, with the side of your hand, toward the side of the vehicle.
3. Pull lamp assembly away from vehicle for access to bulbs.
Lights
51
Page 52 of 216
4. Remove the bulb socket by
rotating it counterclockwise, then
pulling it out of the lamp assembly.
5. Pull the bulb from the socket and
push in the new bulb.
6. Install the bulb socket into the
lamp by rotating it clockwise.
7. Position the tail lamp on the
vehicle and gently tap the lens to
engage the clips. Install the screws.
License plate lamps
To change the license plate bulbs:
1. Remove two screws and the
license plate lamp assembly from
the rear bumper.
2. Carefully pull the bulb out from
the lamp assembly and push in the
new bulb.
3. Install the lamp assembly on rear
bumper with two screws.
Replacing backup lamp bulbs
For bulb replacement, see a dealer or qualified technician.
Lights
52
Page 131 of 216
4. Loosen each wheel lug nut
one-half turn counterclockwise but
do not remove them until the wheel
is raised off the ground.
5. Put the jack in the jack notch
next to the door of the tire you are
changing. Turn the handle clockwise
until the wheel is completely off the
ground.
6. Remove the lug nuts with the lug wrench.
7. Replace the flat tire with the spare tire, making sure the valve stem is
facing outward. Reinstall the lug nuts until the wheel is snug against the
hub. Do not fully tighten the lug nuts until the wheel has been lowered.
8. Lower the wheel by turning the jack handle counterclockwise.
9. Remove the jack and fully tighten
the lug nuts in the order shown.
10. Put flat tire, jack and lug wrench
away. Make sure the jack is fastened
so it does not rattle when you drive.
Unblock the wheels.
1
4 3
2
Roadside Emergencies
131