Page 89 of 216

If the air bag has deployed,the air bag will not function
again and must be replaced immediately.If the air bag is not
replaced, the unrepaired area will increase the risk of injury in a
collision.
Determining if the system is operational
The SRS uses a readiness light in the instrument cluster or a tone to
indicate the condition of the system. Refer toAir bag readinesssection
in theInstrument clusterchapter. Routine maintenance of the air bag is
not required.
A difficulty with the system is indicated by one or more of the following:
²The readiness light will either
flash or stay lit.
²The readiness light will not
illuminate immediately after
ignition is turned on.
²A series of five beeps will be heard. The tone pattern will repeat
periodically until the problem and/or light are repaired.
If any of these things happen, even intermittently, have the SRS serviced
at your dealership or by a qualified technician immediately. Unless
serviced, the system may not function properly in the event of a collision.
Disposal of air bags and air bag equipped vehicles (including
pretensioners)
For disposal of air bags or air bag equipped vehicles, see your local
dealership or qualified technician. Air bags MUST BE disposed of by
qualified personnel.
SAFETY RESTRAINTS FOR CHILDREN
See the following sections for directions on how to properly use safety
restraints for children. Also seeAir bag supplemental restraint system
(SRS)in this chapter for special instructions about using air bags.
Important child restraint precautions
You are required by law to use safety restraints for children in the U.S.
and Canada. If small children ride in your vehicle (generally children who
are four years old or younger and who weigh 18 kg [40 lbs] or less), you
Seating and Safety Restraints
89
Page 97 of 216

STARTING
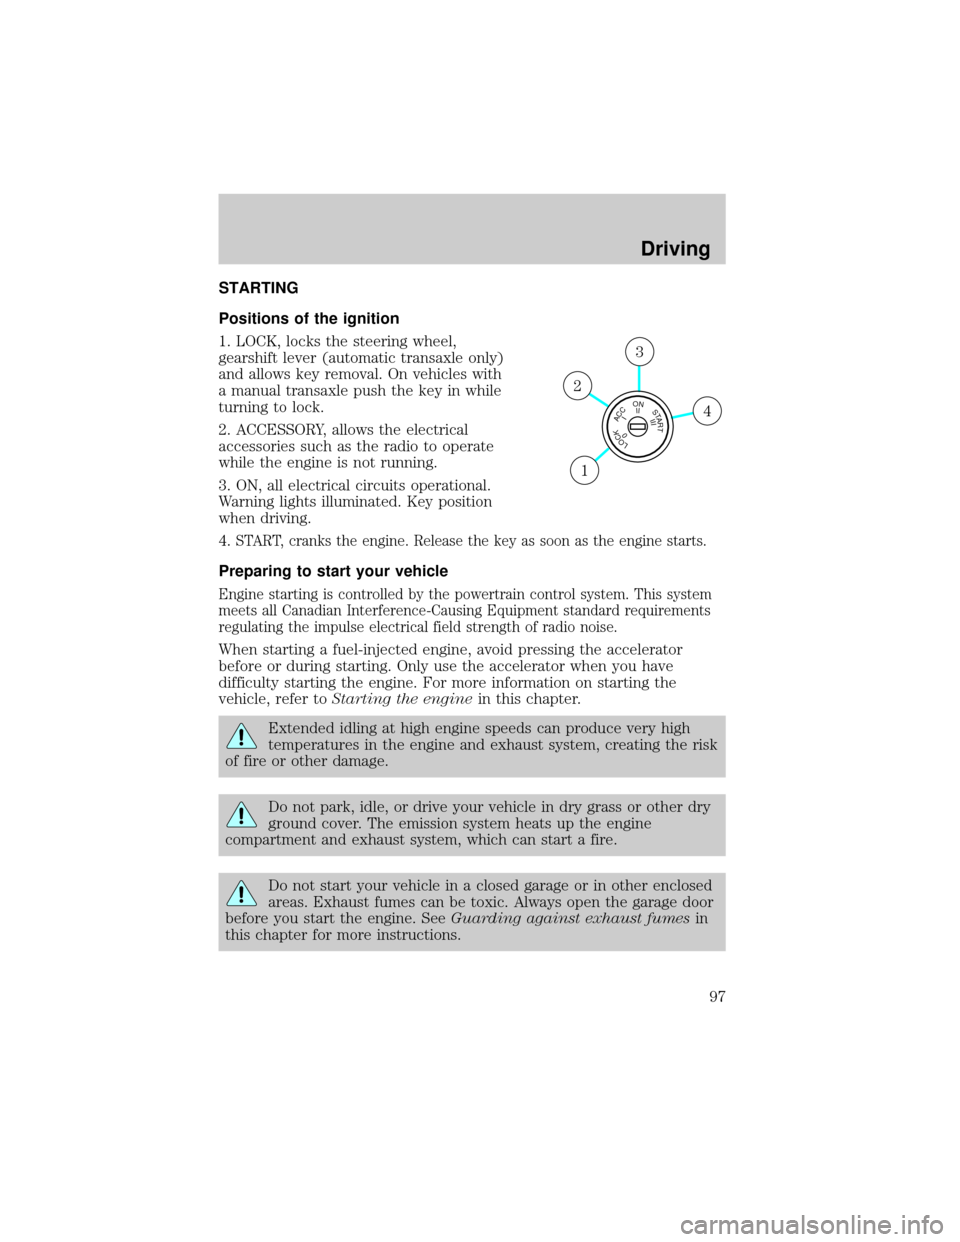
Positions of the ignition
1. LOCK, locks the steering wheel,
gearshift lever (automatic transaxle only)
and allows key removal. On vehicles with
a manual transaxle push the key in while
turning to lock.
2. ACCESSORY, allows the electrical
accessories such as the radio to operate
while the engine is not running.
3. ON, all electrical circuits operational.
Warning lights illuminated. Key position
when driving.
4.
START, cranks the engine. Release the key as soon as the engine starts.
Preparing to start your vehicle
Engine starting is controlled by the powertrain control system. This system
meets all Canadian Interference-Causing Equipment standard requirements
regulating the impulse electrical field strength of radio noise.
When starting a fuel-injected engine, avoid pressing the accelerator
before or during starting. Only use the accelerator when you have
difficulty starting the engine. For more information on starting the
vehicle, refer toStarting the enginein this chapter.
Extended idling at high engine speeds can produce very high
temperatures in the engine and exhaust system, creating the risk
of fire or other damage.
Do not park, idle, or drive your vehicle in dry grass or other dry
ground cover. The emission system heats up the engine
compartment and exhaust system, which can start a fire.
Do not start your vehicle in a closed garage or in other enclosed
areas. Exhaust fumes can be toxic. Always open the garage door
before you start the engine. SeeGuarding against exhaust fumesin
this chapter for more instructions.
LOCKACCONSTART0IIIIII4
3
2
1
Driving
97
Page 103 of 216

The ABS operates by detecting the
onset of wheel lockup during brake
applications and compensates for
this tendency. The wheels are
prevented from locking even when
the brakes are firmly applied. The
accompanying illustration depicts
the advantage of an ABS equipped
vehicle (on bottom) to a non-ABS
equipped vehicle (on top) during hard braking with loss of front braking
traction.
Using ABS
²In an emergency or when maximum efficiency from the four-wheel
ABS is required, apply continuous force on the brake. The four wheel
ABS will be activated immediately, thus allowing you to retain full
steering control of your vehicle and, providing there is sufficient
space, will enable you to avoid obstacles and bring the vehicle to a
controlled stop.
²The anti-lock system does not decrease the time necessary to apply
the brakes or always reduce stopping distance. Always leave enough
room between your vehicle and the vehicle in front of you to stop.
²We recommend that you familiarize yourself with this braking
technique. However, avoid taking any unnecessary risks.
ABS warning lampABS
TheABSwarning lamp in the instrument cluster momentarily illuminates
when the ignition is turned to the ON position. If the light does not
illuminate momentarily at start up, remains on or continues to flash, the
ABS needs to be serviced.
With the ABS light on, the anti-lock
brake system is disabled and normal
braking is still effective unless the
brake warning light also remains
illuminated with parking brake
released. (If your brake warning lamp illuminates, have your vehicle
serviced immediately.)
P!
BRAKE
Driving
103
Page 104 of 216

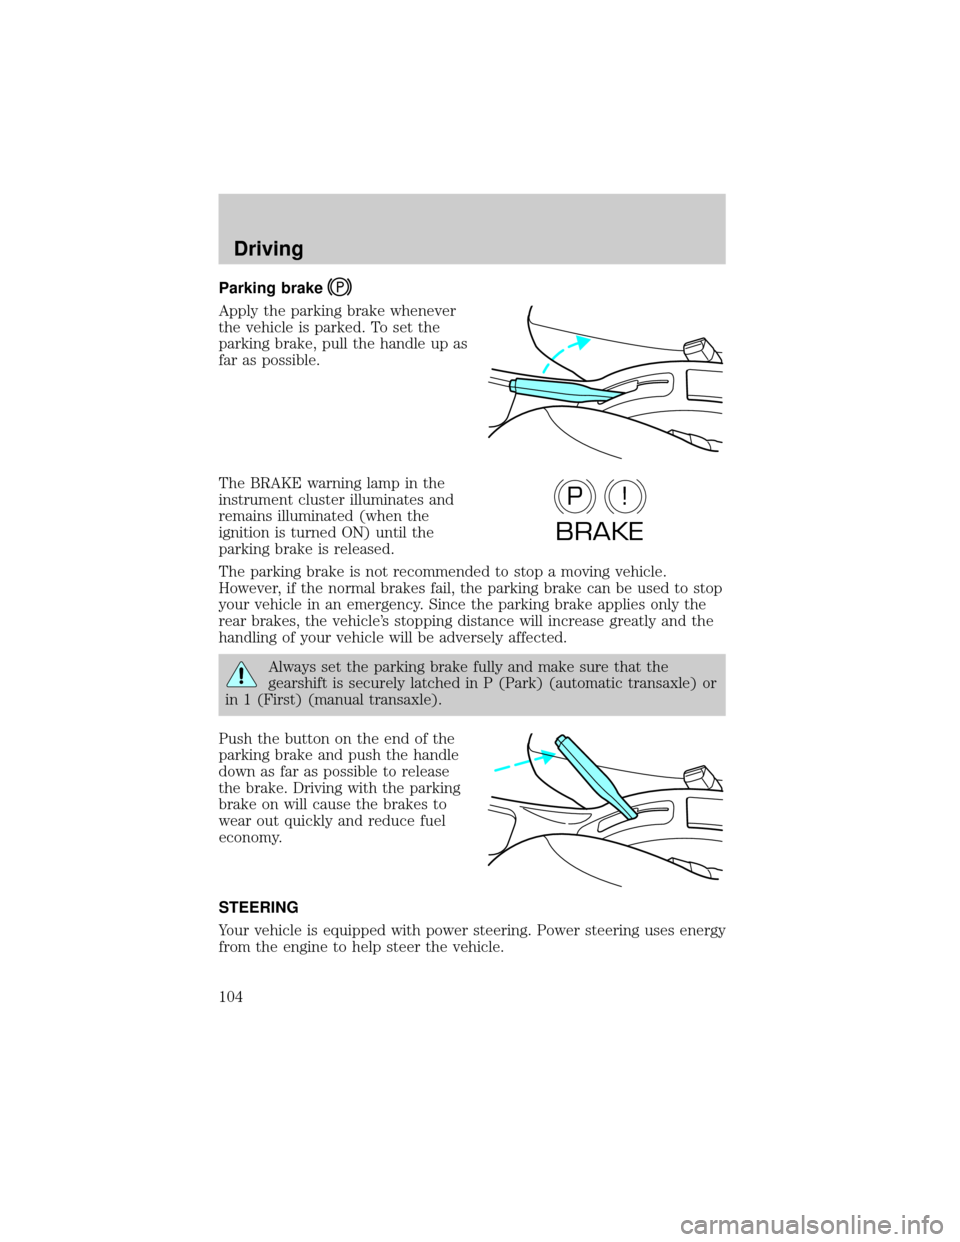
Parking brake
Apply the parking brake whenever
the vehicle is parked. To set the
parking brake, pull the handle up as
far as possible.
The BRAKE warning lamp in the
instrument cluster illuminates and
remains illuminated (when the
ignition is turned ON) until the
parking brake is released.
The parking brake is not recommended to stop a moving vehicle.
However, if the normal brakes fail, the parking brake can be used to stop
your vehicle in an emergency. Since the parking brake applies only the
rear brakes, the vehicle's stopping distance will increase greatly and the
handling of your vehicle will be adversely affected.
Always set the parking brake fully and make sure that the
gearshift is securely latched in P (Park) (automatic transaxle) or
in 1 (First) (manual transaxle).
Push the button on the end of the
parking brake and push the handle
down as far as possible to release
the brake. Driving with the parking
brake on will cause the brakes to
wear out quickly and reduce fuel
economy.
STEERING
Your vehicle is equipped with power steering. Power steering uses energy
from the engine to help steer the vehicle.
P!
BRAKE
Driving
104
Page 106 of 216

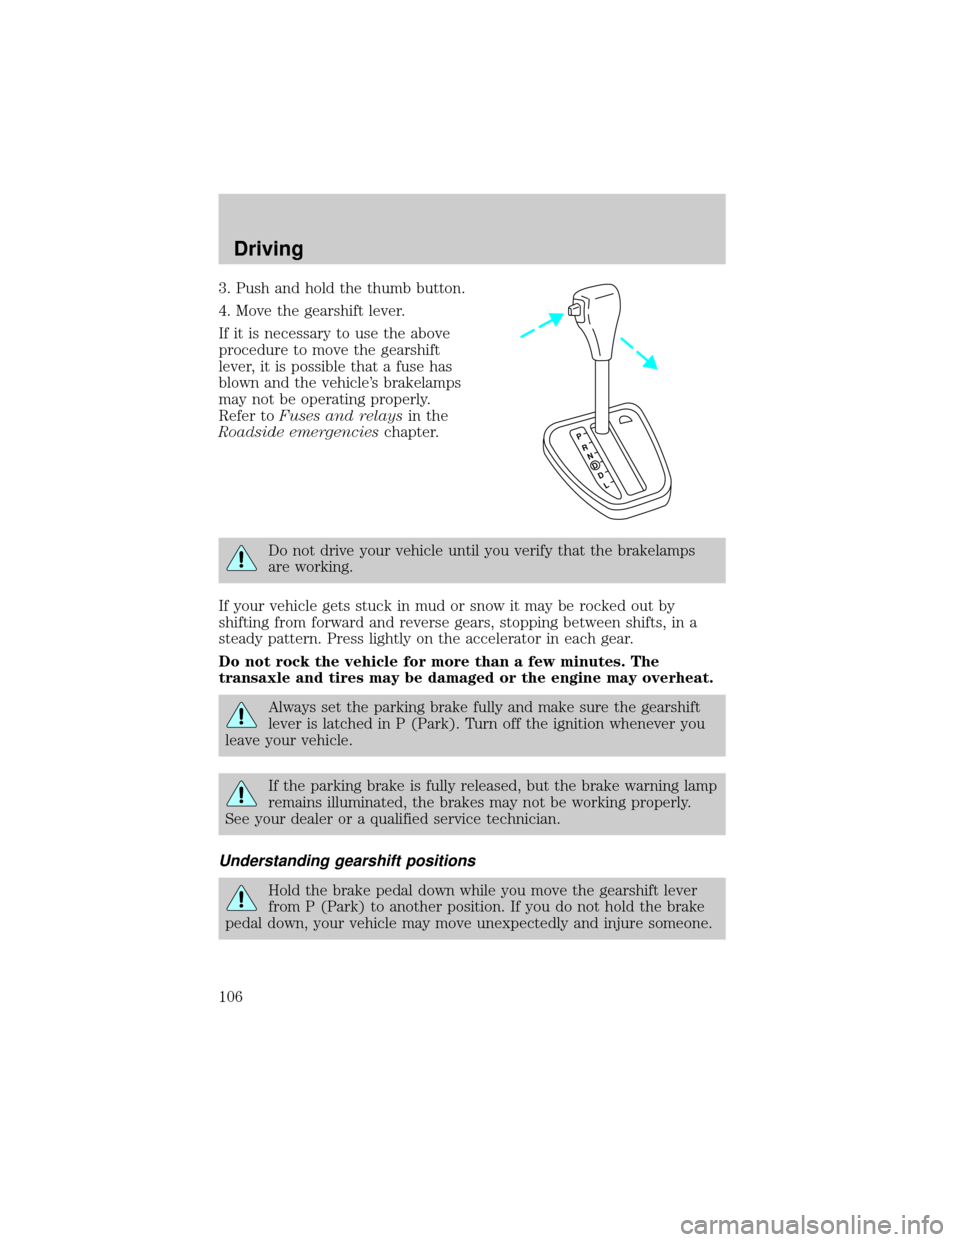
3. Push and hold the thumb button.
4. Move the gearshift lever.
If it is necessary to use the above
procedure to move the gearshift
lever, it is possible that a fuse has
blown and the vehicle's brakelamps
may not be operating properly.
Refer toFuses and relaysin the
Roadside emergencieschapter.
Do not drive your vehicle until you verify that the brakelamps
are working.
If your vehicle gets stuck in mud or snow it may be rocked out by
shifting from forward and reverse gears, stopping between shifts, in a
steady pattern. Press lightly on the accelerator in each gear.
Do not rock the vehicle for more than a few minutes. The
transaxle and tires may be damaged or the engine may overheat.
Always set the parking brake fully and make sure the gearshift
lever is latched in P (Park). Turn off the ignition whenever you
leave your vehicle.
If the parking brake is fully released, but the brake warning lamp
remains illuminated, the brakes may not be working properly.
See your dealer or a qualified service technician.
Understanding gearshift positions
Hold the brake pedal down while you move the gearshift lever
from P (Park) to another position. If you do not hold the brake
pedal down, your vehicle may move unexpectedly and injure someone.
PRND
D
L
Driving
106
Page 107 of 216
P (Park)
Always come to a complete stop
before shifting into P (Park). Make
sure that the gearshift lever is
securely latched in P (Park). This
locks the transaxle and prevents the
front wheels from rotating.
Always set the parking
brake fully and make sure
the gearshift lever is latched in P
(Park). Turn off the ignition
whenever you leave your vehicle.
R (Reverse)
With the gearshift lever in R
(Reverse), the vehicle will move
backward. You should always come
to a complete stop before shifting in
and out of R (Reverse).
P
RNDDL
P
RND
DL
Driving
107
Page 109 of 216
D (Drive)
D (Drive) eliminates the needless
shifting between third and fourth
gears that your vehicle may do
when driving in hilly terrain. It also
gives more engine braking than
overdrive to slow your vehicle on
downgrades.
L (Low)
Use L (Low) when added engine
braking is desired or when
descending steep hills.
The automatic transaxle will shift into the proper gear to ascend any
grade without any need to shift to L (Low).
Do not go faster than 61 km/h (38 mph) when in this gear. You can
upshift from L (Low) to
(overdrive) at any time.
When parking, do not use the gearshift in place of the parking
brake. Always set the parking brake fully and make sure that the
gearshift is securely latched in Park (P). Turn off the ignition
whenever you leave your vehicle. Never leave your vehicle unattended
while it is running. If you do not take these precautions, your vehicle
may move unexpectedly and injure someone.
P
RND
DL
P
RN
D
DL
Driving
109
Page 110 of 216
Using the clutch
Vehicles equipped with a manual transaxle have a starter interrupt
interlock that prevents cranking of the engine unless the clutch pedal is
depressed.
When starting a vehicle with a manual transaxle, you must:
1. Put the gearshift lever in the
neutral position.
2. Hold down the brake pedal.
3. Depress the clutch pedal.
4. Turn the ignition key to 4
(START), then let the engine idle
for a few seconds.
5. Release the brake pedal, then
slowly release the clutch pedal while
pressing down slowly on the
accelerator pedal.
Do not drive with your foot resting
on the clutch pedal and do not use
the clutch pedal to hold your vehicle
at a standstill while waiting on a hill. These actions will seriously reduce
clutch life.
1
24R35
LOCKACCONSTART0IIIIII4
3
2
1
Driving
110