Page 53 of 256
Remote control
1.POWERbutton
Press to turn the videocassette player (VCP) ON or OFF.
2.ENCOREbutton
Press to reverse the casssette for 5 seconds. Normal playback will then
resume when in PLAYBACK mode.
3.STILL/ADVANCE(frame advance button)
Press to temporarily suspend playback. Press again to make the tape
advance one frame at a time.
4.RETRACKINGbutton
Press to activate Auto Tracking in the playback mode.
5.TRACKING +button
Press for manual tape tracking.
6.TRACKING —button
Press for manual tape tracking.
1
5
8
10
3
2
6
9
4
7
Entertainment Systems
53
ProCarManuals.com
Page 61 of 256

On-screen indicators
Playback operation
1. Press the POWER control on the VCP.
2. Insert a videocassette into the VCP.
3. The videocassette should automatically begin playback, and the
picture will appear within approximately nine seconds.
4. Press the STOP control to stop playback or press EJECT to remove
the cassette.
Fast-forward or rewind (no picture)
1. Press the FF/REW control on the VCP.
2. Press the STOP control to stop or press EJECT to remove the
cassette.
The tape will fast forward or rewind until it has reached the end or the
beginning.
Fast-forward or rewind (with picture)
1. While in playback mode, momentarily press the FF/REW key. The VCP
will search the playback direction five times faster than normal playback
mode.
2. Press the PLAY key to resume normal playback.
Special effects playback
Still playback/Frame-to-frame playback (on remote control)
1. Press the STILL/F.ADV key while in playback mode. The playback
picture becomes still.
2. Press the STILL/F.ADV key again. Each time the control is pressed,
the pictures are played back one frame at a time.
The still playback feature can also be used in REW (reverse) mode.
If still playback/or frame-to-frame playback is engaged for five minutes or
longer, the VCP will automatically begin playback to protect the tape.
Automatic tracking is automatically activated the moment the VCP is
turned ON or a cassette is inserted.
If a videocassette is in poor shape (i.e., badly recorded), any tracking
adjustment may result in failure. The VCP will eject the videocassette.
Entertainment Systems
61
ProCarManuals.com
Page 62 of 256

Encore (on remote control)
•Press the ENCORE control while in playback mode.
The VCP will reverse to the previous five seconds of the selection and
then operate at normal playback mode.
Auxiliary input jacks
The auxiliary input jacks on the
AutoVision�control panel accepts
video and audio connectors for all
standard video games (Nintendo�,
PlayStation�, etc.) Other compatible
devices such as DVD players,
camcorders and portable CD players
can also be connected to the
auxiliary jacks.
The auxiliary jack is color-coded for
identification purposes. They are as
follows:
•YELLOW (1)—video input
•WHITE (2)—left channel audio
input
•RED (3)—right channel audio
input
Press the MEDIA control until AUX is illuminated in the control panel.
This will allow you to view the video and listen to the audio from the
auxiliary input.
To listen to another audio source while viewing video from the auxiliary
input, press the MEDIA control until the desired media source is
illuminated.
321
Entertainment Systems
62
ProCarManuals.com
Page 68 of 256
CD AND CD PLAYER CARE
•Handle discs by their edges only. Never touch the playing surface.
•Do not insert more than one disc at a time.
•Do not expose discs to direct sunlight or heat sources for extended
periods of time.
•After playing, store the disc in its case.
CD units are designed to play commercially pressed 12 cm (4.75 in)
audio compact discs only. Due to technical incompatibility, certain
recordable and re-recordable compact discs may not function
correctly when used in Ford CD players. Irregular shaped CDs,
CDs with a scratch protection film attached, and CDs with
homemade paper (adhesive) labels should not be inserted into
the CD player. The label may peel and cause the CD to become
jammed. It is recommended that homemade CDs be identified
with permanent felt tip marker rather than adhesive labels. Ball
point pens may damage CDs. Please contact your dealer for
further information.
CLEANING CASSETTE PLAYER (IF EQUIPPED)
Clean the tape player head with a cassette cleaning cartridge after 10 to
12 hours of play in order to maintain the best sound and operation.
CASSETTE AND CASSETTE PLAYER CARE
•Use only cassettes that are 90 minutes long or less.
•Do not expose tapes to direct sunlight, high humidity, extreme heat or
extreme cold. Allow tapes that may have been exposed to extreme
temperatures to reach a moderate temperature before playing.
•Tighten very loose tapes by inserting a finger or pencil into the hole
and turning the hub.
•Remove loose labels before inserting tapes.
•Do not leave tapes in the cassette player for a long time when not
being played.
Entertainment Systems
68
ProCarManuals.com
Page 72 of 256
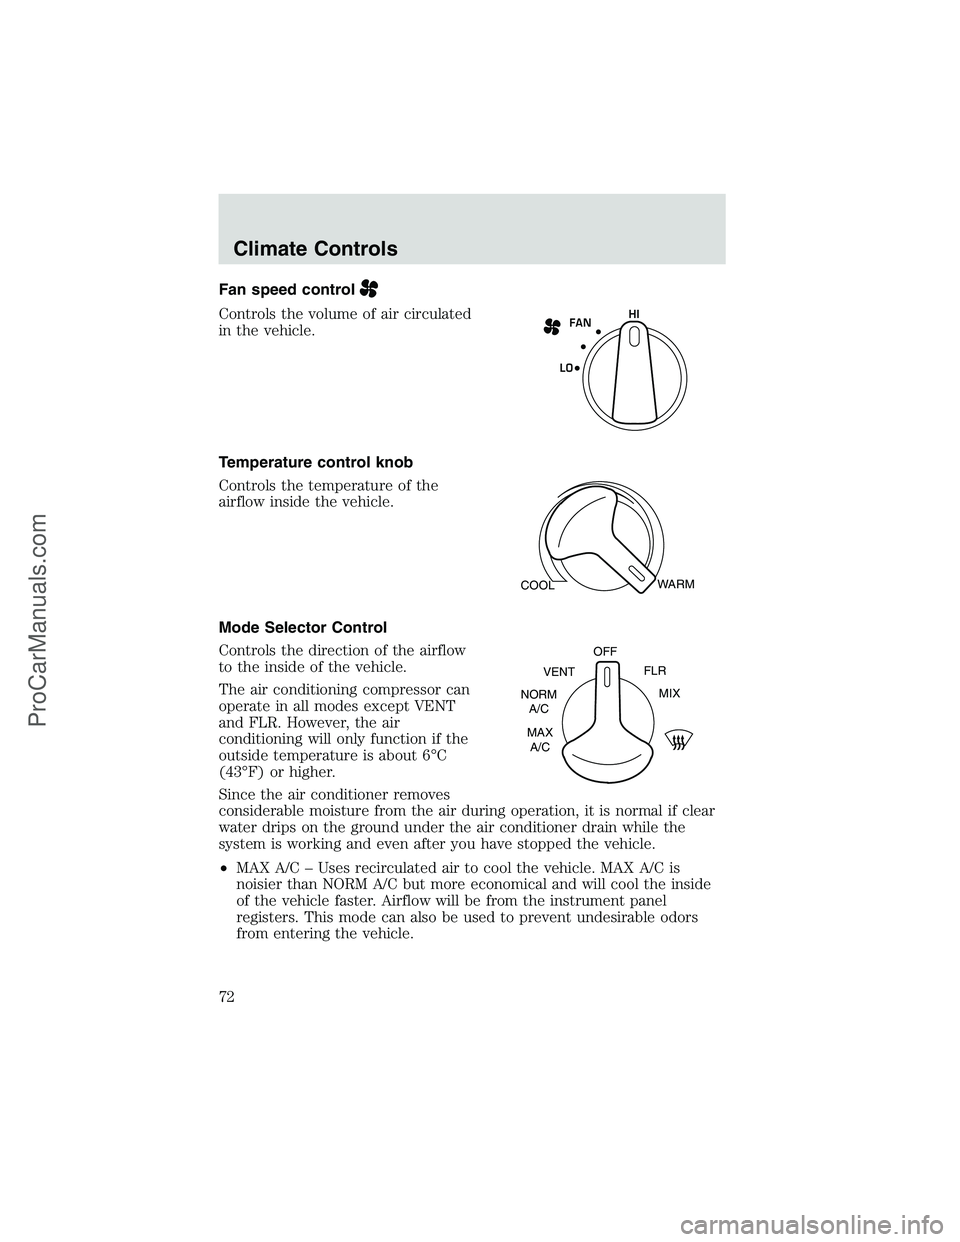
Fan speed control
Controls the volume of air circulated
in the vehicle.
Temperature control knob
Controls the temperature of the
airflow inside the vehicle.
Mode Selector Control
Controls the direction of the airflow
to the inside of the vehicle.
The air conditioning compressor can
operate in all modes except VENT
and FLR. However, the air
conditioning will only function if the
outside temperature is about 6°C
(43°F) or higher.
Since the air conditioner removes
considerable moisture from the air during operation, it is normal if clear
water drips on the ground under the air conditioner drain while the
system is working and even after you have stopped the vehicle.
•MAX A/C–Uses recirculated air to cool the vehicle. MAX A/C is
noisier than NORM A/C but more economical and will cool the inside
of the vehicle faster. Airflow will be from the instrument panel
registers. This mode can also be used to prevent undesirable odors
from entering the vehicle.FAN
LOHI
COOLWARM
MAX
A/C NORM
A/CVENTOFF
FLR
MIX
Climate Controls
72
ProCarManuals.com
Page 73 of 256
•NORM A/C–Uses outside air to cool the vehicle. It is quieter than
MAX A/C but not as economical. Airflow will be from the instrument
panel registers.
•VENT–Distributes outside air through the instrument panel registers.
However, the air will not be cooled below the outside temperature
because the air conditioning does not operate in this mode.
•OFF–Outside air is shut out and the fan will not operate. For short
periods of time only, use this mode to prevent undesirable odors from
entering the vehicle.
•FLR–Allows for maximum heating by distributing outside air through
the floor ducts. However, the air will not be cooled below the outside
temperature because the air conditioning does not operate in this
mode.
•MIX–Distributes outside air through the windshield defroster ducts
and the floor ducts. Heating and air conditioning capabilities are
provided in this mode. For added customer comfort, when the
temperature control knob is anywhere in between the full hot and full
cold positions, the air distributed through the floor ducts will be
slightly warmer than the air sent to the windshield defroster ducts. If
the temperature is about 6°C (43°F) or higher, the air conditioner will
automatically dehumidify the air to reduce fogging.
•
(Defrost)–Distributes outside air through the windshield
defroster ducts. It can be used to clear ice or fog from the windshield.
If the temperature is about 6°C (43°F) or higher, the air conditioner
will automatically dehumidify the air to reduce fogging.
Operating tips
•In humid weather conditions, place the climate control system in
Defrost mode before driving. This will reduce fogging on your
windshield. Once the windshield has been cleared, operate the climate
control system as desired.
•To reduce humidity buildup inside the vehicle in cold weather
conditions, don’t drive with the climate control system in the OFF or
MAX A/C position.
•To reduce humidity buildup inside the vehicle in warm weather
conditions, don’t drive with the climate control system in the OFF
position.
Climate Controls
73
ProCarManuals.com
Page 75 of 256
AUXILIARY HEATER AND AIR CONDITIONER (IF EQUIPPED)
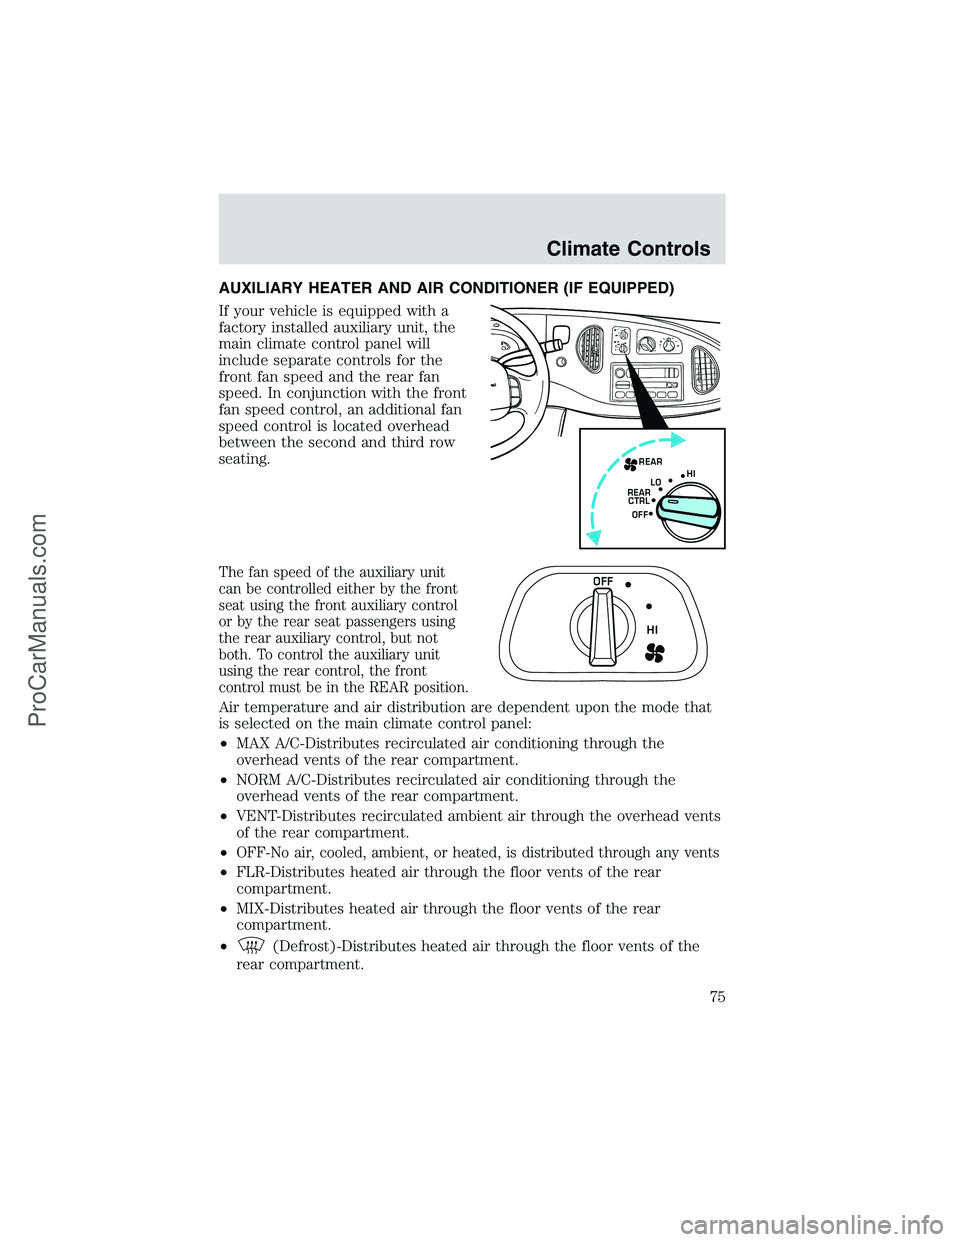
If your vehicle is equipped with a
factory installed auxiliary unit, the
main climate control panel will
include separate controls for the
front fan speed and the rear fan
speed. In conjunction with the front
fan speed control, an additional fan
speed control is located overhead
between the second and third row
seating.
The fan speed of the auxiliary unit
can be controlled either by the front
seat using the front auxiliary control
or by the rear seat passengers using
the rear auxiliary control, but not
both. To control the auxiliary unit
using the rear control, the front
control must be in the REAR position.
Air temperature and air distribution are dependent upon the mode that
is selected on the main climate control panel:
•MAX A/C-Distributes recirculated air conditioning through the
overhead vents of the rear compartment.
•NORM A/C-Distributes recirculated air conditioning through the
overhead vents of the rear compartment.
•VENT-Distributes recirculated ambient air through the overhead vents
of the rear compartment.
•
OFF-No air, cooled, ambient, or heated, is distributed through any vents
•FLR-Distributes heated air through the floor vents of the rear
compartment.
•MIX-Distributes heated air through the floor vents of the rear
compartment.
•
(Defrost)-Distributes heated air through the floor vents of the
rear compartment.
REAR
OFF HI
LO
REAR
CTRL
OFF
HI
Climate Controls
75
ProCarManuals.com
Page 92 of 256
Indicator light (if equipped)
This light comes on when either the
SET ACCEL or RES controls are
pressed. It turns off when the speed
control OFF control is pressed, the
brake is applied or the ignition is
turned to the OFF position.
OVERDRIVE CONTROL
Activating overdrive
(Overdrive) is the normal drive position for the best fuel economy.
The overdrive function allows automatic upshifts and downshifts through
all available gears.
Deactivating overdrive
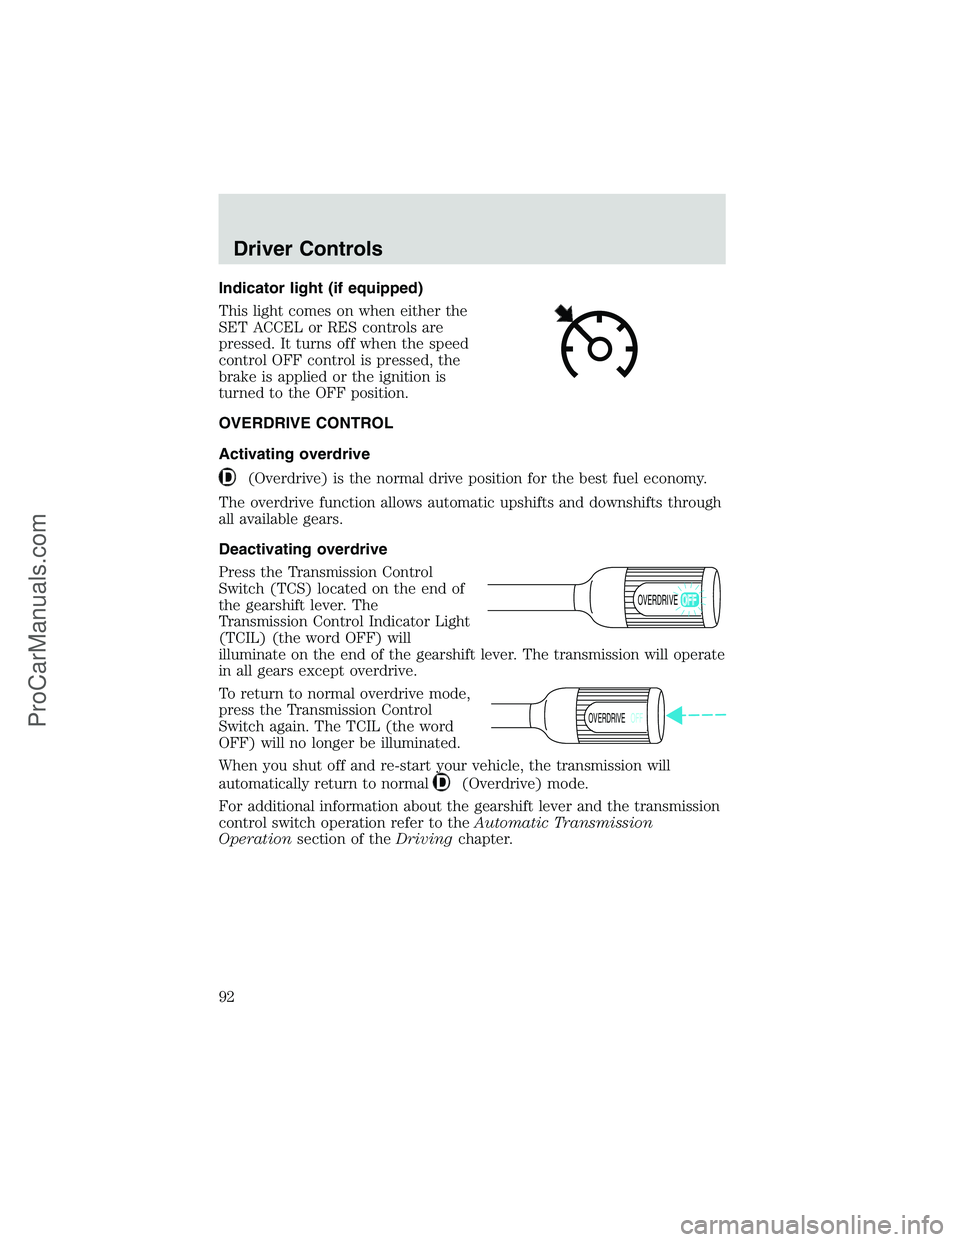
Press the Transmission Control
Switch (TCS) located on the end of
the gearshift lever. The
Transmission Control Indicator Light
(TCIL) (the word OFF) will
illuminate on the end of the gearshift lever. The transmission will operate
in all gears except overdrive.
To return to normal overdrive mode,
press the Transmission Control
Switch again. The TCIL (the word
OFF) will no longer be illuminated.
When you shut off and re-start your vehicle, the transmission will
automatically return to normal
(Overdrive) mode.
For additional information about the gearshift lever and the transmission
control switch operation refer to theAutomatic Transmission
Operationsection of theDrivingchapter.
OVERDRIVE
OVERDRIVEOFF
Driver Controls
92
ProCarManuals.com