2002 FORD CROWN VICTORIA ECO mode
[x] Cancel search: ECO modePage 59 of 240
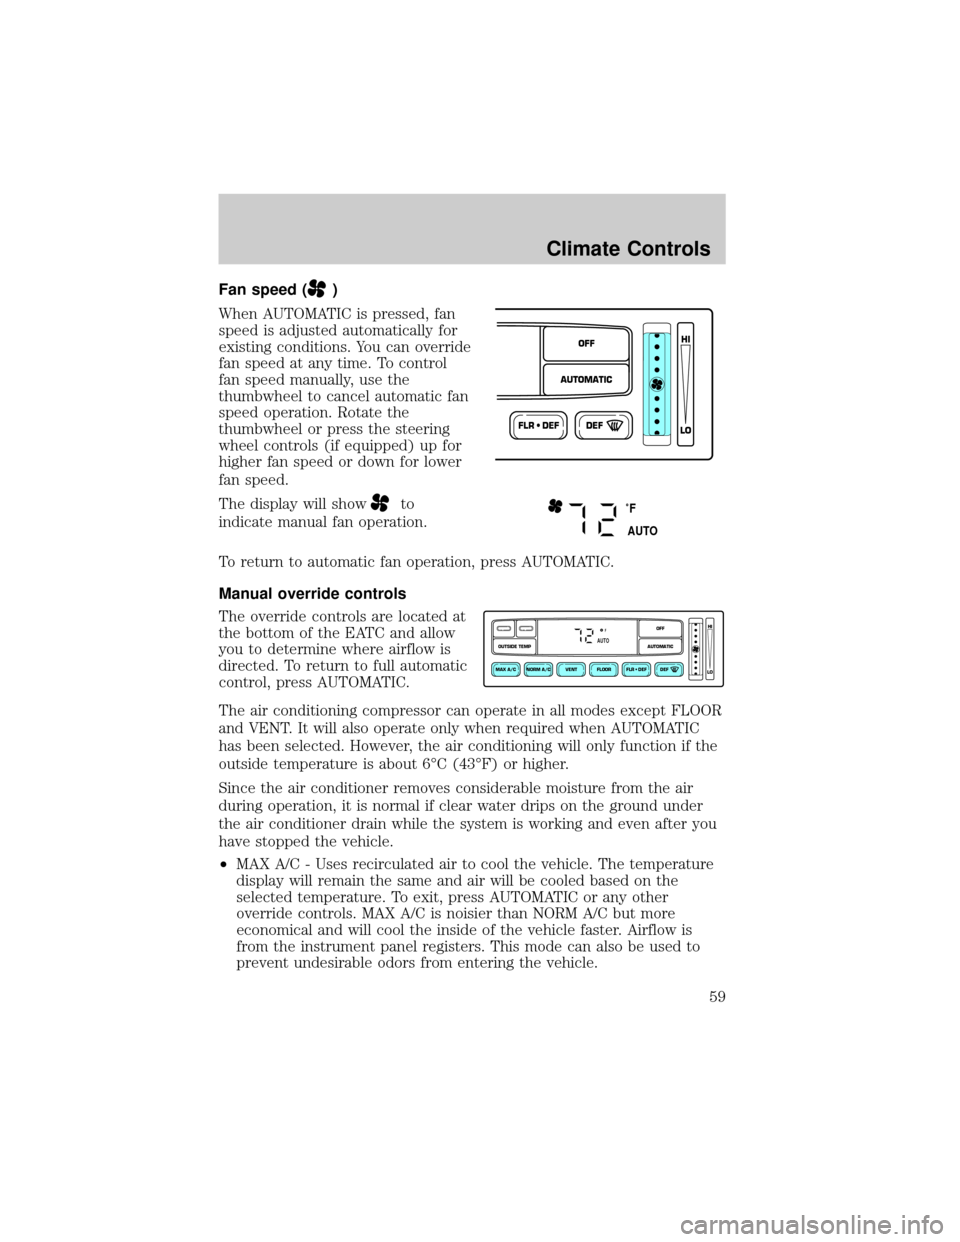
Fan speed ()
When AUTOMATIC is pressed, fan
speed is adjusted automatically for
existing conditions. You can override
fan speed at any time. To control
fan speed manually, use the
thumbwheel to cancel automatic fan
speed operation. Rotate the
thumbwheel or press the steering
wheel controls (if equipped) up for
higher fan speed or down for lower
fan speed.
The display will show
to
indicate manual fan operation.
To return to automatic fan operation, press AUTOMATIC.
Manual override controls
The override controls are located at
the bottom of the EATC and allow
you to determine where airflow is
directed. To return to full automatic
control, press AUTOMATIC.
The air conditioning compressor can operate in all modes except FLOOR
and VENT. It will also operate only when required when AUTOMATIC
has been selected. However, the air conditioning will only function if the
outside temperature is about 6ÉC (43ÉF) or higher.
Since the air conditioner removes considerable moisture from the air
during operation, it is normal if clear water drips on the ground under
the air conditioner drain while the system is working and even after you
have stopped the vehicle.
²MAX A/C - Uses recirculated air to cool the vehicle. The temperature
display will remain the same and air will be cooled based on the
selected temperature. To exit, press AUTOMATIC or any other
override controls. MAX A/C is noisier than NORM A/C but more
economical and will cool the inside of the vehicle faster. Airflow is
from the instrument panel registers. This mode can also be used to
prevent undesirable odors from entering the vehicle.
FLR • DEFDEF
HI
LO
AUTOMATICOFF
˚F
AUTO
NORM A/CVENT FLOOR FLR • DEF DEF
HI
LO
MAX A/C
OUTSIDE TEMP AUTOMATICOFF
FAUTO
Climate Controls
59
Page 60 of 240
²NORM A/C - Uses outside air to cool the vehicle. The temperature
display will remain the same and air will be cooled based on the
selected temperature. It is quieter than MAX A/C but not as
economical. Fan speed will remain automatic. Airflow is from the
instrument panel registers.
²VENT-Distributes outside air through the instrument panel registers.
However, the air cannot be cooled below the outside temperature
because the air conditioning does not operate in this mode.
²FLOOR-Allows for maximum heating by distributing outside air
through the floor ducts. However, the air cannot be cooled below the
outside temperature because the air conditioning does not operate in
this mode.
²FLR²DEF-Distributes outside air through the windshield defroster
ducts and the floor ducts. Heating and air conditioning capabilities are
provided in this mode. The air will be heated or cooled based on the
temperature selection. For added customer comfort, the air
distributed through the floor ducts will be slightly warmer than the air
sent to the windshield defroster ducts. If the temperature is about 6ÉC
(43ÉF) or higher, the air conditioner will automatically dehumidify the
air to reduce fogging.
²DEF
- Distributes outside air through the windshield defroster
ducts. It can be used to clear ice or fog from the windshield. If the
outside air temperature is about 6ÉC (43ÉF) or higher, the air
conditioner will automatically dehumidify the air to reduce fogging.
²OFF-Outside air is shut out and the fan will not operate. For short
periods of time, use this mode to reduce undesirable odors from
entering the vehicle.
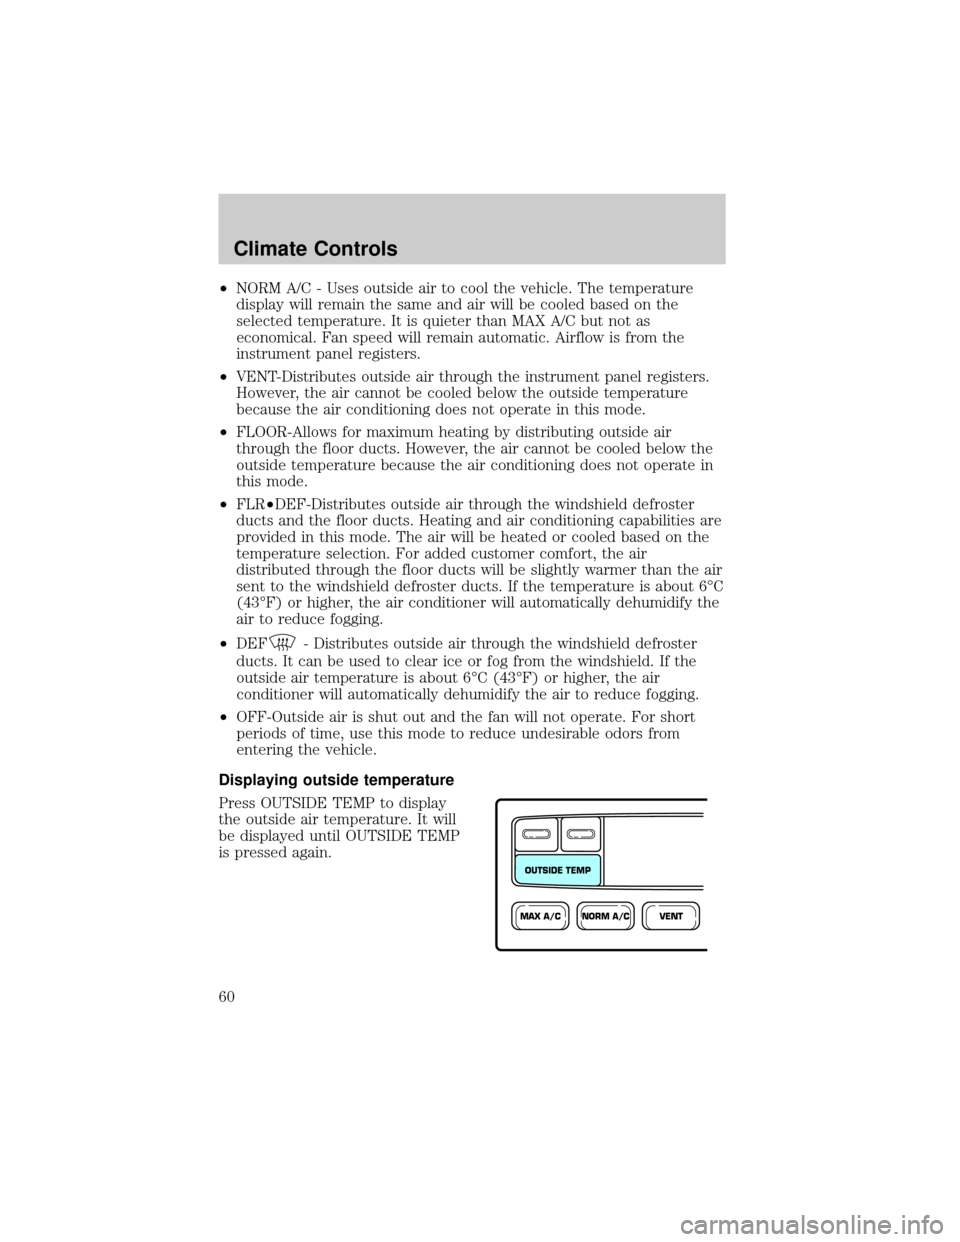
Displaying outside temperature
Press OUTSIDE TEMP to display
the outside air temperature. It will
be displayed until OUTSIDE TEMP
is pressed again.
NORM A/CVENTMAX A/C
OUTSIDE TEMP
Climate Controls
60
Page 78 of 240
6. The display will show all segments, then return to normal compass
mode within ten seconds.
Compass calibration adjustment
Perform this adjustment in an open area free from steel structures and
high voltage lines.
1. Start the vehicle.
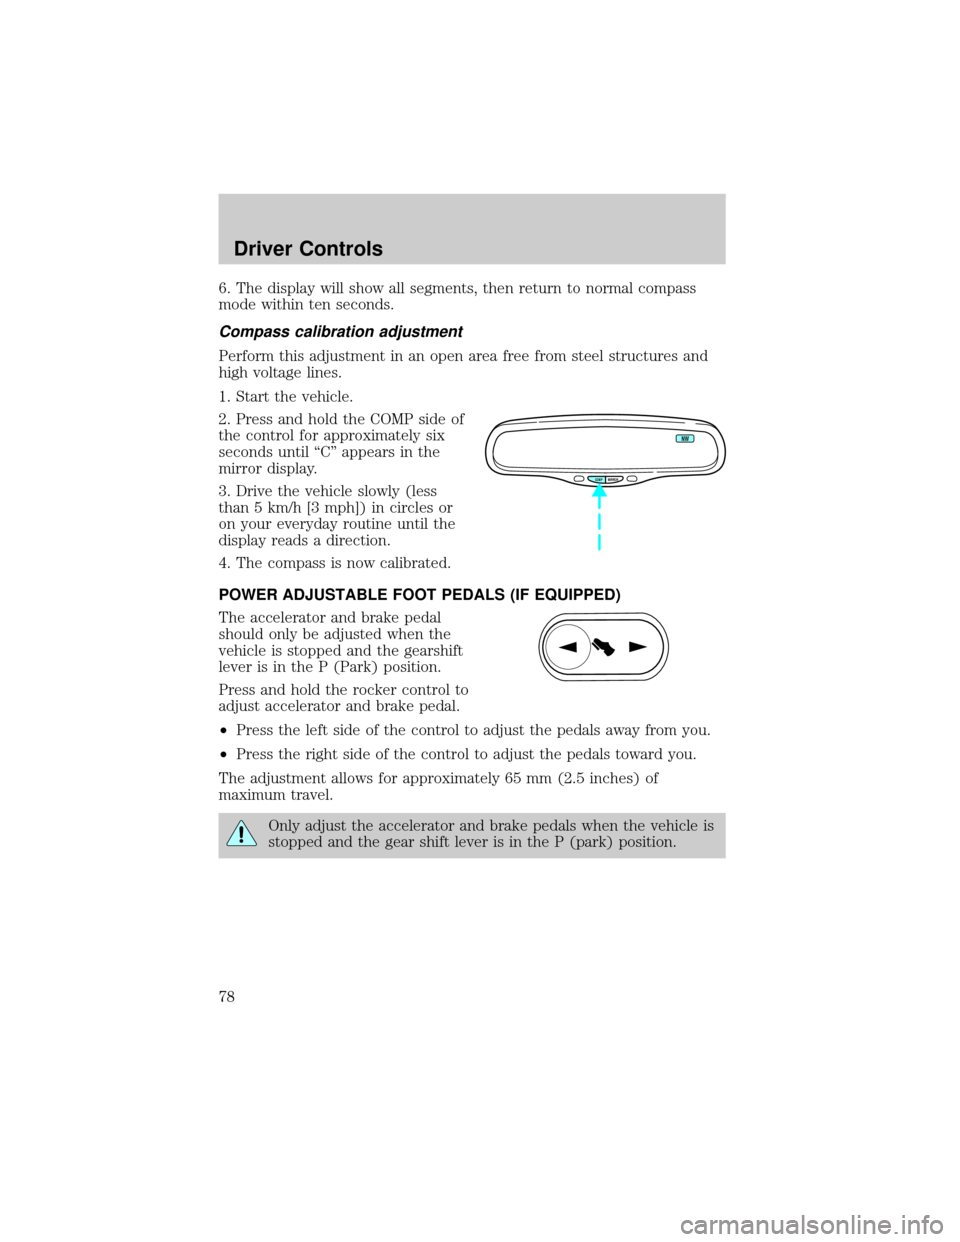
2. Press and hold the COMP side of
the control for approximately six
seconds until ªCº appears in the
mirror display.
3. Drive the vehicle slowly (less
than 5 km/h [3 mph]) in circles or
on your everyday routine until the
display reads a direction.
4. The compass is now calibrated.
POWER ADJUSTABLE FOOT PEDALS (IF EQUIPPED)
The accelerator and brake pedal
should only be adjusted when the
vehicle is stopped and the gearshift
lever is in the P (Park) position.
Press and hold the rocker control to
adjust accelerator and brake pedal.
²Press the left side of the control to adjust the pedals away from you.
²Press the right side of the control to adjust the pedals toward you.
The adjustment allows for approximately 65 mm (2.5 inches) of
maximum travel.
Only adjust the accelerator and brake pedals when the vehicle is
stopped and the gear shift lever is in the P (park) position.
COMP MIRROR
NW
Driver Controls
78
Page 83 of 240
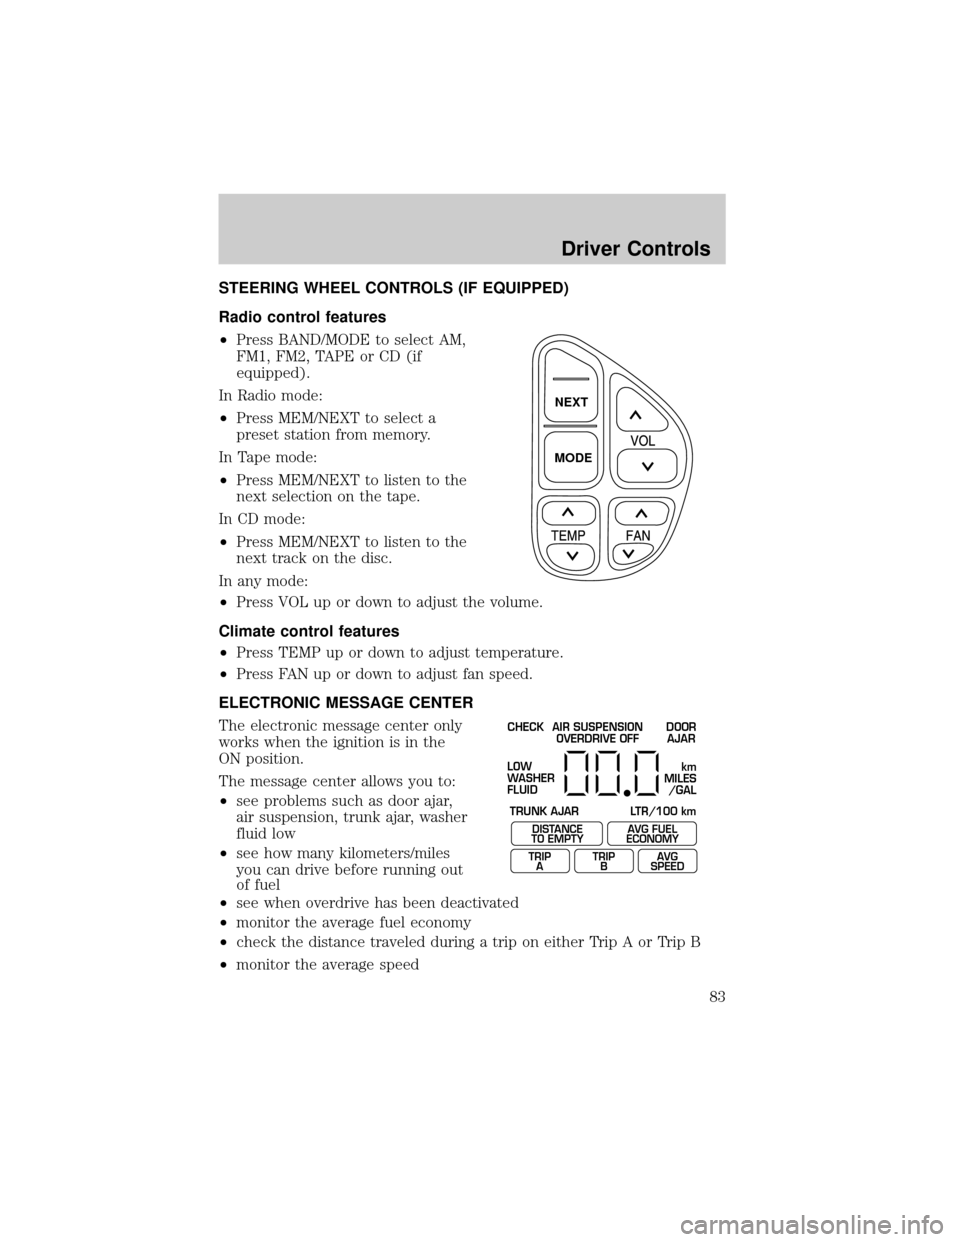
STEERING WHEEL CONTROLS (IF EQUIPPED)
Radio control features
²Press BAND/MODE to select AM,
FM1, FM2, TAPE or CD (if
equipped).
In Radio mode:
²Press MEM/NEXT to select a
preset station from memory.
In Tape mode:
²Press MEM/NEXT to listen to the
next selection on the tape.
In CD mode:
²Press MEM/NEXT to listen to the
next track on the disc.
In any mode:
²Press VOL up or down to adjust the volume.
Climate control features
²Press TEMP up or down to adjust temperature.
²Press FAN up or down to adjust fan speed.
ELECTRONIC MESSAGE CENTER
The electronic message center only
works when the ignition is in the
ON position.
The message center allows you to:
²see problems such as door ajar,
air suspension, trunk ajar, washer
fluid low
²see how many kilometers/miles
you can drive before running out
of fuel
²see when overdrive has been deactivated
²monitor the average fuel economy
²check the distance traveled during a trip on either Trip A or Trip B
²monitor the average speed
NEXT
MODE
CHECK
TRUNK AJAR LTR/100 kmAIR SUSPENSION
OVERDRIVE OFFDOOR
AJAR
LOW
WASHER
FLUID
DISTANCE
TO EMPTY
TRIP
AAVG FUEL
ECONOMY
TRIP
BAVG
SPEED
km
MILES
/GAL
Driver Controls
83
Page 115 of 240
How to disengage the automatic locking mode
Ford Motor Company recommends that all safety belt assemblies
and attaching hardware should be inspected by a qualified
technician after any collision. Safety belt assemblies not in use during a
collision should also be inspected and replaced if either damage or
improper operation is noted.
Disconnect the combination lap/shoulder belt and allow it to retract
completely to disengage the automatic locking mode and activate the
vehicle sensitive (emergency) locking mode.
After any vehicle collision, the front passenger and rear outboard
seat belt systems must be checked by a qualified technician to
verify that the ªautomatic locking retractorº feature for child seats is
still functioning properly. In addition, all seat belts should be checked
for proper function.
BELT AND RETRACTOR ASSEMBLY MUST BE REPLACED if
the seat belt assembly ªautomatic locking retractorº feature or
any other seat belt function is not operating properly when checked
according to the procedures in Workshop Manual.
Failure to replace the Belt and Retractor assembly could
increase the risk of injury in collisions.
Seating and Safety Restraints
115
Page 131 of 240
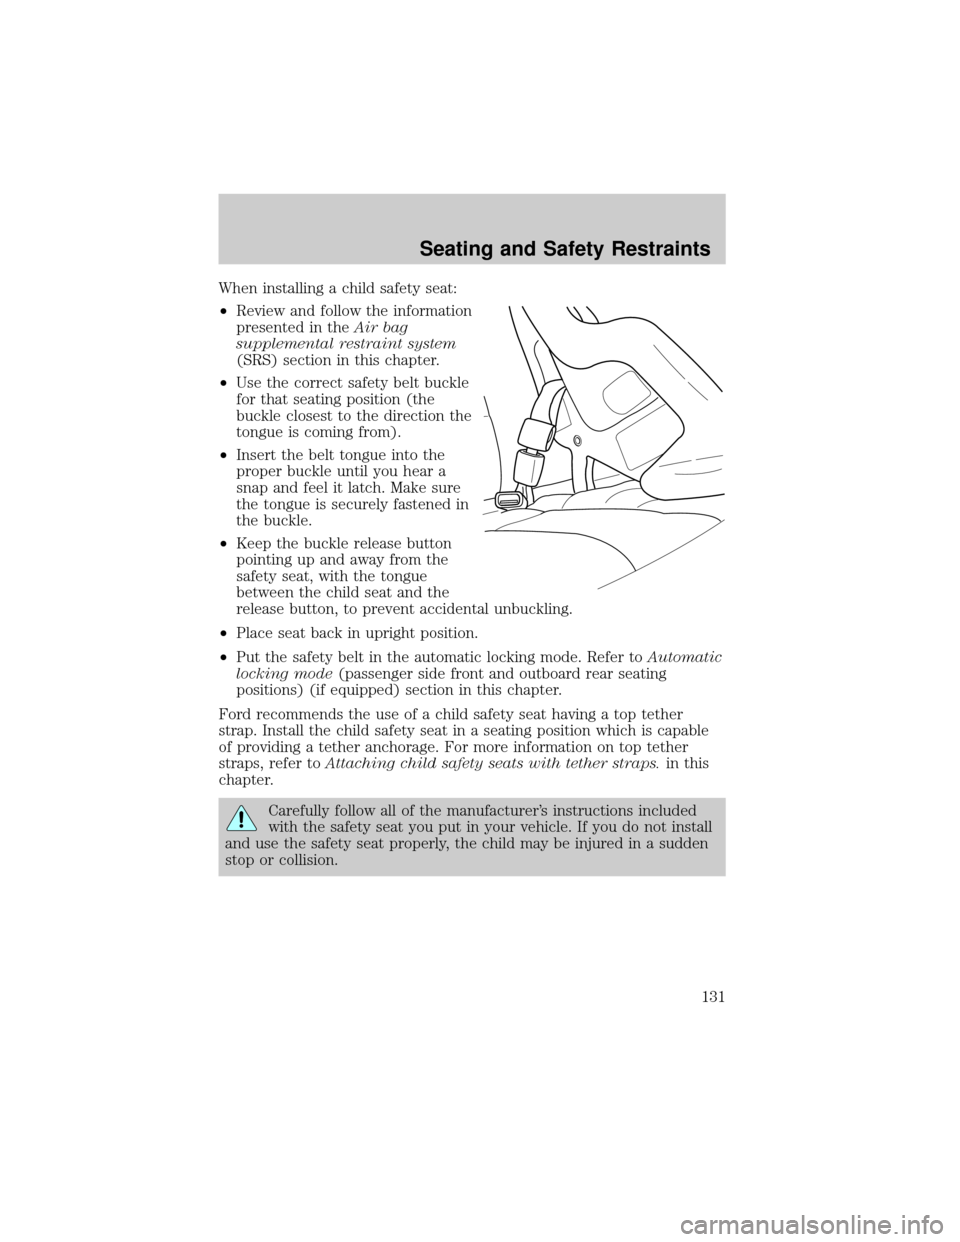
When installing a child safety seat:
²Review and follow the information
presented in theAir bag
supplemental restraint system
(SRS) section in this chapter.
²Use the correct safety belt buckle
for that seating position (the
buckle closest to the direction the
tongue is coming from).
²Insert the belt tongue into the
proper buckle until you hear a
snap and feel it latch. Make sure
the tongue is securely fastened in
the buckle.
²Keep the buckle release button
pointing up and away from the
safety seat, with the tongue
between the child seat and the
release button, to prevent accidental unbuckling.
²Place seat back in upright position.
²Put the safety belt in the automatic locking mode. Refer toAutomatic
locking mode(passenger side front and outboard rear seating
positions) (if equipped) section in this chapter.
Ford recommends the use of a child safety seat having a top tether
strap. Install the child safety seat in a seating position which is capable
of providing a tether anchorage. For more information on top tether
straps, refer toAttaching child safety seats with tether straps.in this
chapter.
Carefully follow all of the manufacturer's instructions included
with the safety seat you put in your vehicle. If you do not install
and use the safety seat properly, the child may be injured in a sudden
stop or collision.
Seating and Safety Restraints
131
Page 179 of 240

Board membership
The Board consists of:
²Three consumer representatives
²A Ford or Lincoln Mercury dealership representative
Consumer candidates for Board membership are recruited and trained by
an independent consulting firm. The dealership Board member is chosen
from Ford and Lincoln Mercury dealership management, recognized for
their business leadership qualities.
What the Board needs
To have your case reviewed you must complete the application in the
DSB brochure and mail it to the address provided on the application
form. Some states will require you to use certified mail, with return
receipt requested.
Your application is reviewed and, if it is determined to be eligible, you
will receive an acknowledgment indicating:
²The file number assigned to your application.
²The toll-free phone number of the DSB's independent administrator.
Your dealership and a Ford Motor Company representative will then be
asked to submit statements.
To properly review your case, the Board needs the following information:
²Legible copies of all documents and maintenance or repair orders
relevant to the case.
²The year, make, model, and Vehicle Identification Number (VIN) listed
on your vehicle ownership license.
²The date of repair(s) and mileage at the time of occurrence(s).
²The current mileage.
²The name of the dealer(s) who sold or serviced the vehicle.
²A brief description of your unresolved concern.
²A brief summary of the action taken by the dealer(s) and Ford Motor
Company.
²The names (if known) of all the people you contacted at the
dealership(s).
²A description of the action you expect to resolve your concern.
You will receive a letter of explanation if your application does not
qualify for Board review.
Customer Assistance
179
Page 205 of 240
If the engine reaches a preset over-temperature condition, the engine
will automatically switch to alternating cylinder operation. Each disabled
cylinder acts as an air pump and cools the engine.
When this occurs the vehicle will still operate. However:
²The engine power will be limited.
²The air conditioning system will be disabled.
Continued operation will increase the engine temperature:
²The
symbol will begin to flash.
²If your vehicle is equipped with digital gauges, the gauge bars will
flash and a tone will sound every five seconds for one minute.
²The engine will completely shut down, causing steering and braking
effort to increase.
Once the engine temperature cools, the engine can be re-started. Take
your vehicle to a service facility as soon as possible to minimize engine
damage.
When fail-safe mode is activated
You have limited engine power when in the fail-safe mode, so drive the
vehicle with caution. The vehicle will not be able to maintain high-speed
operation and the engine will run rough. Remember that the engine is
capable of completely shutting down automatically to prevent engine
damage, therefore:
1. Pull off the road as soon as safely possible and turn off the engine.
2. Arrange for the vehicle to be taken to a service facility.
3. If this is not possible, wait a short period for the engine to cool.
4. Check the coolant level and replenish if low.
Never remove the coolant reservoir cap while the engine is
running or hot.
5. Re-start the engine and take your vehicle to a service facility.
Driving the vehicle without repairing the engine problem
increases the chance of engine damage. Take your vehicle to a
service facility as soon as possible.
Maintenance and Specifications
205