Page 3 of 240
Cleaning 184
Cleaning your vehicle 184
Underbody preservation 189
Maintenance and Specifications 191
Hood 192
Engine compartment 192
Engine oil 193
Battery 197
Fuel information 206
Air filter(s) 219
Part numbers 224
Refill capacities 225
Lubricant specifications 226
Engine data 228
Vehicle dimensions 228
Accessories 231
Index 233
All rights reserved. Reproduction by any means, electronic or mechanical
including photocopying, recording or by any information storage and retrieval
system or translation in whole or part is not permitted without written
authorization from Ford Motor Company. Ford may change the contents without
notice and without incurring obligation.
Copyright 2002 Ford Motor Company
Table of Contents
3
Page 9 of 240
Vehicle Symbol Glossary
Power Window Lockout
Child Safety Door
Lock/Unlock
Interior Luggage
Compartment Release
Symbol
Panic Alarm
Engine OilEngine Coolant
Engine Coolant
TemperatureDo Not Open When Hot
BatteryAvoid Smoking, Flames,
or Sparks
Battery AcidExplosive Gas
Fan WarningPower Steering Fluid
Maintain Correct Fluid
LevelMAX
MIN
Emission System
Engine Air FilterPassenger Compartment
Air Filter
JackCheck fuel cap
Low tire warning
Introduction
9
Page 13 of 240
Safety belt
Illuminates to remind you to fasten
your safety belts. For more
information, refer to theSeating
and safety restraintschapter.
Air bag readiness
Illuminates to confirm that the air
bags (front or side) are operational.
If the light fails to illuminate,
continues to flash or remains on,
have the system serviced immediately.
Charging system
Illuminates when the battery is not
charging properly.
Engine oil pressure (if equipped)
Illuminates when the oil pressure
falls below the normal range. Check
the oil level and add oil if needed.
Refer toEngine oilin the
Maintenance and specificationschapter.
Engine coolant temperature (if equipped)
Illuminates when the engine coolant
temperature is high. Stop the
vehicle as soon as safely possible,
switch off the engine and let it cool.
Never remove the coolant recovery cap while the engine is
running or hot.
AIR
BAG
Instrument Cluster
13
Page 19 of 240
Battery voltage gauge (if equipped)
Indicates battery voltage. If the
pointer moves and stays outside the
normal operating range (as
indicated), have the vehicle's
electrical system checked as soon as
possible.
Fuel gauge
Displays approximately how much fuel is in the fuel tank. The fuel gauge
may vary slightly when the vehicle is in motion or on a grade.
When refueling the vehicle from empty indication, the amount of fuel
that can be added will be less than the advertised capacity due to the
reserve fuel.
²Standard instrument cluster
²Optional instrument cluster
A minimum of four gallons must be
added or removed from the fuel
tank in order for the gauge to
instantaneously update. If less than
four gallons is added, the gauge will
take between five to ten minutes to
update.
VOLTSH
L
E
FUELF
F
E
/2 1
Instrument Cluster
19
Page 95 of 240

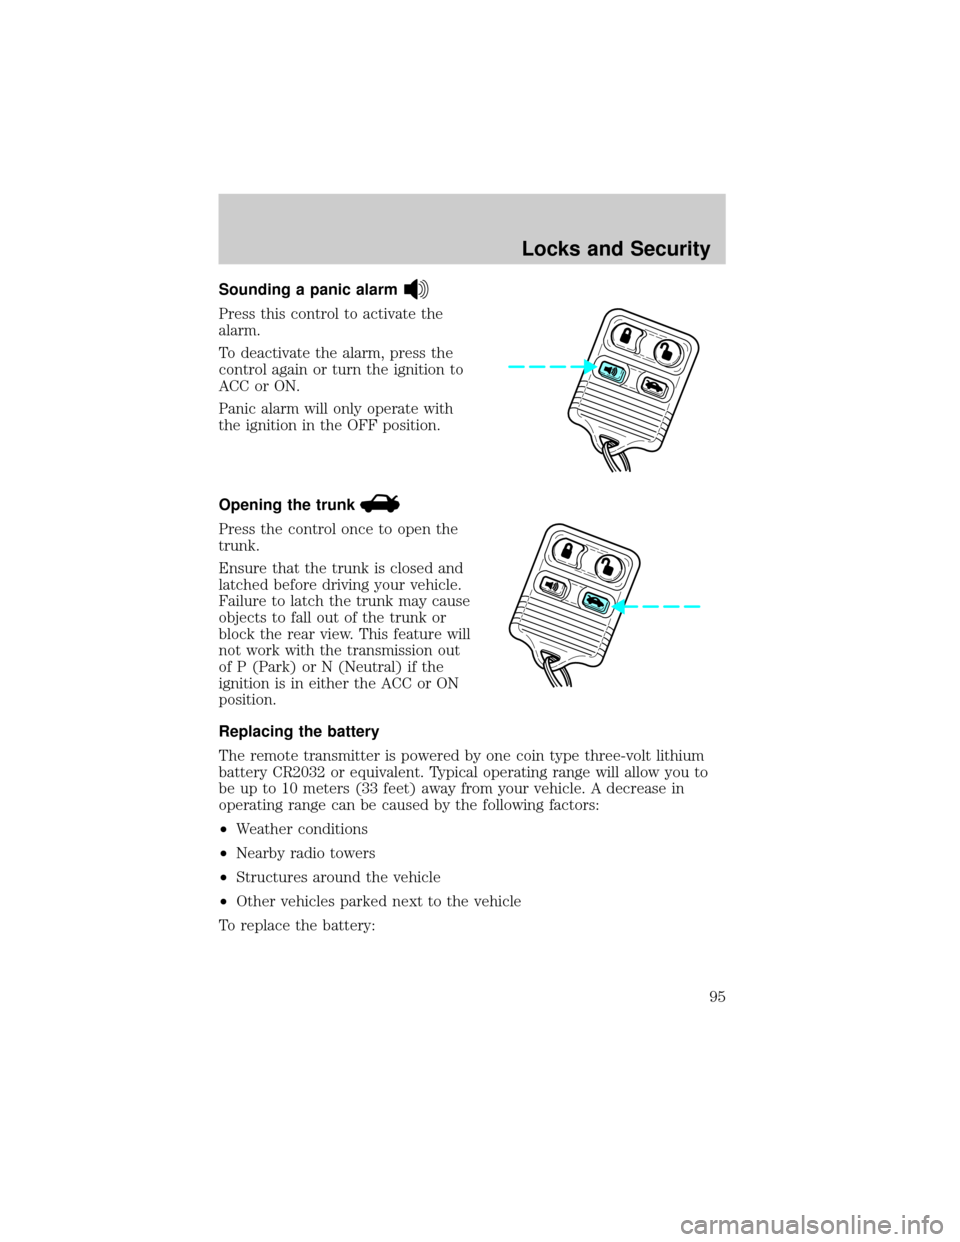
Sounding a panic alarm
Press this control to activate the
alarm.
To deactivate the alarm, press the
control again or turn the ignition to
ACC or ON.
Panic alarm will only operate with
the ignition in the OFF position.
Opening the trunk
Press the control once to open the
trunk.
Ensure that the trunk is closed and
latched before driving your vehicle.
Failure to latch the trunk may cause
objects to fall out of the trunk or
block the rear view. This feature will
not work with the transmission out
of P (Park) or N (Neutral) if the
ignition is in either the ACC or ON
position.
Replacing the battery
The remote transmitter is powered by one coin type three-volt lithium
battery CR2032 or equivalent. Typical operating range will allow you to
be up to 10 meters (33 feet) away from your vehicle. A decrease in
operating range can be caused by the following factors:
²Weather conditions
²Nearby radio towers
²Structures around the vehicle
²Other vehicles parked next to the vehicle
To replace the battery:
Locks and Security
95
Page 96 of 240

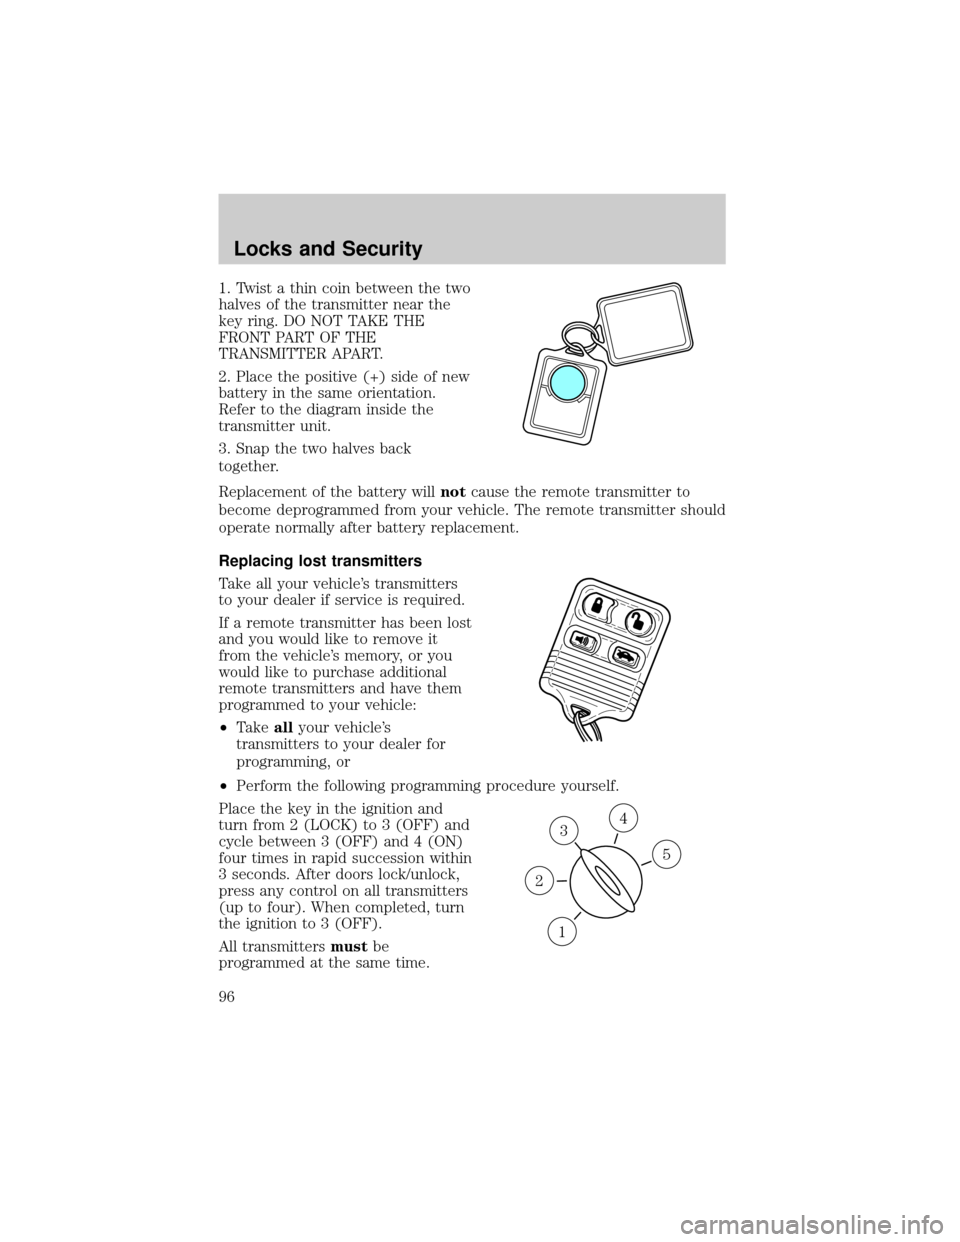
1. Twist a thin coin between the two
halves of the transmitter near the
key ring. DO NOT TAKE THE
FRONT PART OF THE
TRANSMITTER APART.
2. Place the positive (+) side of new
battery in the same orientation.
Refer to the diagram inside the
transmitter unit.
3. Snap the two halves back
together.
Replacement of the battery willnotcause the remote transmitter to
become deprogrammed from your vehicle. The remote transmitter should
operate normally after battery replacement.
Replacing lost transmitters
Take all your vehicle's transmitters
to your dealer if service is required.
If a remote transmitter has been lost
and you would like to remove it
from the vehicle's memory, or you
would like to purchase additional
remote transmitters and have them
programmed to your vehicle:
²Takeallyour vehicle's
transmitters to your dealer for
programming, or
²Perform the following programming procedure yourself.
Place the key in the ignition and
turn from 2 (LOCK) to 3 (OFF) and
cycle between 3 (OFF) and 4 (ON)
four times in rapid succession within
3 seconds. After doors lock/unlock,
press any control on all transmitters
(up to four). When completed, turn
the ignition to 3 (OFF).
All transmittersmustbe
programmed at the same time.
3
1
2
5
4
Locks and Security
96
Page 97 of 240

Illuminated entry
The interior lamps illuminate when the remote entry system is used to
unlock the door(s) or sound the personal alarm.
The system automatically turns off after 25 seconds after the UNLOCK
button on the remote transmitter is pressed or when the ignition is
turned to the START or ACC position. The dome lamp control (if
equipped) mustnotbe set to the OFF position for the illuminated entry
system to operate.
The inside lights will not turn off if:
²they have been turned on with the dimmer control, or
²any door is open.
The battery saver will shut off the interior lamps 30 minutes after the
last door is closed or after 10 minutes if the door is left open.
Autolock (if equipped)
This feature automatically locks all vehicle doors when:
²all doors are closed, and
²the ignition is in the ON position, and
²you shift into any gear.
Relock
The autolock feature repeats when:
²any door, except the drivers, is opened then closed while the engine is
running, and
²you put the vehicle in motion.
Deactivating/activating the autolock feature
Before following the procedure, make sure that the ignition is OFF and
all vehicle doors are closed.
Automatic door locks can be turned on/off with the keyless entry keypad
through the following procedure:
You must complete steps 1-5 within 30 seconds or the procedure will
have to be repeated. If the procedure needs to be repeated, you must
wait 30 seconds.
1. Enter the keyless entry keypad factory code.
2. Within 5 seconds, press and hold control 7/8.
3. Within 5 seconds (while holding down control 7/8), press and release
control 3/4.
4. Release control 7/8.
Locks and Security
97
Page 162 of 240

Fuse/Relay
LocationFuse Amp
RatingPassenger Compartment Fuse
Panel Description
23 15A Power Windows/Door Locks,
PATS, Exterior Rear View Mirrors,
EATC Module, Instrument Cluster,
Clock, Lighting Control Module
(LCM), Interior Lamps
24 10A Left Hand Low Beam
25 20A Power Point, Cigar Lighter,
Emergency Flashers
26 10A Right Hand Low Beam
27 25A Lighting Control Module (LCM),
Main Light Switch, Cornering
Lamps, Fuel Tank Pressure
Sensor
28 20A* Power Windows
29 Ð Not Used
30 Ð Not Used
31 Ð Not Used
32 20A ABS Values
* Circuit breaker
Power distribution box
The power distribution box is located in the engine compartment. The
power distribution box contains high-current fuses that protect your
vehicle's main electrical systems from overloads.
Always disconnect the battery before servicing high current
fuses.
Always replace the cover to the power distribution box before
reconnecting the battery or refilling fluid reservoirs
If the battery has been disconnected and reconnected, refer to the
Batterysection of theMaintenance and specificationschapter.
Roadside Emergencies
162