Page 208 of 246

CONNECT Nav+
207
Enter the name and confirm with
“OK”. The system informs the user if
the name is already present, with the
possibility to change it: if the user
chooses to change it, a window with
the name to be corrected is displayed,
otherwise, the system returns to the
main navigation function page and
stores also the new destination with
the name already present in the list.
“Map”
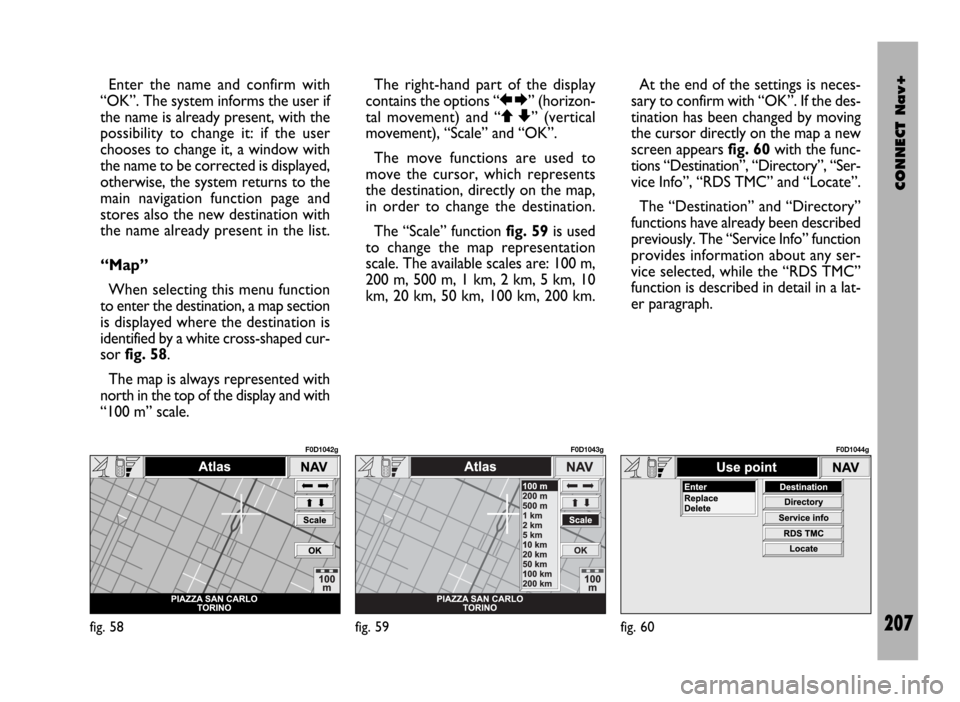
When selecting this menu function
to enter the destination, a map section
is displayed where the destination is
identified by a white cross-shaped cur-
sor fig. 58.
The map is always represented with
north in the top of the display and with
“100 m” scale. The right-hand part of the display
contains the options “RE” (horizon-
tal movement) and “QZ” (vertical
movement), “Scale” and “OK”.
The move functions are used to
move the cursor, which represents
the destination, directly on the map,
in order to change the destination.
The “Scale” function fig. 59is used
to change the map representation
scale. The available scales are: 100 m,
200 m, 500 m, 1 km, 2 km, 5 km, 10
km, 20 km, 50 km, 100 km, 200 km.At the end of the settings is neces-
sary to confirm with “OK”. If the des-
tination has been changed by moving
the cursor directly on the map a new
screen appears fig. 60with the func-
tions “Destination”, “Directory”, “Ser-
vice Info”, “RDS TMC” and “Locate”.
The “Destination” and “Directory”
functions have already been described
previously. The “Service Info” function
provides information about any ser-
vice selected, while the “RDS TMC”
function is described in detail in a lat-
er paragraph.
fig. 58
F0D1042g
fig. 59
F0D1043g
fig. 60
F0D1044g
Page 234 of 246

CONNECT Nav+
233
“Infomobility” FUNCTION
“Connect”
Selecting “Infomobility” and con-
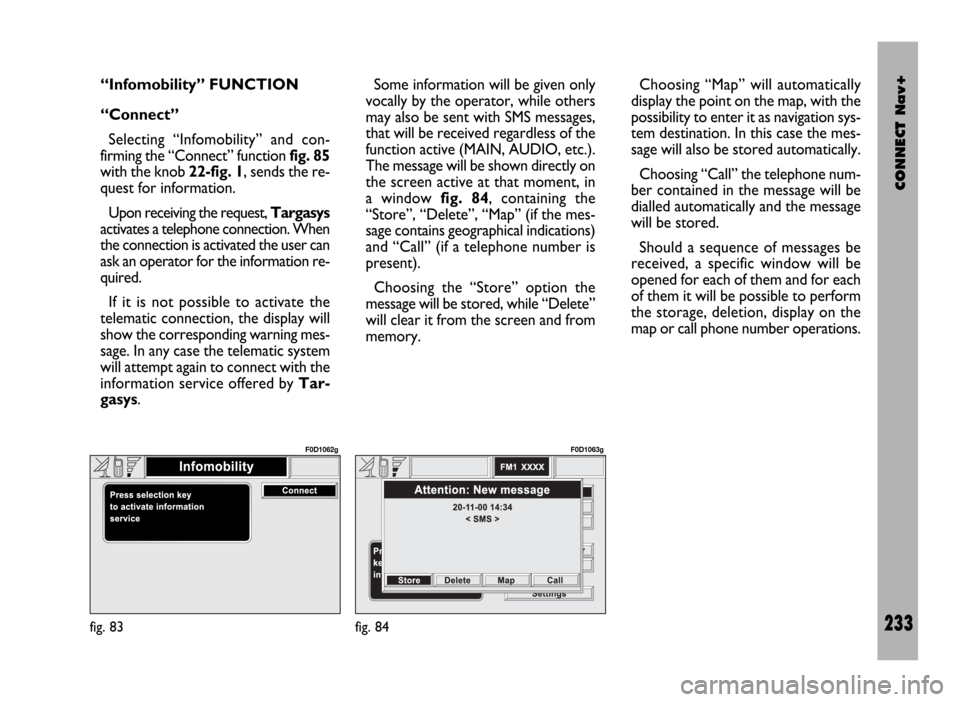
firming the “Connect” function fig. 85
with the knob 22-fig. 1, sends the re-
quest for information.
Upon receiving the request, Targasys
activates a telephone connection. When
the connection is activated the user can
ask an operator for the information re-
quired.
If it is not possible to activate the
telematic connection, the display will
show the corresponding warning mes-
sage. In any case the telematic system
will attempt again to connect with the
information service offered by Tar-
gasys.Some information will be given only
vocally by the operator, while others
may also be sent with SMS messages,
that will be received regardless of the
function active (MAIN, AUDIO, etc.).
The message will be shown directly on
the screen active at that moment, in
a window fig. 84, containing the
“Store”, “Delete”, “Map” (if the mes-
sage contains geographical indications)
and “Call” (if a telephone number is
present).
Choosing the “Store” option the
message will be stored, while “Delete”
will clear it from the screen and from
memory.Choosing “Map” will automatically
display the point on the map, with the
possibility to enter it as navigation sys-
tem destination. In this case the mes-
sage will also be stored automatically.
Choosing “Call” the telephone num-
ber contained in the message will be
dialled automatically and the message
will be stored.
Should a sequence of messages be
received, a specific window will be
opened for each of them and for each
of them it will be possible to perform
the storage, deletion, display on the
map or call phone number operations.
fig. 83
F0D1062g
fig. 84
F0D1063g
Page 241 of 246

CONNECT Nav+
240
AUDIO mode
When the telecamera image is dis-
played, the AUDIO mode is enabled:
– “AUDIO” key 18-fig. 1disabled;
– the active source (RADIO, CD)
stays on;
– audio volume setting, knob 16-fig.
1enabled;
– “SRC” key 15-fig. 1enabled;
– station tuning disabled.
TEL mode
When the telecamera image is dis-
played, the TEL mode is enabled:
– “TEL” key 19-fig. 1disabled;
– key ò13-fig. 1enabled.INCOMING CALL WITH DISPLAYED
TELECAMERA IMAGE
When the above condition occurs,
the following takes place:
– automatic display switching to TEL
mode display;
– incoming call number display (if
available);
– briefly press the òkey 13-fig. 1to
accept the incoming call or press it at
length to refuse the call. Just after
pressing the key (with reverse en-
gaged) the display returns to display
the telecamera image and if the in-
coming call is accepted the system will
enable the communication. If during
this phase there is another incoming
call, the display will show the TEL
mode again.
FORWARDING CALL WITH DISPLAYED
TELECAMERA IMAGE
Briefly press the òkey 13-fig. 1to
obtain the following:
– disable the telecamera image;
– display the last dialled number (see
“Cellular telephone” chapter); press
again the òkey 13-fig. 1to forward
a call within 10 seconds. Pressing
“ESC” 23-fig. 1will delete the last di-
alled number and activate the window
to be used for dialling (through the key-
pad) the required telephone number;
pressing the òkey 13-fig. 1again will
forward the call;
– press ESC 23-fig. 1at length to
return to the telecamera image (with
reverse gear engaged).