Page 168 of 486

2-60 Turn and Lane-Change Signals
The turn signal has two upward (for right) and two
downward (for left) positions. These positions allow you
to signal a turn or a lane change.
To signal a turn, move the lever all the way up or down.
When the turn is finished, the lever will return automatically.
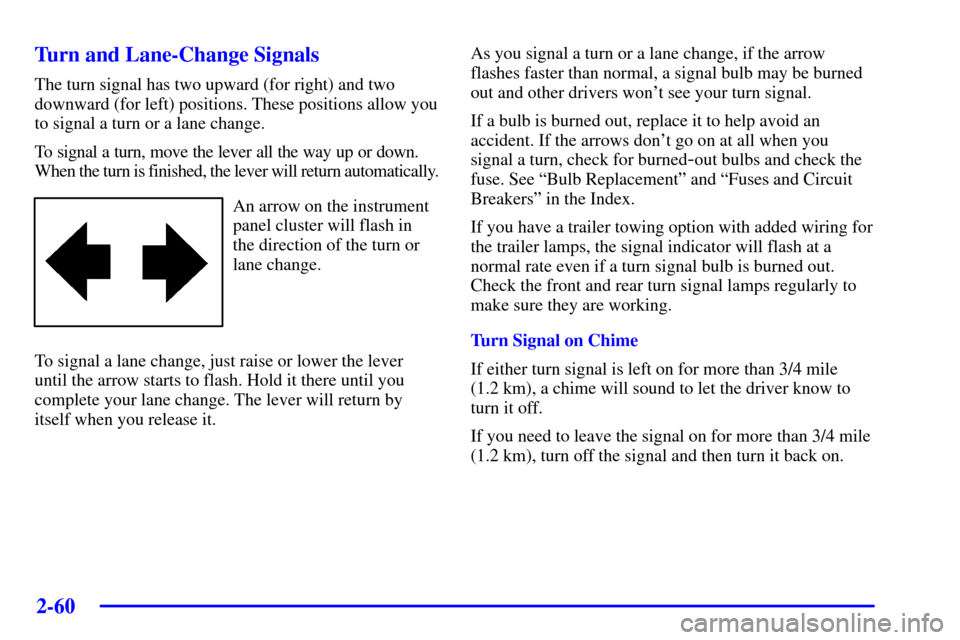
An arrow on the instrument
panel cluster will flash in
the direction of the turn or
lane change.
To signal a lane change, just raise or lower the lever
until the arrow starts to flash. Hold it there until you
complete your lane change. The lever will return by
itself when you release it.As you signal a turn or a lane change, if the arrow
flashes faster than normal, a signal bulb may be burned
out and other drivers won't see your turn signal.
If a bulb is burned out, replace it to help avoid an
accident. If the arrows don't go on at all when you
signal a turn, check for burned
-out bulbs and check the
fuse. See ªBulb Replacementº and ªFuses and Circuit
Breakersº in the Index.
If you have a trailer towing option with added wiring for
the trailer lamps, the signal indicator will flash at a
normal rate even if a turn signal bulb is burned out.
Check the front and rear turn signal lamps regularly to
make sure they are working.
Turn Signal on Chime
If either turn signal is left on for more than 3/4 mile
(1.2 km), a chime will sound to let the driver know to
turn it off.
If you need to leave the signal on for more than 3/4 mile
(1.2 km), turn off the signal and then turn it back on.
Page 331 of 486

4-40 Passing
You'll need more passing distance up ahead when
you're towing a trailer. And, because you're a good deal
longer, you'll need to go much farther beyond the
passed vehicle before you can return to your lane.
Backing Up
Hold the bottom of the steering wheel with one hand.
Then, to move the trailer to the left, just move that hand
to the left. To move the trailer to the right, move your
hand to the right. Always back up slowly and, if
possible, have someone guide you.
Making Turns
NOTICE:
Making very sharp turns while trailering could
cause the trailer to come in contact with the
vehicle. Your vehicle could be damaged. Avoid
making very sharp turns while trailering.
When you're turning with a trailer, make wider turns
than normal. Do this so your trailer won't strike soft
shoulders, curbs, road signs, trees or other objects.
Avoid jerky or sudden maneuvers. Signal well
in advance.
Turn Signals When Towing a Trailer
When you tow a trailer, your vehicle has to have
extra wiring.
The arrows on your instrument panel will flash
whenever you signal a turn or lane change. Properly
hooked up, the trailer lamps will also flash, telling other
drivers you're about to turn, change lanes or stop.
When towing a trailer, the arrows on your instrument
panel will flash for turns even if the bulbs on the trailer
are burned out. Thus, you may think drivers behind you
are seeing your signal when they are not. It's important
to check occasionally to be sure the trailer bulbs are
still working.
Page 373 of 486

6-
6-1
Section 6 Service and Appearance Care
Here you will find information about the care of your vehicle. This section begins with service and fuel information,
and then it shows how to check important fluid and lubricant levels. There is also technical information about your
vehicle, and a part devoted to its appearance care.
6
-2 Service
6
-3 Fuel
6
-5 Fuels in Foreign Countries
6
-5 Filling Your Tank
6
-8 Filling a Portable Fuel Container
6
-8 Checking Things Under the Hood
6
-12 Engine Oil
6
-17 Engine Air Cleaner/Filter
6
-19 Passenger Compartment Air Filter
(If Equipped)
6
-21 Automatic Transaxle Fluid
6
-26 Engine Coolant
6
-29 Radiator Pressure Cap
6
-30 Power Steering Fluid
6
-31 Windshield Washer Fluid
6
-32 Brakes6
-35 Battery
6
-36 Bulb Replacement
6
-43 Windshield Wiper Blade Replacement
6
-45 Tires
6
-54 Appearance Care
6
-54 Cleaning the Inside of Your Vehicle
6
-58 Cleaning the Outside of Your Vehicle
6
-61 Underbody Maintenance
6
-61 Chemical Paint Spotting
6
-62 GM Vehicle Care/Appearance Materials
6
-63 Vehicle Identification Number (VIN)
6
-64 Electrical System
6
-72 Replacement Bulbs
6
-73 Capacities and Specifications
6
-74 Air Conditioning Refrigerant Capacity
6
-74 Normal Maintenance Replacement Parts
Page 408 of 486
6-36 Vehicle Storage
If you're not going to drive your vehicle for 25 days
or more, remove the black, negative (
-) cable from
the battery. This will help keep your battery from
running down.
CAUTION:
Batteries have acid that can burn you and gas
that can explode. You can be badly hurt if you
aren't careful. See ªJump Startingº in the Index
for tips on working around a battery without
getting hurt.
Contact your dealer to learn how to prepare your vehicle
for longer storage periods.
Also, for your audio system, see ªTheft
-Deterrent
Featureº in the Index.
Bulb Replacement
For the type of bulbs, see ªReplacement Bulbsº in
the Index.
For any bulb changing procedure not listed in this
section, contact your dealer.
Halogen Bulbs
CAUTION:
Halogen bulbs have pressurized gas inside and
can burst if you drop or scratch the bulb. You or
others could be injured. Be sure to read and
follow the instructions on the bulb package.
Page 409 of 486
6-37 Headlamps
1. Open the hood.
2. Remove the front turn signal/parking lamp assembly.
See ªFront Turn Signal/Parking/Sidemarker Lampsº
later in this section.
3. Remove the two wing nuts located on top of the
headlamp assembly.
4. Unscrew the black retainer ring that holds the bulb
assembly in place.
5. Pull the bulb assembly straight up from the
lamp housing.
6. Unhook the electrical connector by lifting up the
blue tabs and pulling the bulb out.
Page 410 of 486
6-38
7. Install the new bulb through the black retainer ring
and into the electrical connector. Tighten the black
retainer ring in place. Push the bulb firmly enough so
that the blue tabs hook over the tab on the bulb.8. Carefully put the bulb assembly back into the lamp
housing. Be careful not to damage the bulb on the
headlamp aiming bar.
Page 411 of 486
6-39
9. Align the pins on the bottom of the headlamp
assembly with the holes in the lamp support bracket
while placing the holes in the assembly over the
bolts where the wing nuts attach.
10. Reinstall the wing nuts.
11. To reinstall the front turn signal/parking
lamp assembly See ªFront Turn
Signal/Parking/Sidemarker Lampsº next.
Front Turn Signal/Parking/Sidemarker Lamps
1. Open the hood.
2. Remove the thumbscrew attaching the front
turn signal/parking lamp assembly to the
headlamp assembly.
3. Pull the front turn signal/parking lamp assembly
away from the vehicle.
4. Unscrew the bulb socket from the lamp assembly by
pressing the tab while turning it counterclockwise.
Page 412 of 486
6-40
Front Turn Signal/Parking LampFront Sidemarker Lamp
5. Replace the bulb by pulling the old one out and
gently pushing the new one into the lamp socket.
6. Line up the tabs on the socket with the gaps in the
socket holes and screw the bulb socket back into the
lamp housing until a click is heard (the tab popping
back out).