Page 121 of 497
2-41
Shifting Out of PARK (P)
(Automatic Transmission Only)
If your vehicle has an automatic transmission shift lock
control system, you have to fully apply your regular
brakes before you can shift from PARK (P) when the
ignition is in RUN. See ªAutomatic Transmissionº in
the Index.
If you cannot shift out of PARK (P), ease pressure on
the shift lever and push the shift lever all the way up
into PARK (P) as you maintain brake application. Then,
move the shift lever into the gear you want.
If you ever hold the brake pedal down but still can't
shift out of PARK (P), try this:
1. Turn the key to the OFF ignition position.
2. Apply and hold the brake until the end of Step 4.
3. Shift the vehicle to NEUTRAL (N).
4. Start the vehicle and then shift to the drive gear
you want.
5. Have the system fixed as soon as you can.
Parking Your Vehicle
(Manual Transmission Models Only)
CAUTION:
Shifting the transfer case to NEUTRAL can
cause your vehicle to roll even if the manual
transmission is in gear. You or someone else could
be seriously injured. Be sure to set the parking
brake before placing the transfer case in
NEUTRAL. See ªParking Brakeº in the Index.
Before you get out of your vehicle, move the shift lever
into REVERSE (R), and firmly apply the parking brake.
Once the shift lever has been placed into REVERSE (R)
with the clutch pedal pressed in, you can turn the
ignition key to OFF, remove the key and release
the clutch.
If you are parking on a hill, or if you are pulling a
trailer, see ªTowing a Trailerº in the Index.
Page 125 of 497
2-45
Locking Rear Axle (If Equipped)
If your vehicle has this feature, your locking rear axle
can give you additional traction on snow, mud, ice, sand
or gravel. It works like a standard axle most of the time,
but when one of the rear wheels has no traction and the
other does, this feature will allow the wheel with
traction to move the vehicle.
Four-Wheel Drive (If Equipped)
If your vehicle has four-wheel drive, you can send your
engine's driving power to all four wheels for extra
traction. To get the most satisfaction out of four
-wheel
drive, you must be familiar with its operation. Read the
part that follows before using four
-wheel drive. See the
appropriate text for the transfer case in your vehicle.
NOTICE:
Driving in the 4-WHEEL HIGH (4HI) or
4
-WHEEL LOW (4LO) positions for a long time
on dry or wet pavement could shorten the life of
your vehicle's drivetrain.
Front Axle Locking Feature
The front axle locks and unlocks automatically when
you shift the transfer case. Some delay for the axle to
lock or unlock is normal.
Page 134 of 497

2-54
Shifting from 2HI to 4HI
Press and release the 4HI switch. This can be done at
any speed, and the front axle will lock automatically
with some delay.
Shifting from 4HI to 2HI
Press and release the 2HI switch. This can be done at
any speed, and the front axle will unlock automatically
with some delay.
Shifting from 2HI or 4HI to 4LO
To shift from 2HI or 4HI to 4LO, the vehicle must be
stopped or moving less than 3 mph (4.8 km/h) with the
transmission in NEUTRAL (N). The preferred method
for shifting into 4LO is to have your vehicle moving 1 to
2 mph (1.6 to 3.2 km/h). Press and release the 4LO
switch. You must wait for the 4LO indicator light to
stop flashing and remain illuminated before shifting
your transmission into gear.If the 4LO switch is pressed when your vehicle is in
gear and/or moving, the 4LO indicator light will flash
for 30 seconds and not complete the shift unless your
vehicle is moving slower than 3 mph (4.8 km/h) and the
transmission is in NEUTRAL (N). The transfer case will
shift to 4HI while waiting to complete the shift.
Shifting from 4LO to 4HI or 2HI
To shift from 4LO to 4HI or 2HI, your vehicle must be
stopped or moving less than 3 mph (4.8 km/h) with the
transmission in NEUTRAL (N). The preferred method
for shifting out of 4LO is to have your vehicle moving
1 to 2 mph (1.6 to 3.2 km/h). Press and release the 4HI
switch. You must wait for the 4HI indicator light to stop
flashing and remain illuminated before shifting your
transmission into gear.
If the 4HI switch is pressed when your vehicle is in gear
and/or moving, the 4HI indicator light will flash for
30 seconds but will not complete the shift unless the
vehicle is moving slower than 3 mph (4.8 km/h) and the
transmission is in NEUTRAL (N).
Page 139 of 497
2-59
Tilt Wheel
A tilt wheel allows you to adjust the steering wheel
before you drive. You can raise it to the highest level
to give your legs more room when you exit and enter
your vehicle.
The tilt steering wheel lever
is located on the lower left
side of the column.
To tilt the wheel, hold the steering wheel and pull the
lever. Then move the steering wheel to a comfortable
position and release the lever to lock the wheel in place.
Turn Signal/Multifunction Lever
The lever on the left side of the steering column
includes the following:
�Turn and Lane Change Signals
�Headlamp High/Low Beam Changer
�Flash
-to-Pass Feature
�Windshield Wipers
�Windshield Washer
�Cruise Control (If Equipped)
For information on the exterior lamps, see ªExterior
Lampsº earlier in this section.
Page 142 of 497
2-62
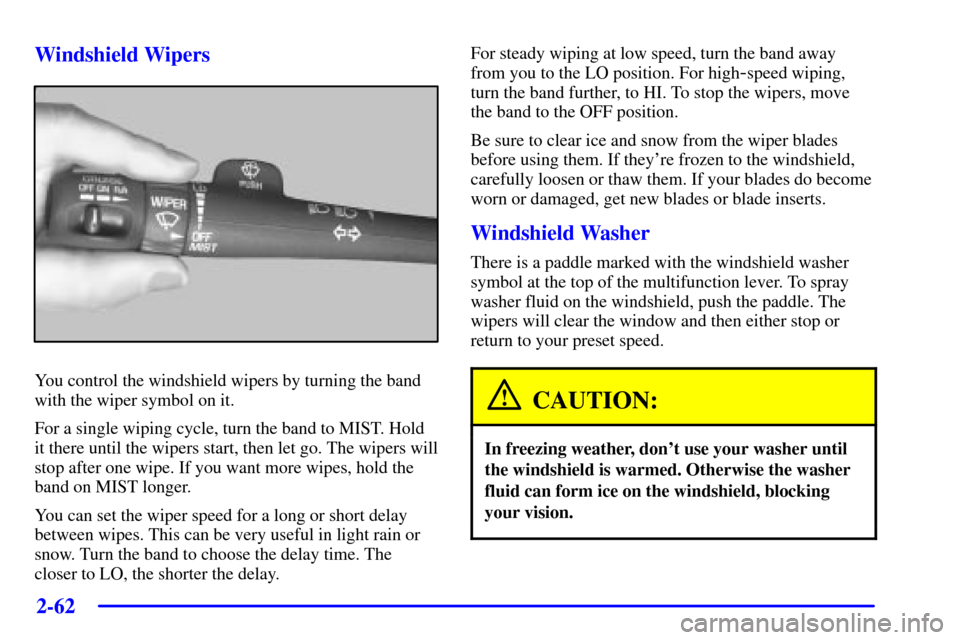
Windshield Wipers
You control the windshield wipers by turning the band
with the wiper symbol on it.
For a single wiping cycle, turn the band to MIST. Hold
it there until the wipers start, then let go. The wipers will
stop after one wipe. If you want more wipes, hold the
band on MIST longer.
You can set the wiper speed for a long or short delay
between wipes. This can be very useful in light rain or
snow. Turn the band to choose the delay time. The
closer to LO, the shorter the delay.For steady wiping at low speed, turn the band away
from you to the LO position. For high
-speed wiping,
turn the band further, to HI. To stop the wipers, move
the band to the OFF position.
Be sure to clear ice and snow from the wiper blades
before using them. If they're frozen to the windshield,
carefully loosen or thaw them. If your blades do become
worn or damaged, get new blades or blade inserts.
Windshield Washer
There is a paddle marked with the windshield washer
symbol at the top of the multifunction lever. To spray
washer fluid on the windshield, push the paddle. The
wipers will clear the window and then either stop or
return to your preset speed.
CAUTION:
In freezing weather, don't use your washer until
the windshield is warmed. Otherwise the washer
fluid can form ice on the windshield, blocking
your vision.
Page 146 of 497
2-66
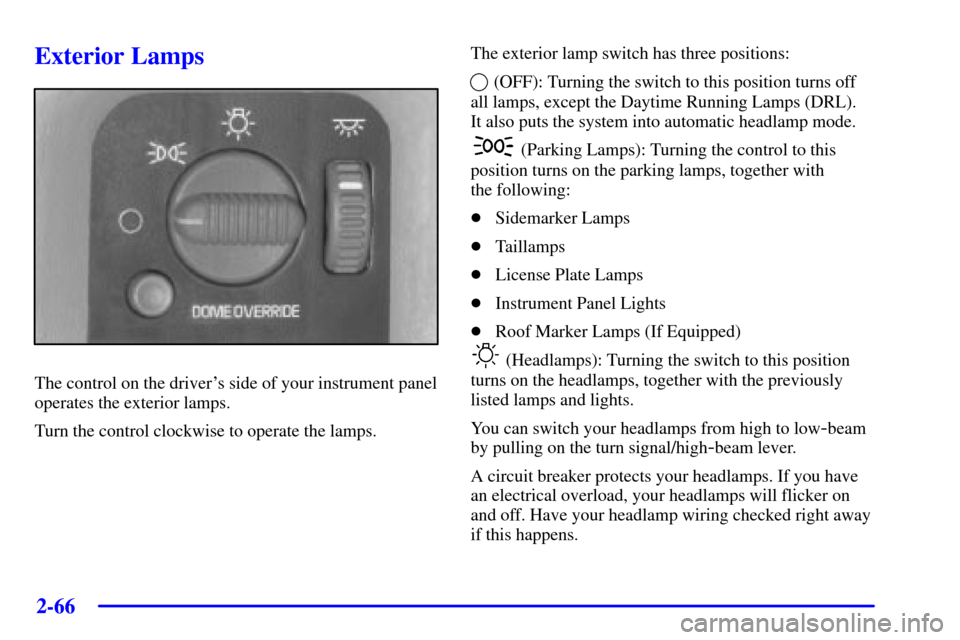
Exterior Lamps
The control on the driver's side of your instrument panel
operates the exterior lamps.
Turn the control clockwise to operate the lamps.The exterior lamp switch has three positions:
(OFF): Turning the switch to this position turns off
all lamps, except the Daytime Running Lamps (DRL).
It also puts the system into automatic headlamp mode.
(Parking Lamps): Turning the control to this
position turns on the parking lamps, together with
the following:
�Sidemarker Lamps
�Taillamps
�License Plate Lamps
�Instrument Panel Lights
�Roof Marker Lamps (If Equipped)
(Headlamps): Turning the switch to this position
turns on the headlamps, together with the previously
listed lamps and lights.
You can switch your headlamps from high to low
-beam
by pulling on the turn signal/high
-beam lever.
A circuit breaker protects your headlamps. If you have
an electrical overload, your headlamps will flicker on
and off. Have your headlamp wiring checked right away
if this happens.
Page 147 of 497

2-67
Automatic Headlamp System
When it is dark enough outside, your automatic
headlamp system will turn on your headlamps at the
normal brightness along with other lamps such as the
taillamps, sidemarker, parking lamps and the instrument
panel lights. The radio lights will also be dim.
Your vehicle is equipped with a light sensor located on
the top of the instrument panel in the defroster grille. Be
sure it is not covered, or the system will be on whenever
the ignition is on.
The system may also turn on your headlamps when
driving through a parking garage, heavy overcast
weather or a tunnel. This is normal.
There is a delay in the transition between the daytime
and nighttime operation of the Daytime Running
Lamps (DRL) and the automatic headlamp systems so
that driving under bridges or bright overhead street
lights does not affect the system. The DRL and
automatic headlamp system will only be affected when
the light sensor sees a change in lighting lasting longer
than the delay.To idle your vehicle with the automatic headlamp
system off, set the parking brake while the ignition is
off. Then start your vehicle. The automatic headlamp
system will stay off until you release the parking brake.
You may be able to turn off your automatic headlamp
system. See ªDaytime Running Lamps (DRL)º later in
this section for more information.
As with any vehicle, you should turn on the regular
headlamp system when you need them.
Lamps On Reminder
A reminder chime will sound when your headlamps or
parking lamps are manually turned on and your ignition
is in OFF, LOCK or ACCESSORY. To disable the
chime, turn the thumbwheel all the way down. In the
automatic mode, the headlamps turn off once the
ignition key is in OFF.
Page 157 of 497
2-77
Electrochromic Inside Rearview Mirror
with Compass, Temperature Display and
OnStar Controls (If Equipped)
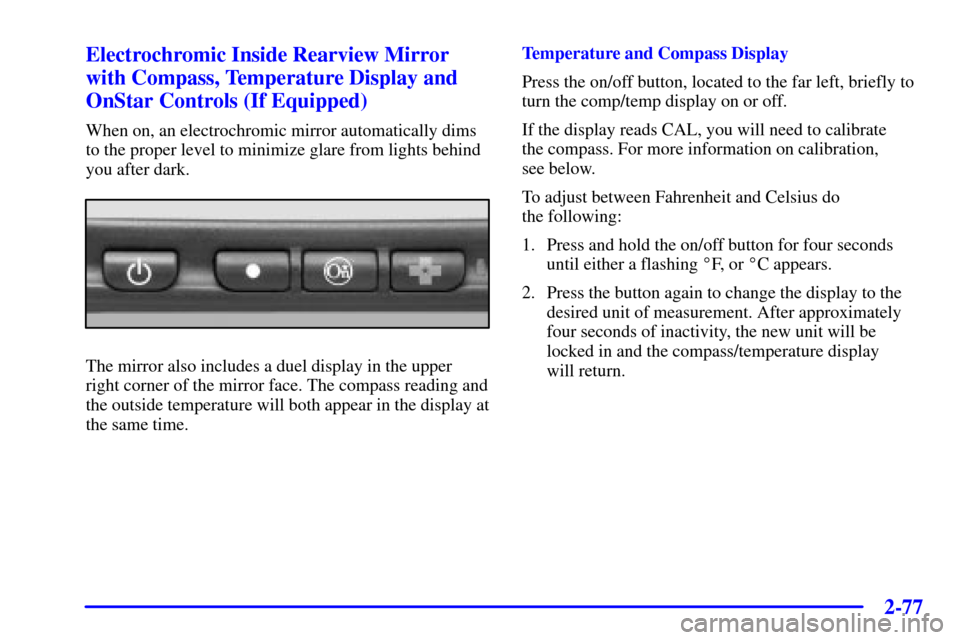
When on, an electrochromic mirror automatically dims
to the proper level to minimize glare from lights behind
you after dark.
The mirror also includes a duel display in the upper
right corner of the mirror face. The compass reading and
the outside temperature will both appear in the display at
the same time.Temperature and Compass Display
Press the on/off button, located to the far left, briefly to
turn the comp/temp display on or off.
If the display reads CAL, you will need to calibrate
the compass. For more information on calibration,
see below.
To adjust between Fahrenheit and Celsius do
the following:
1. Press and hold the on/off button for four seconds
until either a flashing �F, or �C appears.
2. Press the button again to change the display to the
desired unit of measurement. After approximately
four seconds of inactivity, the new unit will be
locked in and the compass/temperature display
will return.