Page 344 of 497
5-18
Your vehicle may be
equipped with one of
the two caps shown.
1. Park the vehicle on a level surface. You can remove
the coolant surge tank pressure cap when the cooling
system, including the coolant surge tank pressure cap
and upper radiator hose, is no longer hot. Turn the
pressure cap slowly counterclockwise (left) about
one full turn. If you hear a hiss, wait
for that to stop. A hiss means there is still some
pressure left.
2. Then keep turning the pressure cap slowly, and
remove it.
3. Then fill the coolant surge tank with the proper
mixture, to the FILL COLD mark.
Page 345 of 497
5-19
4. With the coolant surge tank pressure cap off, start the
engine and let it run until you can feel the upper
radiator hose getting hot. Watch out for the engine
cooling fan.
By this time, the coolant level inside the coolant
surge tank may be lower. If the level is lower, add
more of the proper mixture to the coolant surge tank
until the level reaches the FILL COLD mark.5. Then replace the pressure cap. Be sure the pressure
cap is hand
-tight and fully seated.
Page 366 of 497

6-
6-1
Section 6 Service and Appearance Care
Here you will find information about the care of your vehicle. This section begins with service and fuel information,
and then it shows how to check important fluid and lubricant levels. There is also technical information about your
vehicle, and a part devoted to its appearance care.
6
-2 Service
6
-3 Fuel (Gasoline Engine)
6
-5 Fuels in Foreign Countries
6
-6 Filling Your Tank
6
-8 Checking Things Under the Hood
6
-13 Noise Control System
6
-14 Engine Oil (Gasoline Engine)
6
-19 Engine Air Cleaner/Filter
6
-21 Passenger Compartment Air Filter
(If Equipped)
6
-22 Automatic Transmission Fluid
(Except Allison Transmission)
6
-26 Automatic Transmission Fluid
(Allison� Only)
6
-29 Manual Transmission Fluid
6
-31 Hydraulic Clutch
6
-32 Rear Axle
6
-32 Four-Wheel Drive6
-35 Engine Coolant
6
-38 Coolant Surge Tank Pressure Cap
6
-39 Power Steering Fluid
6
-40 Windshield Washer Fluid
6
-41 Brakes
6
-45 Battery
6
-46 Bulb Replacement
6
-55 Windshield Wiper Blade Replacement
6
-56 Tires
6
-67 Appearance Care
6
-67 Cleaning the Inside of Your Vehicle
6
-71 Cleaning the Outside of Your Vehicle
6
-75 GM Vehicle Care/Appearance Materials
6
-76 Vehicle Identification Number (VIN)
6
-77 Electrical System
6
-85 Replacement Bulbs
6
-86 Capacities and Specifications
Page 402 of 497

6-37 Checking Coolant
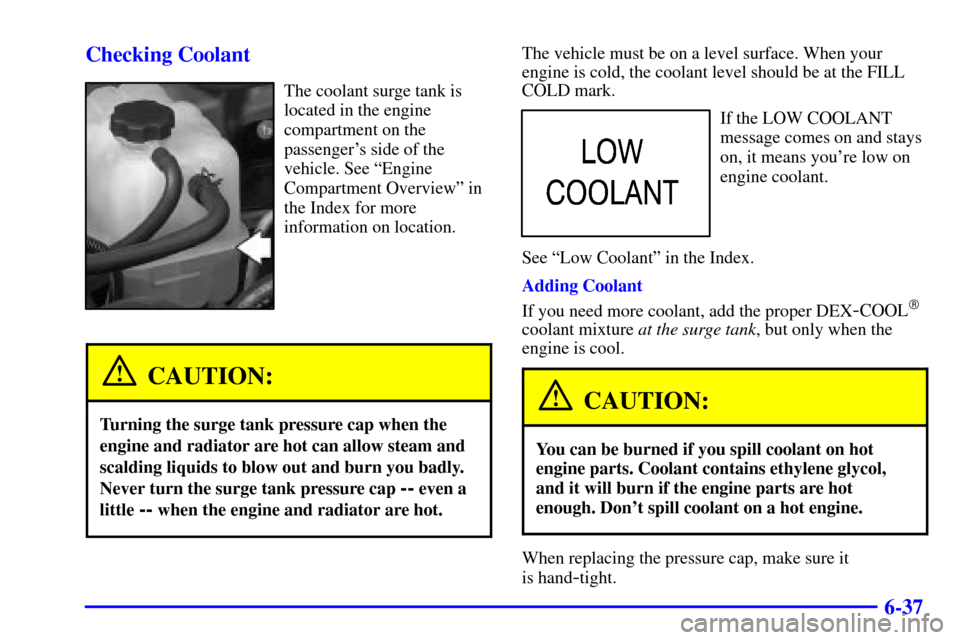
The coolant surge tank is
located in the engine
compartment on the
passenger's side of the
vehicle. See ªEngine
Compartment Overviewº in
the Index for more
information on location.
CAUTION:
Turning the surge tank pressure cap when the
engine and radiator are hot can allow steam and
scalding liquids to blow out and burn you badly.
Never turn the surge tank pressure cap
-- even a
little
-- when the engine and radiator are hot.
The vehicle must be on a level surface. When your
engine is cold, the coolant level should be at the FILL
COLD mark.
If the LOW COOLANT
message comes on and stays
on, it means you're low on
engine coolant.
See ªLow Coolantº in the Index.
Adding Coolant
If you need more coolant, add the proper DEX
-COOL�
coolant mixture at the surge tank, but only when the
engine is cool.
CAUTION:
You can be burned if you spill coolant on hot
engine parts. Coolant contains ethylene glycol,
and it will burn if the engine parts are hot
enough. Don't spill coolant on a hot engine.
When replacing the pressure cap, make sure it
is hand
-tight.
Page 406 of 497

6-41
NOTICE:
�When using concentrated washer fluid,
follow the manufacturer's instructions for
adding water.
�Don't mix water with ready
-to-use washer
fluid. Water can cause the solution to freeze
and damage your washer fluid tank and
other parts of the washer system. Also,
water doesn't clean as well as washer fluid.
�Fill your washer fluid tank only
three
-quarters full when it's very cold. This
allows for expansion if freezing occurs,
which could damage the tank if it is
completely full.
�Don't use engine coolant (antifreeze) in
your windshield washer. It can damage
your washer system and paint.
Brakes
Brake Fluid
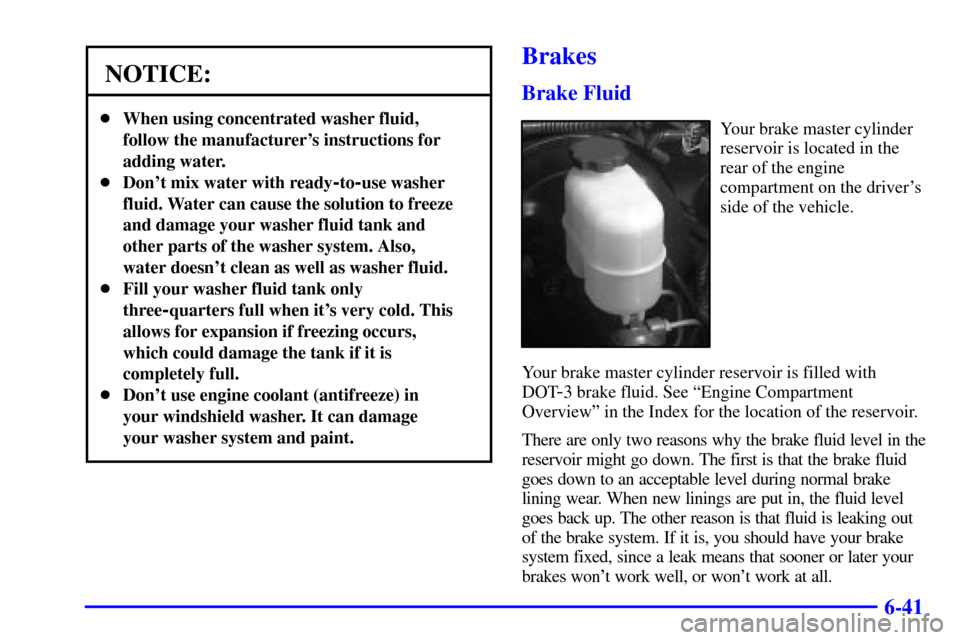
Your brake master cylinder
reservoir is located in the
rear of the engine
compartment on the driver's
side of the vehicle.
Your brake master cylinder reservoir is filled with
DOT
-3 brake fluid. See ªEngine Compartment
Overviewº in the Index for the location of the reservoir.
There are only two reasons why the brake fluid level in the
reservoir might go down. The first is that the brake fluid
goes down to an acceptable level during normal brake
lining wear. When new linings are put in, the fluid level
goes back up. The other reason is that fluid is leaking out
of the brake system. If it is, you should have your brake
system fixed, since a leak means that sooner or later your
brakes won't work well, or won't work at all.
Page 473 of 497

7-18
Part B: Owner Checks and Services
Listed in this part are owner checks and services which
should be performed at the intervals specified to help
ensure the safety, dependability and emission control
performance of your vehicle.
Be sure any necessary repairs are completed at once.
Whenever any fluids or lubricants are added to your
vehicle, make sure they are the proper ones, as shown
in Part D.
At the First 100, 1,000 and 6,000 Miles
(160, 1 600 and 10 000 km)
Check dual wheel nut torque. For proper torque, see
ªWheel Nut Torqueº in the Index.
At Each Fuel Fill
It is important for you or a service station attendant to
perform these underhood checks at each fuel fill.
Engine Oil Level Check
Check the engine oil level and add the proper oil
if necessary. See ªEngine Oilº in the Index for
further details.Engine Coolant Level Check
Check the engine coolant level and add DEX
-COOL�
coolant mixture if necessary. See ªEngine Coolantº in
the Index for further details.
Windshield Washer Fluid Level Check
Check the windshield washer fluid level in the
windshield washer tank and add the proper fluid if
necessary. See ªWindshield Washer Fluidº in the
Index for further details.
At Least Once a Month
Tire Inflation Check
Make sure tires are inflated to the correct pressures.
Don't forget to check your spare tire. See ªTiresº in the
Index for further details.
Cassette Deck Service
Clean cassette deck. Cleaning should be done every
50 hours of tape play. See ªAudio Systemsº in the
Index for further details.