Page 3 of 384
ii
GENERAL MOTORS, GM, the GM Emblem,
CHEVROLET, the CHEVROLET Emblem, the
name CORVETTE and the CORVETTE Emblem are
registered trademarks of General Motors Corporation.
This manual includes the latest information at the time
it was printed. We reserve the right to make changes
after that time without further notice. For vehicles first
sold in Canada, substitute the name ªGeneral Motors
of Canada Limitedº for Chevrolet Motor Division
whenever it appears in this manual.
Please keep this manual in your vehicle, so it will
be there if you ever need it when you're on the road.
If you sell the vehicle, please leave this manual in it
so the new owner can use it.
We support voluntary
technician certification.
For Canadian Owners Who Prefer a
French Language Manual:
Aux propri‡taires canadiens: Vous pouvez vous
procurer un exemplaire de ce guide en fran†ais chez
votre concessionaire ou au:
Helm, Incorporated
P.O. Box 07130
Detroit, MI 48207
Page 41 of 384

1-29 Servicing Your Air Bag-Equipped Vehicle
Air bags affect how your vehicle should be serviced.
There are parts of the air bag system in several places
around your vehicle. You don't want the system to
inflate while someone is working on your vehicle.
Your dealer and the service manual have information
about servicing your vehicle and the air bag system.
To purchase a service manual, see ªService and Owner
Publicationsº in the Index.
CAUTION:
For up to 10 seconds after the ignition key is
turned off and the battery is disconnected,
an air bag can still inflate during improper
service. You can be injured if you are close to an
air bag when it inflates. Avoid yellow wires, wires
wrapped with yellow tape or yellow connectors.
They are probably part of the air bag system.
Be sure to follow proper service procedures,
and make sure the person performing work for
you is qualified to do so.
The air bag system does not need regular maintenance.
Children
Everyone in a vehicle needs protection! This includes
infants and all other children. Neither the distance
traveled nor the age and size of the traveler changes
the need, for everyone, to use safety restraints. In fact,
the law in every state in the United States and in every
Canadian province says children up to some age must be
restrained while in a vehicle.
Infants and Young Children
Every time infants and young children ride in
vehicles, they should have the protection provided by
the appropriate restraint. Young children should not use
the vehicle's safety belts, unless there is no other choice.
Page 66 of 384

2-8
Memory (Option)
MEMORY can store and recall the settings for the
driver's seat position, the outside rearview mirror
positions, telescopic steering column (if equipped),
radio presets, tone, volume, playback mode (AM/FM,
tape or CD), last displayed station, compact disc position
and tape direction and the last climate control setting.The MEMORY buttons are located on the driver's
door, above the power mirror controls. The MEMORY
buttons can store and recall settings for up to three
drivers. Use button 1 to store the settings for the first
driver, button 2 for a second driver or press buttons
1 and 2 at the same time for a third driver. To store
your memory settings:
1. Adjust your settings for the driver's seat position,
outside rearview mirror positions, and telescopic
steering wheel (if equipped).
2. Press and hold a MEMORY button. The light
above the MEMORY button will glow steady for
one second and then flash once when the settings
are complete. Then the light will go off.
3. Set the climate control temperature, fan speed and
mode settings, radio presets, tone, volume, playback
mode (AM/FM, tape or CD), tape direction and
compact disc position.
Your memory settings are now programmed.
Any changes that are made to the audio system and
climate controls while driving will be automatically
stored when the ignition key is turned off.
Page 71 of 384
2-13 Battery Replacement
Under normal use, the battery in your remote keyless
entry transmitter should last about three years.
You can tell the battery is weak if the transmitter won't
work at the normal range in any location. If you have
to get close to your vehicle before the transmitter works,
it's probably time to change the battery.
NOTICE:
When replacing the battery, use care not to
touch any of the circuitry. Static from your
body transferred to these surfaces may damage
the transmitter.
Replacing the Battery in the Remote
Keyless Entry Transmitter
1. Insert a coin or similar object into the slot on the
back of the transmitter and gently pry apart the
front and back.
2. Gently pull the battery out of the transmitter.
3. Put the new battery in the transmitter, positive (+)
side up. Use a battery, type CR2032, or equivalent.
4. Reassemble the transmitter. Make sure to put it
together so water won't get in.
5. Test the transmitter.
Page 83 of 384

2-25
2. If it doesn't start within 10 seconds, push the
accelerator pedal all the way to the floor, while you
hold the ignition key in START. When the engine
starts, let go of the key and let up on the accelerator
pedal. Wait about 15 seconds between each try.
When starting your engine in very cold weather
(below 0�F or
-18�C), do this:
1. With your foot off the accelerator pedal, turn the
ignition key to START and hold it there up to
15 seconds. When the engine starts, let go of
the key.
2. If your engine still won't start (or starts but then
stops), it could be flooded with too much gasoline.
Try pushing your accelerator pedal all the way to the
floor and holding it there as you hold the key in
START for about three seconds. When the engine
starts, let go of the key and accelerator. If the
vehicle starts briefly but then stops again, do the
same thing, but this time keep the pedal down for
five or six seconds. This clears the extra gasoline
from the engine.
NOTICE:
Your engine is designed to work with the
electronics in your vehicle. If you add electrical
parts or accessories, you could change the way
the engine operates. Before adding electrical
equipment, check with your dealer. If you don't,
your engine might not perform properly.
Starter Interlock Feature
For your convenience and to avoid damage to your
starter, your vehicle is equipped with a starter interlock
feature. This feature will not allow you to crank the
engine when the vehicle is already running.
Page 99 of 384

2-41
Selective Real Time Damping (Option)
You may have a ride control system on your vehicle
called Selective Real Time Damping. The system
provides the following performance benefits:
�Reduced Impact Harshness
�Improved Road Isolation
�Improved High
-Speed Stability
�Improved Handling Response
This knob is located on the center console. Turn it to
select the suspension of your choice.TOUR: Use for normal city and highway driving.
This setting provides a smooth, soft ride.
SPORT: Use where road conditions or personal
preference demand more control. This setting provides
more ªfeel,º or response to the road conditions.
PERF (Performance): Use for performance driving.
This setting provides a tight, firm ride and precise
response to road conditions.
You can select a setting at any time. Based on road
conditions, steering wheel angle and your vehicle speed,
the system automatically adjusts to provide the best
ride and handling. Select a new setting whenever driving
conditions change.
There are three Driver Information Center (DIC)
messages that are displayed when a malfunction
occurs with the Selective Real Time Damping system.
Refer to ªDIC Warnings and Messagesº in the Index.
Horn
To sound the horn, press either horn symbol on the
steering wheel.
Page 113 of 384

2-55 Electrochromic Day/Night Inside Rearview
Mirror with Map Lamps (Option)
Your vehicle may have an automatic electrochromic
day/night rearview mirror with map lamps.
This mirror automatically changes to reduce glare from
headlamps behind you. A time delay feature prevents
rapid changing from the day to night positions while
driving under lights and through traffic.
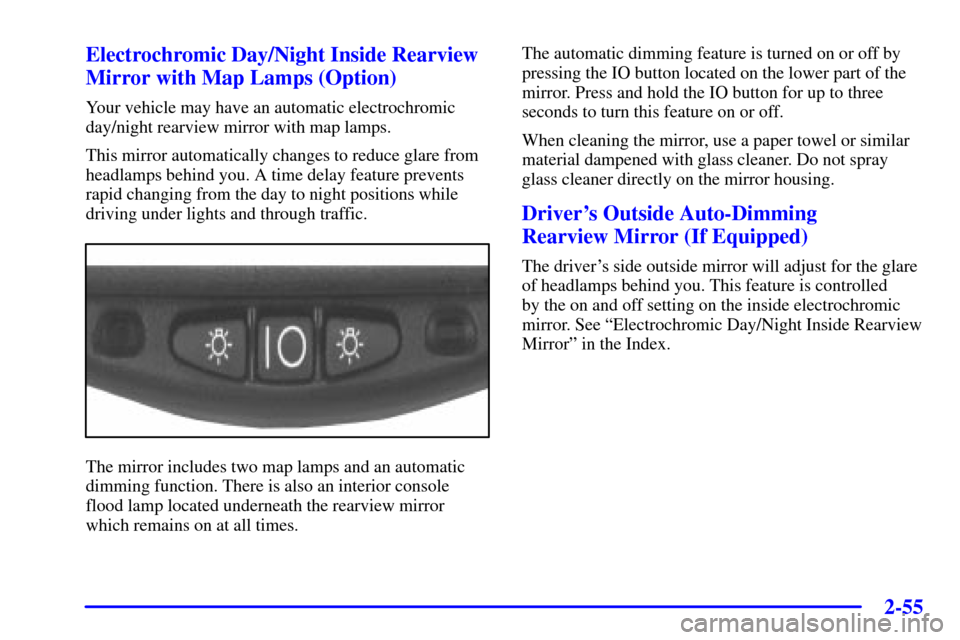
The mirror includes two map lamps and an automatic
dimming function. There is also an interior console
flood lamp located underneath the rearview mirror
which remains on at all times.The automatic dimming feature is turned on or off by
pressing the IO button located on the lower part of the
mirror. Press and hold the IO button for up to three
seconds to turn this feature on or off.
When cleaning the mirror, use a paper towel or similar
material dampened with glass cleaner. Do not spray
glass cleaner directly on the mirror housing.
Driver's Outside Auto-Dimming
Rearview Mirror (If Equipped)
The driver's side outside mirror will adjust for the glare
of headlamps behind you. This feature is controlled
by the on and off setting on the inside electrochromic
mirror. See ªElectrochromic Day/Night Inside Rearview
Mirrorº in the Index.
Page 151 of 384

2-93
Here are five things that some owners ask about.
All these things are normal and do not indicate that
anything is wrong with the fuel gage.
�At the gas station, the gas pump shuts off before
the gage reads F (full).
�It takes more (or less) fuel to fill up than the gage
reads. For example, the gage reads half full, but it
took more (or less) than half of the tank's capacity
to fit it.
�The gage pointer may move while cornering,
braking or speeding up.
�The gage may not indicate E (empty) when the
ignition is turned off.
�The gage reading may change slightly within the
first several minutes after starting the vehicle.You can use the Driver Information Center (DIC) to
display more detailed fuel information. Each time you
press FUEL, one of the following will appear in the
Driver Information Center (DIC).
�AVERAGE: The fuel economy calculated for
the current tank of fuel, or since you last reset
the display.
�INST (Instant): The fuel economy calculated
for your current driving conditions.
�RANGE: The distance you can drive
before refueling.
�BLANK: The fuel gage is displayed alone.
You should reset the fuel information display every
time you refuel. To reset the display, press FUEL
until AVERAGE appears. Then, press RESET on the
Driver Information Center (DIC).