Page 78 of 360

Arming the System
With the ignition off, pressing the transmitter LOCK
button will arm the system immediately after all doors
and trunk are closed. If")
2-17
Content Theft Security System
(If Equipped)
Arming the System
With the ignition off, pressing the transmitter LOCK
button will arm the system immediately after all doors
and trunk are closed. If the transmitter LOCK button is
pressed again within five seconds, the horn will chirp to
confirm that the system had been armed.
Once the system is armed, the THEFT SYSTEM light
on your instrument panel will flash and remain flashing.
This confirms the system is armed and monitoring the
doors and trunk. If the light is on solid, the system is
not properly activated due to either a door or the trunk
being ajar.
If you don't want to arm the system, lock the car
with the lock levers on the doors or with the door
lock switch.
Disarming the System
If the system is armed, pressing the UNLOCK button
on the transmitter will disarm the system. The THEFT
SYSTEM light will stop flashing.
If the system is armed, turning the key to START will
also disarm the system.
If the system is armed and the trunk is opened using the
trunk release button on the transmitter, the system will
temporarily disarm itself and rearm when the trunk has
been closed. This allows the customer to exit the
vehicle, lock the doors using the transmitter, and open
the trunk using the transmitter without having to disarm
and subsequently rearm the system.
How the System Alarm is Activated
If the system is armed, opening any door or trunk,
or using a wrong key to start the vehicle will cause a
pre
-alarm chirp for 10 seconds and then a full alarm
of horn and headlights for two minutes.
If an alarm event has finished and all doors and
trunk are closed, the content theft security system
will re
-arm itself.
Page 79 of 360

2-18 How to Turn Off the System Alarm
If the system alarm is active, it can be deactivated by:
�Pressing the transmitter LOCK or panic button to
turn
-off alarm. The system will also rearm if all
doors and trunk are later closed, or
�pressing the transmitter UNLOCK or trunk button to
turn off the alarm and disarm system, or
�putting the key in the ignition and turning it to
START to turn off the alarm and disarm the system.
How to Detect a Tamper Condition
If you hear three horn chirps when you press the
UNLOCK, LOCK or trunk buttons on your transmitter,
that means the content theft security system alarm was
triggered while you were away.
Your dealer can change the settings to disable the
headlamp flash and horn chirp features. Your dealer can
also change the settings to allow the horn to chirp twice
on the first press of the UNLOCK button. See your
dealer for more information.
Passlock�
Your vehicle is equipped with the Passlock
theft
-deterrent system.
Passlock is a passive theft
-deterrent system. Passlock
enables fuel if the ignition lock cylinder is turned with a
valid key. If a correct key is not used or the ignition lock
cylinder is tampered with, fuel is disabled.
During normal operation, the THEFT SYSTEM light
will go off approximately five seconds after the key
is turned to the RUN ignition position following an
engine start.
If the engine stalls and the THEFT SYSTEM light
flashes, wait until the light stops flashing before trying
to restart the engine. Remember to release the key from
START as soon as the engine starts.
If the engine is running and the THEFT SYSTEM light
comes on, you will be able to restart the engine if you
turn the engine off. However, your Passlock system is
not working properly and must be serviced by your
dealer. Your vehicle is not protected by Passlock at this
time. You may also want to check the fuses (See ªFuses
and Circuit Breakersº in the Index). See your dealer for
service. Also, see ªRoadside Assistanceº in the Index
for more information.
Page 110 of 360

is left on and the ignition is")
2-49 Battery Saver
Your vehicle is equipped with a battery saver feature
designed to protect your vehicle's battery.
When any interior lamp (trunk, reading, dome, etc.)
is left on and the ignition is turned off, the battery
rundown protection system will automatically turn the
lamp off after 20 minutes. This will avoid draining the
battery. This system does not protect against leaving
on the headlamps or parking lamps.
To reactivate the interior lamps, do one of the following:
�The ignition must be turned on, or
�the activated interior lamp must be turned off, then
on, or
�any door must be opened.
The battery rundown protection feature will also be
activated when any door is left open.
Mirrors
Inside Day/Night Rearview Mirror
To reduce glare from lamps behind you, move the lever
toward you to the night position.
Manual Remote Control Mirror
The outside rearview mirror
should be adjusted so you
can see a little of the side of
your vehicle when you are
sitting in a comfortable
driving position.
Adjust the driver's outside mirror with the control lever
on the driver's door.
To adjust your passenger's outside mirror, sit in the
driver's seat and have a passenger adjust the mirror
for you.
The mirror is a spring
-loaded breakaway design.
Page 113 of 360

2-52
Storage Compartments
Center Console Storage Area
To open the center console, pull the lift lever up and the
lid back.
To close the center console, push the lid down until
it clicks.
Center Console Cupholders
There are two cupholders located at the front of the
center console, in front of the shift lever. There are also
cupholders for the rear seat passengers located under the
center console lid. Open the center console lid all the
way to uncover the rear cupholders. There is also a
large, removeable cupholder inside of the center
console lid.
Convenience Net (If Equipped)
Your vehicle may have a convenience net. You'll see it
inside the back wall of the trunk. Put small loads, like
grocery bags, behind the net. It can help keep them from
falling over during sharp turns or quick starts and stops.
Unclip a corner of the convenience net to fit larger
objects behind the net, then reclip it to secure them in
place. The net isn't for larger, heavier loads. Store them
in the trunk as far forward as you can.
You can unhook the net so that it will lie flat when
you're not using it.
Page 118 of 360
2-57
The main components of your instrument panel are the following:
A. Fog Lamp Button (If Equipped)
B. Instrument Panel Brightness Control
C. Turn Signal/Multifunction Lever
D. Instrument Panel Cluster
E. Hazard Warning Flashers Switch
F. Ignition Switch
G. Windshield Wiper/Washer Controls
H. Cigarette Lighter (If Equipped)
I. Audio SystemJ. Climate Controls and Rear Window Defogger
K. Fuse Panel
L. Remote Trunk Release Button
M. Hood Release Lever
N. Tilt Steering Wheel Lever (If Equipped)
O. Parking Brake Lever
P. Accessory Power Outlet
Q. Shift Lever
Page 191 of 360
4-26
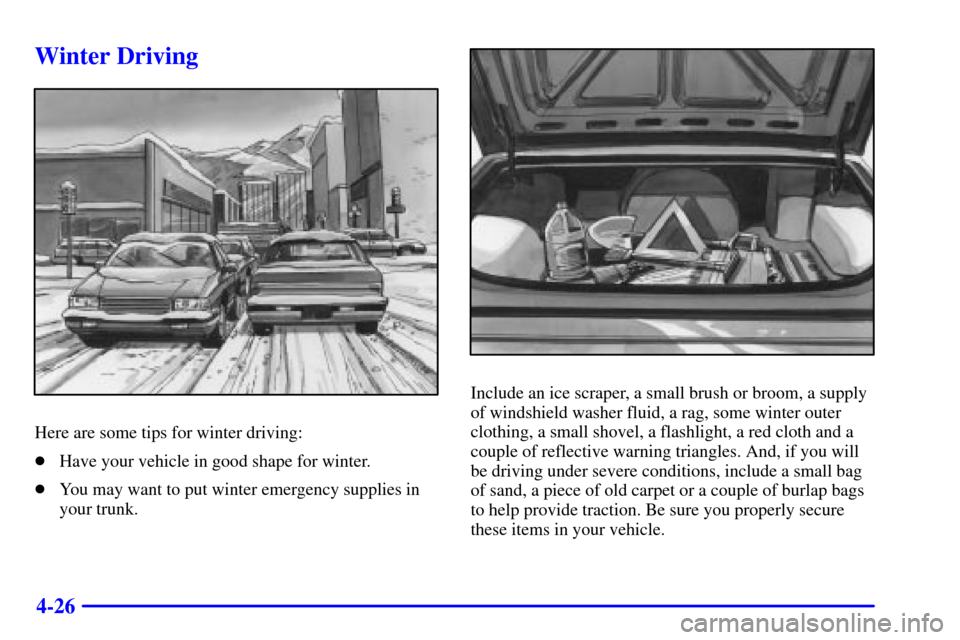
Winter Driving
Here are some tips for winter driving:
�Have your vehicle in good shape for winter.
�You may want to put winter emergency supplies in
your trunk.
Include an ice scraper, a small brush or broom, a supply
of windshield washer fluid, a rag, some winter outer
clothing, a small shovel, a flashlight, a red cloth and a
couple of reflective warning triangles. And, if you will
be driving under severe conditions, include a small bag
of sand, a piece of old carpet or a couple of burlap bags
to help provide traction. Be sure you properly secure
these items in your vehicle.
Page 199 of 360
 in
your trunk.
CAUTION:
Do not load your vehicle any heavier than the
GVWR, or either the maxi")
4-34
And, if you do have a heavy load, you should spread
it out. Don't carry more than 132 lbs. (60 kg) in
your trunk.
CAUTION:
Do not load your vehicle any heavier than the
GVWR, or either the maximum front or rear
GAWR. If you do, parts on your vehicle can
break, and it can change the way your vehicle
handles. These could cause you to lose control
and crash. Also, overloading can shorten the life
of your vehicle.
If you put things inside your vehicle -- like suitcases,
tools, packages, or anything else
-- they will go as fast
as the vehicle goes. If you have to stop or turn quickly,
or if there is a crash, they'll keep going.
CAUTION:
Things you put inside your vehicle can strike
and injure people in a sudden stop or turn,
or in a crash.
�Put things in the trunk or rear area of your
vehicle. In a trunk, put them as far forward
as you can. Try to spread the weight evenly.
If you have fold
-down rear seats, you'll find
four anchors on the back wall of your trunk.
You can use these anchors to tie down lighter
loads. They're not strong enough for heavy
things, however, so put them as far forward
as you can in the trunk or rear area.
�Never stack heavier things, like suitcases,
inside the vehicle so that some of them are
above the tops of the seats.
�Don't leave an unsecured child restraint in
your vehicle.
�When you carry something inside the
vehicle, secure it whenever you can.
�Don't leave a seat folded down unless you
need to.
Page 229 of 360
5-22 Removing the Spare Tire and Tools
The equipment you'll need
is located in the trunk.
1. Turn the center retainer nut on the compact spare
cover counterclockwise to remove it.
2. Lift and remove the cover. See ªCompact Spare
Tireº later in this section for more information about
the compact spare tire.

B. Instrument Panel Brightness Control
C. Turn Signal/Multifunction Lever
D. Instrument Panel Clus")