Page 109 of 399

2-52 Illuminated Entry
The illuminated entry system turns on the courtesy
lamps and the backlighting to the door switches and to
the exterior lamp control when a door is opened or if
you press the remote keyless entry transmitter unlock
button. If activated due to the transmitter, the lighting
will remain active for about 40 seconds. Since the
illuminated entry system uses the light sensor, it must be
dark outside in order for the courtesy lamps to turn on.
The courtesy lamps turn off approximately 25 seconds
after the last door is closed. They will dim to off if the
ignition key is placed in ON, or immediately deactivate
if the power locks are activated.
Parade Dimming
This feature prohibits dimming of the digital displays
and backlighting during daylight hours when the key is
in the ignition and the headlamps are on. This feature
operates with the light sensor for the Twilight Sentinel
and is fully automatic. When the light sensor reads
darkness outside and the parking lamps are active,
the digital displays can be adjusted by turning the
instrument panel brightness knob counterclockwise
to dim and clockwise to brighten lighting.
Reading Lamps
The front reading lamps are located in the overhead
console. These lamps and the interior courtesy lamps
come on when a door is opened and it is dark outside.
The rear reading lamps will not come on when a front
door is opened.
The rear courtesy lamps are located on the rear headliner
above the rear seat outboard positions. When a rear door
is opened, both the front and rear reading lamps come
on with the courtesy lamps.
Press the button near each lamp to turn it on and off.
If the reading lamps are left on, they automatically shut
off 10 minutes after the ignition has been turned off.
Battery Load Management
The battery load management feature is designed to
monitor the vehicle's electrical load and determine
when the battery is in a heavy discharge condition.
During times of high electrical loading, the engine
may idle at a higher revolutions per minute (rpm)
setting than normal to make sure the battery charges.
High electrical loads may occur when several of the
following are on: headlamps, high beams, fog lamps,
rear window defogger, the climate control fan at high
speeds, heated seats and engine cooling fans.
Page 173 of 399

3-
3-1
Section 3 Comfort Controls and Audio Systems
In this section, you'll find out how to operate the comfort control and audio systems offered with your vehicle.
Be sure to read about the particular systems supplied with your vehicle.
3
-2 Comfort Controls
3
-2 Climate Control Panel
3
-6 Air Conditioning
3
-6 Heating
3
-6 Defogging and Defrosting
3
-7 Rear Window Defogger
3
-8 Ventilation System
3
-10 HVAC Steering Wheel Controls
3
-10 Climate Control Personalization (If Equipped)
3
-12 Audio Systems
3
-12 Setting the Clock
3
-12 AM-FM Stereo with Cassette Tape and
Compact Disc Player
3
-17 AM-FM Stereo with Cassette Tape and
Compact Disc Player with Radio Data
Systems (RDS), Digital Signal
Processing (DSP) and XM� Satellite
Radio Service (If Equipped)3
-27 Navigation/Radio System (Option)
3
-28 Console-Mounted CD Changer (Option)
3
-30 Radio Personalization with Home and
Away Feature (If Equipped)
3
-31 Theft-Deterrent Feature
3
-31 Audio Steering Wheel Controls
3
-32 Understanding Radio Reception
3
-33 Tips About Your Audio System
3
-34 Care of Your Cassette Tape Player
3
-35 Care of Your Compact Discs
3
-35 Care of Your Compact Disc Player
3
-36 Diversity Antenna System
3
-36 XM Satellite Radio Antenna (If Equipped)
Page 174 of 399

3-2
Comfort Controls
This section tells you how to make your air system work
for you.
Climate Control Panel
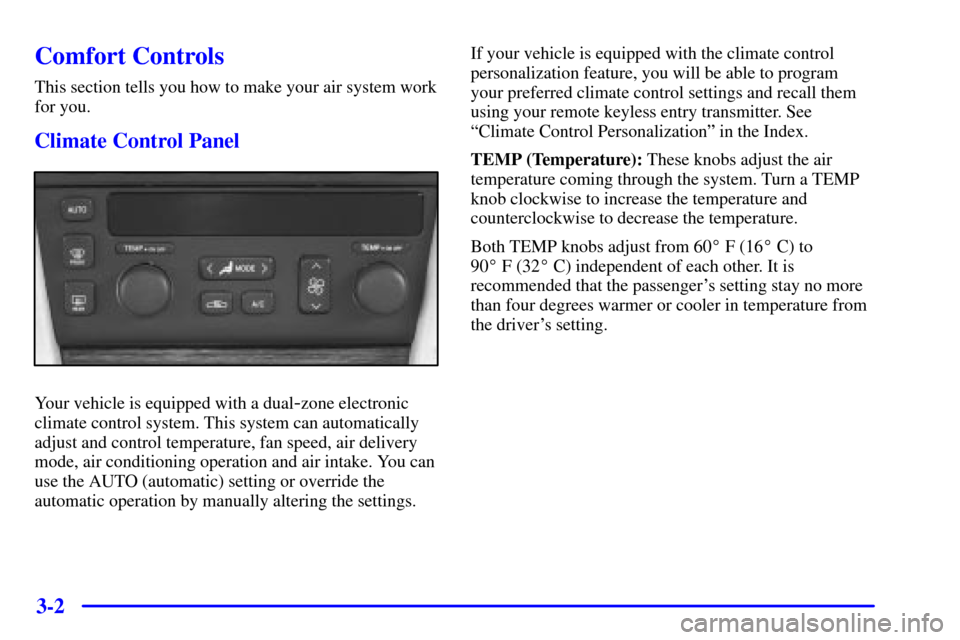
Your vehicle is equipped with a dual-zone electronic
climate control system. This system can automatically
adjust and control temperature, fan speed, air delivery
mode, air conditioning operation and air intake. You can
use the AUTO (automatic) setting or override the
automatic operation by manually altering the settings.If your vehicle is equipped with the climate control
personalization feature, you will be able to program
your preferred climate control settings and recall them
using your remote keyless entry transmitter. See
ªClimate Control Personalizationº in the Index.
TEMP (Temperature): These knobs adjust the air
temperature coming through the system. Turn a TEMP
knob clockwise to increase the temperature and
counterclockwise to decrease the temperature.
Both TEMP knobs adjust from 60� F (16� C) to
90� F (32� C) independent of each other. It is
recommended that the passenger's setting stay no more
than four degrees warmer or cooler in temperature from
the driver's setting.
Page 184 of 399

3-12
Audio Systems
Your audio system has been designed to operate easily
and give years of listening pleasure. You will get the
most enjoyment out of it if you acquaint yourself with it
first. Find out what your audio system can do and how
to operate all of its controls to be sure you're getting the
most out of the advanced engineering that went into it.
Your vehicle has a feature called Retained Accessory
Power (RAP). With RAP, you can play your audio
system even after the ignition is turned off. See
ªRetained Accessory Powerº in the Index.
Setting the Clock
Press and hold HR or MN until the time display begins
to change. Release the button as you get close to the
correct time. The time may be set anytime the clock is
displayed. There is a two
-second delay before the clock
goes into time
-set mode.
AM-FM Stereo with Cassette Tape and
Compact Disc Player
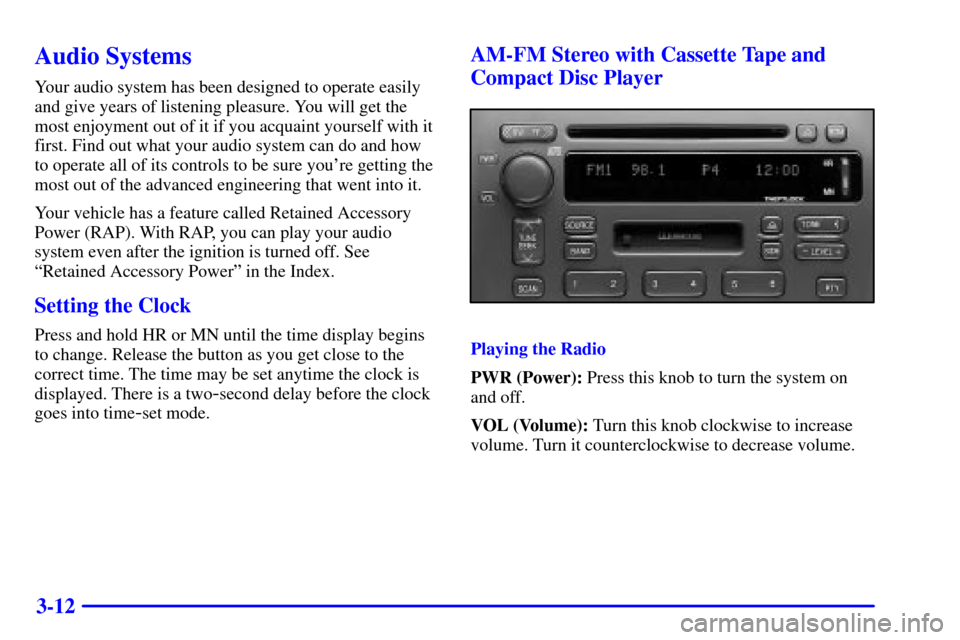
Playing the Radio
PWR (Power): Press this knob to turn the system on
and off.
VOL (Volume): Turn this knob clockwise to increase
volume. Turn it counterclockwise to decrease volume.
Page 202 of 399

3-30 Radio Personalization with Home and Away
Feature (If Equipped)
If DRIVER 1 (HOME or AWAY) PRESETS or
DRIVER 2 (HOME or AWAY) PRESETS appears in
the display when the radio is first turned on, your
vehicle is equipped with this feature.
This feature allows the driver to return to the last used
audio source (radio, cassette or CD) using their remote
keyless entry transmitter. This feature can also store
and recall AM and FM presets, volume, tone and the
last selected radio station. The number on the back of
each transmitter (1 or 2) corresponds to driver 1 or 2.
If transmitter 1 is used to enter the vehicle, the last
used audio source and/or settings set by driver 1 will be
recalled. If transmitter 2 is used to enter the vehicle, the
last used audio source and/or settings set by driver 2 will
be recalled. The settings can also be recalled by pressing
the MEMORY seat buttons 1 or 2 located on the
driver's door.Your radio can store home and away presets. Home and
away presets allow you to use one set of preset radio
settings in the area where you live, and another set when
you go out of town. That way, you will not need to
reprogram your presets every time you travel. With the
radio off and the clock displayed, use fast forward and
reverse to select home or away presets. To select the
away presets, press and hold FF for five seconds until
you hear a beep. The next time the radio comes on, the
away presets will be active. To select the home presets,
press and hold RW or REV for five seconds until you
hear a beep. The next time the radio comes on, the home
presets will be active.
When battery power is removed and later applied, you
will not have to reset your home radio presets because
the radio remembers them. However, you will have to
reset your away radio presets.