Page 94 of 399
2-37
CAUTION:
It can be dangerous to get out of your vehicle if
the shift lever is not fully in PARK (P) with the
parking brake firmly set. Your vehicle can roll.
Don't leave your vehicle when the engine is
running unless you have to. If you've left the
engine running, the vehicle can move suddenly.
You or others could be injured. To be sure your
vehicle won't move, even when you're on fairly
level ground, always set your parking brake after
you move the shift lever to PARK (P).
Follow the proper steps to be sure your vehicle won't
move. See ªShifting Into PARK (P)º in the Index.
If you are parking on a hill and if you're pulling a
trailer, also see ªTowing a Trailerº in the Index.
Horn
The horn can be sounded by pressing on the center
of the steering wheel pad.
Tilt Wheel
A tilt wheel allows you to adjust the steering wheel
before you drive. You can raise the steering wheel to
the highest level to give your legs more room when
you enter and exit the vehicle.
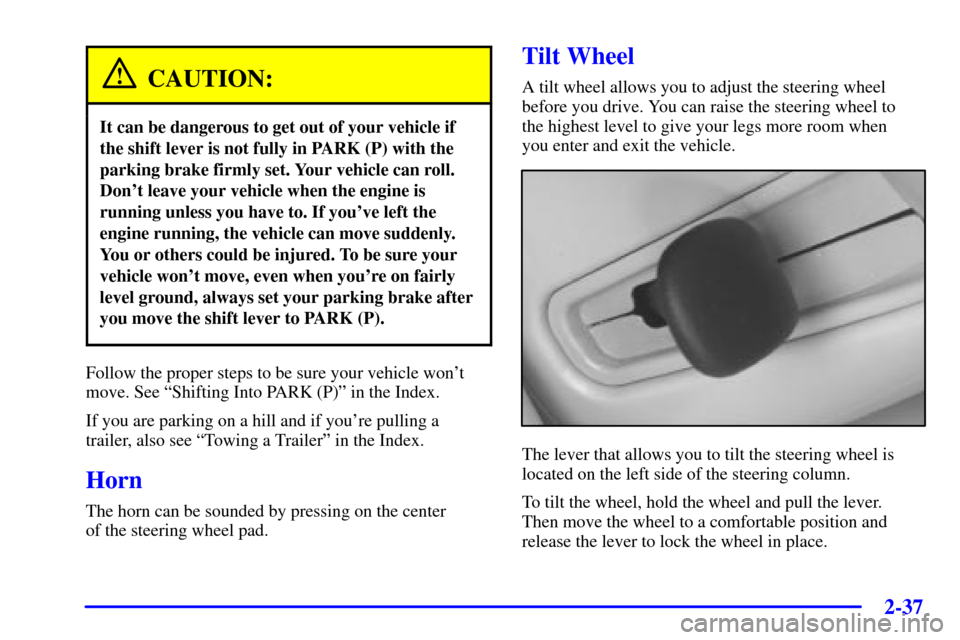
The lever that allows you to tilt the steering wheel is
located on the left side of the steering column.
To tilt the wheel, hold the wheel and pull the lever.
Then move the wheel to a comfortable position and
release the lever to lock the wheel in place.
Page 104 of 399

2-47
: Turning the control to this position turns on
the parking lamps together with the following:
�Sidemarker Lamps
�Taillamps
�License Plate Lamps
�Instrument Panel Lights
The parking brake indicator light will come on and stay
on when the parking lamps are on with the engine off
and the ignition in ACC or ON.
: Turning the control to this position turns on the
headlamps, together with the previously listed lamps
and lights.
Your vehicle may be equipped with High Intensity
Discharge (HID) headlamps. These headlamps come
on at a lower intensity and gradually increase to
full brightness.Wiper
-Activated Headlamps
This feature activates the headlamps and parking
lamps after the windshield wipers have been in use for
approximately six seconds. To operate, the Twilight
Sentinel
� feature must be turned on. See ªTwilight
Sentinelº in the Index for more information.
When the exterior lamp control is in the off or in the
parking lamp position and the wiper control is on INT,
LO or HI, the HEADLAMPS SUGGESTED message
will appear on the Driver Information Center (DIC).
When the ignition is turned to OFF, the wiper
-activated
headlamps will immediately turn off. The wiper
-activated
headlamps will also turn off if the Twilight Sentinel or
the windshield wipers are turned off.
Lamps On Reminder
A warning chime will sound if the exterior lamp
control is left on in either the headlamp or parking
lamp position and the driver's door is opened with the
ignition off.
Page 135 of 399
2-78 Brake System Warning and Parking Brake
Indicator Light
Your vehicle's hydraulic brake system is divided into
two parts. If one part isn't working, the other part can
still work and stop you. For good braking, though,
you need both parts working well.
If the warning light comes on, there is a brake problem.
Have your brake system inspected right away.
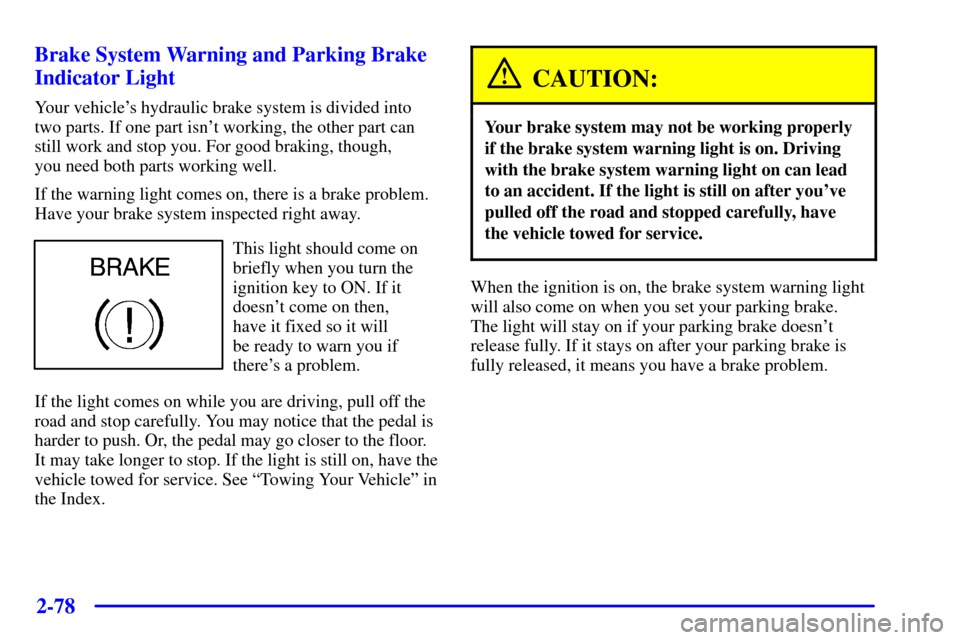
This light should come on
briefly when you turn the
ignition key to ON. If it
doesn't come on then,
have it fixed so it will
be ready to warn you if
there's a problem.
If the light comes on while you are driving, pull off the
road and stop carefully. You may notice that the pedal is
harder to push. Or, the pedal may go closer to the floor.
It may take longer to stop. If the light is still on, have the
vehicle towed for service. See ªTowing Your Vehicleº in
the Index.
CAUTION:
Your brake system may not be working properly
if the brake system warning light is on. Driving
with the brake system warning light on can lead
to an accident. If the light is still on after you've
pulled off the road and stopped carefully, have
the vehicle towed for service.
When the ignition is on, the brake system warning light
will also come on when you set your parking brake.
The light will stay on if your parking brake doesn't
release fully. If it stays on after your parking brake is
fully released, it means you have a brake problem.
Page 239 of 399
4-31 Dinghy Towing
NOTICE:
Towing your vehicle with all four wheels on the
ground will damage drivetrain components.
Your vehicle was not designed to be towed with all four
wheels on the ground. If your vehicle must be towed,
you should use a dolly. See ªDolly Towingº later in this
section for more information.
Dolly Towing
Your vehicle can be towed using a dolly. To tow your
vehicle using a dolly, follow these steps:
1. Put the front wheels on the dolly.
2. Put the vehicle in PARK (P).
3. Set the parking brake and then remove the key.
4. Clamp the steering wheel in a
straight
-ahead position.
5. Release the parking brake.
Page 248 of 399

4-40 Driving On Grades
Reduce speed and shift to a lower gear before you start
down a long or steep downgrade. If you don't shift
down, you might have to use your brakes so much that
they would get hot and no longer work well.
On long uphill grades, reduce speed to 45 to 50 mph
(70 to 90 km/h) and avoid prolonged use of
SECOND (2) gear and engine speeds above 3800 rpm.
Climbing grades steeper than four percent at
temperatures above 90�F (32�C) with a loaded
vehicle and trailer is not recommended. The cooling
system may temporarily overheat. See ªEngine
Overheatingº in the Index.
Parking on Hills
CAUTION:
You really should not park your vehicle, with a
trailer attached, on a hill. If something goes
wrong, your rig could start to move. People can
be injured, and both your vehicle and the trailer
can be damaged.
But if you ever have to park your rig on a hill, here's
how to do it:
1. Apply your regular brakes, but do not shift
into PARK (P).
2. Have someone place chocks behind the
trailer wheels.
3. When the wheel chocks are in place, release the
regular brakes until the chocks absorb the load.
4. Reapply the regular brakes. Then shift into
PARK (P) firmly and apply your parking brake.
5. Release the regular brakes.
Page 249 of 399
4-41 When You Are Ready to Leave After
Parking on a Hill
1. Apply your regular brakes and hold the pedal down
while you:
�start your engine,
�shift into a gear, and
�make sure the parking brake has released.
2. Let up on the brake pedal.
3. Drive slowly until the trailer is clear of the chocks.
4. Stop and have someone pick up and store the chocks.
Maintenance When Trailer Towing
Your vehicle will need service more often when you're
pulling a trailer. See the Maintenance Schedule for more
on this. Things that are especially important in trailer
operation are automatic transaxle fluid (don't overfill),
engine oil, drive belt, cooling system and brake system.
Each of these is covered in this manual, and the Index
will help you find them quickly. If you're trailering, it's
a good idea to review this information before you start
your trip.
Check periodically to see that all hitch nuts and bolts
are tight.
Engine Cooling When Trailer Towing
Your cooling system may temporarily overheat during
severe operating conditions. See ªEngine Overheatingº
in the Index.
Page 253 of 399
5-4
1. Check the other vehicle. It must have a 12-volt
battery with a negative ground system.
NOTICE:
If the other system isn't a 12-volt system with a
negative ground, both vehicles can be damaged.
2. Get the vehicles close enough so the jumper cables
can reach, but be sure the vehicles aren't touching
each other. If they are, it could cause a ground
connection you don't want. You wouldn't be able to
start your vehicle and the bad grounding could
damage the electrical systems.
To avoid the possibility of the vehicles rolling, set
the parking brake firmly on both vehicles involved in
the jump start procedure. Put an automatic transaxle
in PARK (P) or a manual transaxle in NEUTRAL
before setting the parking brake.
NOTICE:
If you leave your radio on, it could be badly
damaged. The repairs wouldn't be covered by
your warranty.
3. Turn off the ignition on both vehicles. Unplug
unnecessary accessories plugged into the cigarette
lighter or in the accessory power outlets. Turn off the
radio and all lamps that aren't needed. This will
avoid sparks and help save both batteries. And it
could save your radio!
4. Open the hoods and locate the positive (+) and
negative (
-) terminal locations on the other vehicle.
Your vehicle has a remote (+) jump starting terminal
and a remote negative (
-) jump starting terminal.
You should always use these remote terminals
instead of the terminals on the battery.
Page 269 of 399
5-20
If a Tire Goes Flat
It's unusual for a tire to ªblow outº while you're driving,
especially if you maintain your tires properly. If air goes
out of a tire, it's much more likely to leak out slowly.
But if you should ever have a ªblowout,º here are a few
tips about what to expect and what to do:
If a front tire fails, the flat tire will create a drag that
pulls the vehicle toward that side. Take your foot off the
accelerator pedal and grip the steering wheel firmly.
Steer to maintain lane position, and then gently brake to
a stop well out of the traffic lane.
A rear blowout, particularly on a curve, acts much like a
skid and may require the same correction you'd use in a
skid. In any rear blowout, remove your foot from the
accelerator pedal. Get the vehicle under control by
steering the way you want the vehicle to go. It may be
very bumpy and noisy, but you can still steer. Gently
brake to a stop
-- well off the road if possible.
If a tire goes flat, the next part shows how to use your
jacking equipment to change a flat tire safely.
Changing a Flat Tire
If a tire goes flat, avoid further tire and wheel damage
by driving slowly to a level place. Turn on your hazard
warning flashers.
CAUTION:
Changing a tire can cause an injury. The vehicle
can slip off the jack and roll over you or other
people. You and they could be badly injured.
Find a level place to change your tire. To help
prevent the vehicle from moving:
1. Put the shift lever in PARK (P).
2. Set the parking brake firmly.
3. Turn off the engine.
To be even more certain the vehicle won't move,
you can put blocks at the front and rear of the
tire farthest away from the one being changed.
That would be the tire on the other side of the
vehicle, at the opposite end.