Page 92 of 368

2-28 To Use the Engine Coolant Heater
1. Turn off the engine.
2. Open the hood and unwrap the electrical cord.
The cord is attached to the underside of the
vehicle's diagonal brace, which is located above
the engine air cleaner/filter assembly.
3. Plug it into a normal, grounded 110
-volt AC outlet.
CAUTION:
Plugging the cord into an ungrounded outlet
could cause an electrical shock. Also, the wrong
kind of extension cord could overheat and cause
a fire. You could be seriously injured. Plug the
cord into a properly grounded three
-prong
11 0
-volt AC outlet. If the cord won't reach,
use a heavy
-duty three-prong extension cord
rated for at least 15 amps.
4. Before starting the engine, be sure to unplug
and store the cord as it was before to keep it
away from moving engine parts. If you don't,
it could be damaged.
How long should you keep the coolant heater plugged
in? The answer depends on the outside temperature, the
kind of oil you have, and some other things. Instead of
trying to list everything here, we ask that you contact
your dealer in the area where you'll be parking your
vehicle. The dealer can give you the best advice for
that particular area.
Automatic Transaxle Operation
Your automatic transaxle
has a shift lever on the
console between the seats.
Page 150 of 368

3-2
Comfort Controls
Dual ComforTemp� Climate Control
With this system, the driver and passenger can maintain
separate temperatures in their seating areas. The system
works best if you keep your windows closed while using it.
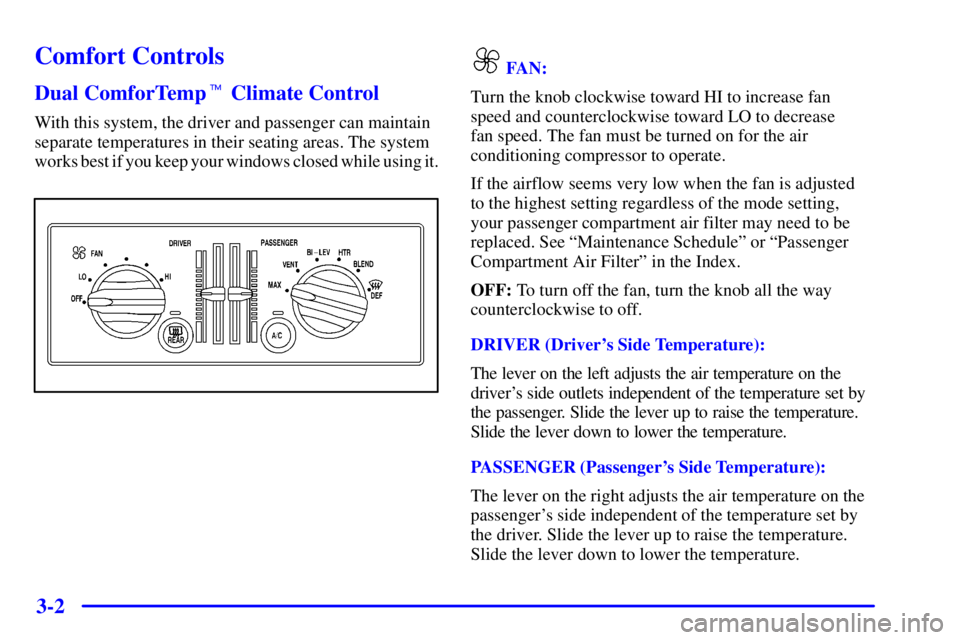
FAN:
Turn the knob clockwise toward HI to increase fan
speed and counterclockwise toward LO to decrease
fan speed. The fan must be turned on for the air
conditioning compressor to operate.
If the airflow seems very low when the fan is adjusted
to the highest setting regardless of the mode setting,
your passenger compartment air filter may need to be
replaced. See ªMaintenance Scheduleº or ªPassenger
Compartment Air Filterº in the Index.
OFF: To turn off the fan, turn the knob all the way
counterclockwise to off.
DRIVER (Driver's Side Temperature):
The lever on the left adjusts the air temperature on the
driver's side outlets independent of the temperature set by
the passenger. Slide the lever up to raise the temperature.
Slide the lever down to lower the temperature.
PASSENGER (Passenger's Side Temperature):
The lever on the right adjusts the air temperature on the
passenger's side independent of the temperature set by
the driver. Slide the lever up to raise the temperature.
Slide the lever down to lower the temperature.
Page 157 of 368

3-9 Ventilation System
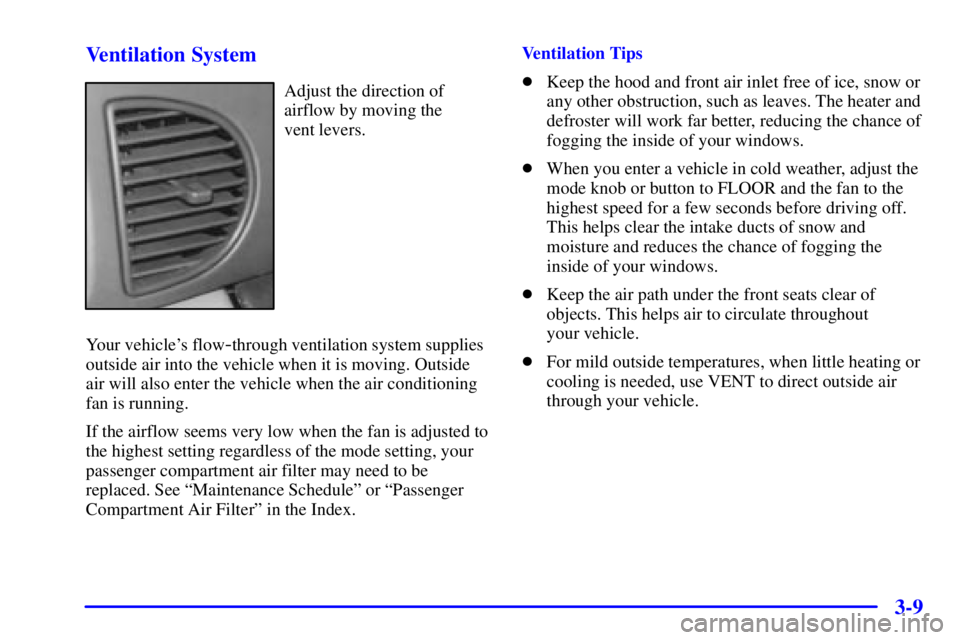
Adjust the direction of
airflow by moving the
vent levers.
Your vehicle's flow
-through ventilation system supplies
outside air into the vehicle when it is moving. Outside
air will also enter the vehicle when the air conditioning
fan is running.
If the airflow seems very low when the fan is adjusted to
the highest setting regardless of the mode setting, your
passenger compartment air filter may need to be
replaced. See ªMaintenance Scheduleº or ªPassenger
Compartment Air Filterº in the Index.Ventilation Tips
�Keep the hood and front air inlet free of ice, snow or
any other obstruction, such as leaves. The heater and
defroster will work far better, reducing the chance of
fogging the inside of your windows.
�When you enter a vehicle in cold weather, adjust the
mode knob or button to FLOOR and the fan to the
highest speed for a few seconds before driving off.
This helps clear the intake ducts of snow and
moisture and reduces the chance of fogging the
inside of your windows.
�Keep the air path under the front seats clear of
objects. This helps air to circulate throughout
your vehicle.
�For mild outside temperatures, when little heating or
cooling is needed, use VENT to direct outside air
through your vehicle.
Page 255 of 368

6-
6-1
Section 6 Service and Appearance Care
Here you will find information about the care of your vehicle. This section begins with service and fuel information,
and then it shows how to check important fluid and lubricant levels. There is also technical information about your
vehicle, and a part devoted to its appearance care.
6
-2 Service
6
-3 Fuel
6
-5 Fuels in Foreign Countries
6
-6 Filling Your Tank
6
-8 Filling a Portable Fuel Container
6
-8 Checking Things Under the Hood
6
-12 Engine Oil
6
-18 Engine Air Cleaner/Filter
6
-19 Passenger Compartment Air Filter
6
-20 Supercharger Oil
6
-21 Automatic Transaxle Fluid
6
-25 Engine Coolant
6
-29 Power Steering Fluid
6
-30 Windshield Washer Fluid
6
-31 Brakes
6
-35 Battery
6
-36 Bulb Replacement
6
-43 Windshield Wiper Blade Replacement6
-44 Tires
6
-55 Appearance Care
6
-55 Cleaning the Inside of Your Vehicle
6
-58 Cleaning Glass Surfaces
6
-59 Cleaning the Outside of the Windshield and
Wiper Blades
6
-59 Cleaning the Outside of Your Vehicle
6
-61 Cleaning Aluminum or Chrome-Plated
Wheels (If Equipped)
6
-61 Cleaning Tires
6
-63 GM Vehicle Care/Appearance Materials
6
-64 Vehicle Identification Number (VIN)
6
-65 Electrical System
6
-71 Replacement Bulbs
6
-72 Capacities and Specifications
6
-72 Air Conditioning Refrigerant Capacity
6
-72 Normal Maintenance Replacement Parts
Page 264 of 368
6-10 Engine Compartment Overview
When you open the hood on the 3800 V6 engine, you'll see:
A. Windshield Washer
Fluid Reservoir
B. Battery
C. Remote Positive (+)
Battery Terminal
D. Underhood Fuse BlockE. Radiator Pressure Cap
F. Engine Coolant Recovery Tank
G. Power Steering Fluid Reservoir
(Below Generator)
H. Engine Oil DipstickI. Engine Oil Fill Cap
J. Automatic Transaxle
Fluid Dipstick
K. Brake Fluid Reservoir
L. Engine Air Cleaner/Filter
Page 265 of 368
6-11
When you open the hood on the 3800 V6 Supercharged engine, you'll see:
A. Windshield Washer
Fluid Reservoir
B. Battery
C. Remote Positive (+)
Battery Terminal
D. Underhood Electrical CenterE. Radiator Pressure Cap
F. Engine Coolant Recovery Tank
G. Power Steering Fluid Reservoir
(Below Generator)
H. Engine Oil DipstickI. Engine Oil Fill Cap
J. Automatic Transaxle
Fluid Dipstick
K. Brake Fluid Reservoir
L. Engine Air Cleaner/Filter
Page 272 of 368

6-18
Engine Air Cleaner/Filter
The engine air cleaner/filter is located underneath a
diagonal brace in the engine compartment on the
driver's side of the vehicle. See ªEngine Compartment
Overviewº in the Index for more information
on location.
To check or replace the engine air cleaner/filter,
do the following:
1. Loosen the wing nut on the air duct.
2. Lift up on the two clips
located on the top of
the filter assembly.3. Then disconnect the duct and reposition it while
removing the side cover.
4. Pull out the filter.
5. Replace the filter if needed.
6. Be sure to reinstall the filter and install the cover
tightly when you are finished.
Refer to the Maintenance Schedule to determine when to
replace the air filter.
See ªScheduled Maintenance Servicesº in the Index.
CAUTION:
Operating the engine with the air cleaner/filter
off can cause you or others to be burned. The air
cleaner not only cleans the air, it stops flame if
the engine backfires. If it isn't there, and the
engine backfires, you could be burned.
Don't drive with it off, and be careful working
on the engine with the air cleaner/filter off.
Page 273 of 368

6-19
NOTICE:
If the air cleaner/filter is off, a backfire can
cause a damaging engine fire. And, dirt can
easily get into your engine, which will damage it.
Always have the air cleaner/filter in place when
you're driving.
Passenger Compartment Air Filter
The passenger compartment air filter is located
underneath your hood below the windshield wiper
arm, on the passenger's side (below the air inlet grille)
of the vehicle.
The filter traps most of the pollen from the air entering
the air conditioning module. Like your engine's air
cleaner/filter, it may need to be changed periodically.
For information on how often to change the passenger
compartment air filter, see ªMaintenance Scheduleº in
the Index.To change the passenger compartment air filter, use the
following steps:
1. Turn off the ignition when the windshield wipers are
in the up position.
2. Raise the hood.
3. Disconnect the windshield washer pump hose from
the fender rail and air inlet grille.
4. Remove the hood weatherstrip from the passenger's
side of the vehicle (peel back halfway to center).
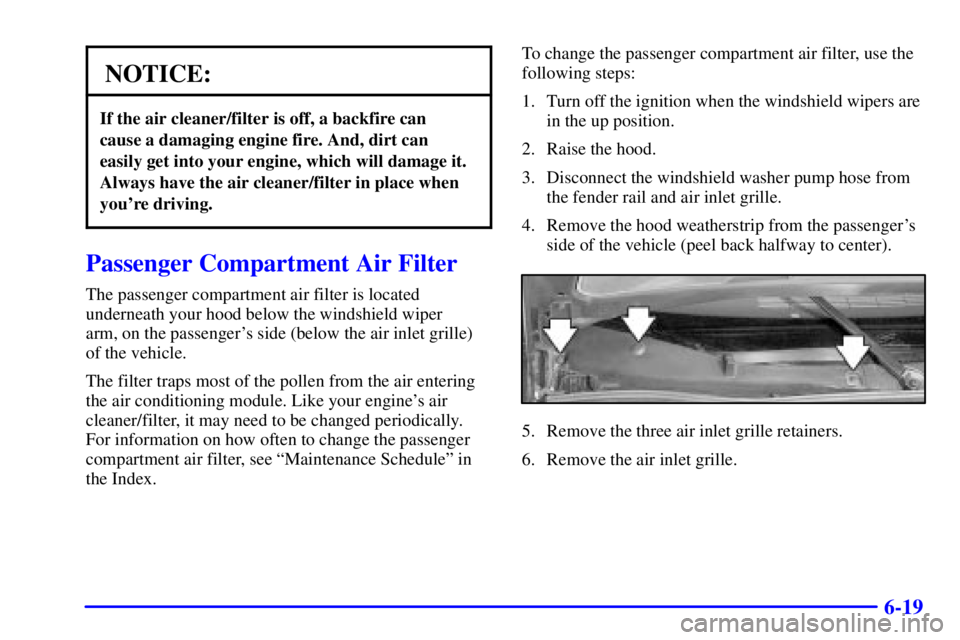
5. Remove the three air inlet grille retainers.
6. Remove the air inlet grille.