Page 68 of 395

2-5
The master key is used for
the ignition, as well as the
driver's door lock, trunk
and glove box.
The VALET key is used for
the ignition and the driver's
door only. It will not open
the trunk or glove box. This
is a theft
-deterrent feature.
The VALET key should
always be used when valet
parking your vehicle.Your vehicle has the PASS
-Key� III vehicle theft
system. Both the master and VALET key have a
transponder in the key head that matches a decoder in
the vehicle's steering column. If a replacement key or
any additional key is needed, you must purchase this key
from your dealer. The key will have PK3 stamped on it.
Keep the bar code tag that came with the original keys.
Give this tag to your dealer if you need a new key made.
Any new PASS
-Key III key must be programmed before
it will start your vehicle. See ªPASS
-Key� IIIº in the Index
for more information on programming your new key.
If your vehicle is equipped with the OnStar
� System
with an active subscription and you lock your keys
inside the vehicle, OnStar may be able to send a
command to unlock your vehicle. See ªOnStar
�
Systemº in the Index for more information.
NOTICE:
Your vehicle has a number of features that can help
prevent theft. But you can have a lot of trouble
getting into your vehicle if you ever lock your keys
inside. You may even have to damage your vehicle
to get in. So be sure you have extra keys.
Page 80 of 395

2-17 Trunk Lock Release
To unlock the trunk from the outside, insert the master
key and turn it.
Remote Trunk Release
Press the TRUNK button located to the left of the
steering column to release the trunk lid.
The trunk will open if the transaxle is in PARK (P) or
NEUTRAL (N) and the trunk release lockout is in the
unlocked position.
The remote keyless entry system will also unlock your
trunk if the ignition is off, or if the ignition is on and the
transaxle is in PARK (P).
Remote Trunk Release Lockout
The remote trunk release lockout button allows you to
secure items in the trunk.
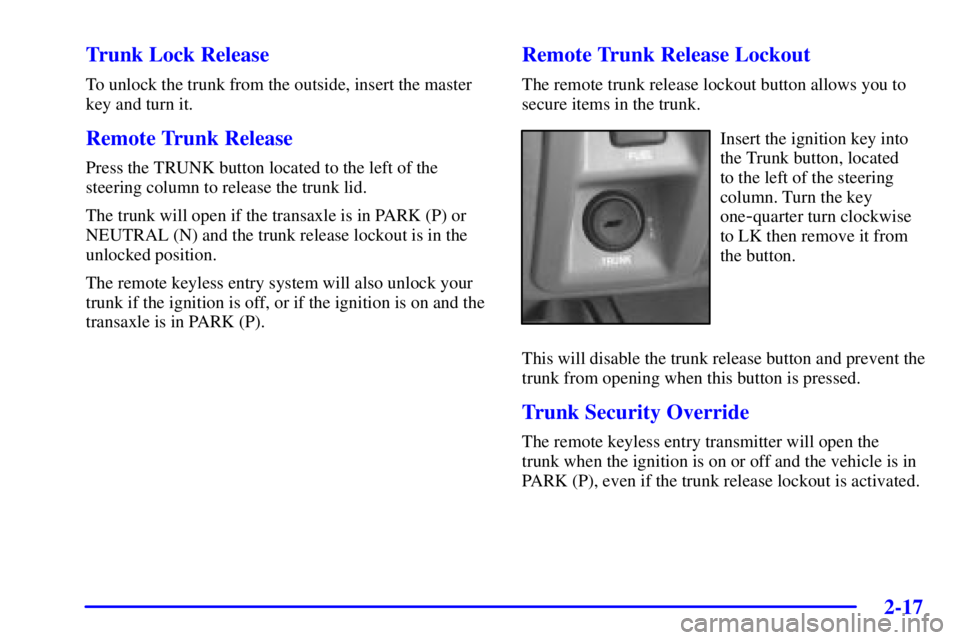
Insert the ignition key into
the Trunk button, located
to the left of the steering
column. Turn the key
one
-quarter turn clockwise
to LK then remove it from
the button.
This will disable the trunk release button and prevent the
trunk from opening when this button is pressed.
Trunk Security Override
The remote keyless entry transmitter will open the
trunk when the ignition is on or off and the vehicle is in
PARK (P), even if the trunk release lockout is activated.
Page 91 of 395

2-28
Automatic Transaxle Operation
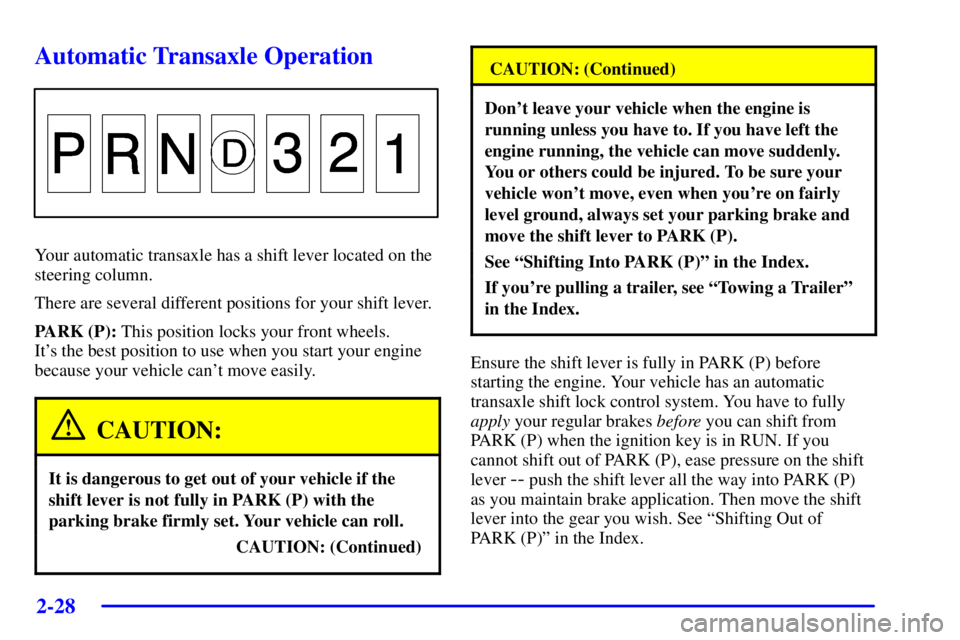
Your automatic transaxle has a shift lever located on the
steering column.
There are several different positions for your shift lever.
PARK (P): This position locks your front wheels.
It's the best position to use when you start your engine
because your vehicle can't move easily.
CAUTION:
It is dangerous to get out of your vehicle if the
shift lever is not fully in PARK (P) with the
parking brake firmly set. Your vehicle can roll.
CAUTION: (Continued)
CAUTION: (Continued)
Don't leave your vehicle when the engine is
running unless you have to. If you have left the
engine running, the vehicle can move suddenly.
You or others could be injured. To be sure your
vehicle won't move, even when you're on fairly
level ground, always set your parking brake and
move the shift lever to PARK (P).
See ªShifting Into PARK (P)º in the Index.
If you're pulling a trailer, see ªTowing a Trailerº
in the Index.
Ensure the shift lever is fully in PARK (P) before
starting the engine. Your vehicle has an automatic
transaxle shift lock control system. You have to fully
apply your regular brakes before you can shift from
PARK (P) when the ignition key is in RUN. If you
cannot shift out of PARK (P), ease pressure on the shift
lever
-- push the shift lever all the way into PARK (P)
as you maintain brake application. Then move the shift
lever into the gear you wish. See ªShifting Out of
PARK (P)º in the Index.
Page 100 of 395

2-37
CAUTION:
It can be dangerous to get out of your vehicle if
the shift lever is not fully in PARK (P) with the
parking brake firmly set. Your vehicle can roll.
Don't leave your vehicle when the engine is
running unless you have to. If you've left the
engine running, the vehicle can move suddenly.
You or others could be injured. To be sure your
vehicle won't move, even when you're on fairly
level ground, always set your parking brake and
move the shift lever to PARK (P).
Follow the proper steps to be sure your vehicle won't
move. See ªShifting Into PARK (P)º in the Index.
If you are parking on a hill and if you're pulling a
trailer, also see ªTowing a Trailerº in the Index.
Horn
Press on the center area of the steering wheel to sound
the horn.
Tilt Wheel
A tilt wheel allows you to adjust the steering wheel
before you drive. You can also raise it to the highest
level to give your legs more room when you exit and
enter the vehicle.
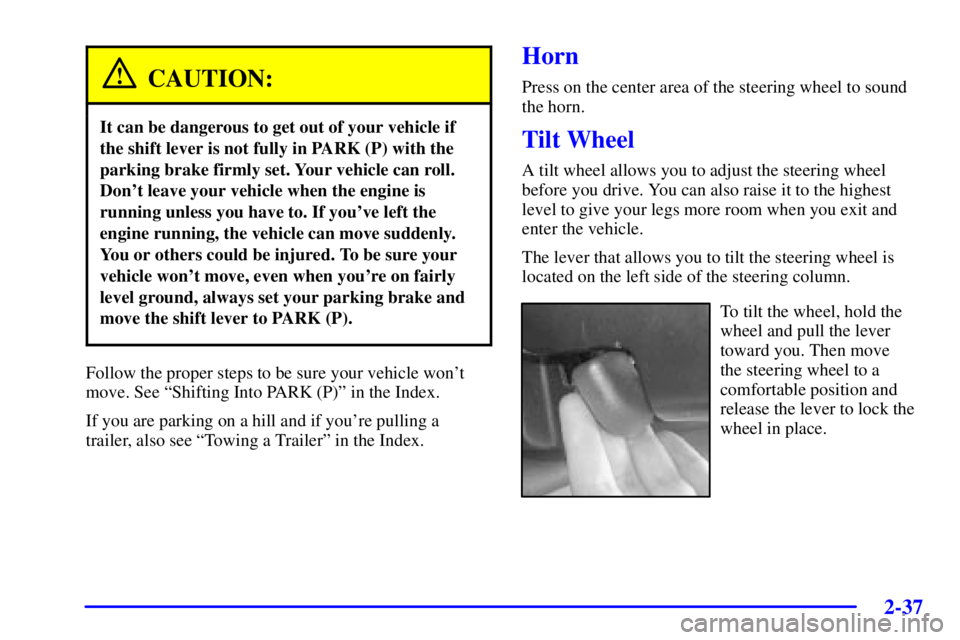
The lever that allows you to tilt the steering wheel is
located on the left side of the steering column.
To tilt the wheel, hold the
wheel and pull the lever
toward you. Then move
the steering wheel to a
comfortable position and
release the lever to lock the
wheel in place.
Page 101 of 395

2-38
Turn Signal/Multifunction Lever
The lever on the left side of the steering column
includes the following:
�Turn and Lane
-Change Signals
�Headlamp High/Low Beam Changer
�Flash
-to-Pass Feature
�Windshield Wipers
�Windshield Washer
�Cruise Control
For information on the exterior lamps, see ªExterior
Lampsº later in this section.
Turn and Lane-Change Signals
The turn signal has two upward (for right) and two
downward (for left) positions. These positions allow you
to signal a turn or a lane change.
To signal a turn, move the lever all the way up or down.
When the turn is finished, the lever will return automatically.
An arrow on the instrument
panel cluster will flash in
the direction of the turn or
lane change.
If your vehicle is equipped with the Head
-Up Display
(HUD), an arrow will also appear in the display area to
indicate the direction of the turn or lane change.
See ªHead
-Up Display (HUD)º in the Index
for more information.
To signal a lane change, just raise or lower the lever
until the arrow starts to flash. Hold it there until you
complete your lane change. The lever will return by
itself when you release it.
Page 108 of 395
2-45
Exterior Lamps
This control, located to the left of the steering column,
operates the following systems:
�Headlamps
�Taillamps
�Parking Lamps
�License Lamps
�Sidemarker Lamps
�Instrument Panel Lights
�Interior Courtesy Lamps
Off: Pushing the exterior lamps control all the way in
turns off all lamps and lights.
Parking Lamps: Pulling the exterior lamps control out
to the first position turns on the parking lamps, license
plate lamps, the sidemarker lamps and the instrument
panel lights.
Headlamps: Pulling the exterior lamps control out to
the second position turns on the headlamps, together
with the previously listed lamps and lights.
For information on the interior lights, see ªInterior
Lampsº later in this section.
Lamps On Reminder
If you leave the exterior lamp control on, remove the
key from the ignition and open the driver's door, you
will hear a continuous warning chime. The chime will
turn off when the lamps are turned off.
Page 150 of 395

2-87
Here are some things that some owners ask about. None
of these show a problem with your fuel gage:
�At the service station, the gas pump shuts off before
the gage reads full.
�It takes more (or less) fuel to fill up than the gage
indicated. For example, the gage may have indicated
half full, but it took more (or less) than half the
tank's capacity to fill it.
�The gage moves up a little when you turn a corner,
speed up or make a hard stop.
�The gage doesn't go back to empty when you turn
off the ignition.
Driver Information Center (DIC)
(If Equipped)
Your vehicle may be equipped with a Driver
Information Center (DIC). The DIC will display
information about how your vehicle is functioning,
as well as warning messages if a system problem
is detected.
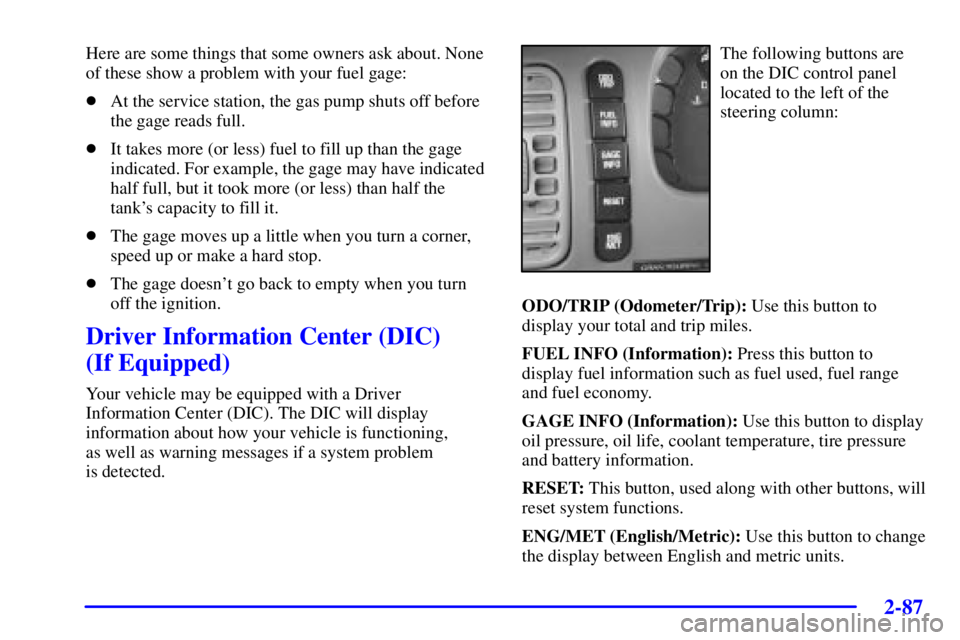
The following buttons are
on the DIC control panel
located to the left of the
steering column:
ODO/TRIP (Odometer/Trip): Use this button to
display your total and trip miles.
FUEL INFO (Information): Press this button to
display fuel information such as fuel used, fuel range
and fuel economy.
GAGE INFO (Information): Use this button to display
oil pressure, oil life, coolant temperature, tire pressure
and battery information.
RESET: This button, used along with other buttons, will
reset system functions.
ENG/MET (English/Metric): Use this button to change
the display between English and metric units.
Page 161 of 395

2-98
NOTICE:
Although the HUD image appears to be near the
front of the vehicle, do not use it as a parking aid.
The HUD was not designed for that purpose. If
you try to use the display as a marker for the
front of your vehicle, such as in a parking lot, you
may misjudge distance and hit an obstacle or
another vehicle.
The HUD controls
are located in the
overhead console.1. Start your engine and slide the HUD dimmer switch
all the way up.
The brightness of the HUD image is determined by
whether the headlamps are on or off, and where you
have the HUD dimmer switch set.
2. Adjust the seat to a comfortable driving position.
Keep pressing the top of the image height adjuster to
raise the image as far as possible.
3. Keep pressing the bottom of the image height
adjuster to move the image as low as possible, while
still keeping it in full view.
4. Slide the dimmer switch downward until the HUD
image is no brighter than necessary.
To turn the HUD display off, slide the dimmer switch all
the way down.
If the sun comes out, the sky becomes cloudy, or if you
turn your headlamps on, you may need to adjust the
HUD brightness using the dimmer switch. Polarized
sunglasses could make the HUD image harder to see.
To change the display from English to metric units,
push the ENG/MET button located to the left of the
steering column.