2002 BMW Z8 CONVERTIBLE ESP
[x] Cancel search: ESPPage 6 of 174
6n
For your safety
Use unleaded gasoline only. Fuels
containing up to and including
10% ethanol or other oxygenates with
up to 2.8% oxygen by weight (i.e. 15%
MTBE or 3% methanol plus an equiva-
lent amount of co-solvent) will not void
the applicable warranties respecting
defects in materials or workmanship.
Field experience has indicated signifi-
cant differences in fuel quality (i.e. vola-
tility, composition, additives, etc.)
among gasolines offered for sale in the
United States and Canada. Use of infe-
rior fuels can lead to poor starting,
driveability problems and stalling; these
difficulties can be aggravated by
extreme operating conditions such as
those encountered in extremely hot
weather and at high altitudes.
Should you encounter drivability prob-
lems which you suspect could be
related to the fuel you are using, we
recommend that you respond by
switching to a recognized high-quality
brand.
Failure to comply with these recom-
mendations may result in unscheduled
maintenance.
Always observe all applicable safety
rules and precautions when handling
gasoline.
<
Important safety information!
For your own safety, use genuine parts
and accessories approved by BMW.
When you purchase accessories tested
and approved by BMW and Original
BMW Parts, you simultaneously acquire
the assurance that they have been thor-
oughly tested by BMW to ensure
optimum performance when installed
on your vehicle.
BMW warrants these parts to be free
from defects in material and workman-
ship.
BMW will not accept any liability for
damages resulting from installation of
parts and accessories not approved by
BMW.
BMW cannot test every product made
by other manufacturers to confirm that
it can be used on a BMW safely and
withour risk to either the vehicle, its
operation, or its occupants.
Original BMW Parts, BMW Accessories
and other products approved by BMW,
together with professional advice on
using these items, are available from all
BMW centers.
Installation and operation of non-BMW
approved accessories such as alarms,
radios, amplifiers, radar detectors,
wheels, suspension components, brake
dust shields, telephones (including
operation of any portable cellular phone
from within the vehicle without using an
externally mounted antenna) or trans-
ceiver equipment (such as CB, walkie-
talkie, ham radio or similar) may cause
extensive damage to the vehicle,
compromise its safety, interfere with
the vehicle's electrical system or affect
the validity of the BMW Limited
Warranty. See your BMW center for
additional information.
<
Maintenance, replacement, or
repair of the emission control
devices and systems may be performed
by any automotive repair establishment
or individual using any certified auto-
motive part.
<
Symbol on vehicle parts
Indicates that you should consult
the relevant section of this
Owner's Manual for information on a
particular part or assembly.
For your safety
Page 20 of 174
20n
Indicator and warning lamps
Technology that monitors itself
Indicator and warning lamps identified
by "
l
" are tested for proper operation
whenever the ignition key is turned.
They each light up once for different
periods of time.
The indicator lamps signal defects in
monitored systems by either remaining
lit after the engine is started or by
coming on in the course of normal
vehicle operation. Refer to the following
section for detailed information on how
to respond to the various types of warn-
ings.
Red: stop immediately
Battery charge current
The battery is no longer being
charged. Indicates a defect in
the alternator drive belt or the charging
circuit. Please contact the nearest
BMW center.
Never attempt to continue driving
if the drive belt is defective: the
engine could overheat and sustain
serious damage. A broken or damaged
drive belt will also lead to a sudden
increase in steering effort.
<
Engine oil pressure
l
Stop vehicle immediately and
switch off engine. Check the
engine oil level and top up as required.
If the oil level is correct, please contact
the nearest BMW center.
Do not continue driving. The
engine could sustain damage
owing to inadequate lubrication.
<
Flat Tire Monitor
l
Flashing warning lamp in addi-
tion to an acoustic signal: a flat
tire has occurred. Carefully reduce
speed to less than 50 mph (80 km/h),
and avoid hard braking or steering
maneuvers.
For additional information, refer to
page 67.
Brake warning lamp
l
If the lamp comes on when the
parking brake is not engaged,
check the brake fluid level. Before
driving further, be sure to read the
notes on pages 92 and 114.
Brake warning lamp for Cana-
dian models.
Page 21 of 174
21n
IndexDataTechnologyRepairsCar careControlsOverview
Indicator and warning lamps
Red and yellow: continue driving
cautiously
The red brake warning lamp
comes on together with the
yellow indicator lamps for ABS
and DSC:
The entire ABS, CBC, DSC and
DBC control system has failed.
Continue driving cautiously and
defensively. Avoid hard brake
applications. Please have the
system checked by your BMW center
as soon as possible.
For additional information, refer to
pages 65, 88.
Warning lamps for Canadian
models.
Red: an important reminder
Brake warning lamp
l
Comes on when the parking
brake is applied Ð an additional
acoustic signal sounds when the
vehicle is set in motion.
For additional information, refer to
page 57.
Brake warning lamp for Cana-
dian models.
Please fasten safety belts
l
Together with an acoustic
signal. Comes on until the safety
belts are fastened.
For additional information on safety
belts, refer to page 50.
Airbags
l
Please have the system
inspected by your BMW center.
For additional information, refer to
pages 51, 150.
Yellow: check at the earliest
opportunity
Antilock Brake System (ABS)
l
ABS has been deactivated in
response to system malfunction.
Unrestricted conventional brake system
performance remains available. Please
have the system inspected by your
BMW center.
For additional information, refer to
page 88.
Antilock Brake System (ABS)
warning lamp for Canadian
models.
Engine oil level
Comes on while driving: the oil
level is at the absolute
minimum; add engine oil as soon as
possible. Do not drive more than
approx. 30 miles (50 km) until you add
oil.
For additional information, refer to
page 111.
Engine oil level
Comes on after the engine has
been shut off: add engine oil at
the earliest opportunity (when you stop
to refuel).
For additional information, refer to
page 111.
Page 35 of 174
35n
IndexDataTechnologyRepairsCar careControlsOverview
Opening and closing Ð from the outsideTo open the luggage
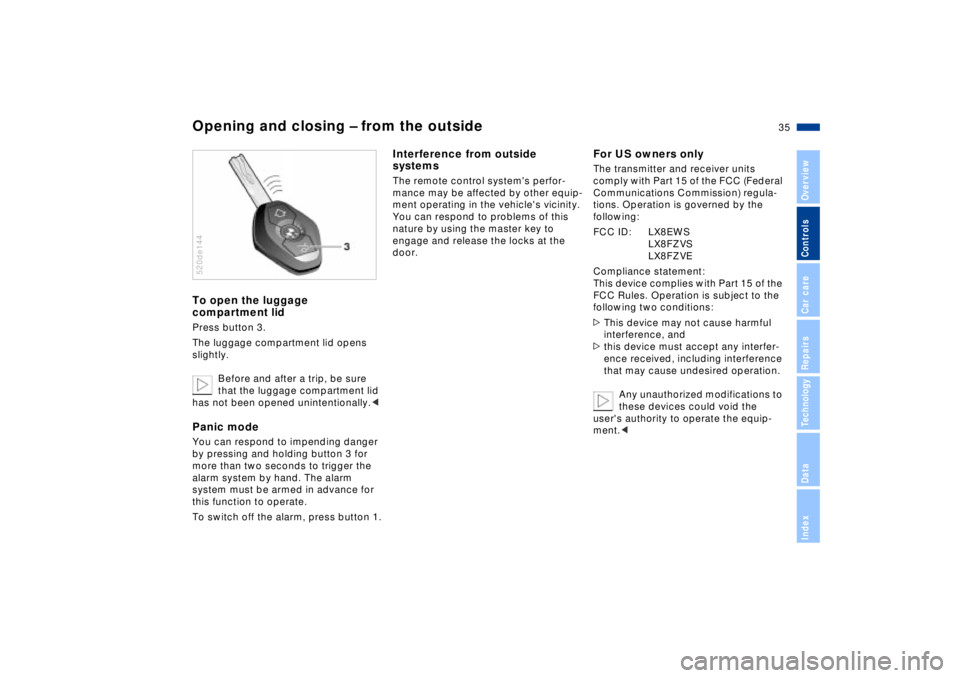
compartment lidPress button 3.
The luggage compartment lid opens
slightly.
Before and after a trip, be sure
that the luggage compartment lid
has not been opened unintentionally.
more than two seconds to trigger the
alarm system by hand. The alarm
system must be armed in advance for
this function to operate.
To switch off the alarm, press button 1.520de144
Interference from outside
systems The remote control system's perfor-
mance may be affected by other equip-
ment operating in the vehicle's vicinity.
You can respond to problems of this
nature by using the master key to
engage and release the locks at the
door.
For US owners onlyThe transmitter and receiver units
comply with Part 15 of the FCC (Federal
Communications Commission) regula-
tions. Operation is governed by the
following:
FCC ID: LX8EWS
LX8FZVS
LX8FZVE
Compliance statement:
This device complies with Part 15 of the
FCC Rules. Operation is subject to the
following two conditions:
>This device may not cause harmful
interference, and
>this device must accept any interfer-
ence received, including interference
that may cause undesired operation.
Any unauthorized modifications to
these devices could void the
user's authority to operate the equip-
ment.<
Page 38 of 174

38n
Luggage compartment lid Alarm systemEmergency release This lever releases the luggage
compartment lid from the luggage
compartment's interior.390de792
The conceptThe vehicle alarm system responds
>when a door, the hood or the luggage
compartment lid is opened
>to movement inside the vehicle
(interior motion sensor)
>to variations in the vehicle's tilt angle
such as those occuring during
attempts to steal the wheels or tow
the vehicle
>to interruption of battery voltage.
The system responds to attempts of
unauthorized vehicle incursion and theft
by simultaneously activating the
following
>an alarm sounds for 30 seconds
>the hazard warning flashers are acti-
vated for approx. five minutes
>the high beams flash on and off in the
same rhythm.
To arm and disarm the alarm
systemWhen the vehicle is locked or unlocked
via a door lock or with the remote
control, the alarm system is also simul-
taneously armed or disarmed.
The interior motion sensor and tilt alarm
sensor are activated approx.
30 seconds after you have finished
locking the vehicle.
The system indicates that it has been
correctly armed by switching on the
hazard warning flashers for a single
cycle and by emitting an acoustic
signal.
You can select the individual
confirmation signal used to indi-
cate that the alarm system has been
armed or disarmed.<
Page 39 of 174

39n
IndexDataTechnologyRepairsCar careControlsOverview
Alarm systemIndicator lamp displaysThe indicator lamp is located in the
inside rear view mirror's rotary knob.
>The indicator lamp flashes continu-
ously: the system is armed
>The indicator lamp flashes during
arming: a door, the hood or luggage
compartment lid is not completely
closed. Even if you do not respond by
securing the affected area, the system
starts to monitor all other points and
the indicator lamp reverts to contin-
uous, uninterrupted operation once
ten seconds have elapsed. The inte-
rior motion sensor remains off
>The indicator lamp goes out during
disarming: no manipulation or
attempted intrusions have been
detected in the period since the
system was armed520de014
>The indicator lamp flashes for
10 seconds when the system is
disarmed: an attempted entry has
been detected in the period since the
system was armed.
Following triggering of an alarm, the
indicator lamp will flash continuously.Avoiding unintentional alarms The tilt alarm sensor and interior motion
sensor may be switched off at the same
time to prevent a false alarm from being
triggered (in garages with elevator
ramps, for instance), or when the
vehicle is transported by trailer or train:
Lock the vehicle twice (= arm the
system) by pressing button 2 on the
remote control twice in succession
(refer to page 34), or lock the vehicle
twice with the key (refer to page 32).
The indicator lamp lights up briefly and
then flashes continuously. The tilt alarm
sensor and the interior motion sensor
remain deactivated for as long as the
system is armed.
Interior motion sensorIn order for the interior motion sensor to
function properly, the windows and the
luggage compartment lid must be
closed.
Nevertheless, you should deactivate
the interior motion sensor (refer to the
previous column) if
>children or animals are left in the
vehicle
>windows should remain open.
For US vehicles only:
The interior motion sensor is not
installed on US models as it has not
received FCC (Federal Communica-
tions Commission) approval.<
Page 43 of 174
43n
IndexDataTechnologyRepairsCar careControlsOverview
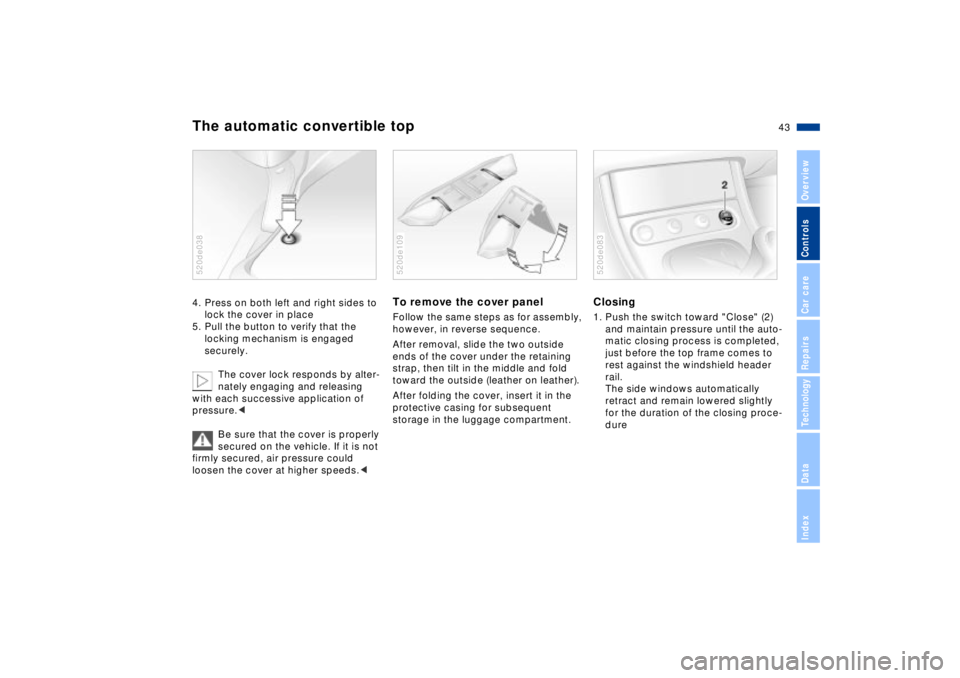
The automatic convertible top4. Press on both left and right sides to
lock the cover in place
5. Pull the button to verify that the
locking mechanism is engaged
securely.
The cover lock responds by alter-
nately engaging and releasing
with each successive application of
pressure.<
Be sure that the cover is properly
secured on the vehicle. If it is not
firmly secured, air pressure could
loosen the cover at higher speeds.<520de038
To remove the cover panelFollow the same steps as for assembly,
however, in reverse sequence.
After removal, slide the two outside
ends of the cover under the retaining
strap, then tilt in the middle and fold
toward the outside (leather on leather).
After folding the cover, insert it in the
protective casing for subsequent
storage in the luggage compartment.520de109
Closing1. Push the switch toward "Close" (2)
and maintain pressure until the auto-
matic closing process is completed,
just before the top frame comes to
rest against the windshield header
rail.
The side windows automatically
retract and remain lowered slightly
for the duration of the closing proce-
dure520de083
Page 45 of 174
45n
IndexDataTechnologyRepairsCar careControlsOverview
For maximum safety when adjusting the
seating position, please observe the
following:
Never try to adjust your seat while
driving the vehicle. The seat could
respond with un unexpected move-
ment, and the ensuing loss of vehicle
control could lead to an accident.
Be sure that the safety belt remains
firmly against your body at all times. In
the event of a frontal impact, a loose lap
belt could slide over the hips, leading to
abdominal injury. In addition, the safety
belt's restraint effectiveness is reduced
if the belt is worn loosely.
Never ride with the backrest reclined to
an extreme angle (especially important
for the passenger to remember). If you
do so, there is a risk that you will slide
under the safety belt in an accident,
thus reducing the protection provided
by the safety belt.<
Correct sitting postureTo reduce strain on the spinal column,
sit all the way back in the seat and rest
your back fully against the backrest.
The ideal sitting posture is achieved
with your head extending from your
spine in a straight line.
For long-distance driving, you may wish
to increase the backrest tilt-angle
slightly to reduce muscular tension.
You should be able to grasp the
steering wheel at its highest point with
your arms slightly bent.
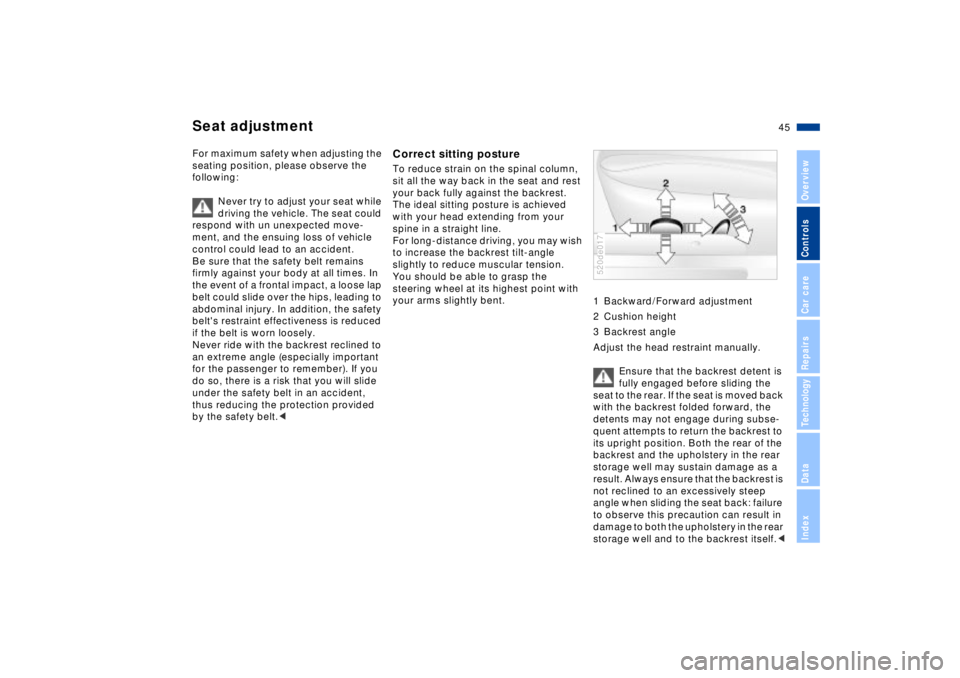
1 Backward/Forward adjustment
2 Cushion height
3 Backrest angle
Adjust the head restraint manually.
Ensure that the backrest detent is
fully engaged before sliding the
seat to the rear. If the seat is moved back
with the backrest folded forward, the
detents may not engage during subse-
quent attempts to return the backrest to
its upright position. Both the rear of the
backrest and the upholstery in the rear
storage well may sustain damage as a
result. Always ensure that the backrest is
not reclined to an excessively steep
angle when sliding the seat back: failure
to observe this precaution can result in
damage to both the upholstery in the rear
storage well and to the backrest itself.<
520de017
Seat adjustment