2002 BMW Z8 CONVERTIBLE turn signal
[x] Cancel search: turn signalPage 57 of 174
57n
IndexDataTechnologyRepairsCar careControlsOverview
Switching off the engine Parking brake Turn ignition key to position 1 or 0.
Never remove the ignition key
while the vehicle is rolling. If you
do so, the ignition lock would engage
when the steering wheel is turned.
When you leave the vehicle, always
remove the ignition key and engage the
steering lock.
Always engage the parking brake when
parking on hills and inclined surfaces,
as first gear or reverse may not provide
adequate resistance to rolling.<
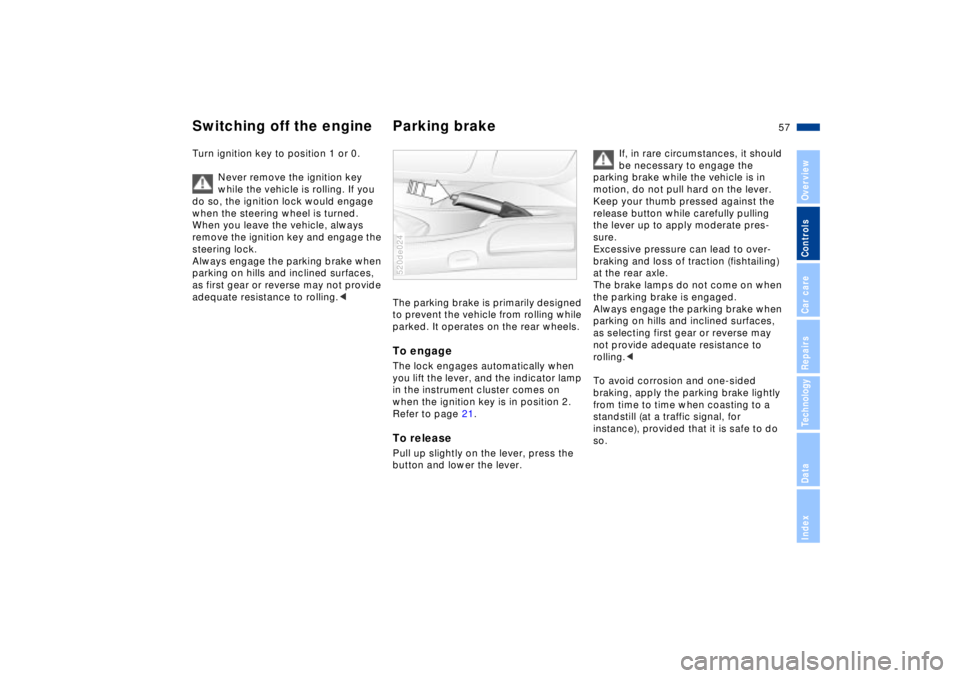
The parking brake is primarily designed
to prevent the vehicle from rolling while
parked. It operates on the rear wheels. To engage The lock engages automatically when
you lift the lever, and the indicator lamp
in the instrument cluster comes on
when the ignition key is in position 2.
Refer to page 21.To releasePull up slightly on the lever, press the
button and lower the lever. 520de024
If, in rare circumstances, it should
be necessary to engage the
parking brake while the vehicle is in
motion, do not pull hard on the lever.
Keep your thumb pressed against the
release button while carefully pulling
the lever up to apply moderate pres-
sure.
Excessive pressure can lead to over-
braking and loss of traction (fishtailing)
at the rear axle.
The brake lamps do not come on when
the parking brake is engaged.
Always engage the parking brake when
parking on hills and inclined surfaces,
as selecting first gear or reverse may
not provide adequate resistance to
rolling.<
To avoid corrosion and one-sided
braking, apply the parking brake lightly
from time to time when coasting to a
standstill (at a traffic signal, for
instance), provided that it is safe to do
so.
Page 58 of 174

58n
Manual transmission Indicator/Headlamp ßasher Every time you shift gears, always
depress the clutch pedal all the way
down, pushing the gear lever into the
desired position.
Always remember to depress the clutch
pedal when starting the engine; a lock-
out device prevents starting when the
clutch is engaged.
The shift lever's neutral plane is located
between 3rd and 4th gears.
The shift lever automatically returns to
the 3rd/4th plane whenever you select
neutral. 520de158
When shifting across the gate to
the 5th/6th gear plane always
remember to push the lever to the right
to avoid inadvertent engagement of 3rd
or 4th gear.<
Reverse Select only when the vehicle is
stationary. Press the shift lever to the
left to overcome the resistance.
As you do this, the backup lamp will
turn on automatically when the ignition
key is in position 2.
Never slip the clutch to prevent
the vehicle from rolling backwards
when stopping on hills. Slipping the
clutch for extended periods leads to
rapid, premature clutch wear.<
1 High beams (blue indicator lamp)
2 Headlamp flasher (blue indicator
lamp)
3 Turn signal indicator (green indicator
lamp and cyclical clicking from the
blinker relay)
If the indicator lamp and the clicking
from the relay are faster than normal,
one of the turn signal bulbs is defective. To signal brieflyPress the lever up to but not beyond
the pressure point. It then returns to the
center position when released. 520de025
Page 69 of 174
69n
IndexDataTechnologyRepairsCar careControlsOverview
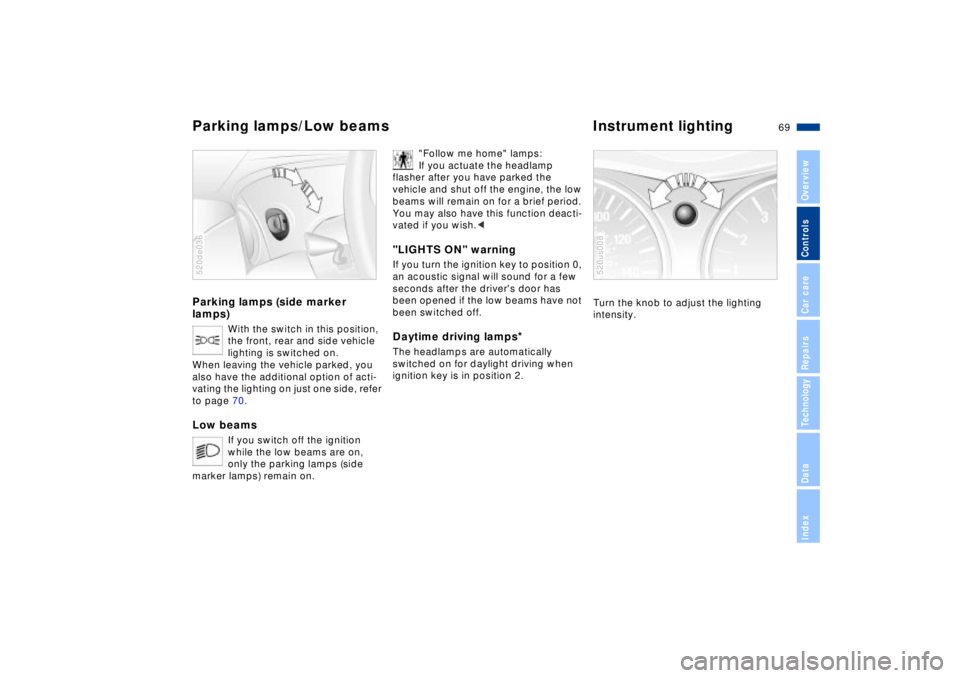
Parking lamps (side marker
lamps)
With the switch in this position,
the front, rear and side vehicle
lighting is switched on.
When leaving the vehicle parked, you
also have the additional option of acti-
vating the lighting on just one side, refer
to page 70.
Low beams
If you switch off the ignition
while the low beams are on,
only the parking lamps (side
marker lamps) remain on.
520de036
"Follow me home" lamps:
If you actuate the headlamp
flasher after you have parked the
vehicle and shut off the engine, the low
beams will remain on for a brief period.
You may also have this function deacti-
vated if you wish.<
"LIGHTS ON" warningIf you turn the ignition key to position 0,
an acoustic signal will sound for a few
seconds after the driver's door has
been opened if the low beams have not
been switched off.Daytime driving lamps
*
The headlamps are automatically
switched on for daylight driving when
ignition key is in position 2.
Turn the knob to adjust the lighting
intensity.520us008
Parking lamps/Low beams Instrument lighting
Page 70 of 174
70n
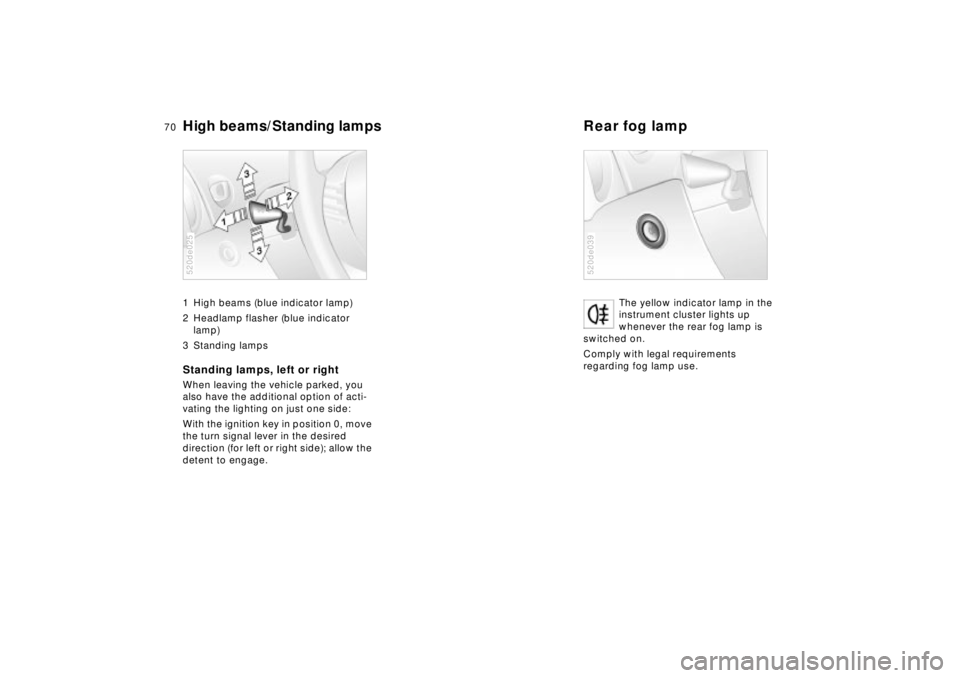
High beams/Standing lamps Rear fog lamp 1 High beams (blue indicator lamp)
2 Headlamp flasher (blue indicator
lamp)
3 Standing lampsStanding lamps, left or rightWhen leaving the vehicle parked, you
also have the additional option of acti-
vating the lighting on just one side:
With the ignition key in position 0, move
the turn signal lever in the desired
direction (for left or right side); allow the
detent to engage.520de025
The yellow indicator lamp in the
instrument cluster lights up
whenever the rear fog lamp is
switched on.
Comply with legal requirements
regarding fog lamp use.
520de039
Page 131 of 174
131n
IndexDataTechnologyRepairsCar careControlsOverview
Lamps and bulbs The lamps and bulbs make essential
contributions to the safety of your
vehicle. Therefore, comply fully with the
following instructions during bulb
replacement. If you are not familiar with
any of the procedures, consult your
BMW center.
Do not touch the glass portion of a
new bulb with your bare hands
since even small amounts of impurities
burn into the surface and reduce the
service life of the bulb. Use a clean
cloth, paper napkin, or a similar mate-
rial, or hold the bulb by its metallic
base.<
A replacement bulb set is available from
your BMW center.
Whenever working on the elec-
trical system, switch off the elec-
trical accessory you are working on or
disconnect the cable from the negative
terminal of the battery. Failure to do this
could result in short circuits.
To prevent injuries and damage,
comply with any instructions provided
by the bulb manufacturer.<
When cleaning the headlamps,
please observe the following:
>Do not wipe dry (scratches). Never
use abrasives or strong solvents to
clean the covers
>Remove dirt and contamination (such
as insects) by soaking with BMW Car
Shampoo and then rinsing with plenty
of water
>Always use a deicer spray to remove
accumulated ice and snow Ð never
use a scraper.<
Xenon lamps
The main headlamps for your BMW
Z8 roadster have been designed using
xenon-light technology. The service life
of these bulbs is very long and the
probability of a failure is very low,
provided that they are not switched on
and off an unusual number of times.
Should a lamp ever fail, however,
please contact your BMW center for
assistance.
The xenon-light unit operates at
extremely high voltages; contact
with the unit's electrical components
can be fatal. We therefore urge you to
refer all service and repairs, including
bulb changes, to qualified professional
technicians.<
Neon lampsThe front turn signal indicators (side
marker lamps), the rear turn signal indi-
cators, the rear and brake lamps, as
well as the high-mounted brake lamp
are of neon-light technology. The
service life for these lamps is very high
and the likelihood of failure very
minimal.
Should a lamp ever fail, however,
please contact your BMW center for
assistance.
Page 132 of 174
132n
Lamps and bulbsSide turn signal indicators10 watt bulb
Please contact a BMW center in the
event of a malfunction.Parking lamps5 watt bulb
Please contact a BMW center in the
event of a malfunction.
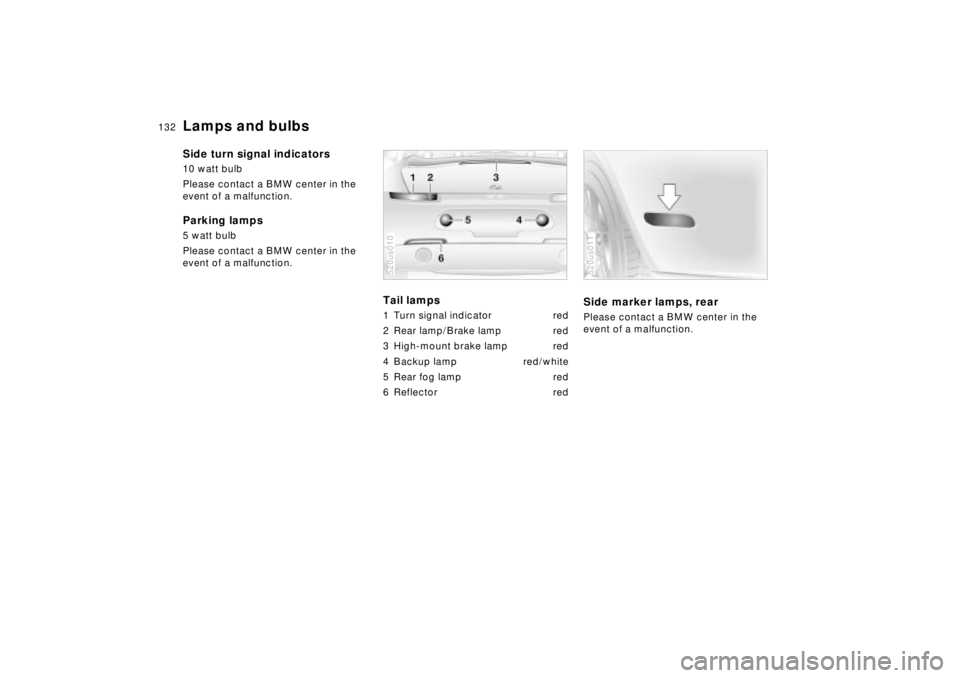
Tail lamps 1 Turn signal indicator red
2 Rear lamp/Brake lamp red
3 High-mount brake lamp red
4 Backup lamp red/white
5 Rear fog lamp red
6 Reflector red520us010
Side marker lamps, rearPlease contact a BMW center in the
event of a malfunction.520us011
Page 147 of 174
147n
IndexDataTechnologyRepairsCar careControlsOverview
Towing the vehicle
Avoid "off-center" towing. Be sure
that the tow rope is pulled tightly
when the towing vehicle begins to
move.<
The towed vehicle should always
be the lighter of the two vehicles.
If this is not the case, it is no longer
possible to control vehicle response.<
Tow-startingFor instructions on jump-starting, refer
to page 145.
Never attempt to use your vehicle to
push another vehicle, since damage to
the energy-absorbing bumpers could
result.
Towing a vehicle1. Put the shift lever in neutral
2. Towing speed:
Max. 45 mph (70 km/h)
3. Towing distance:
Max. 95 miles (150 km)
4. Leave the ignition key in position 1 to
ensure that the brake lamps, turn
signals, horn and windshield wipers
remain operative, and to prevent the
steering lock detent from engaging
5. Switch on the hazard warning system
(comply with country-specific regula-
tions).
Find some means of identifying the
vehicle in tow, e. g. place a sign or
warning triangle in the rear window.
Make sure that the ignition key
remains in position 1 even when
the electrical system has failed to
prevent the steering lock from
engaging. The steering and brakes are
without power assist when the engine is
not running. This means that increased
effort is required for steering and
braking.<
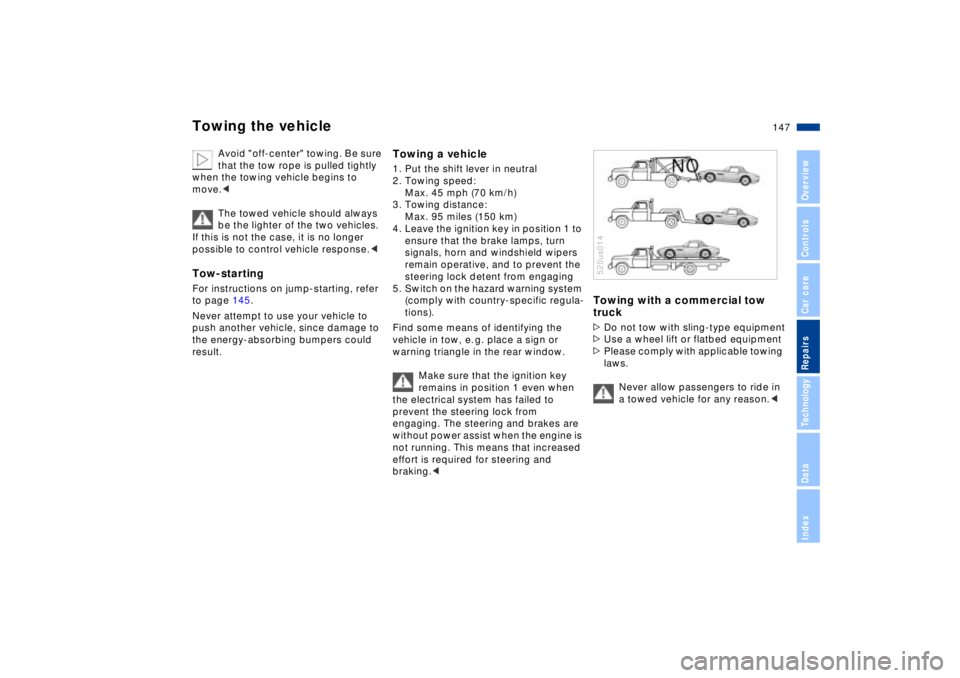
Towing with a commercial tow
truck>Do not tow with sling-type equipment
>Use a wheel lift or flatbed equipment
>Please comply with applicable towing
laws.
Never allow passengers to ride in
a towed vehicle for any reason.<520us014
Page 166 of 174

Everything from A to Z
A
ABS (Antilock Brake System) 21, 88
Accessories 6
Activated charcoal filter 75
Add brake fluid 114t
engine coolant 114t
engine oil 111t
washer fluid 110, 161
Adjust seats 45
steering wheel 47
temperature 74
washer nozzles 110t
Adjustment setting configuration 49
Air conditioner 72
Air distribution 74
Air outlets 72
Air pressure 99
Air supply 74
Airbags 21, 51 , 123 , 150
Alarm system 38
Antenna 94
Antifreeze 113
radiator 92
Antifreeze/corrosion protection 92
Antilock Brake System (ABS) 21, 88 Anti-theft alarm system
38
Anti-theft protection 32
Approved gross vehicle weight 160
Aquaplaning 99
Ashtray 81
Attach vehicle vacuum cleaner 82
Automatic car washes 117
Automatic headlamp washers 60
Automatic windshield washer 60
Avoiding a false alarm 39t
Axle weights 160
B
Backrest
adjusting 45
unlock 46
Backup lamps 58
bulb replacement 133t
Battery 138, 162
add distilled water 138t
capacity 162
charge current 20
charging 139t
discharged 145t
recycling 140t
removing and
installing 139t Belts
50
Beverage holder 80
Blower 74
BMW High Performance Synthetic Oil 112
Bore 158
Brake hydraulic system 20, 92
Brake system faults 92t
fluid 114t
pads 22, 92
refer also to ABS, DBC and
Disc brakes
Break-in procedure 86
Bulbs and lamps 131tC
California Proposition 65
Warning 125
Can holder 80
Car Memory 49
Car phone 81, 94
Car radio 64, 95
reception 95, 151
refer also to the radio
Owner's Manual
Car wash 117
Care exterior 119
for the vehicle finish 120
interior 121 Catalytic converter
87
CBC (Cornering Brake Control) 21, 89
CD player, refer to the radio Owner's Manual
Cellular phone 94
refer also to separate
Owner's Manual
Central locking system 32
key 36
Changing a wheel 137t
Changing the oil filter 161
Changing tires 137t
Checking air pressure 26t
Checking engine oil level 111t
Child restraint systems 54
Child seat safety 54
Child seats 53
Child-restraint systems 53
Cigarette lighter 82
Clean headlamps 60
Clock 64
Cockpit 16
Code, refer to the radio
Owner's Manual
Combination switch, turn signal indicator/headlamp
flasher 59
Compartments 79
for stowing items 78
Compression 158